Archive for September 29, 2011

Getting the Most from Your Late Season Garden

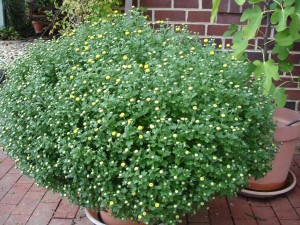
Chrysanthemums have an entire new set of flowers beneath the first set. Deadheading will result in double the flower time!

Perennials, as you know, only bloom for a month or so, and then you are left with an ugly mass of dying flower heads and usually declining  foliage on the remainder of the plant. I am often asked about what to do and when to cutback, as opposed to just deadheading, and when to just tear something out. There are many tips I can share with you on all of these questions.

Many plants benefit from cutting back after they bloom. I regularly cut back the foliage on the hosta, yarrow, daylillies, salvia, lamb’s ears and iris to just above the crown of the plant when the flowers are finished. The foliage will re-sprout, and the plants will look fresh throughout the rest of the growing season. This is true with many perennials and herbs.
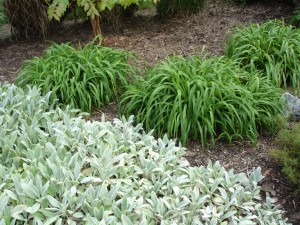
Here is an example of the second growth on daylillies and lamb's ears. Once the flowering has stopped, cut back to just above the crown and you will be rewarded with a fresh new crop of foliage to last the rest of the season.

Deadheading is a good way to keep your annuals looking at their peak. I would also recommend this for roses all throughout the summer and fall. Even some perennials like mums and dahlias will have a repeat bloom if deadheaded, giving you a repeat performance in the same season. This is also true of pansies. Budget tip: I prefer to plant pansies in the fall, they will come back into bloom in the spring in all their glory, giving you two seasons for the price of one!

I reserve tearing out only for the annuals, and usually between mid-September and mid-October. When the temperature at night starts falling into the 40’s the flowers decline rapidly, so this is when I like to replace them with pansies, ornamental kale or cabbage, or some other Autumn beauty.
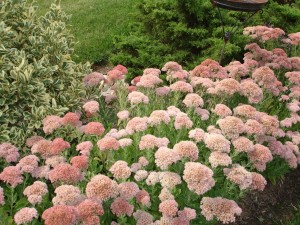
Cutting back Sedums and Mums mid-season will yield fuller, more compact plants which will be less prone to splitting open under the weight of full blooms.

When laying out your garden design make sure to consider the texture of the foliage. Try to group differing kinds, because this will give you visual interest when the plants are not in bloom. I also try to stagger the groups in drifts so that as one is blooming it can mask the decline of another variety. For example: If you plant daylillies and daffodils in the same place, the foliage from the daylillies will hide the daffodil leaves as they decline for the season.

This is also a good time to give the mulch a good scratching up to make it look fresh again, and give it one last application of a weed preventer for the year. Fall weeds are really tough, so I do what I can to prevent them from ever starting.

One last tip to take your garden over the top health and beauty-wise is to apply  a coating of Horticultural oil (Volck oil) to your foundation plants. This will safely keep the spiders off while giving your plants a really beautiful sheen. This will also protect the leaves from winter burn. I find the easiest way to apply this is with a hose end sprayer, but you can also use a pump sprayer for smaller gardens.

With just a little bit of change your garden can be just as striking in the Autumn as it is in the height of the growing season. Enjoy!

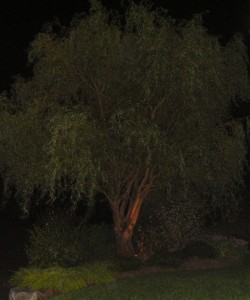
Garden Lighting

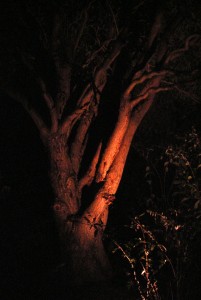
Highlighting certain trees or plants at night can really enhance your landscape.

With the days getting shorter, I thought it would be a great time to talk about garden lighting. The kind I would like to highlight are the ones beyond the normal entry door lights and post lamps, and move further into the garden. There are so many types out there to choose from, and they can really enhance your landscape as well as provide some safety.

Whether you choose hardwired, low-voltage, or solar here are some things to consider. With hardwired you need some electrical knowledge, permits, and may need to bury your lines quite deeply, to pass code. Usually the hardwired lights are installed during a new build, but can be added later. Solar has come a long way in the past few decades, and has some clear advantages in some applications. You can easily find kits with multiple pathway lights, deck post-cap lights, and even stair tread lights in solar. About the only drawback is that you must get six or more hours of sun on the panels each day for them to work, and the light that they cast is not very bright, but is good for guiding your way as an accessory to a brighter light source. That leaves us with low-voltage, which I personally think is the best. It is consumer friendly being easy to install, and very flexible. You can change your layout as needed without to much effort. Also, you can determine what wattage is best for your personal application.

Low-voltage is the type that we chose for our yard, and my husband installed it more than a decade ago. We have changed it around a few times, and learned a lot about what works best. Here are some helpful tips he wanted to share.

*  When you are planning your lighting layout add up your total wattage and get a transformer that is the next size up. That way if you want to change it around, or add an extra light or two you will have the capacity.

* Up-lighting is truly a great way to highlight your house. To do this place the spotlights about 2-3 ft. away from the foundation with a slight angle toward to house. It will highlight the brick or siding and bathe your house in glow, a real professional look.

When up-lighting a tree, aim the spotlight mid way on the trunk for a great effect.

* When highlighting a tree, aim the light about half way up the trunk. It will cast light up into the branches, and highlight the bark.

* When connecting the individual lights to the main wire, leave the junction above ground. Even though it is “waterproof,” the connectors are the weakest link, and are usually the first part needing to be checked.

* We have found that using 40-50 watt bulbs works best for us, the lower wattage is just to dim to cast light beyond a few feet. Also, please be considerate and do not aim your lighting beyond your property line.

* For safety’s sake make sure to light your property’s address number, in an emergency it could make a difference!

I hope you will add some lighting to your garden, you will be amazed at how much beauty it adds.

And The Winner Is…..

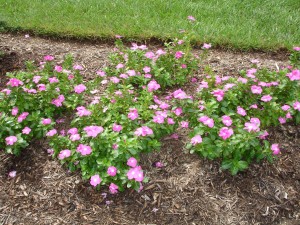
The Vinca was the best performer of all the annuals in the garden this summer.

With the Emmy’s around the corner, I thought it only fitting to write about the winners in this summer’s garden. Even though the temperatures soared, and we had little rain to speak of, there were still some true winners.

I give top honors to the Vinca which bordered my driveway. It is in the full afternoon sun, on the west side of my house. It not only survived, but thrived on the awful 100+ degree days! In past years I have planted Ageratum and Begonia with fairly good results, but in comparison, the Vinca is a clear winner.

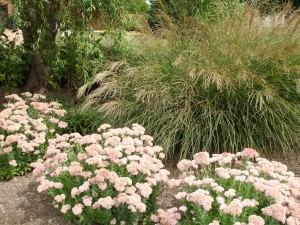
The Maidenhair Grasses add height and motion to the garden. Sedum borders the front edge, and gives color late Summer through the Fall.

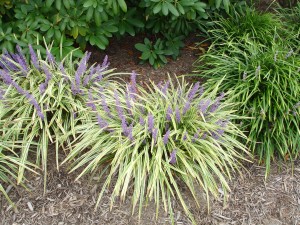
I will also give kudos to the Ornamental grasses in the yard. They have just come into bloom and are spectacular. The variety that I have in my garden is Maidenhair, which has very fine leaves, and white plumes. Also, the liriope has just sprouted its lavender spikes and is a terrific ground cover for all exposures.

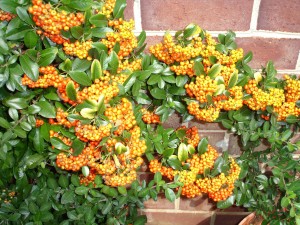
Also taking honorable mention are the Nandina and the Pyracantha which are both covered in berries. And, the Sedum which looked fabulous all summer and are now coloring up for fall.

The Pyracantha has beautiful flowers in Spring, glossy leaves all summer, and bright orange berries in the Fall.

These plants all did extremely well, they are all tried and true in my garden, and I would recommend them to anyone who is looking for really hardy, tough, drought tolerant, yet beautiful plants for their garden. This summer was one for the ages, and a true test of endurance for both flora and fauna. Which plants did best in your garden? I would love to know.

Liriope is a terrific ground cover, whether you are looking for variegated or solid green, they do well in shade to full sun.


Fall Garden Renewal

There are now three Crepe Myrtle trees where the old Maple tree once stood.

Fall is here, and in many ways it seemed like it couldn’t get here fast enough. We had the hottest, driest summer, and it really was hard on the garden. We lost one tree to intense storm damage, another to disease, and an unusual number of branches on the Japanese hollies and azaleas. Just too hot and buggy.

All summer long I was thinking about what kind of tree I would like to replace my Maple tree with. I decided that instead of one large tree, I would plant three Crepe Myrtles instead. They are not as tall, with looser branching structure, so they will be wind tolerant, and faster growing, to mask an unfavorable view, so I think it will be a better choice all round. I had to move a couple of huge bushes in order to get the spacing right between the trees, but that gives me a chance to share some more of my ornamental grass with a neighbor who is re-doing her yard. It is a big change where the new trees stand, but a nice one. I look forward to the beautiful lavender flowers that they will bring in the future.

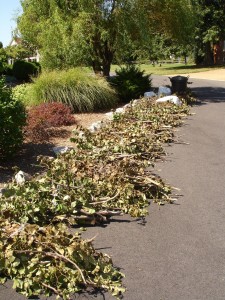
We lost a lot of branches in storms. Thankfully, our waste collection company recycles it into compost for use in the garden.


The area where my Peartree stood is also where we were thinking about repositioning the front walk, so I will add another tree or two to the front when that job is complete. This will provide more direct access up to the front door from the sidewalk, and improve the curb appeal as well. I will increase the area at the base of the front stairs so that a bench and possibly a post lamp will fit. I love to have as many places in the garden as possible to sit and view from different vantage points.


This is also a time to add some more stone into the garden. I love using natural products, and am planning to use the huge, natural slab bluestone from Pennsylvania. It is not far, so it won’t be adding too much to my carbon footprint, which is always a concern to me when choosing something new.  It will lend a natural feel, and I will be able to reposition the slabs in the future, if I feel like it. I love that aspect of it, because its always interesting to change things around after a few years.

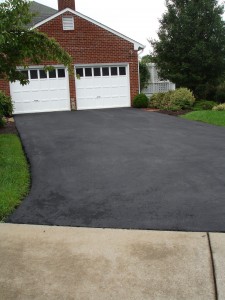
A fresh coating of driveway sealant can make the driveway look like new again.


In addition to addressing both of those areas, I have also resurfaced the driveway. We have an asphalt surface, so every few years I add new coating. It is surprising how quickly it transforms and beautifies — almost looks like new, even though it is 30 years old!


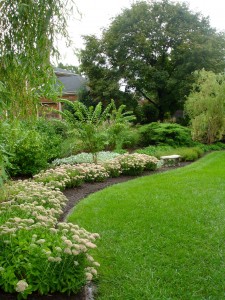
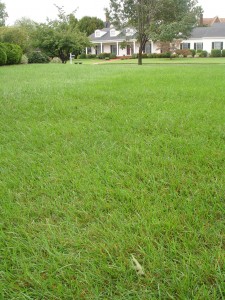
Thanks to two hurricanes and a tropical storm, the lawn has come back to health. Croquet anyone?

The turf in the yard had become so dry that it hurt your feet to walk on it barefooted. It was sharp and had turned brown and mostly dormant. We have been getting some incredible rain for about ten days, off and on (thanks to Hurricanes Irene and Lee), and the grass has come back green and strong. I was getting worried that I would have to do some major lawn renovating, but it’s looking terrific. Some fall fertilizer and weed control will be all it needs. Now that it is a little cooler, I will trim out the dead branches on the bushes, and of course plant some beautiful Mums and Pansies.


It is great to get back outside. What projects will you tackle in your yard?


Sharing Buttons by Linksku