Tag Archive for Garden Preparation

Small Edits for a Big Impact

Hello, my gardening friends! It is June already, and I’m sorry to have been out of touch for so long. Life has a way of doing that here and there. Today I’d like to share some quick edits I have been working on this spring that have made a big impact on our home’s curb appeal.

The first thing I did in my line-up of edits was painting the pediments above the windows and front door. Sometimes just highlighting an existing architectural feature of your home can add just the right amount of emphasis. After running out of good weather last year, I was finally able to get to the repairs needed to the bricks and bluestone on the front porch, then followed with lime washing the stair risers on both front porches. Finally, sanding and painting the iron railings added some needed safety and I love how the glossy black railing stand out in front of the white backdrop. These were the finishing steps in the lime washing of the whole house that I started last year. Getting these done brightens up the front entrance immeasurably, and as much as I had fun, it feels great to check the box “done” on this huge project.

Next up was to add two more window boxes to the front of the house, for a total of four. The two largest ones I’ve had for years — one on the window above the front door and the other at the zig zag of the front walk. I added the two new ones on the front side of the garage. (They were given to me by my sweet daughter of choice! That makes them even more special.) For continuity, I filled each of them with botanicals and flowers in the same color combinations. There are more in pots on each of the front porches. Adding a bright splash of color is one of the quickest and best ways to amp up curb appeal!
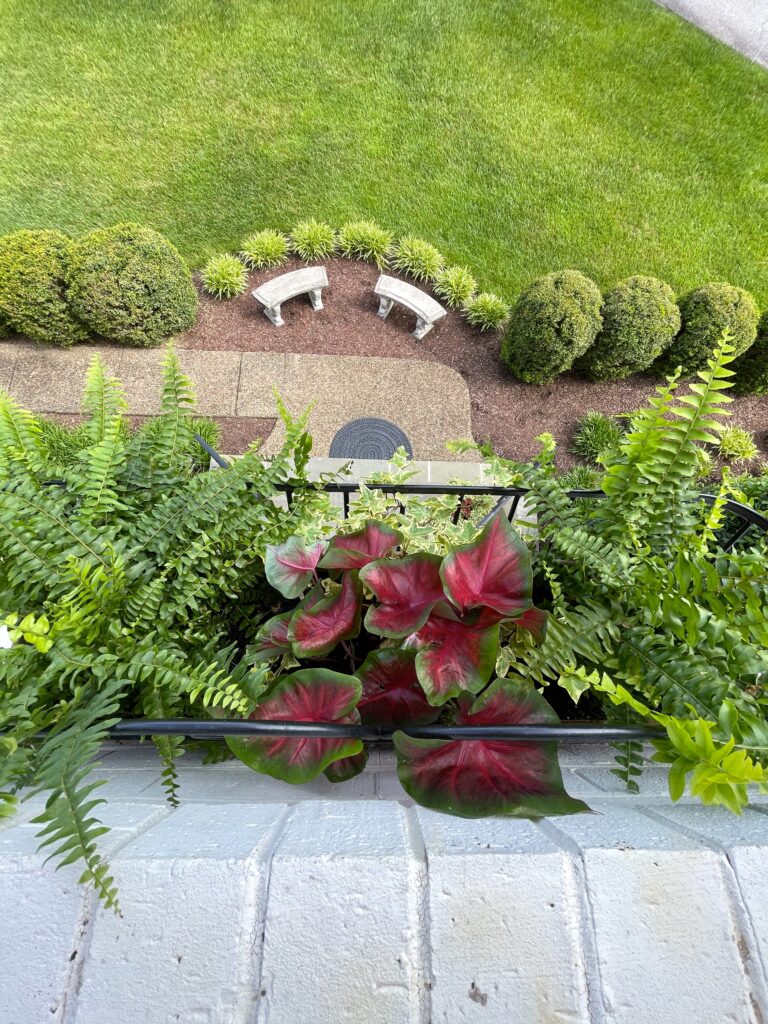
Here’s a bird’s eye view of the window box above the front door. I filled it with Boston fern, caladium, and variegated ivy.
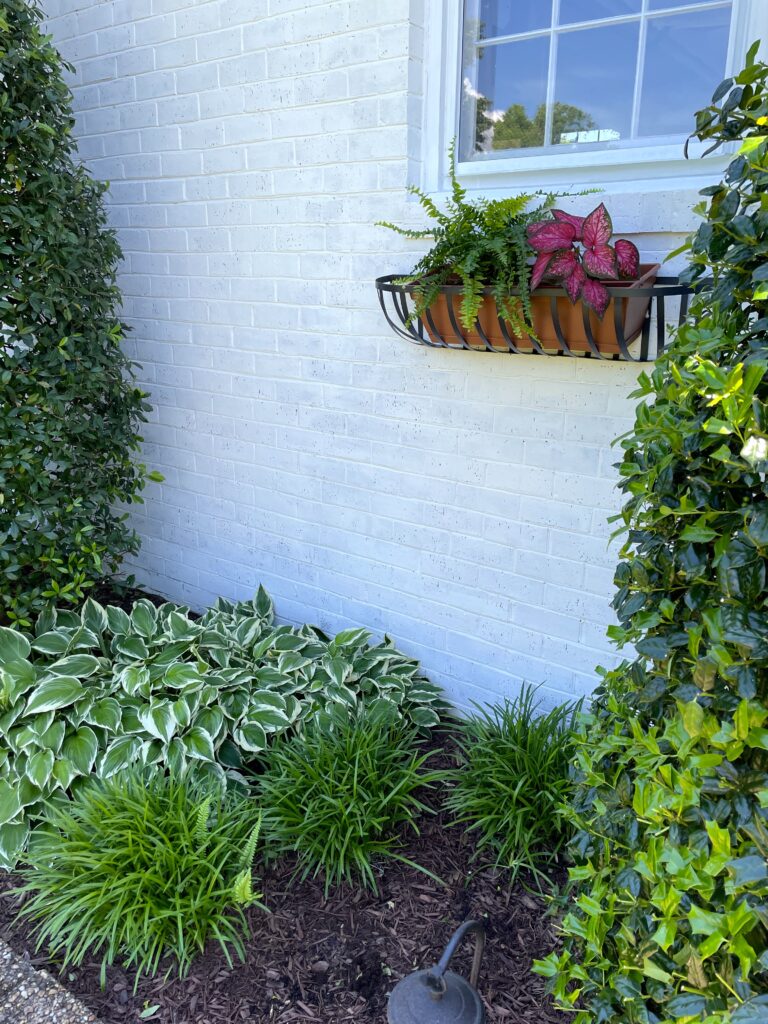
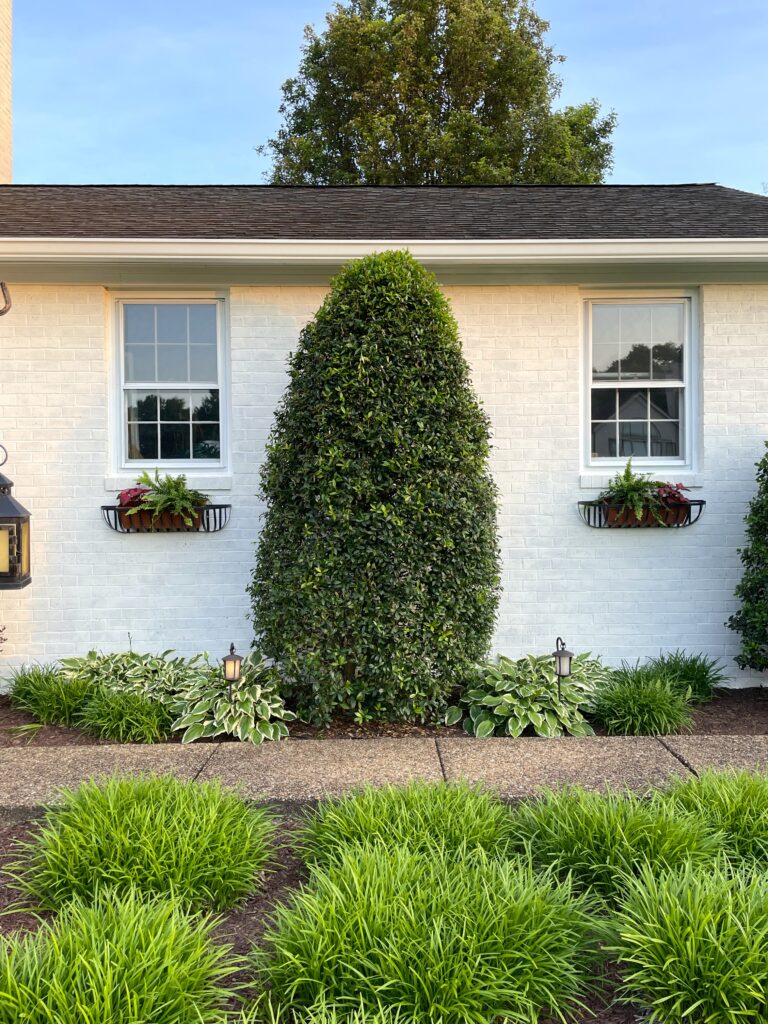
The two window boxes on both sides of the garage were each filled with a Boston fern, and caladium. Here’s a photo from further back, so you can see the effect.
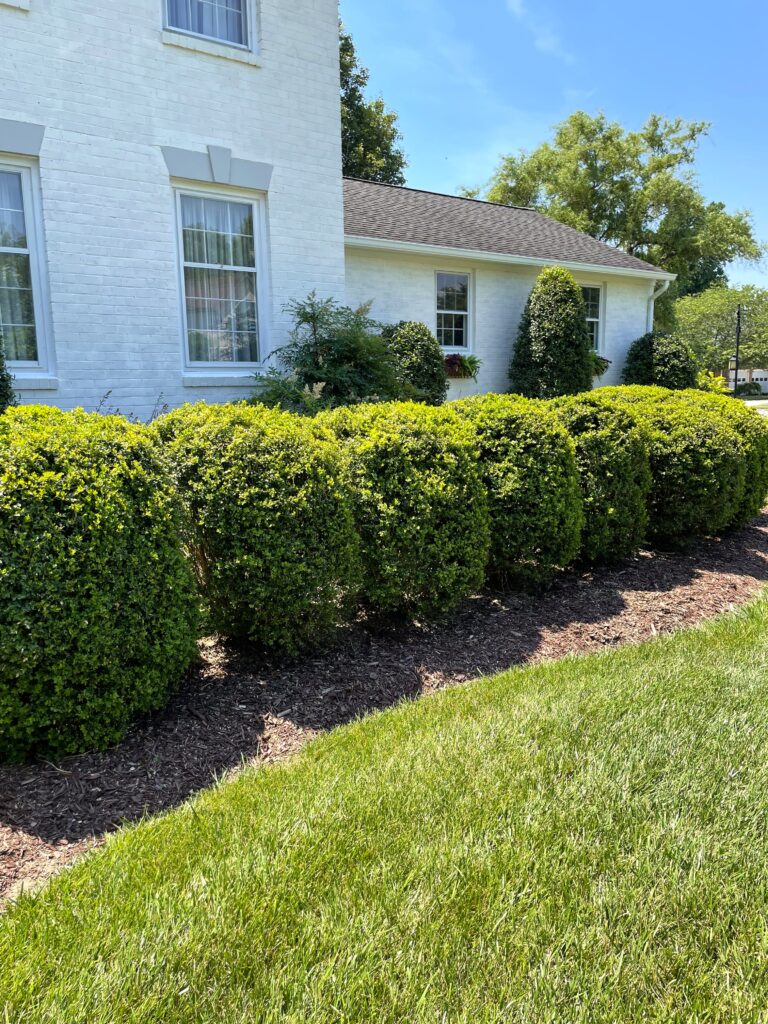
Also this year, I spent a week shaping the boxwoods and hollies. It makes a huge difference in the curb appeal to finally give the boxwoods a uniform height and symmetry! They had damage from snow and burn from chemicals (overspray from a roof cleaning) a few years back, both of which took a while to fill back out to a point where they could be shaped again. It’s a long process to get them uniform, but just take your time, and stand back every few minutes to check your work. It is gratifying to see them all uniform again, after seeing them looking sort of like lumpy blobs as they grew out the damage. And while at it, putting a nice edging on the gardens seals the deal.
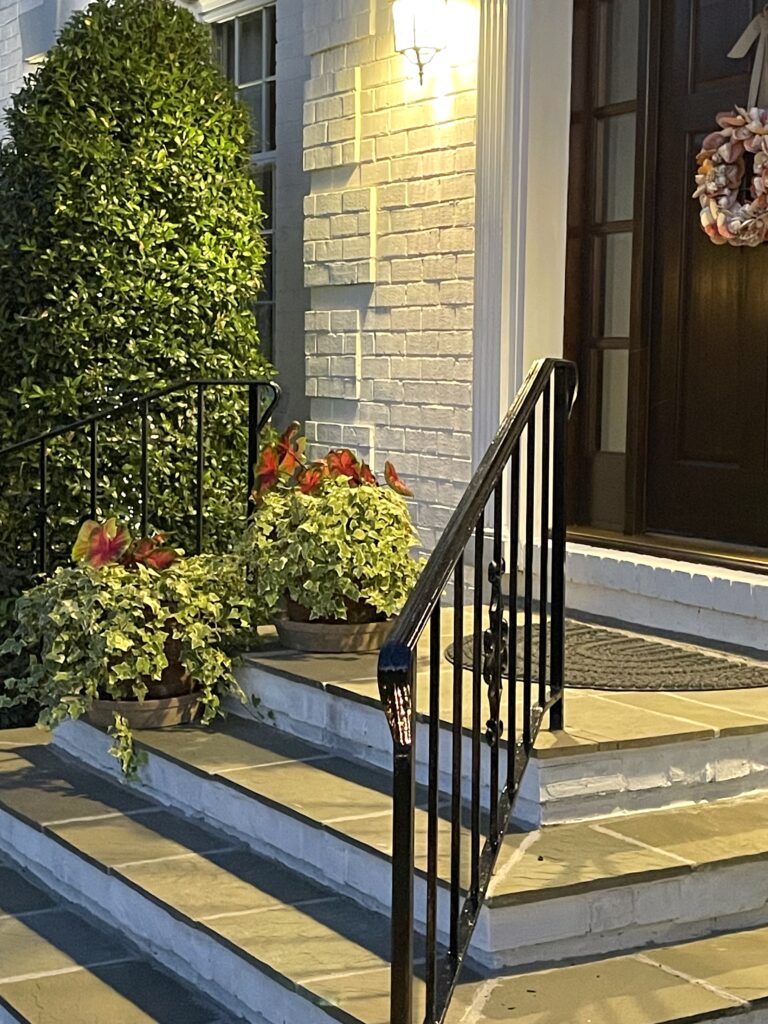
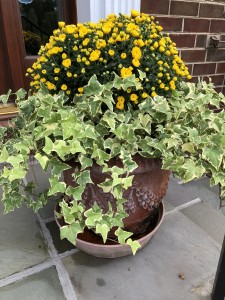
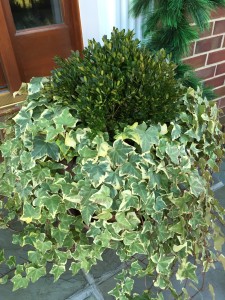
Above is a close up of the big pots on the front porch. Each were filled with caladium and variegated ivy. You might remember these pots from the last several years. I leave the ivy in them and swap out the flowers in the center each season. This ivy has been with me for at least 20 years or so, it creates the perfect “spiller” in a planter, and it’s easy to divide and transplant if it gets too large.
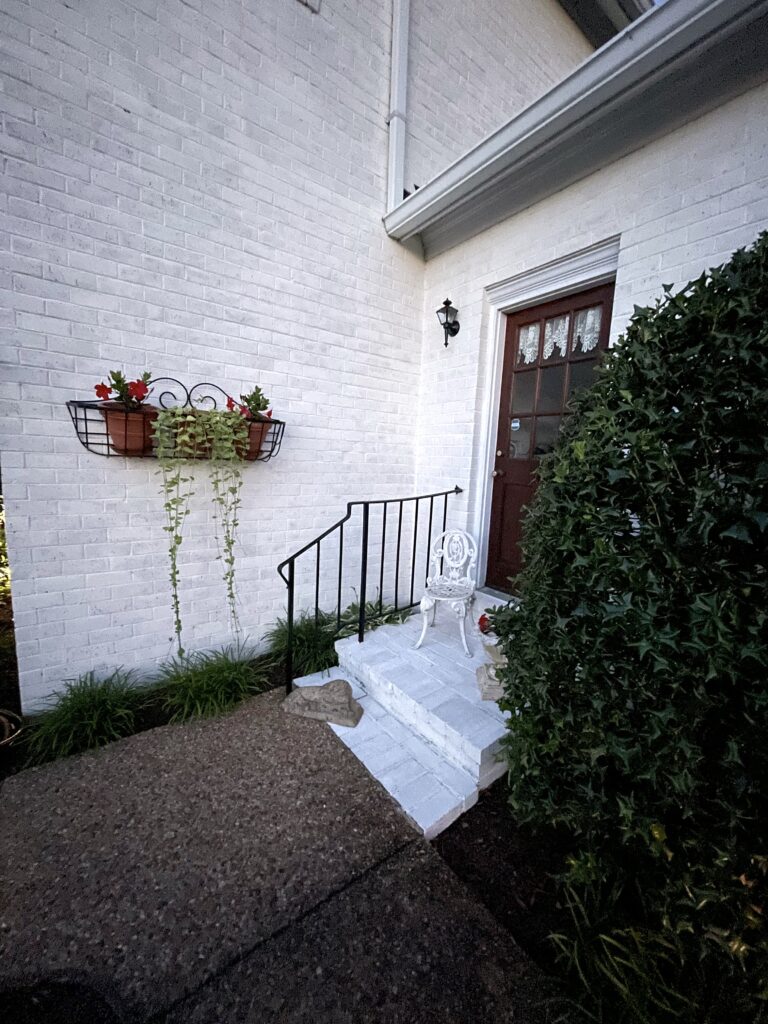
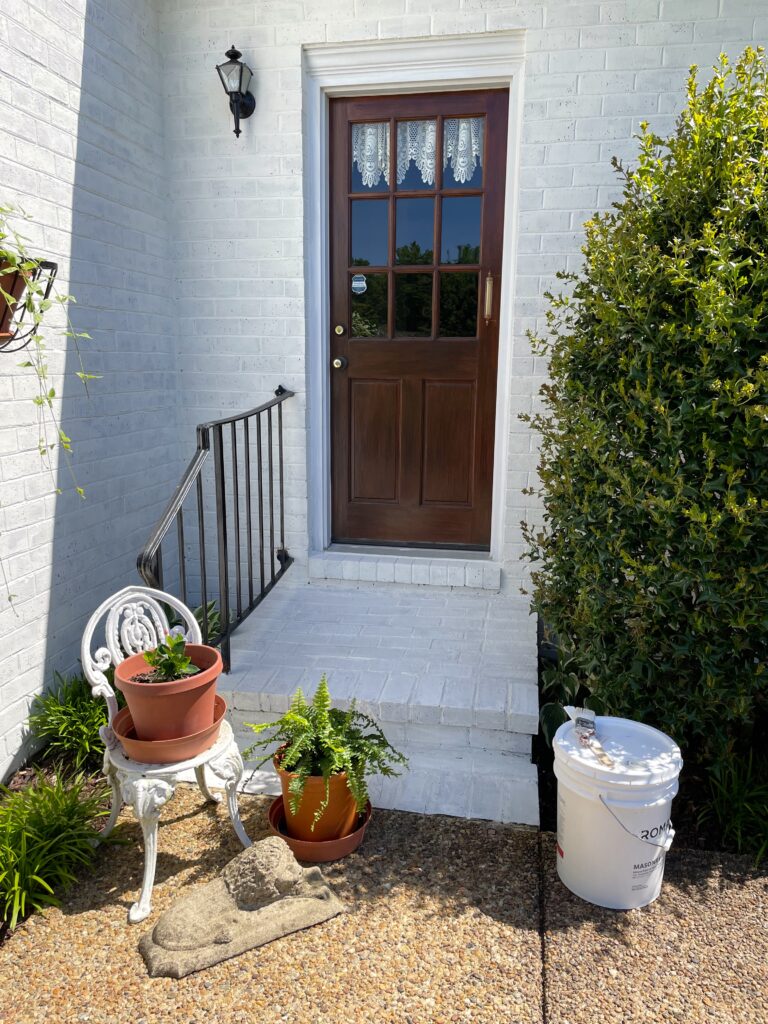
This window box at the zig zag of the front walk and mud room porch has coordinating flowers and trailing vines of mandevilla and vinca. Below is a better shot of the mud room porch. I know I say this a lot but, it’s amazing what a difference paint can make!
Another quick edit was changing out the wreath on the front door to a summer wreath. Adding a wreath is like adding jewelry. It’s an accessory that can showcase what your interests are. I love this shell wreath. OK — I love anything with shells, LOL!

I hope this leaves you with ideas you might incorporate at your own home. Some time invested a little bit here and a little bit there, and you will have it done! And as always, Happy Gardening!

Lawn Renovation Even in Sauna Weather – Got to Get it Done!

Hi everyone! We had an unbelievable amount of rain here this year, almost double our annual rainfall total. The air feels like a sauna even in October. It’s been hard to spend more than a few hours outside at a time in the heat and humidity — but you know I can’t stay inside, and there’s work to be done!

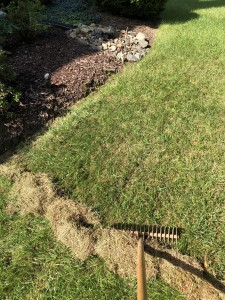
This type of steel rake is my favorite choice for de-thatching the lawn and preparing the soil for overseeding. Just look how much debris it removes!

This type of steel rake is my favorite choice for de-thatching and preparing the soil for overseeding. Just look how much debris it removes!

My priority now is renovating the lawn. Normally, I would finish this completely in September, but the weather has put me behind schedule. To do this right, I started by weeding the entire lawn by hand, as opposed to using an herbicide. When planning to overseed, one needs to make sure not to have any chemicals on the lawn which could interfere with the new seed sprouting.

I am using a specialized steel rake to get every bit of thatch out of the lawn — a tool I inherited from my grandfather. This is THE most grueling step. After de-thatching two-thirds of the lawn, I have collected more than a dozen full bags of debris (don’t worry — you know it’s going to the compost heap). I’m impressed with how effectively this steel rake pulls out the thatch — and it loosens the surface, which makes for great new seed contact into the top soil.

Everyone who walks by while I’m working asks me why I don’t just use a machine for this, but if you saw how much better this works you’d know why!

This is a photo of what the plugging machines do. They really don't get any thatch up, and compared to the steel rake- well, there is no comparison-

This is what those plugging machines do. They really don’t get any thatch up, and compared to my steel rake — well, there is no comparison, not to mention that the plugs of soil the machines leaves behind look like, um, something else we don’t really want to see…

I bought a premium seed that has a variety of grass types: some that sprout within a week to stabilize the bare spots, and additional varieties that will be sprouting over the next few. This mix also had a seed-starting fertilizer mixed in, but if the variety you purchase doesn’t have this, I’d recommend using some.

Keeping things moist while the seeds are doing their magic is key, but with all the rain we’ve had, I’ve only had to water the new seed a few times.

With the combination of sod, seed and fertilizer you can hardly see where the old tree stumps used to be!

With the combination of sod, seed and fertilizer you can hardly see where the old tree stumps used to be!


I’m happy to say that I finally was able to easily pull out the last of the roots from two pear trees which used to grace the front yard. Now those areas are much smoother in elevation. The vast majority of the surface roots came out with the tree, but a few deep ones remained. On these areas, which were quite large, I used a couple of pieces of sod and more seed around the edges to completely fill it in. Now you’d never know that those were trouble spots!


Once the new seed reaches three inches tall, you can start mowing. We gave our newly-seeded lawn its first mow this week.  I have a tip for this, too: Set your mower to highest level first, because after a few weeks of not mowing, the existing grass will definitely be quite long and would clog the bagging chute. In a couple of days, set your mower to the normal level and cut it again. This way your lawn won’t be stressed as much — and you won’t create new thatch by using a clogged mower!

Yes! Nice new seedlings emerging. What a good feeling that is-

Yes! Nice new seedlings emerging.


The front yard is finished, now on to the back-

The front yard is finished, now on to the back…


I’m hoping the weather will cooperate so I can finish up my raking this week, but (if you can believe it) we have a new hurricane bearing down tomorrow night, and two more in the Atlantic pipeline. Hope everyone stays safe, and best of luck — I’ll be back with some pretty fall flowers next week!


Happy Fall !

Happy Fall!

Front Garden Renovation – Adding Curb Appeal

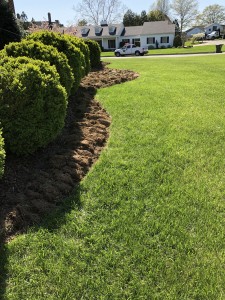
Here is my "before" photo of the front entrance garden. I am looking to fill in the area between boxwoods, and soften the edge of the garden.

Here is the “before” photo of the front entrance garden. I want to fill in the area between the boxwoods with a seating area that will soften the straight edge of the walkway by adding curves.


Long ago, when I first designed the front yard of our house, I left a 15 foot wide gap between the boxwood bushes that wrap the front of the house. This was supposed to be very temporary. My intent was to change the path of the front walkway and bring it up the middle of the lawn instead of from the driveway on the side. Well, as years slipped by, I have had much more pressing projects. The front pathway took a back seat, but it’s time to get started with a new plan. I’ve changed my mind on moving the location of the walkway for now, but I still want to soften up the existing straight line of the boxwood garden. To improve curb appeal, I added some seating and space for seasonal color by the front entrance.  I’ll show you how I went about it, step by step.


Then for the hard part-- cutting the edge with a scallop edger, and turning all the turf over with a rounded shovel. I prefer this to a cultivator, because you have far less grass growing back up, almost none!

First, I laid out a long rope to define where I wanted to expand the edge of the garden bed and marked the new edge with landscape paint. Then, the hard part — cutting the edge with a scallop edger, and turning all the turf over with a rounded shovel. This is back breaking work, but I prefer this to a cultivator — you have far less grass growing back up, almost none! You can see already how the curvy edge softens up the row of boxwoods.


Here's another angle from the side that shows the new edge.

Here’s another angle from the side that shows the new edge. Once it had rested for a few days, I broke up the shovelfuls of turf to smooth it out. Over time the turned grass will degrade, providing nutrients for the new garden area.


I added some stone benches that we already had, transplanted some pachasandra and some annuals, and finished it out with a nice topping of mulch. Over time the pachasandra will fill out and create a nice border. I'm planning to add some flagstone pieces to the front side and fill in with some more pachasandra between the stones, in the fall when the weather is cooler.     I added some stone benches that we already had, transplanted some pachasandra and some annuals, and finished it out with a nice topping of mulch. Over time the pachasandra will fill out and create a nice border. I'm planning to add some flagstone pieces to the front side and fill in with some more pachasandra between the stones, in the fall when the weather is cooler.

Here is the “after” shot: I added stone benches, transplanted  pachysandra and annuals, and finished it out with a nice topping of mulch. You already hardly notice the straight line of the walkway.  I’m planning to add some flagstone pieces to the side bordering the walkway and fill in with more pachysandra between the stones in the fall when the weather is cooler. Until then, I’m happy with the progress, and the more welcoming look!


I’m not quite finished with it, but already I’m much happier with the amped-up curb appeal, and a new place to sit in the garden. I’ll post another photo in the fall when I add some flagstone pieces to transition from the walkway to the benches. I’ll transplant more ground cover to fill it in when the weather cools off. Hope you all have a safe and wonderful 4th of July! Happy gardening!



A moment in time – waiting for the cherry tree to bloom!

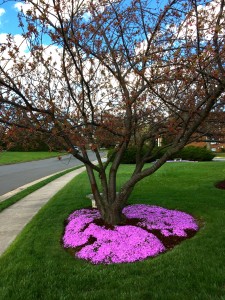
Anxiously waiting for the cherry tree to bloom.

Anxiously waiting for the cherry tree to bloom.


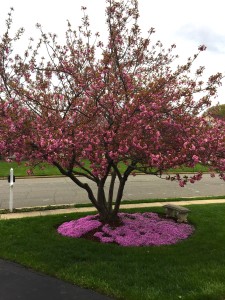
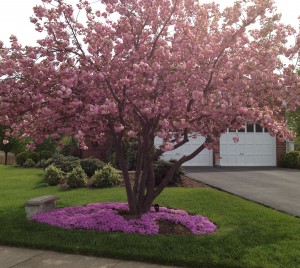
Every year I’m working against the clock to have the yard looking at its peak when the cherry tree blooms. This year we have had an inordinate number of warm days, and I have almost finished — well, at least the front yard. It’s hard work, but the weeding, edging, mulching (90 bags!) and lots and lots of pruning are almost completed. We have lots of people who drive by and a few who take Easter pictures here when the tree blooms coincide with Bunny Day. I think this year I was lucky that this tree is a little behind the Tidal Basin cherry trees in D.C. The cold snap and late ice and snow storm that collided with them didn’t harm mine, just delayed it a few days. For those who are as in love with these trees as I am, this is a Kwansan variety. Its double flowers are magical!


The “Charleston pink” phlox that surrounds the tree is at its peak right now, and the tree is hours away from exploding with color, so this is just a teaser and I will post another photo when the tree is blooming — until then, Happy Spring!


Update, April 6th –  The tree has started to open. I’ll post a photo each day until it’s fully open. We had an incredible Spring storm that blasted through here just now with intense wind and the darkest clouds I’ve ever seen. Everyone in its path — stay safe!

You can see now how many flowers have opened in just a day. More to come!!!

You can see now how many flowers have opened in just a day. More to come in tomorrow’s update!


Update, April 7th – She is now in all her glory! It’s always worth the wait. I feel so happy to have her in my garden.

Full bloom! Always worth the wait! Happy Easter everyone-

Full bloom! Always worth the wait! Happy Easter everyone…

One more close up for posterity! How I love this tree-

One more close up for posterity! How I love this tree!


Save

Save

Save

Save

Save

Happy New Year to All-

Time to start putting those  dreams to reality. All the best to all the gardeners out there-

Time to start putting those dreams to reality. All the best to all the gardeners out there-

Save

Save

Save

Save

Save

A Very Busy Second Half of Spring

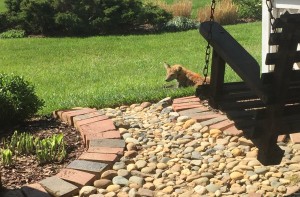
Our resident fox enjoying a nap and a sunbath.

Our resident fox enjoying a nap and a sunbath.

Here it is — the second half of spring already! The garden here is bursting with activity, both flora and fauna. We recently spent a leisurely morning with our fox friend, our feral kitty, the crazy squirrel, duck family, chipmunks and many songbirds to name a few. It’s always an adventure around here!

With the nice weather warming the soil, the garden is growing quickly now, despite the fluke ice storm that deposited an inch of slushy ice two weekends ago. The trees are blooming all out of sync again. Strangely enough, the dogwood was the first to bloom and has held on to her flowers for almost a month.

This ice/slush storm was winter's last hurrah. Most plants had started to get their new Spring leaves, so this storm was most unwelcome.

This fluke ice/slush storm was winter’s last hurrah. Most plants had started to get their new spring leaves, so this storm was most unwelcome.

We have finally turned the corner on frost and freeze warnings, so I’ve been planting herbs and veggies. It makes me so happy to see how many heirloom varieties are now being offered in the garden centers! I’m trying out many old fashioned varieties this year, so I will have some fun things to report back on.

The flowering trees were a welcome sight, and the dogwood is still blooming!

The flowering trees were a welcome sight, and the dogwood is still blooming!

I’m so glad that the trees came through the winter alright in this region. We had such a strange autumn that many of the National Cherry Blossom trees bloomed around Christmas, about 1/4 of them! The affected trees didn’t rebloom, but thankfully they are all okay.

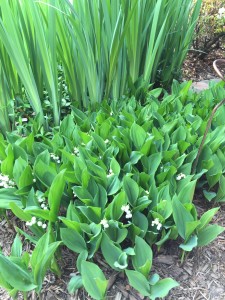
This patch of lily of the valley has doubled in size this last year. The scent is wonderful!

This patch of lily of the valley has doubled in size this last year. The scent is wonderful!


The same happened with many of the bulb flowers. The hyacinths that I have in my garden had sprouted at Christmastime, so they became freezer burned by the cold of winter and their flowers were all deformed this time around. Thankfully the daffodils had not gotten as big and were fine. On a better note, the patch of lily of the valley is looking the best that it ever has, and I’m so glad to report that it is covered in fabulously scented flowers. This is a fantastic ground cover with tons of old fashioned appeal, and will grow nearly anywhere, so keep that in mind if you are looking for something to fill a tough spot.


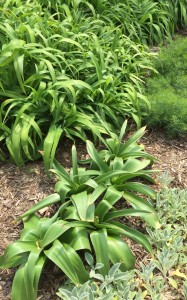
Not in bloom yet, but this area is planted with large masses of flowers. I can't wait to see the alliums in bloom!

Not in bloom yet, but this area is planted with large masses of flowers. I can’t wait to see the allium in bloom!

The allium bulbs are getting so huge as well. They were a gift at Christmas, so this is their first year. I will post some pictures when they start to bloom. I love how interesting the flowers are, and I planted them in a wave, between masses of iris, daylily, lamb’s ear and coreopsis. It’s getting so full that it should look amazing when they are all in bloom. While they are newly emerging, this is the perfect time to round up the edges on hosta, grasses, liriope, and lily to get them in shape for the new growing season. I like to do this now, rather than in autumn because they send out shoots underground over the winter months, and can start to look a bit messy otherwise.


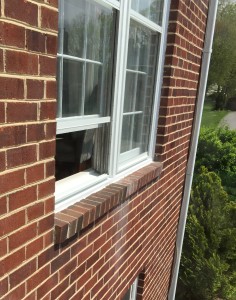
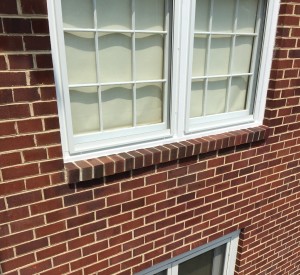
On other fronts, I’m continuing to work on the storm window project, and I have a tip for you on fixing discolored brick. Years ago, way before we bought this house, someone had used some crummy paint on the trim work. It left long streaks of ugliness on the brick. I had tried all kinds of things to remove it short of sandblasting, and nothing could clean it off. My solution — more paint! I picked up half a dozen exterior craft paints in different brick colors and blended them. Just dab them into the offending areas and like magic the stained areas look fresh and clean. I have done this before on the front stairs and many other places on the house. If you didn’t know a stain was there, you never would. I won’t tell, if you won’t! Works like a charm. Give it a try!

BEFORE- ugly white streaks on the brick.

BEFORE: ugly white streaks on the brick.

AFTER- Looks like new! Blending a few different brick colors and dabbing it on the stained bricks works great, and east to do!

AFTER: Looks like new! Blending a few different brick colors and dabbing it on the stained bricks works great, and it’s easy to do!

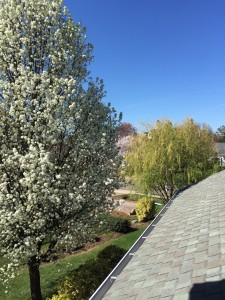
I hope you are having a wonderful springtime and getting time in the garden. Here is one last photo, a bird’s eye view picture from the upper window looking out on the neighborhood trees. I just love how many bloomed all at once again this year!

Bird's eye view of the tapestry of colors of the blooming trees.

Bird’s eye view of the tapestry of colors of the blooming trees.


Spring Cleaning — Outside, Too!

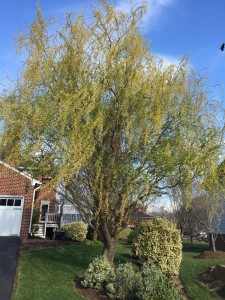
The curly willow was the first tree to start it's new growth. This year it has doubled in size!

The curly willow was the first tree in my garden to start its new growth. This year, it has doubled in size!

This has been a very strange spring so far, with weather not being able to make up its mind between winter, spring or summer. There have been some really turbulent wind storms as well. Even still, I’m doing my best to get the garden and house in tip-top shape. There are many projects underway and inspections taking place. I will walk you through a few of the big ones that you might find helpful in relation to your own home and garden.

While I’ve been getting the perennials and bushes trimmed up and ready for new growth,  the cleaning outside has started from the top down.

Here's the before picture of our roof. You can really see the black streaks appearing.

Here’s the before picture of our roof taken at the end of summer. You can see the black streaks appearing.


It’s been five years  since we had our roof cleaned, and it had developed black streaks from algae and air pollution again. Last time only the north-facing front was grungy, but this time there were streaks on all four sides. The method of cleaning has improved greatly since the last time. Now the technicians spray the roof with a special soaking nozzle using a detergent that makes quick work of cleaning the shingles. This is far better because it does not damage or wear the roof like the machine scrubber of the past.


Here's the after photo- all clean and getting some squirrel damage repaired.

Here’s the after photo — all clean now and squirrel damage repaired. Now it’s good as new!

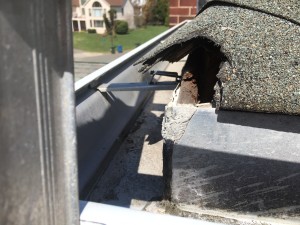
They also did an inspection and discovered 3 spots where squirrels had chewed up the shingles trying to get inside. We quickly had that fixed.  I recommend that everyone have their roof inspected each year. The damage on ours wasn’t visible from below, so we would not have even known until water damage became visible inside. That would have been much more expensive to fix!


Here's why I think everyone should get a roof inspection. This is where a squirrel chewed a hole right on the corner. You can't see it from below, so we wouldn't have known it was there.

Here’s why I think everyone should get a roof inspection. This is where a squirrel chewed a hole right on the corner. You can’t see it from below, so we wouldn’t have known it was there.

Many roofing companies will inspect at no cost and take pictures to show you damage that they find. Many thanks to the A Team Roof Cleaners, and Marshall Roofing for the repairs.

These are the 30 year old storm windows. Back then you only had one option where you could place the meeting bar, only in the middle of the window. On these windows that meant looking at it every time you looked outside- not pretty!

BEFORE— The 30 year old storm windows. Back then you only had one option of where you could place the center bar, only in the middle of the window. That meant looking at it every time you looked outside – not pretty!

I am also back on track replacing ten of the storm windows on the main level of the house. I’m always a “bring the outside in” kind of girl, so having proper windows is important to me. The former storm windows didn’t match up with the style of window in the house, so instead of looking out of a pretty wooden window, we had been looking at an ugly metal bar in the middle of our view. The new windows are great, and even come with a new coating that helps them stay clean — YAY!!!! I love that feature.

Anyone who is considering window replacement look at this option first. The new storms provide great R-value, and in our case were 1/10th the cost of a window replacement.

Here are the nice new storm windows- center meeting bar where it should be! And bonus being a special coating to help keep the windows clean!

Here are the nice new storm windows – with the center meeting bar where it should be. And bonus being a special coating to help keep the windows clean!

That’s a fantastic savings! We chose Larsen Gold Series Storm windows — I’m not a paid spokesperson, but I do believe in sharing my sources.

I also still need to scrub down the north steps in front of the house. I like using oxygen bleach and then rinsing it well. Makes the stones and the grout look like new. And this year, I’m determined to actually finish power washing the sidewalk. There’s always some touch up paint needed on the trim work. It all takes time, but in the end, it makes everything so much nicer.

IMG_0833Those of us who live in the Washington, D.C. area are very happily watching our national cherry trees blooming, and that means mine are not far behind. So as I wait on my beautiful cherry tree to start opening up, I’m checking off things on  my to-do list for this spring — hope that yours is on its way, too.  Happy gardening!


And Just Like That — SPRING!

Goodbye Ice and snow- we are ready for Spring!

Goodbye Ice and snow- we are ready for spring!

Goodbye ice and snow! Spring is popping! We shattered high temperature records already, and went from heat to A/C in the house on the same day. The groundhog was right — it’s an early spring. I’m ready, or at least I’m try to keep up. This last week I managed to get a lot of grasses, sedum, liriope, iris, rose bushes and some of the straggly nandina trimmed up and ready for the new growth. I’m more than half done, but this year many of them are already showing signs of new growth. Normally that doesn’t happen until much later in March or April around here. Mother Nature has been confused, most definitely.

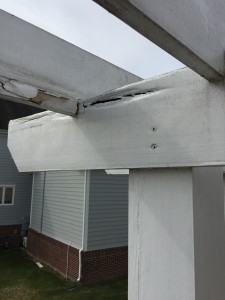
After just a couple of years, despite lots of maintenance, there was a huge amount of rot in the wisteria arbor. Time for replacing!

After just a couple of years, despite lots of maintenance, there was a huge amount of rot in the wisteria arbor. Time for replacing!


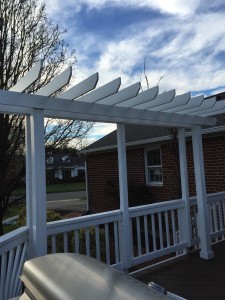
We also had some pretty awful rot in the arbors that we built only a few years ago. Before we installed them, I primed them, put on two coats of paint, and then annually gave them another coat of paint, but they completely failed anyway, full of rot — very discouraging! So this time around, we used PVC instead of wood, and there will be no chance of rot again. It looks great! We were rushing to get this project finished because this is one of the arbors that the wisteria is trained on, and we wanted to get it finished before it started to open up for spring. Just made it!


The new and improved arbor- this one made with PVC instead of wood- no more rotting!

The new and improved arbor, this one made with PVC instead of wood — no more rotting! This one also has been made a little wider to give more sun protection below, and more room for the wisteria above.

This is really my favorite time to be outside in the garden. I love getting the plants ready for the season. Things grow so fast you can almost see it happening, and it feels so fresh after being couped up during the winter. The robins have been coming through en mass, and I have already seen nests being built, so I know I’m not the only one ready for spring! Here are some of the early blooms already making their debut in garden:

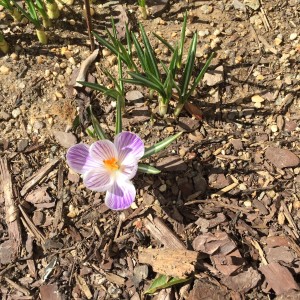
As soon as the snow melted the crocus appeared-

As soon as the snow melted the crocus appeared…

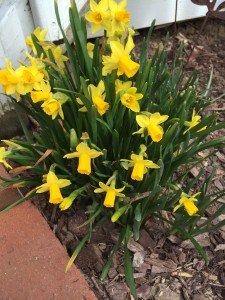
Followed quickly by the daffodils-

Followed quickly by the daffodils…

And now the hellebores are starting to bloom- so pretty!

And now the hellebores are starting to bloom — so pretty!

January 3rd – Is It Winter or Spring?

There is still a lot of new growth on many plants that would normally have gone dormant by now.

There is still a lot of new growth on many plants that would normally have gone dormant by now.

Well, it’s January 3rd and I’m already gardening! You know I can’t stay away from it for more than a few days.
We have had such a warm start to winter. Even when it has gotten cold overnight, the days are pleasant — so pleasant that here in the mid-Atlantic region, we have daffodils sprouting and cherry blossom trees flowering. Although it’s warm now, we will pay for it in February and March, according to the weather people. A classic El Niño with ice storms to come, so until then, I am getting as much done as I can and enjoying every minute in the garden!

I was a lucky gardener and received some fun gardening-oriented gifts for Christmas, too. A really nice gardening seat and tool tote, a pointsettia, a rosemary topiary and some beautiful allium bulbs. These were such thoughtful gifts! I spent this weekend planting the allium bulbs. Normally one would not do that this time of year, but because our temperatures have remained in the range you would expect an October day to be (between 50-70 degrees), I went ahead and got them planted. I just know they will be gorgeous this spring!
The pointsettia doubled in size this last month, and is loving the east exposure.

The pointsettia doubled in size this last month and is loving the east exposure.

I also finished getting the roses ready for winter. They were still blooming until just this week! The last of the leaves dropped, so I scooped them all up. Its a good practice to always do that, as the leaves can harbor diseases which can cause black spot on the next year’s growth if left on the soil below the plant. Better safe than sorry, so I collect them. I had a little bit of it on my older roses this last summer and tried something new: a spray of half water/ half spoiled milk, and much to my surprise, it worked! I removed the affected leaves, sprayed, and within a couple of weeks new growth had sprouted showing no signs of the black spot. Remember this for next year in case you see any. I love it when there are simple home remedies that work! And have no harsh chemicals, either.

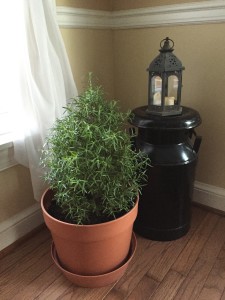
Rosemary is a fantastic plant to have inside over winter, the scent is wonderful, it cleans the air and you can cook with it . How great is that!

Rosemary is a fantastic plant to have inside over winter, the scent is wonderful, it cleans the air, and you can cook with it. How great is that!

Inside the house, I re-potted my rosemary topiary and lightly watered the pointsettia. They both really don’t need much water this time of year, and both like bright light. I have the perfect east facing window that I keep the pointsettia next to, and in previous years this has proven to be just the right exposure. It even kept color long into March. I love to have the rosemary in my kitchen, and can’t resist brushing by it to release the wonderful scent. I often use it in cooking, and it is just so pretty, too! These are also natural air fresheners.

Looking forward to seeing what kind of weather tomorrow brings, but I’m hoping to get back out there in the garden. Hope to see you!

The Merry Month of May

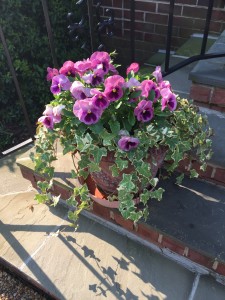
Pansies at there fullest-

Pansies at their fullest right now – just in time for Mother’s Day!

First of all, I would like to say that I hope all the Moms out there had a very Happy Mother’s Day! Did you know that there are more flowers sent for Mother’s Day than Valentine’s Day — interesting statistic!

The old adage “April showers bring May flowers” is very true this year. Suddenly, the gardens have sprung to life around here. We went from a freeze warning to 90-degree days in less than a week, and that brought on an amazing array of beautiful flowers overnight! The grass is growing about six to seven inches in a week. I hope that you are enjoying the warmer weather, and I have some tips for how to manage some of the spring tasks ahead.

The azalea & periwinkle bloomed at the same time this year-

The azalea and periwinkle bloomed at the same time this year.

This season came on so fast that almost all of my spring blooming plants are flowering all at once, creating fun combinations that almost never happen. Right now, the periwinkle, rhododendron and azalea are blooming together, and before that the Pear, Cherry and Dogwood trees all bloomed at the same time. Normally these are all spaced about two weeks apart, so it has created a magical display. The pollen is out in force, too, but we won’t talk about that… A-choo!

Since the overnight temps were still dipping too low to mulch the grass clippings (the overnight lows need to be above 55 degrees), I want to share a tip that your flowers are going to love. Just take the grass clippings and spread them on your flower beds about 3 to 4 inches thick, then turn them into the soil with a spading fork. This will lighten the soil and nourish the bed.

Spade in excess grass clippings now, for a terrific flower bed in a couple of weeks-

Spade-in excess grass clippings now, for a terrific flower bed in a few weeks.

Let the garden rest for a couple of weeks until the clippings turn brown and it’s warm enough to plant your summer annuals. If you do this, I promise you will be rewarded with flowers that grow twice as big. I like to top dress the beds with a little mulch after the flowers are planted to help keep the moisture in the soil, too. In garden beds that have been established/planted you might stir in some leaf compost around the base of the plants instead.

We had a pretty harsh winter for this region and I lost a few plants, but I’m having fun filling in the spots with some transplants from other areas. Seems there is always change in the air around here, but that is what keeps it interesting.

Hope you enjoy!

The rhododendron are so full of flowers. A welcome sight after a cold winter.

The rhododendron are so full of flowers. A welcome sight after a cold winter.

The white iris is even taller than usual this year- almost 4 feet tall!

The white iris is even taller than usual this year — almost four feet tall!

One more shot of the azaleas-

One more shot of the azaleas — Happy Spring!

Spring is Here

My kwansan cherry tree in peak bloom. (For those of you who have asked, this is the tree in the blog page's background.)

Just like magic to me, spring has sprung. With such a mild winter this year the blooms are very early. The flowering trees are magnificent, and the phlox is beyond compare. All of the bulbs have finished, but the masses of foliage were much fuller and greener than usual. I think that this might be one of the more beautiful displays ever. Even the azaleas are opening, in all their glory.

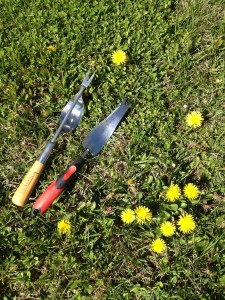
These are two weeding tools I use. The one on the left is an ergo tool, and rocks the weeds out of the soil. The one on the right is a serious tool which can extract even the toughest weeds.

It seems all of the plants that I transplanted last fall had a very easy first winter in which to spread their roots and become acclimated to their new locations. I was very happy to see the first leaves sprouting on the three crepe myrtles, and am even more anxious to see them grow to fill out the side garden where once the purple maple stood. Really the only downside of this spring is dandelions, which always seem to blow in, and they are doing way too well. Thankfully, I have two terrific tools which easily uproot them. If your yard is prone to these weeds, I wholeheartedly recommend getting one. They make the process a lot quicker. They work great on all weeds, whatever size.

I am almost done with trimming back the liriope, euonymus, and junipers. Not a minute too soon either, they are already sprouting new growth. I am hoping to finish this weekend because it is now time to edge, and add some new mulch to keep the weeds down and the moisture in. Lots to do!

Here is a closeup of the pink dogwood this year. The flowers were so huge and perfect that it almost looked artificial.

A good tip to get your garden off to a good start is after you have prepared the soil with some weed preventer, and stirred in a little compost to add nutrients, give your garden a good watering prior to mulching. This will give it a boost, and ensure that all your plants have everything they need for the new growing season.

One more closeup -- these are the creeping phlox. When first planted, these were just a small plug, they are now more than three feet in diameter, and gorgeous. I would recommend them for my top awards honor this spring.

I hope everyone gets a chance to enjoy this incredible time of the year, whether it’s in your own yard, or even the park. Just a reminder — Garden Week is almost here with lots of inspiring places to visit.

Garden creation

For me, this is where the fun begins.

I like to layout my garden shape by using a hose or a rope to define the outer edge. Try to incorporate large sweeping curves whenever possible, this adds grace and visual interest. Follow by cutting a smooth edge with a scalloped edger.

Curved edges create visual interest


At this point, if you have grass that needs removal this is the time to do that. I prefer to set the grass to the side for use later.

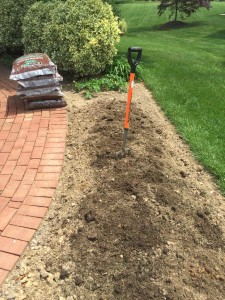
The double digging method of prep is my favorite. I start by using a pick to loosen the soil (in my area it is as hard as concrete, and this is the easiest method). If you have big strong kids, this is the perfect job for them. Then start digging — go down one shovel-full, set aside, dig down one more shovel-full, set aside. This is a  huge amount of work, but will pay off with a deep, wonderful bed.

Once you have dug out the bed completely, you can start reloading it. First, by putting the grass layer back in, but, put it in upside down. The grass will break down into nutrients for the garden. Next, layer in the soil you removed, adding any amendments you need, breaking up the soil into a smooth texture as you go. In my location, I always add compost, grass clippings and sand, but in your area this may be different. Let the garden rest for a couple of days, then with a spading fork, give it one more stir. At this point you have the most luxurious garden bed you could ever ask for.  Next up: plants!

Divide and Conquer – Segmenting your garden beds

Now that you have thought through an overall plan for your yard, it’s time to start planning the individual garden beds. In my own garden I designate a name to each bed by location (for example: front left, front right, side yard, etc.), another way would be to number them. I try to divide them into sections that can easily be maintained in less than 15 minutes on a normal schedule. It depends on how much time you personally have to spend in your yard at one time. I find that if I work my way around the garden in this manner, I can know exactly where to stop and start back up.

Prioritizing maintenance from most to least visible, is another way of making sure that the garden looks the way you want it to. For instance, I will do a quick walk through of the previously worked on sections, before starting in on another. I find this is the easiest way to keep a mental note on what to work on next time I get to that section. I always start with the front door — that’s just me — but I always like it to be as nice as I can make it.

A lot of people ask about how deep and wide to make a garden bed. For this, I think a good rule of thumb is to look at the height of your house. In general your ideal depth should be 1/3 to 1/2 the overall height. My house is approx. 30 ft. high, so my front bed is 15 ft. deep. As well the width should span to 1/3 to 1/2 the overall height beyond the edge of the house. This keeps the proportions right. You always want the surrounding beds to visually anchor the house to the land.

Now that you know my formula for sizing and segmenting beds into manageable sections, I hope it will help you to divide and conquer your own garden.

A close look – Getting to know your garden

For my first blog I am starting at the beginning.

It’s important to know your terrain. All the hills and valleys, where it’s flat, etc. Walk your entire yard, and look at your property from every window, walkway and driveway, even from across the street. All of these areas will become important in figuring out your focal points. Once that is done you can start with your plan.

There are many solutions to terrain imperfections. For instance, you might consider creating some elevation to a flat yard by adding a berm, or terracing a steep yard to maximize your usability.

Another consideration is where to steer your rain water, and downspouts.  There are many good options, and more being thought up all the time. (Dry wells, rain barrels, rain bladders, rain gardens, ponds, etc.)

This is also the time to decide where you want your walkways and drives to be. Consider installing them in the sun if you live where it’s snowy, and in the shade if you live where it’s hot. Also, designated areas for relaxing (decks, patios), and recreation (pool, open space, etc.).

Knowing your yard is your most important step in planning, and worth a lot of thought. It can save you countless hours of redoing in the future, not to mention expense and effort. I will discuss each of these topics, and many more, in future blogs at greater length, so stay tuned.

I promise to keep my blogs short and meaty, so that’s my food for thought today. Enjoy!

Sharing Buttons by Linksku