
Happy 4th of July everyone! Please be safe, watch out for your 4 legged furbabies, and enjoy your celebration!


To me Autumn is all about pumpkins, fall leaves, candles, and warm colors. I just love all the different shapes, colors, and varieties of decorative gourds. I have been collecting them for decades now, and I love to use them all over the house, even outside. Most of mine are either paper mâché or resin, and last forever, which is important to the Earthgirl in me to be able to reuse over and over again. While I love decorating for each season, I have to be careful from going overboard, as my entire pumpkin/gourd collection fills two large storage bins when packed away.
I love to mix them up. Each year I fill bowls with small ones, as well as use them in lanterns, around candles, in stacks, and on fireplace hearths from Labor Day until Thanksgiving. Here are a few photos from this year’s display at our home.

Choosing interesting bowls that have fun colors relating to the season is the key. This vintage one was my grandmother’s, so it’s very special to me.


These two Bordallo green cabbage designs are some of my favorite pottery pieces, and they really set off the pumpkin colors.

Here are two of my favorite paper mâché gourds on the family room mantle. I embellished a few of them with fall leaves to bring together the color scheme. I love them with a mix of candles. The more eclectic the grouping, the better, in my opinion. All of my candlestick holders are either inherited or thrifted from shops, or estate sales– I love them all!
In the photo below are decorative lanterns on the mantle in the game room. Tip: when you decorate the inside of lanterns, be sure to use battery candles so you don’t have a fire risk.

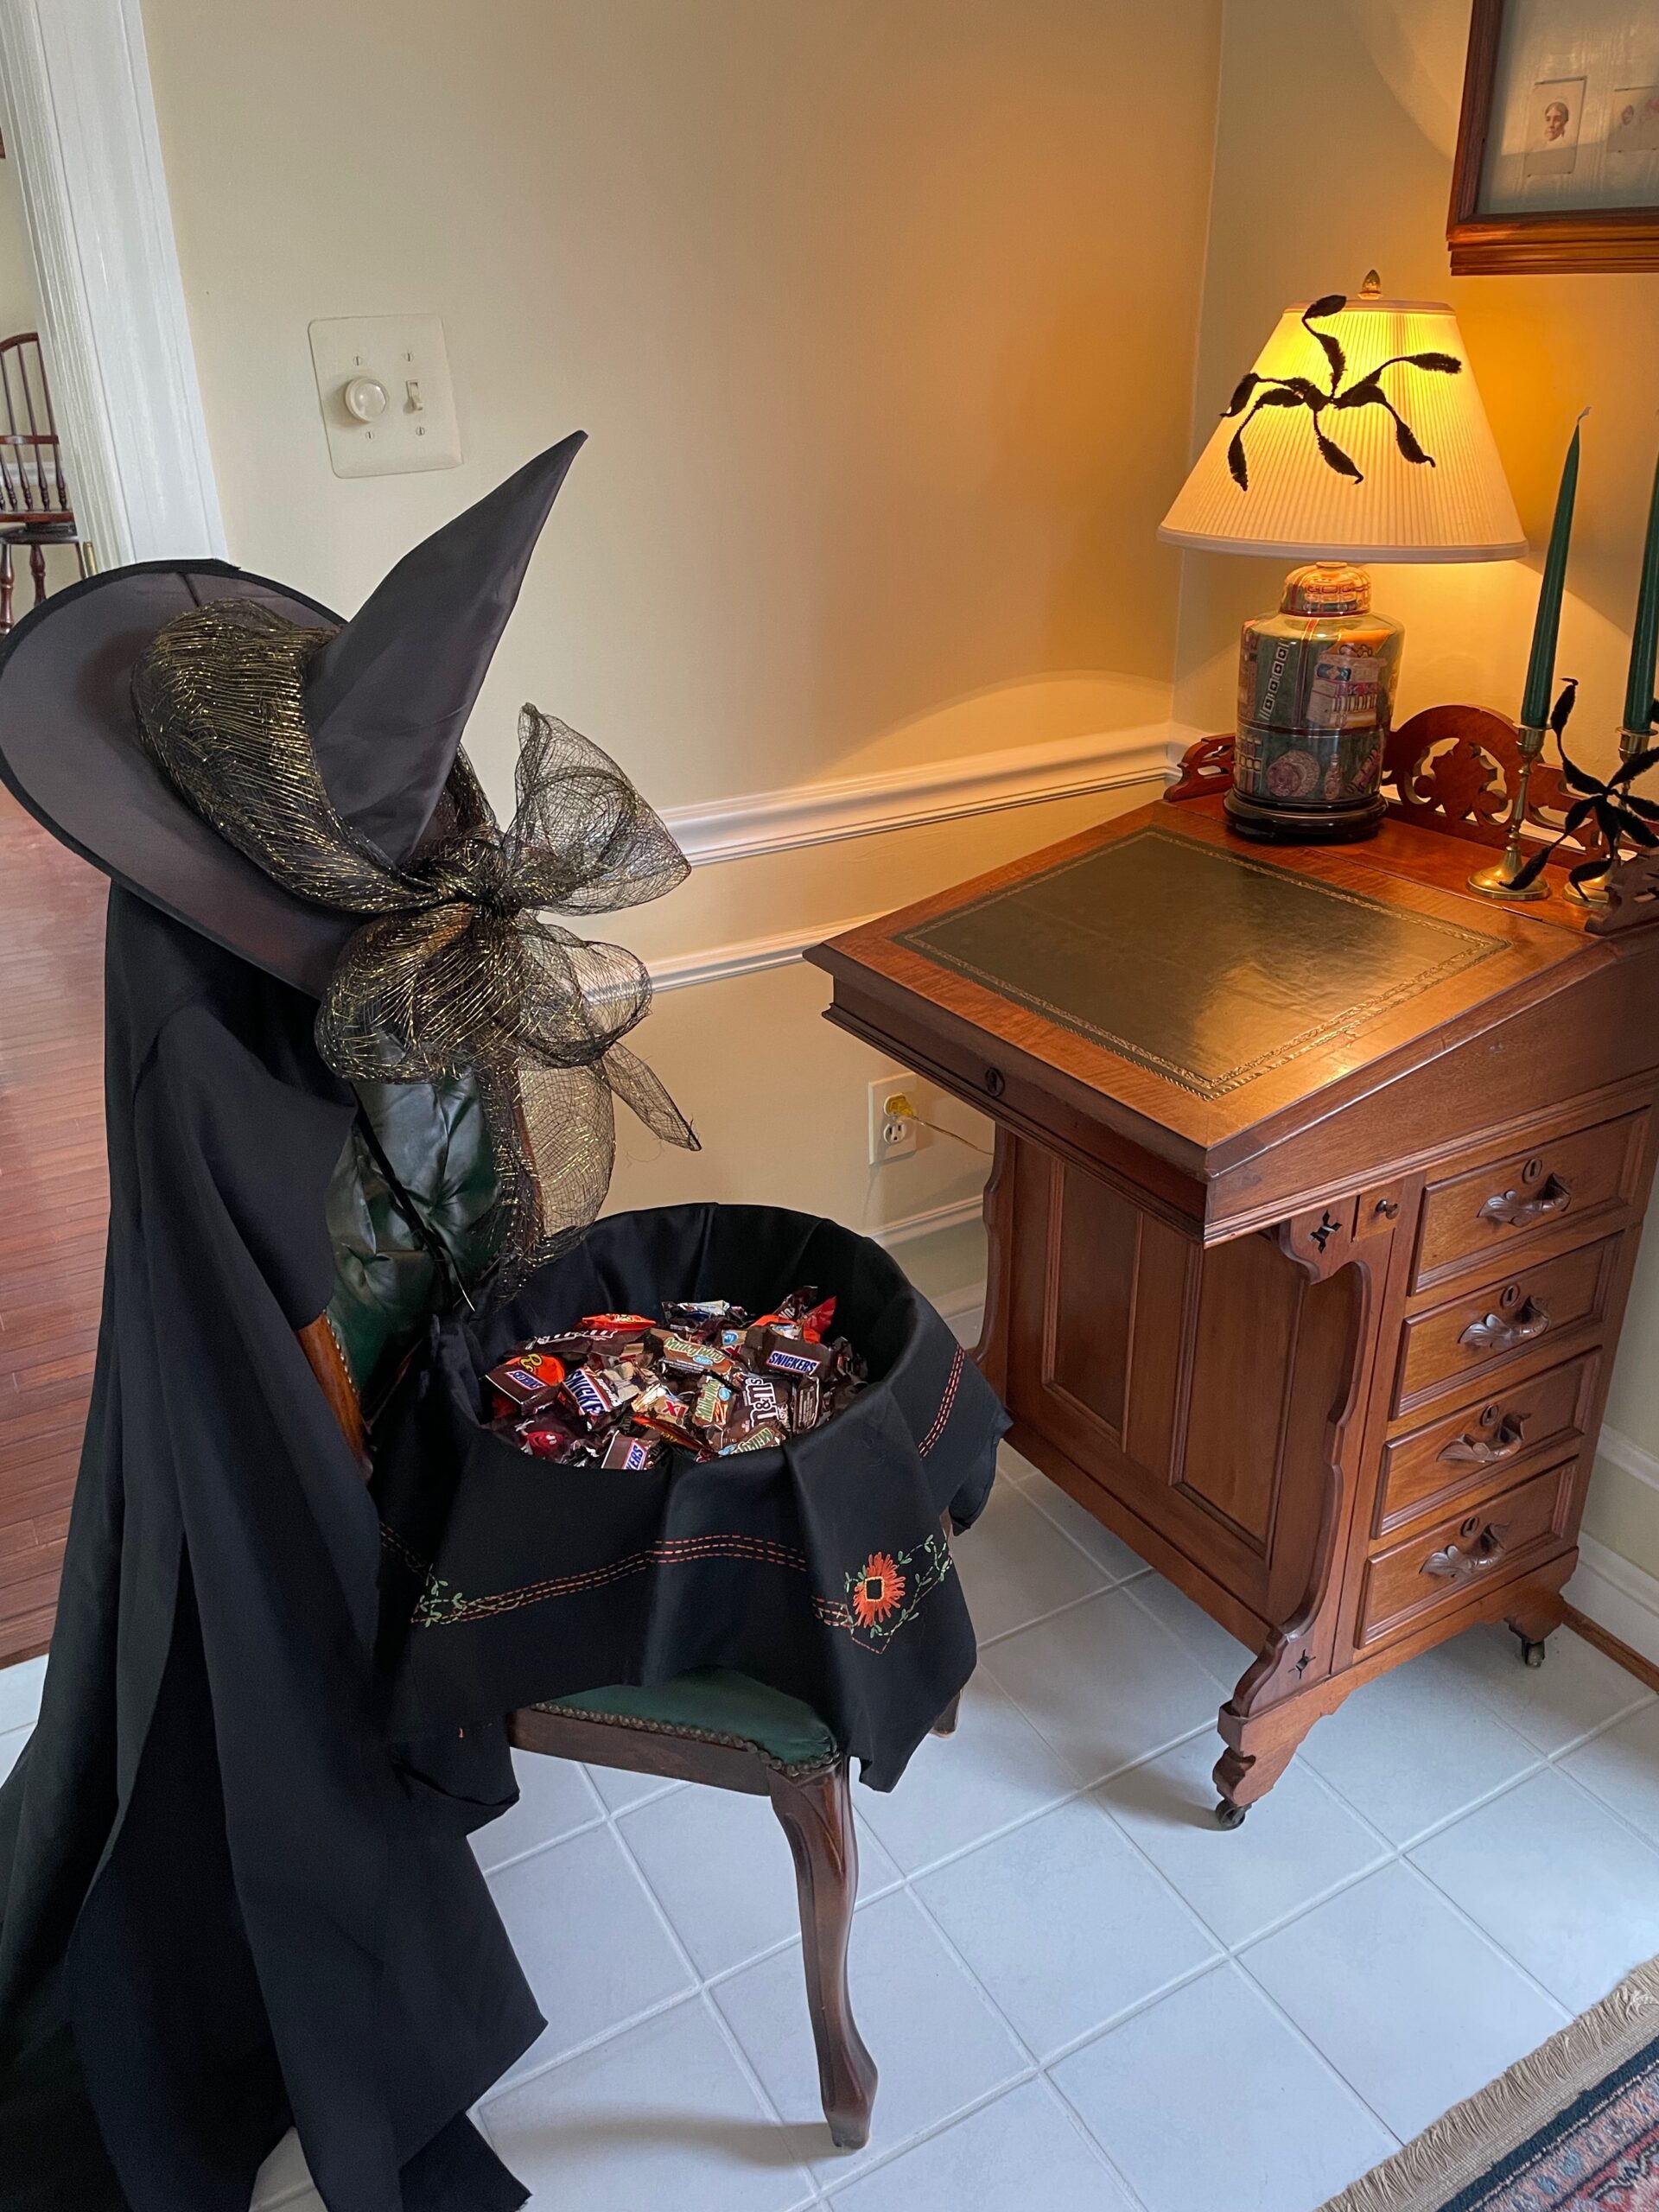
Of course, on Halloween a witch stopped by and helped me hand out candies to the Trick-or-Treaters, and even one of my pumpkins got in the holiday spirit and dressed up!


On the front porch, I created a stack of gourds inside old tomato cages for each side of the door. Just turn the cages upside down and bind the ends together with copper wire to form a cone shape, then fill with gourds. I added stakes to hold them in place in the pots during the fall winds. They are large enough to be seen from the street and make a big autumn impact.

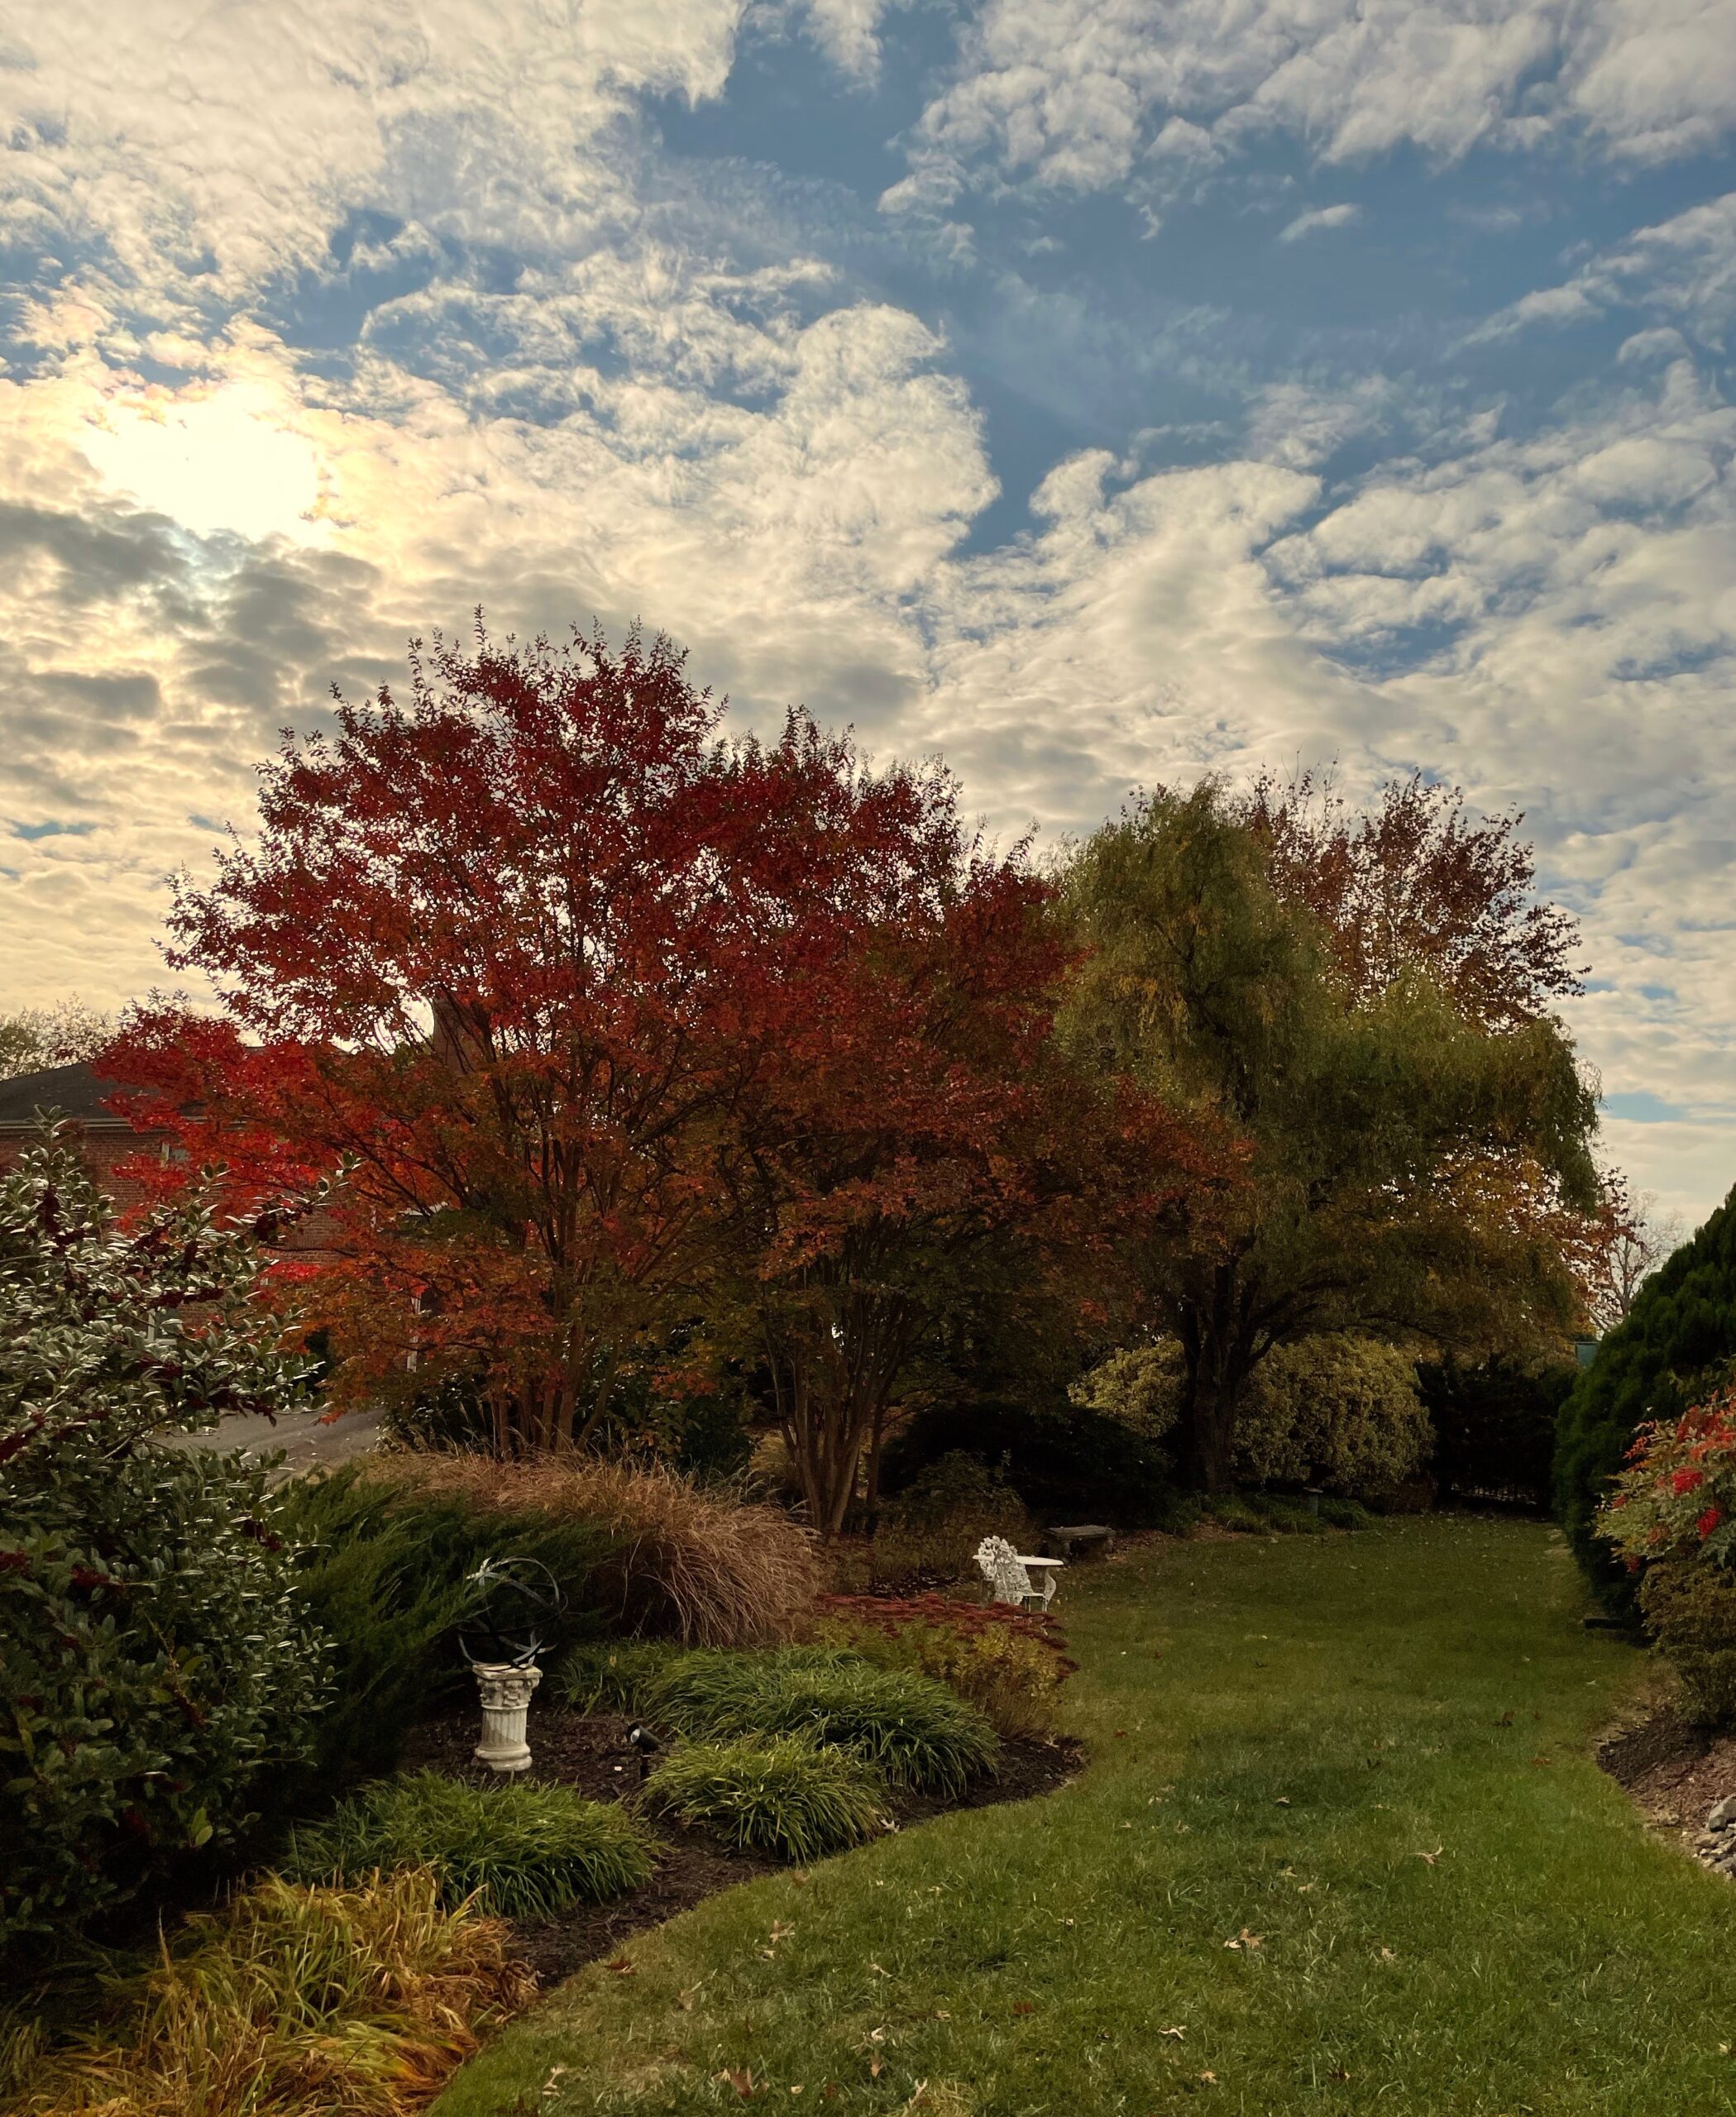
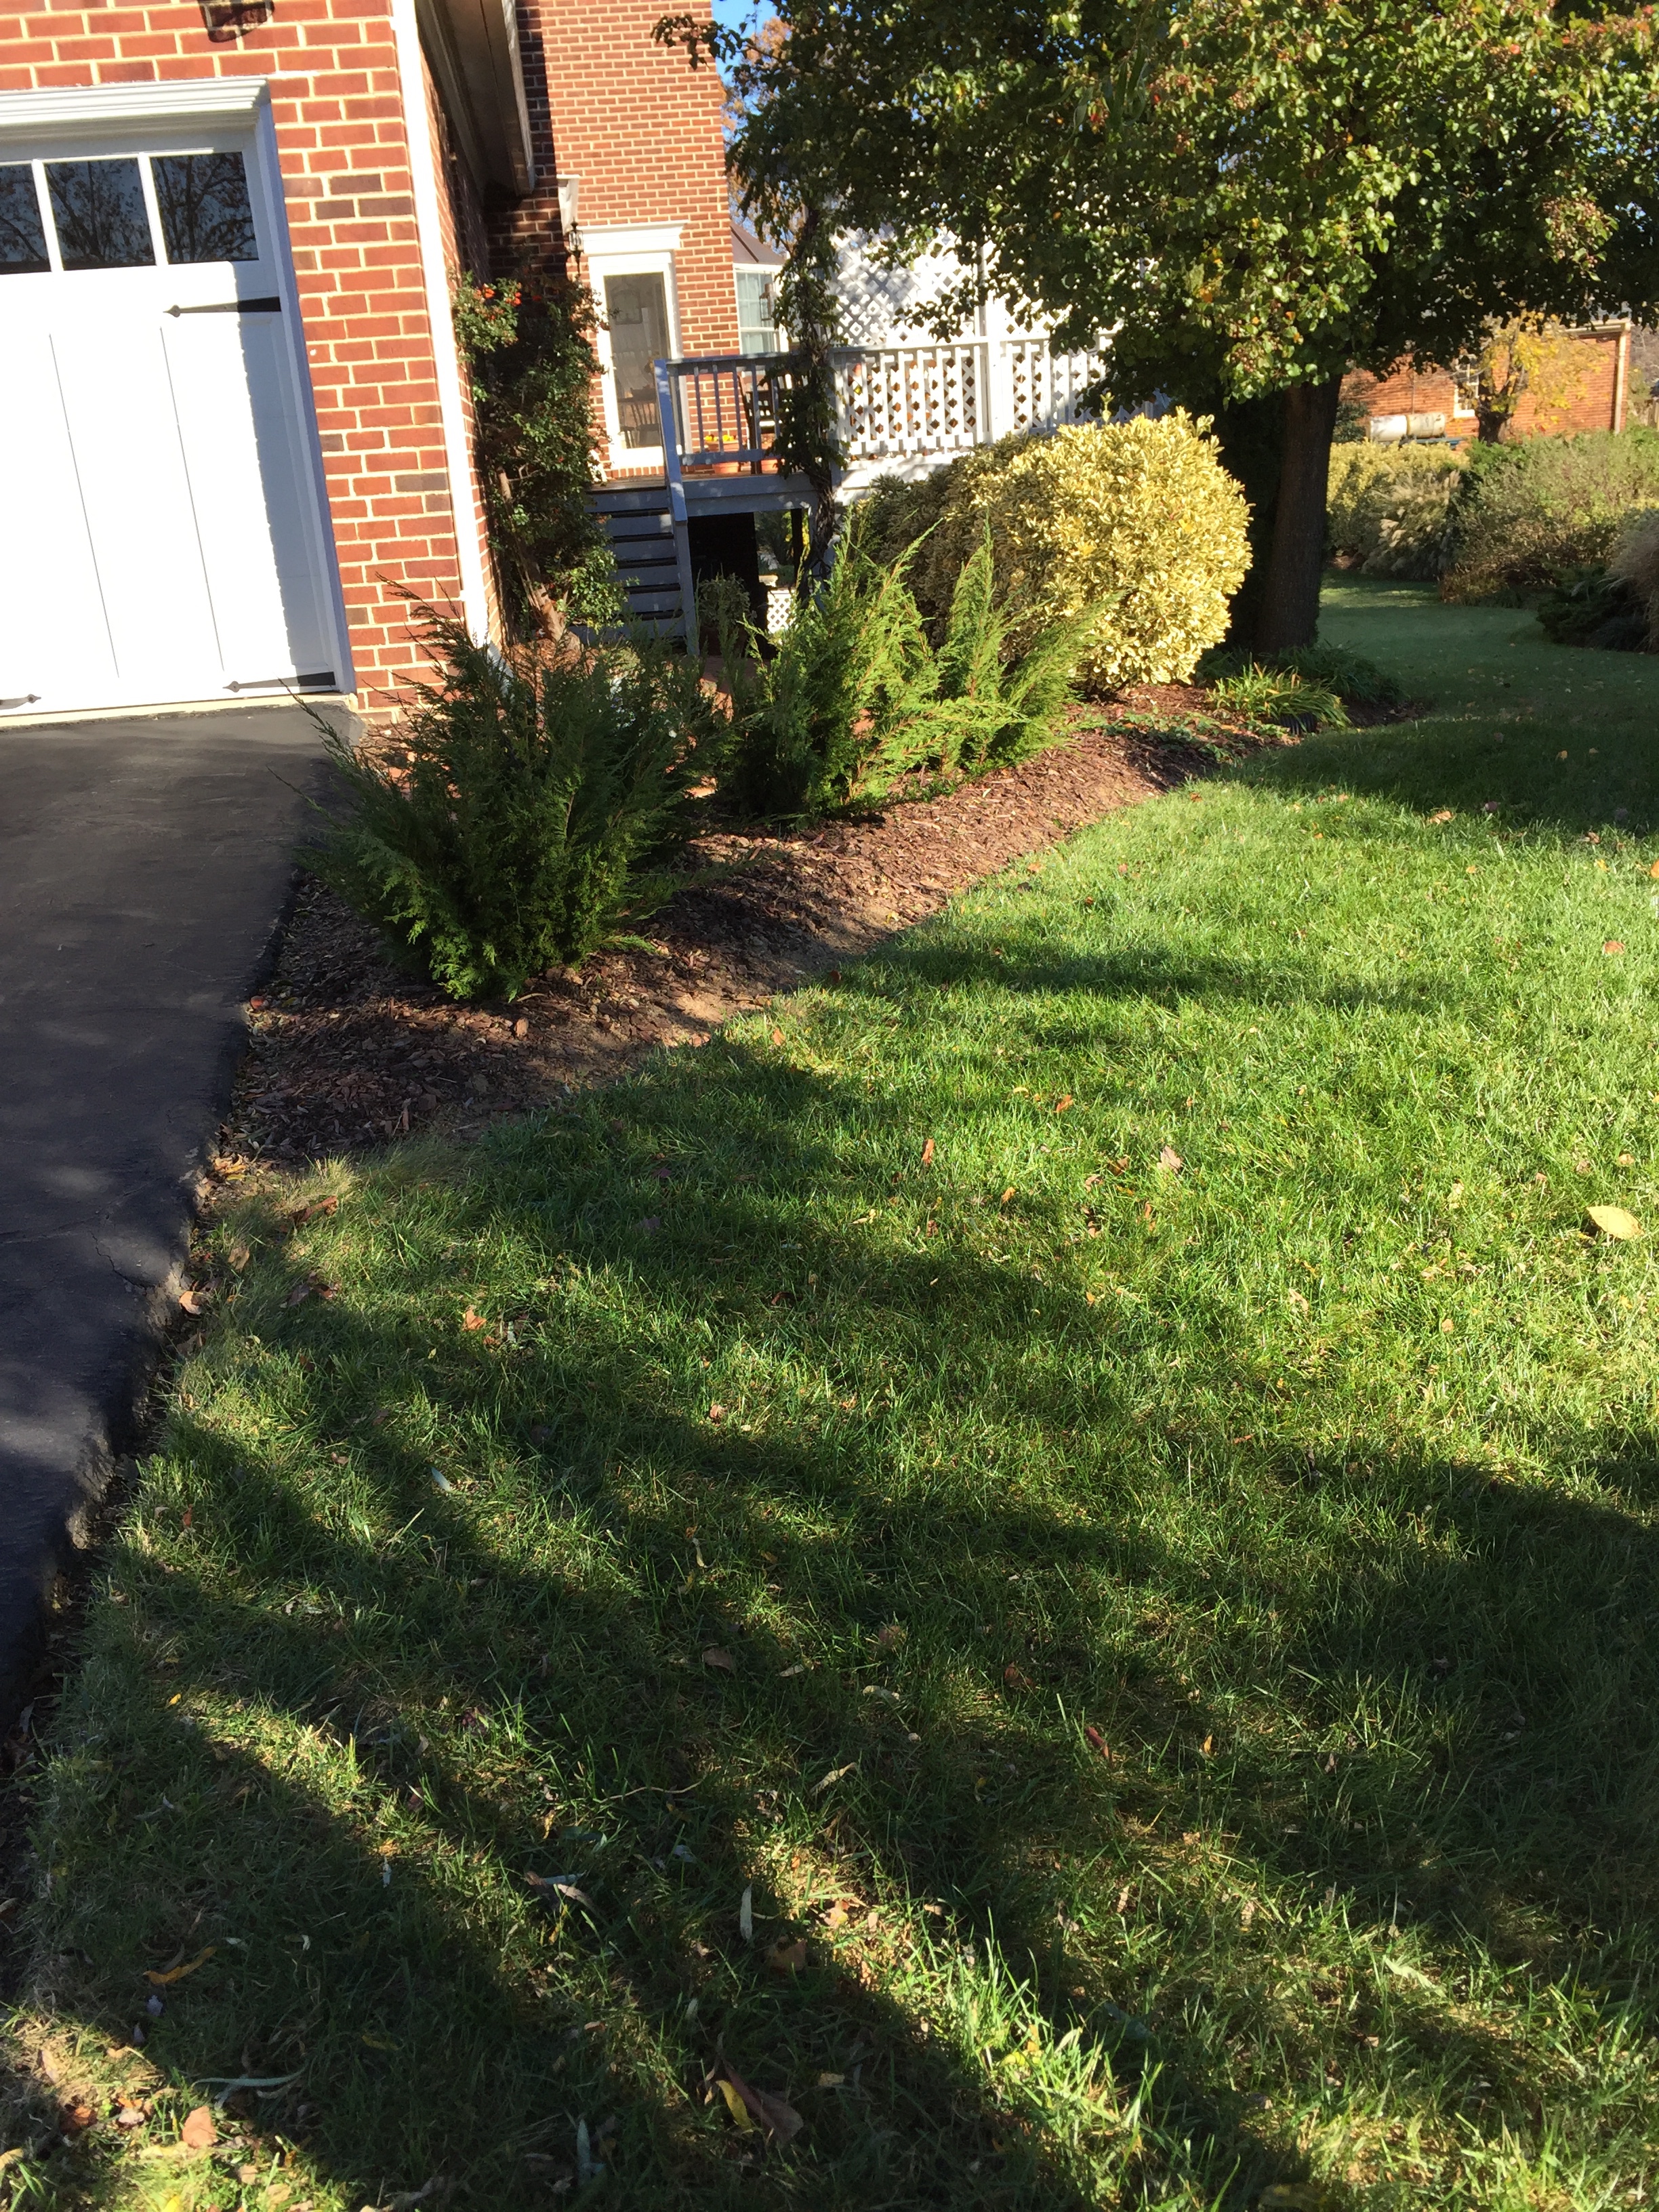
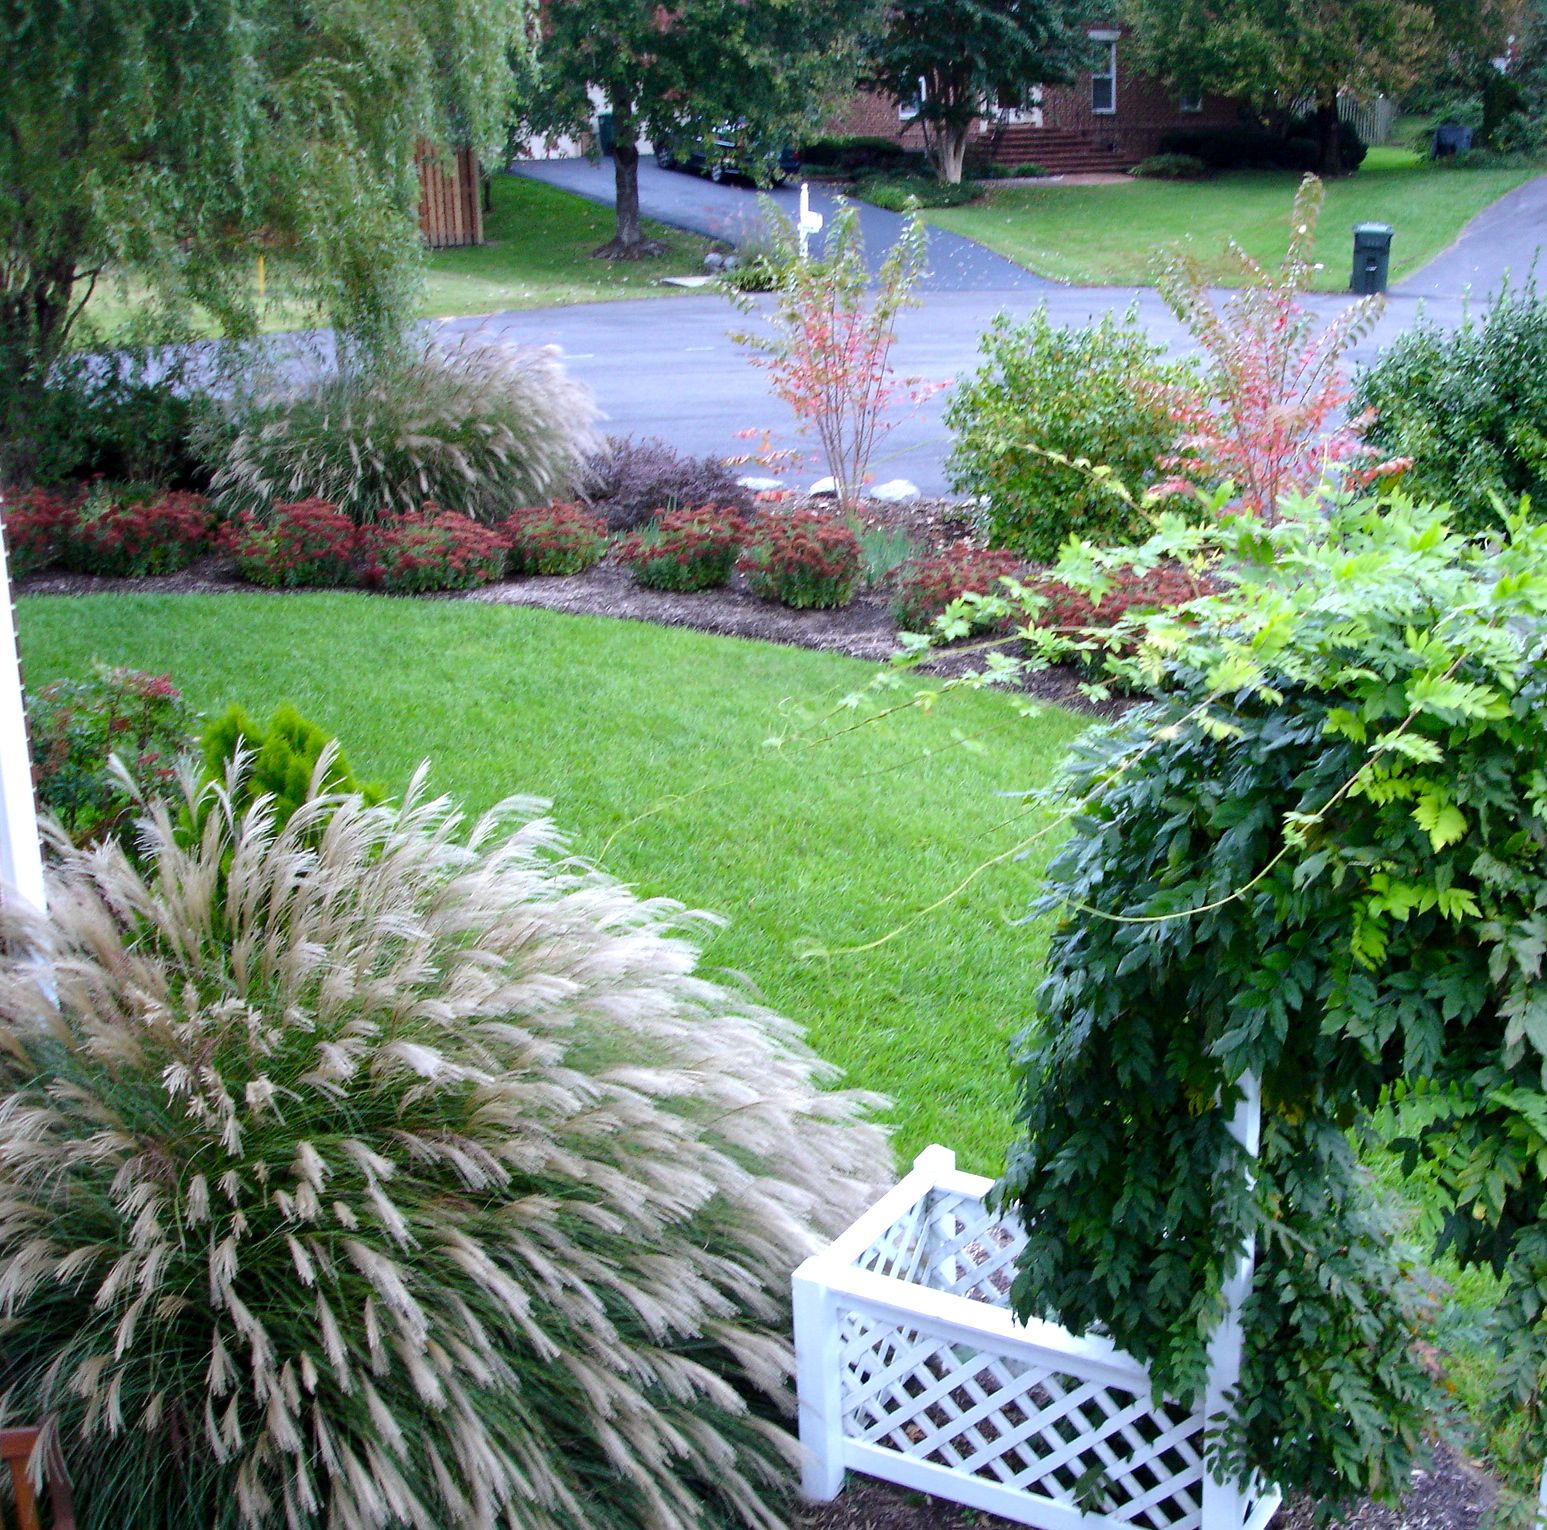
But enough of my gourd obsession for now! Let’s move into the gardens. Here’s the east garden before the leaves started to fall. I love to watch the leaves turn their spectacular colors, but this year, because of the drought, you could blink and miss them. I felt lucky to catch a few pictures.
In the back garden, where there are many ornamental grasses with plumes and plants with berries, this is the season that they really come to life. It was a challenge to keep the grasses hydrated this year, so I’m thrilled that they made it through. The nandinas and hollies this autumn are beautiful and loaded with berries, which is a testament to their resilience after such a hard summer.
In this changing climate the poor pear tree is really struggling this season; it hardly produced any of its tiny pears. The birds and squirrels love to eat them, and they’ve been coming around to snack but not finding any. In a normal year, it would not be an exaggeration to say there were close to a million pears on this tree, with hundreds of tiny pears on each of the branches.


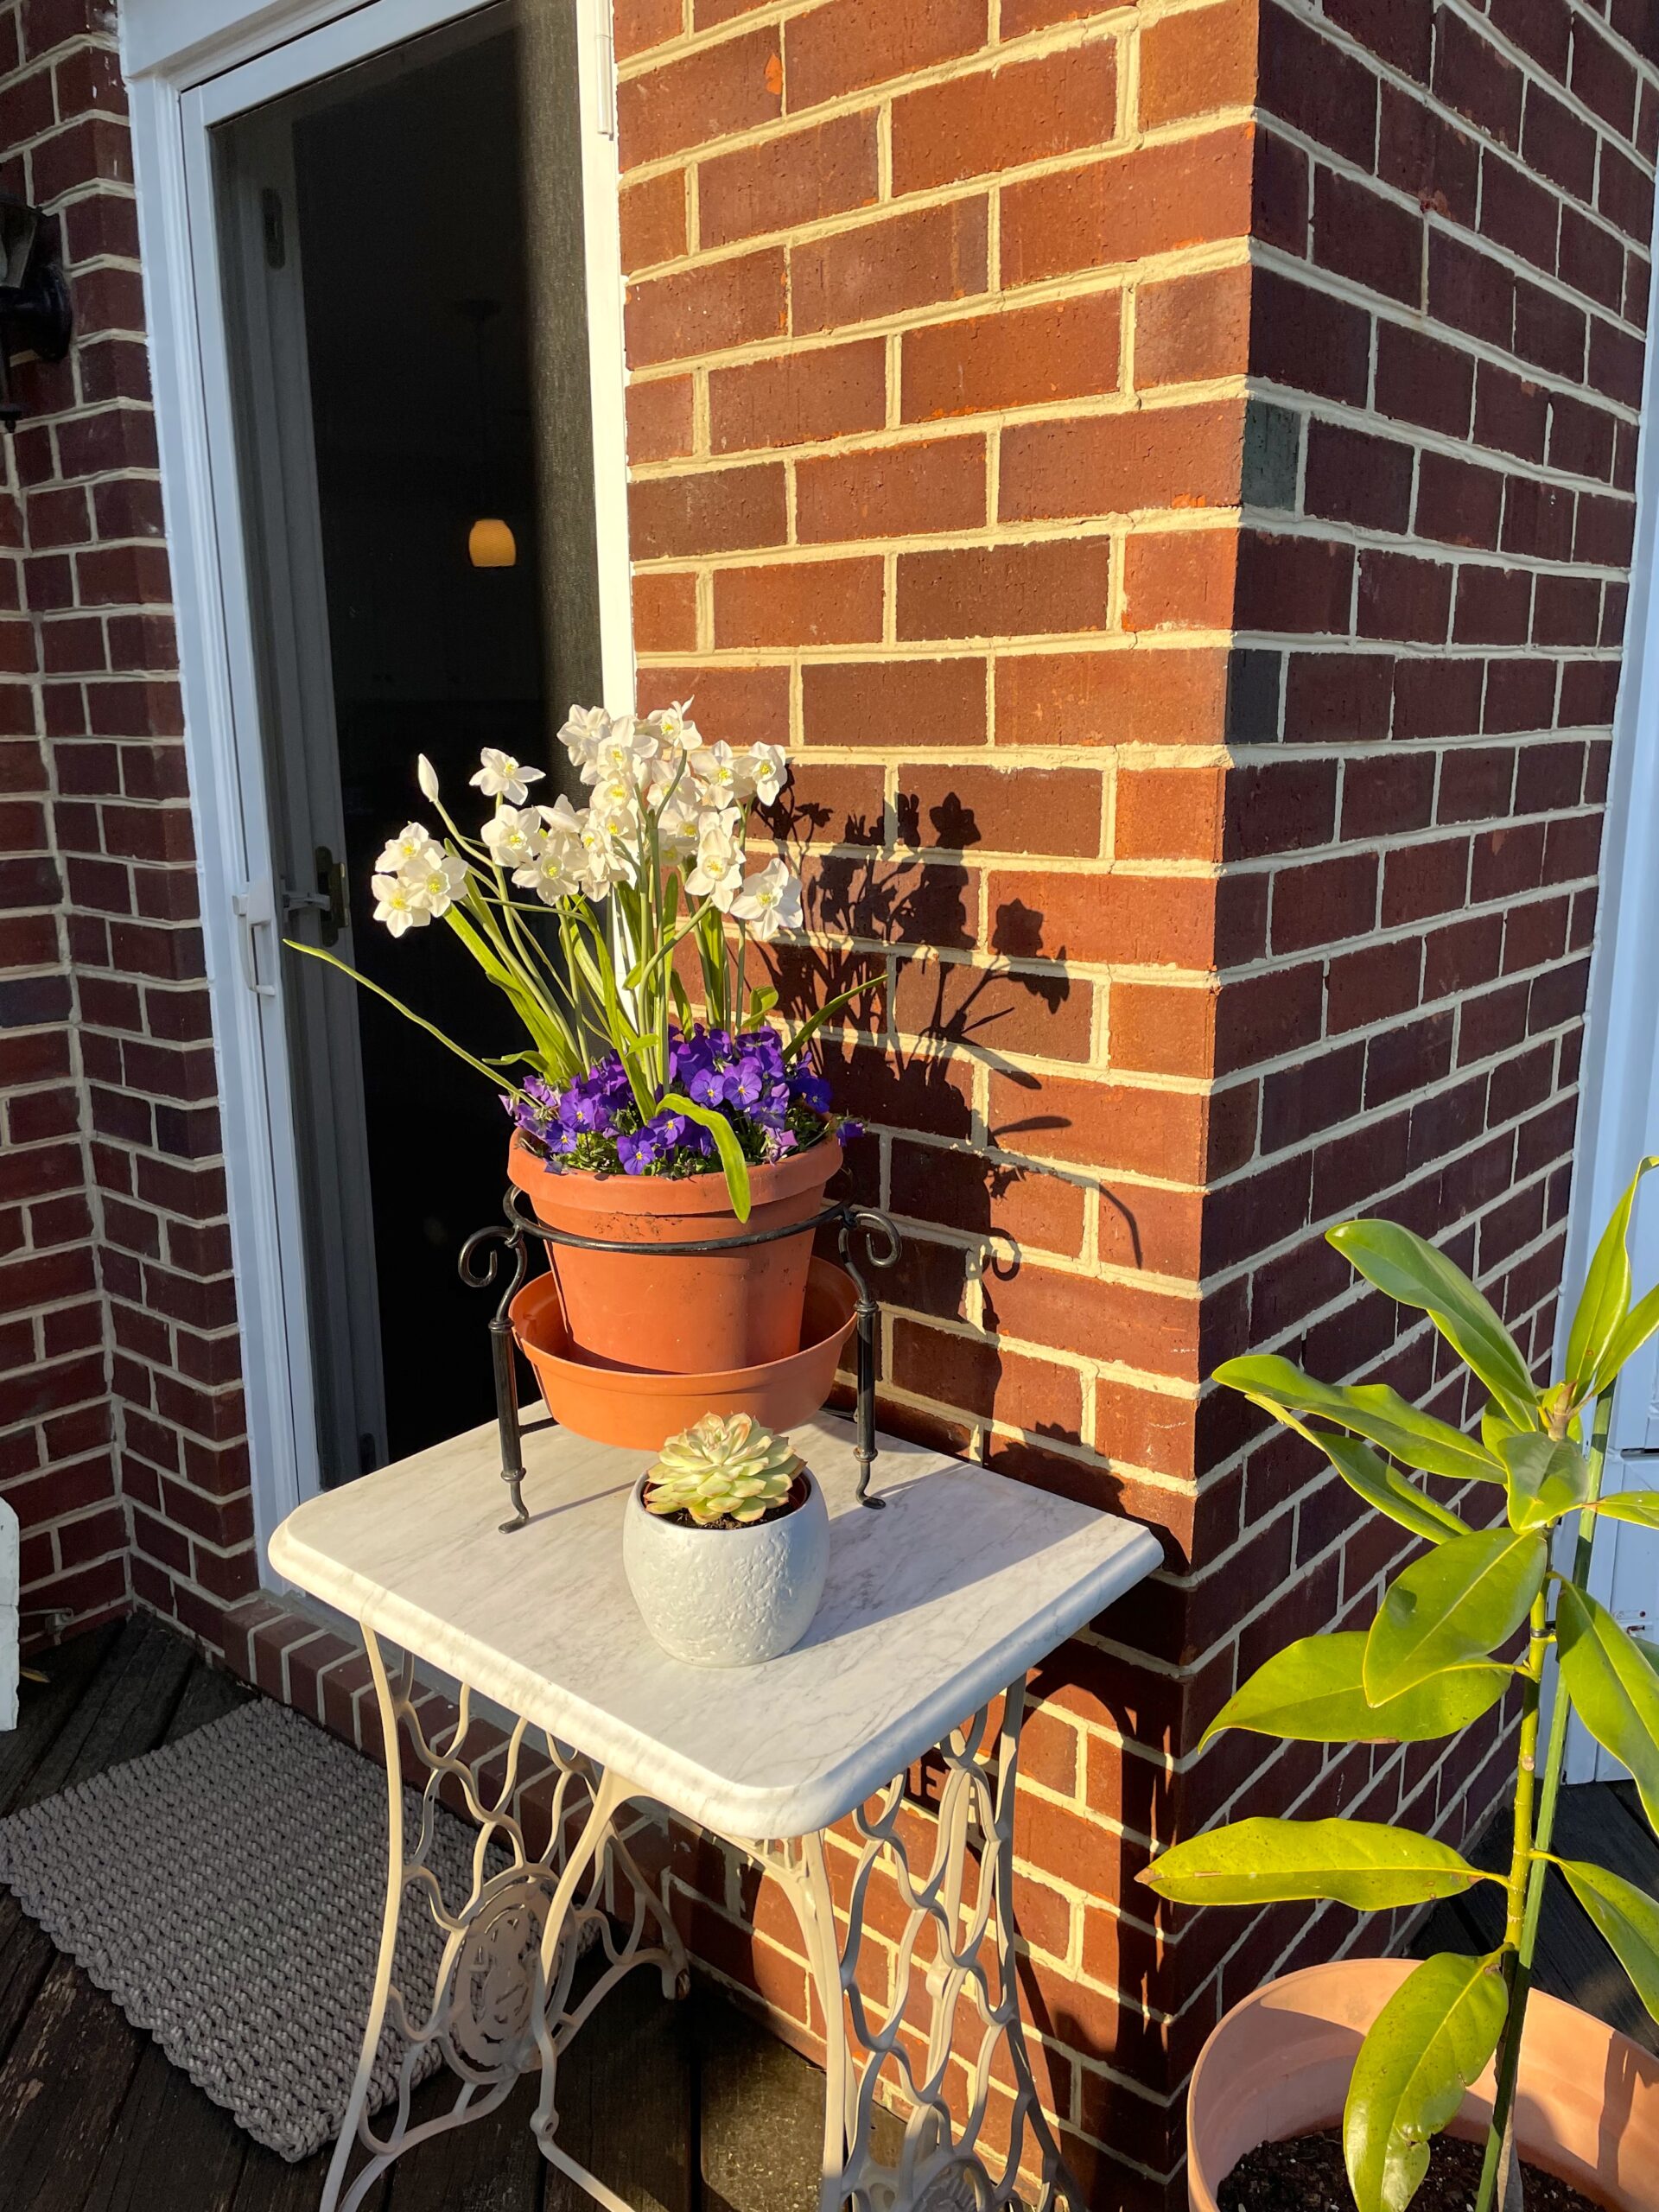
Lastly, on the deck, I opted for violas this fall because they reliably bloom all winter, and even into the spring if I’m lucky. I have them all in pots, so if we are predicted for snow I can easily bring them into the garage and back out when the weather clears.
That’s the end of my tour, I’d love to hear what you are doing in your gardens-
I hope all my readers have a wonderful and healthy Thanksgiving, and as always, Happy Gardening!
Hello, my gardening friends! It is June already, and I’m sorry to have been out of touch for so long. Life has a way of doing that here and there. Today I’d like to share some quick edits I have been working on this spring that have made a big impact on our home’s curb appeal.
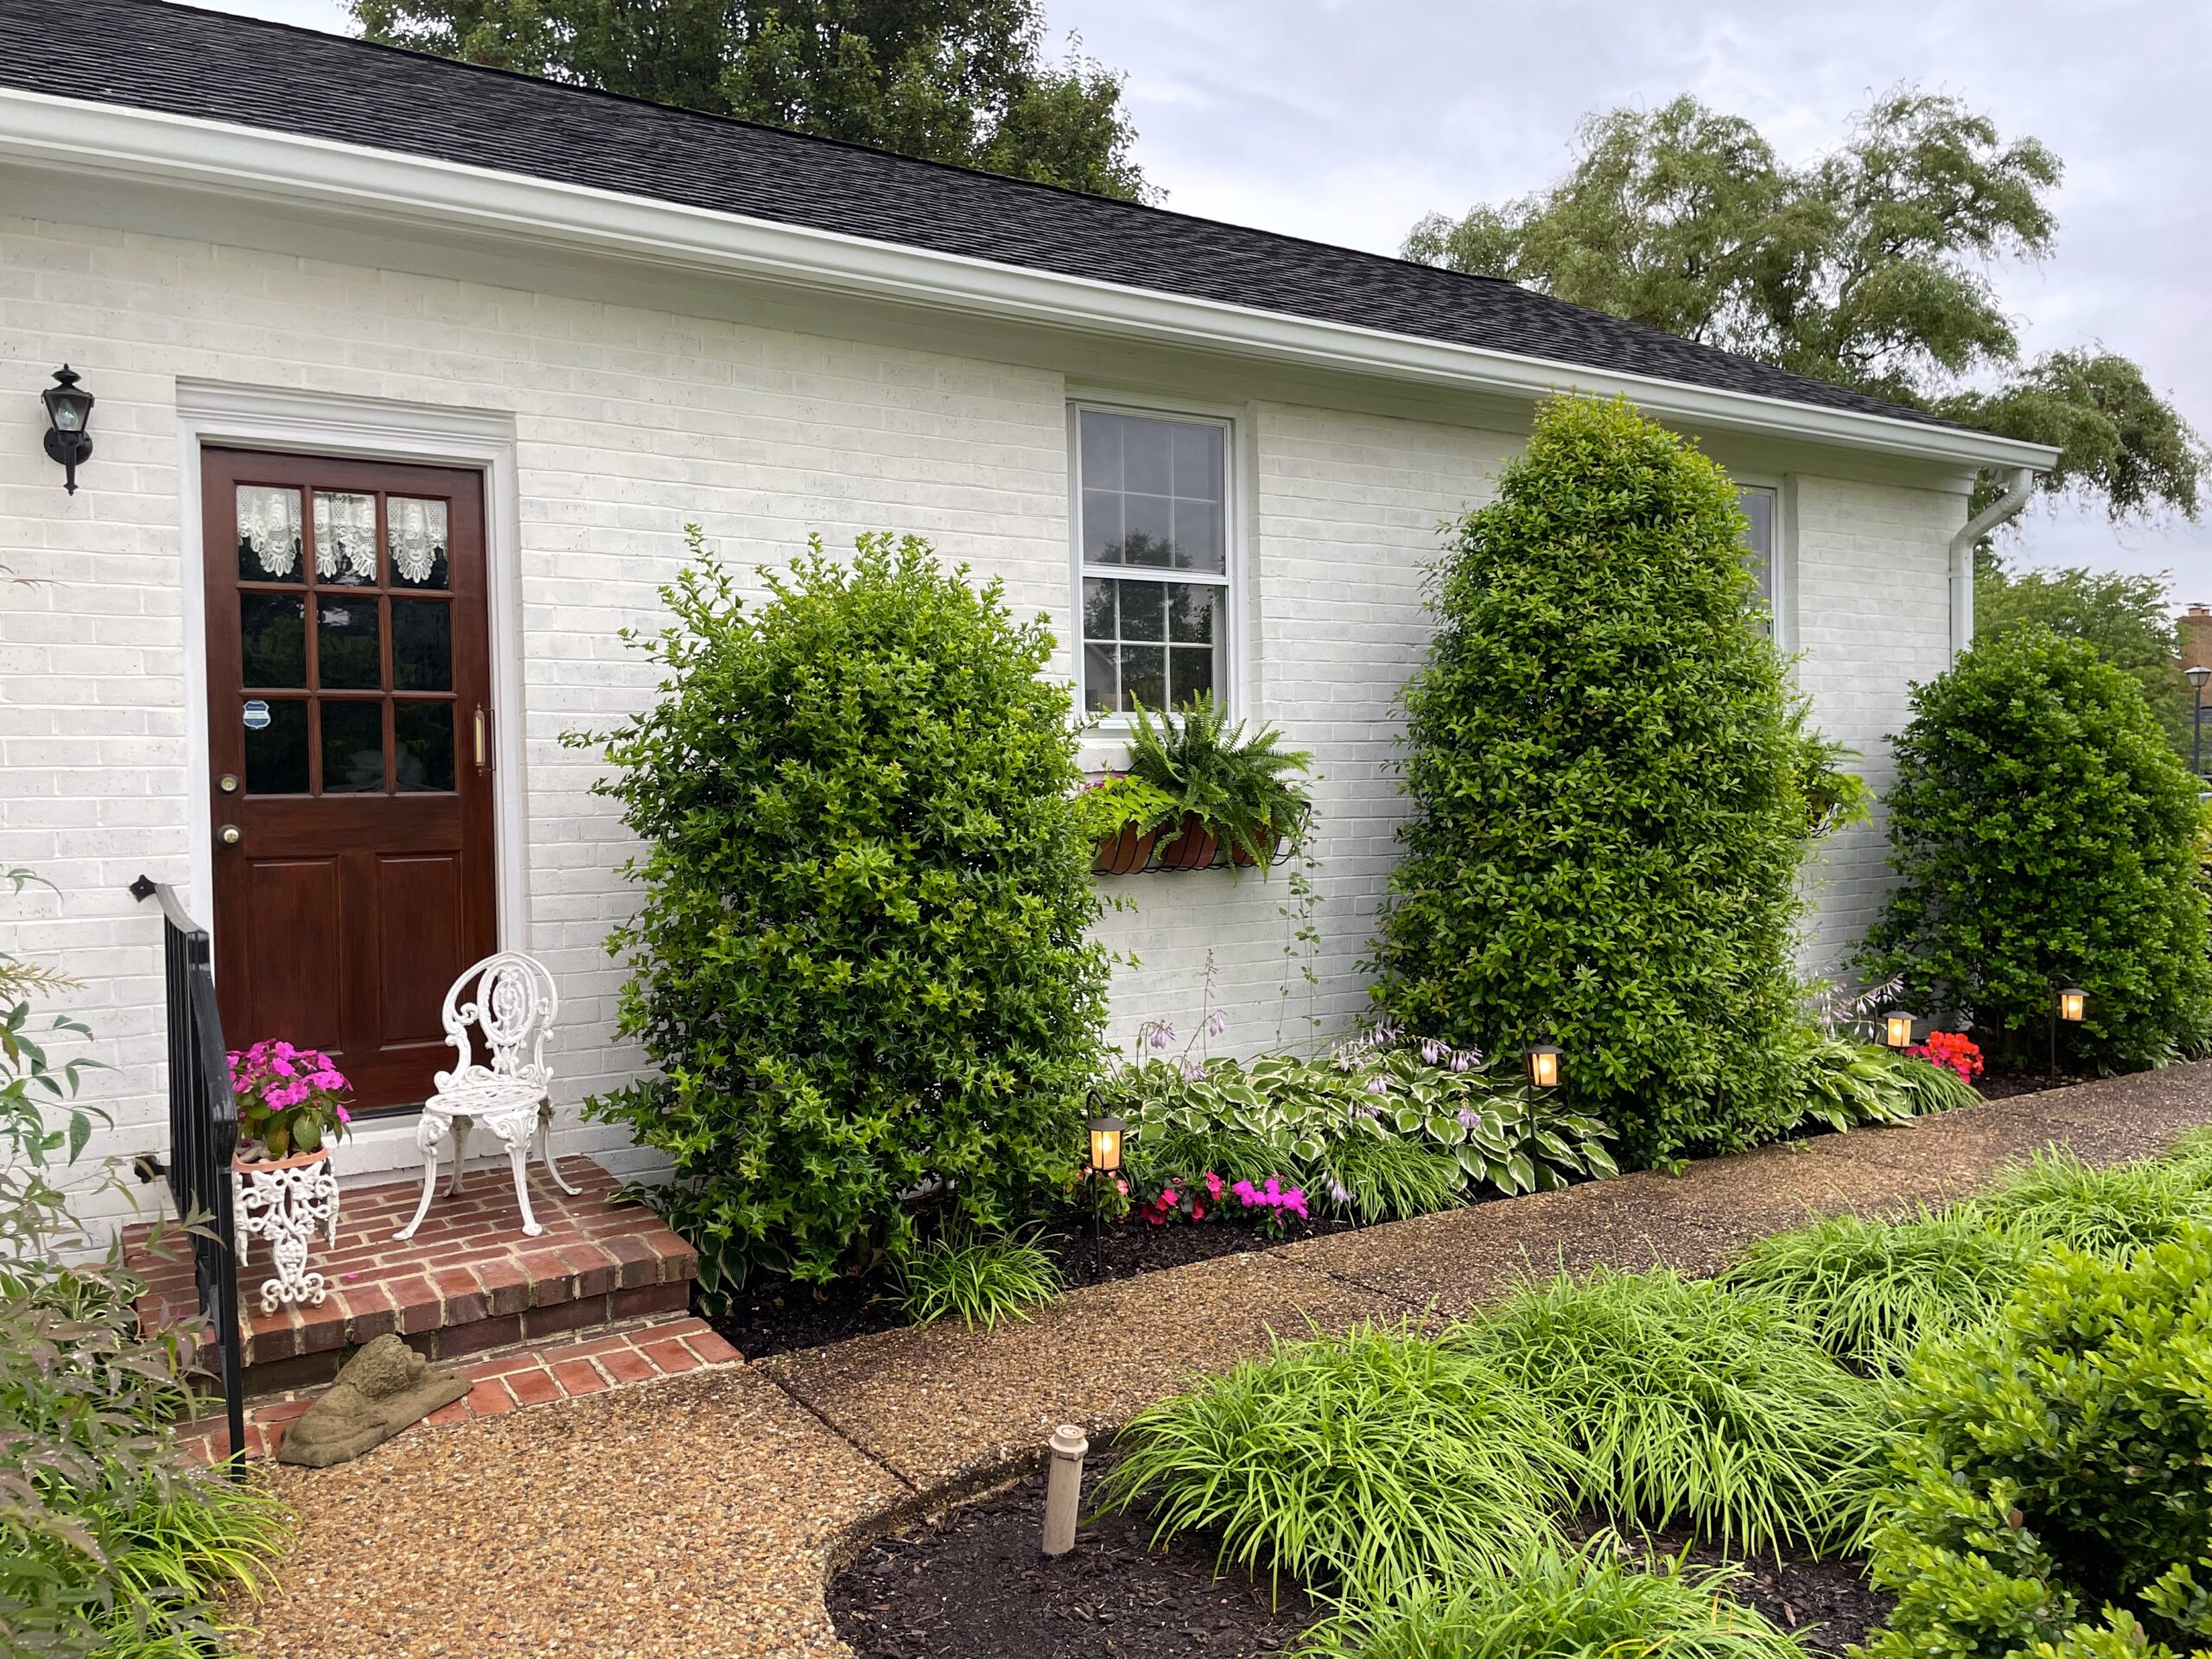
The first thing I did in my line-up of edits was painting the pediments above the windows and front door. Sometimes just highlighting an existing architectural feature of your home can add just the right amount of emphasis. After running out of good weather last year, I was finally able to get to the repairs needed to the bricks and bluestone on the front porch, then followed with lime washing the stair risers on both front porches. Finally, sanding and painting the iron railings added some needed safety and I love how the glossy black railing stand out in front of the white backdrop. These were the finishing steps in the lime washing of the whole house that I started last year. Getting these done brightens up the front entrance immeasurably, and as much as I had fun, it feels great to check the box “done” on this huge project.
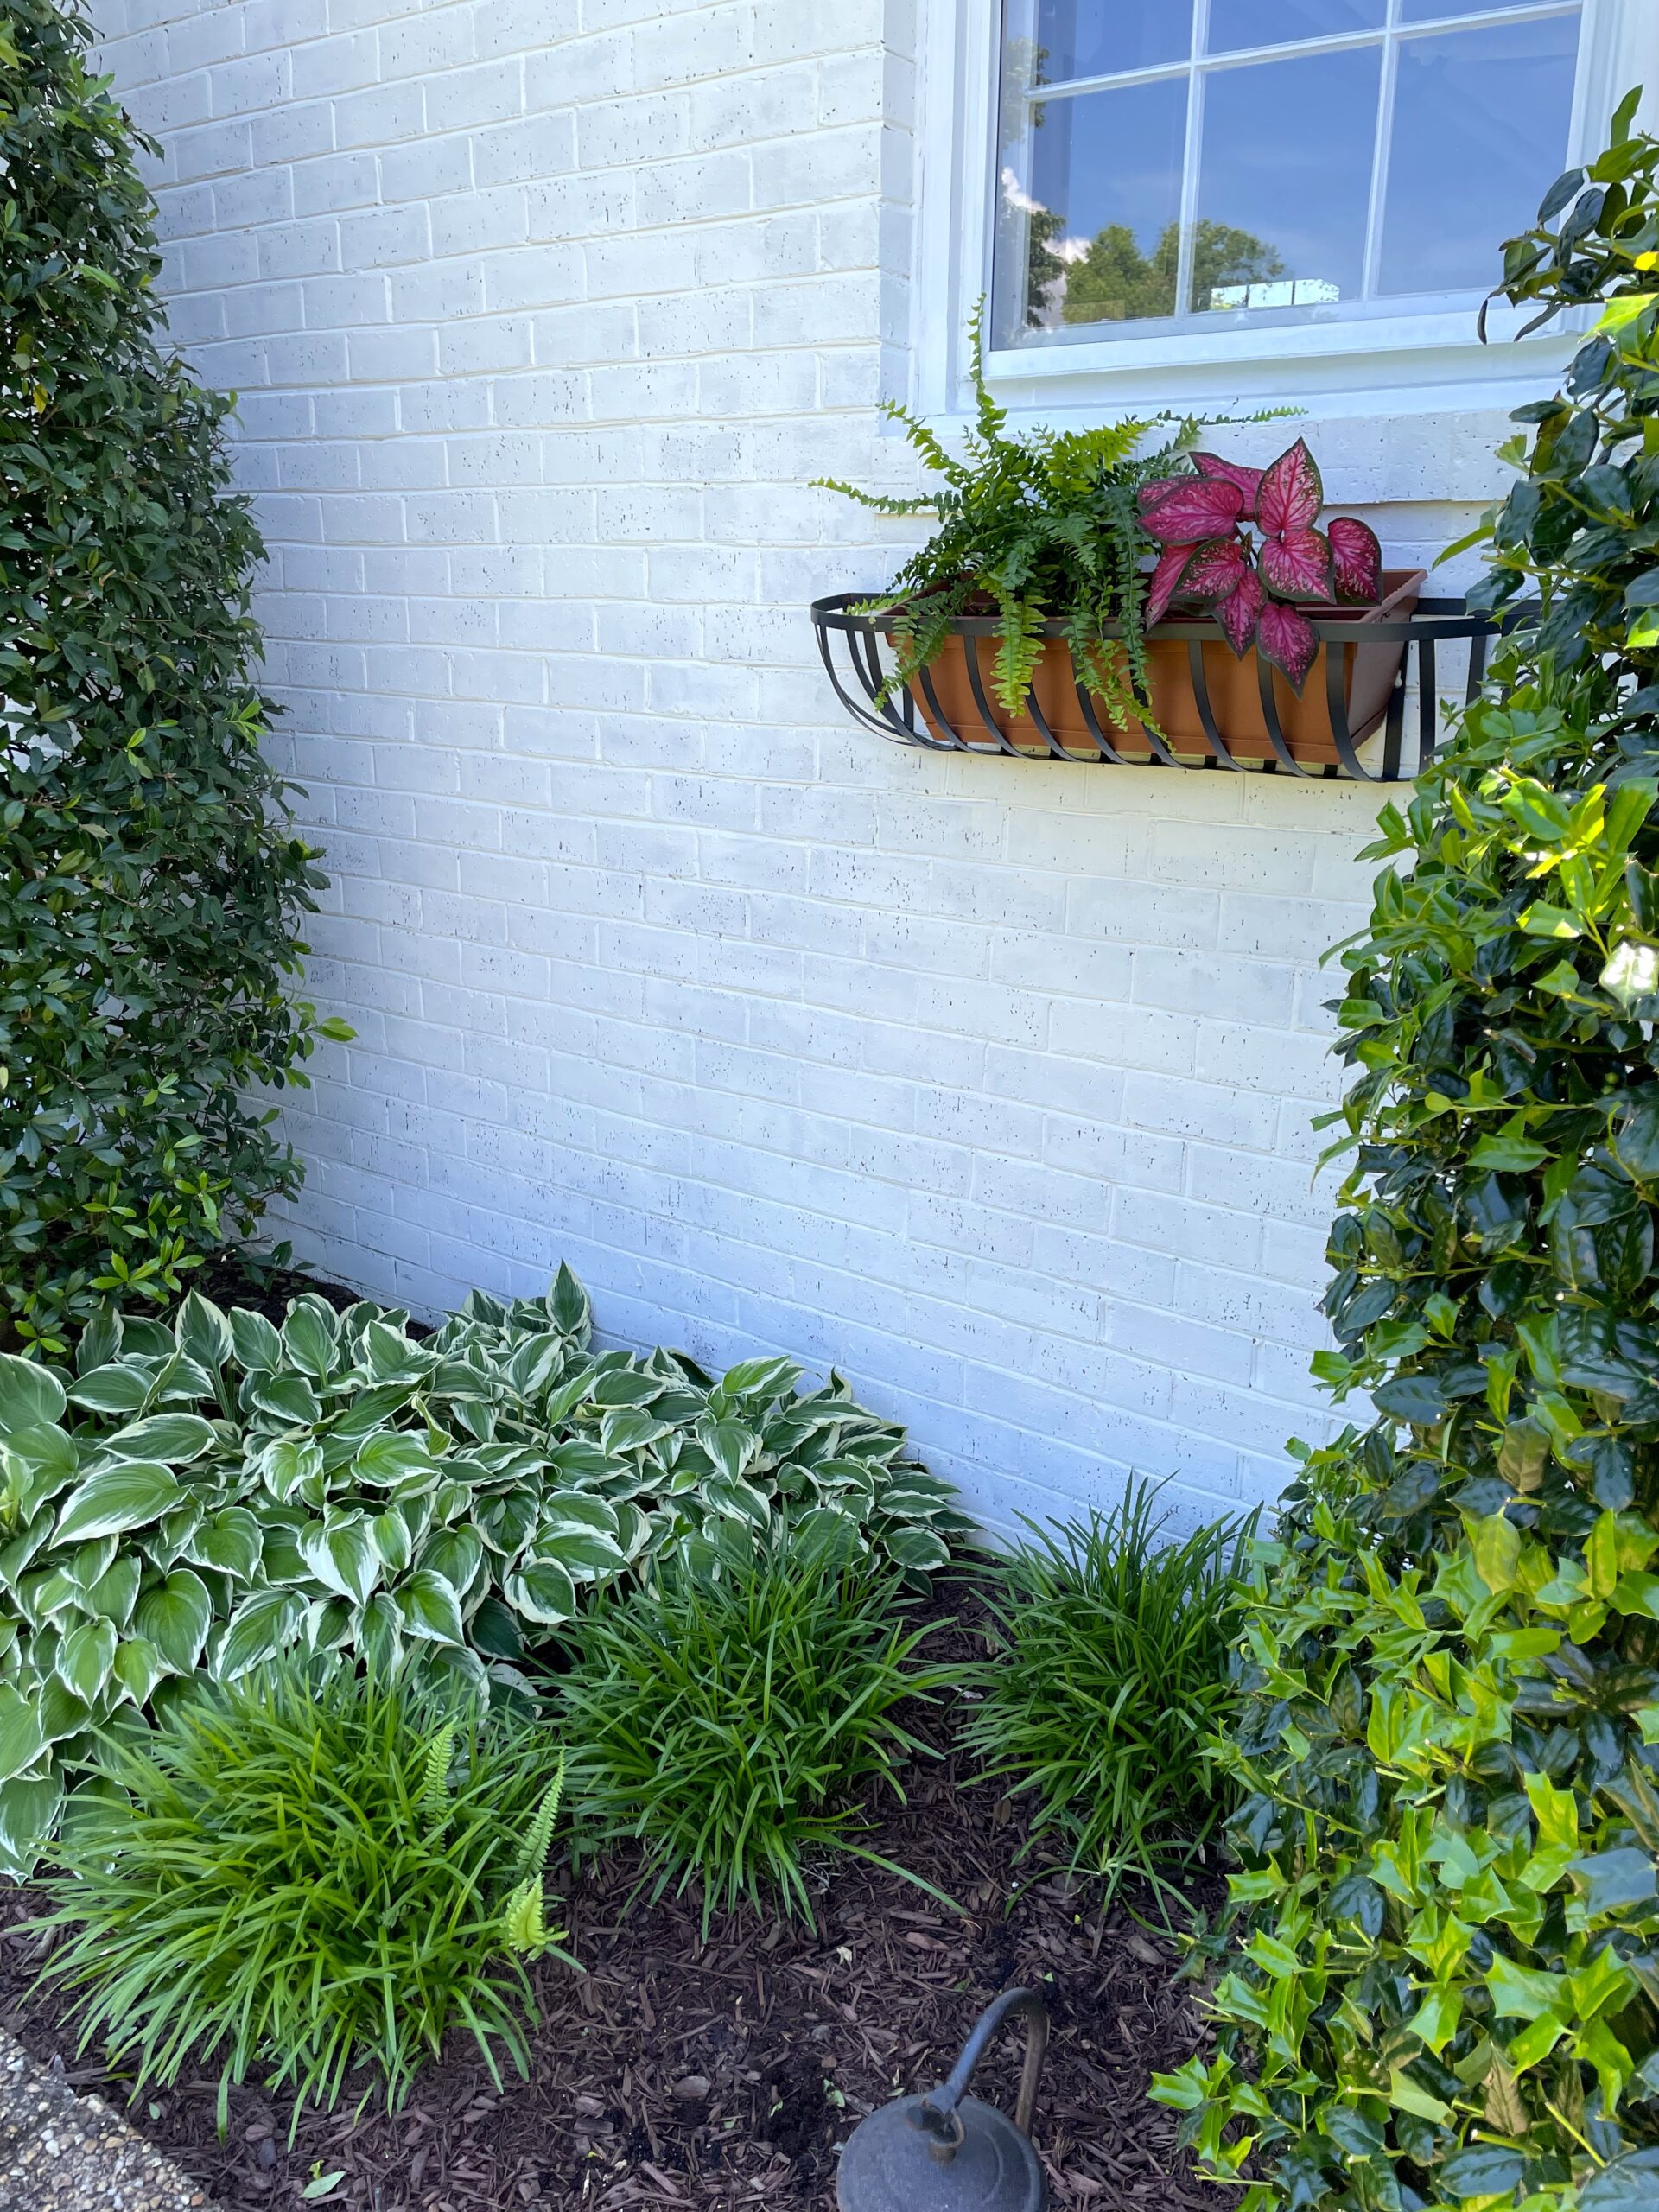
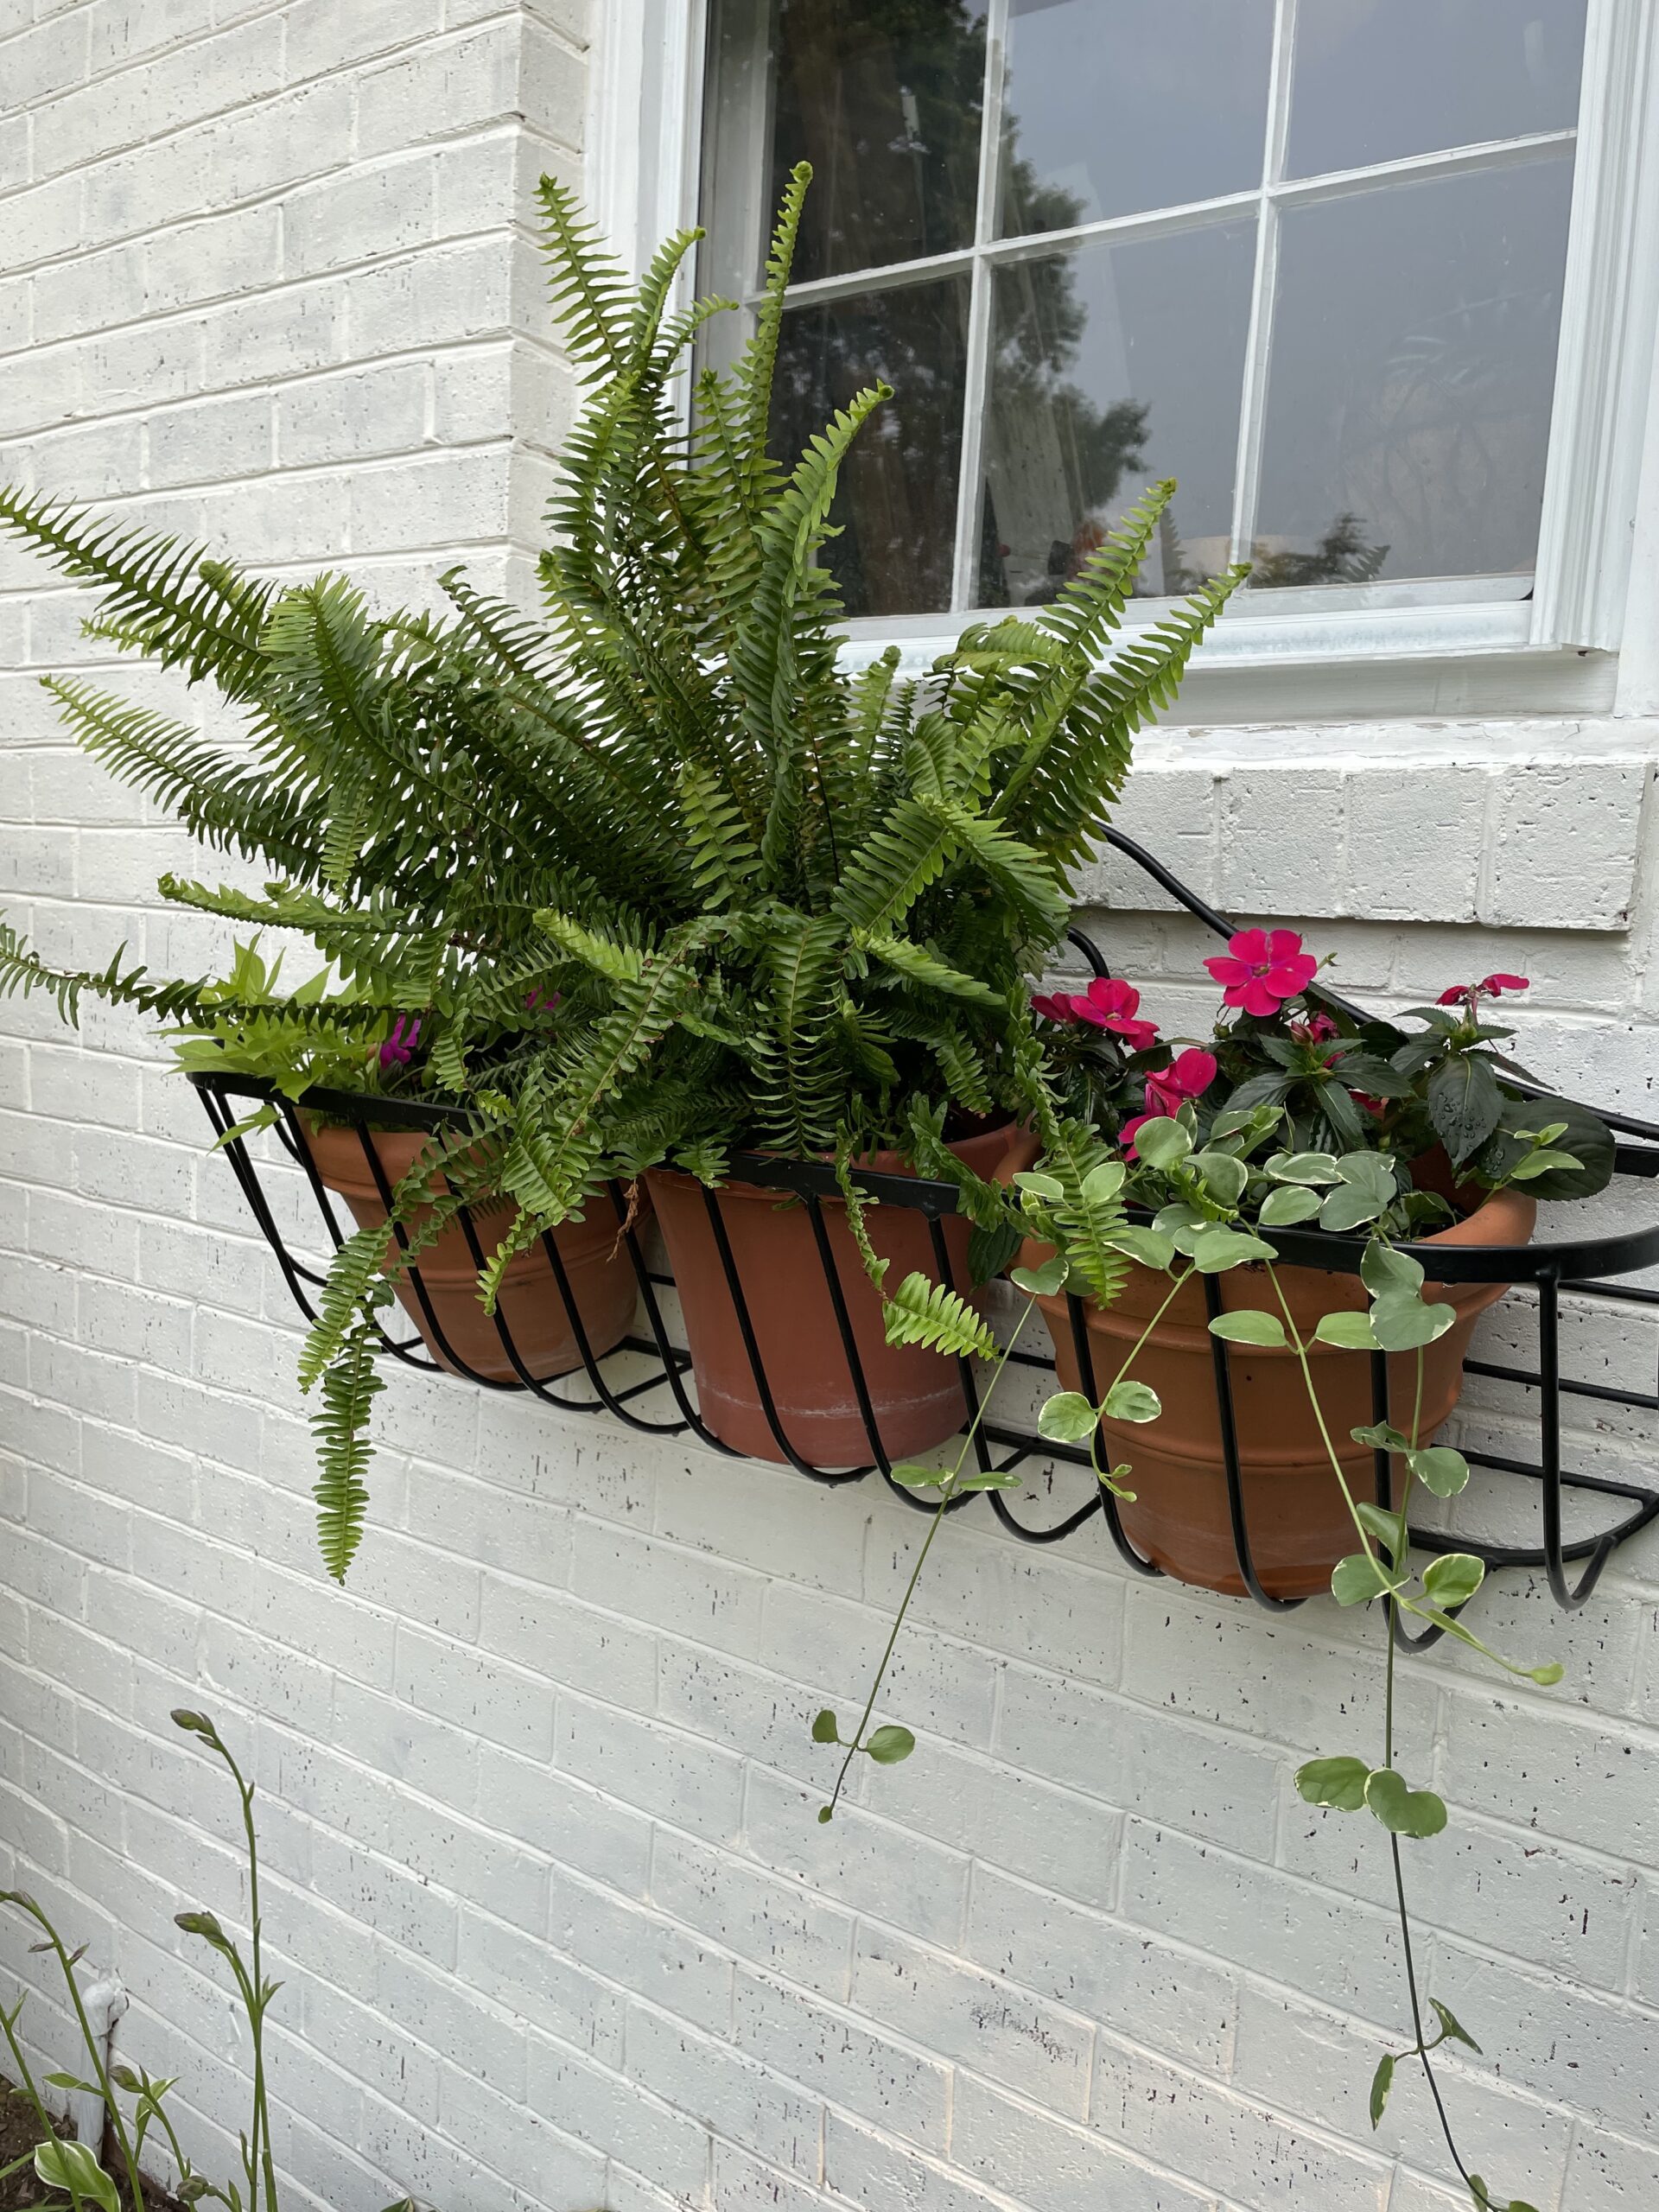
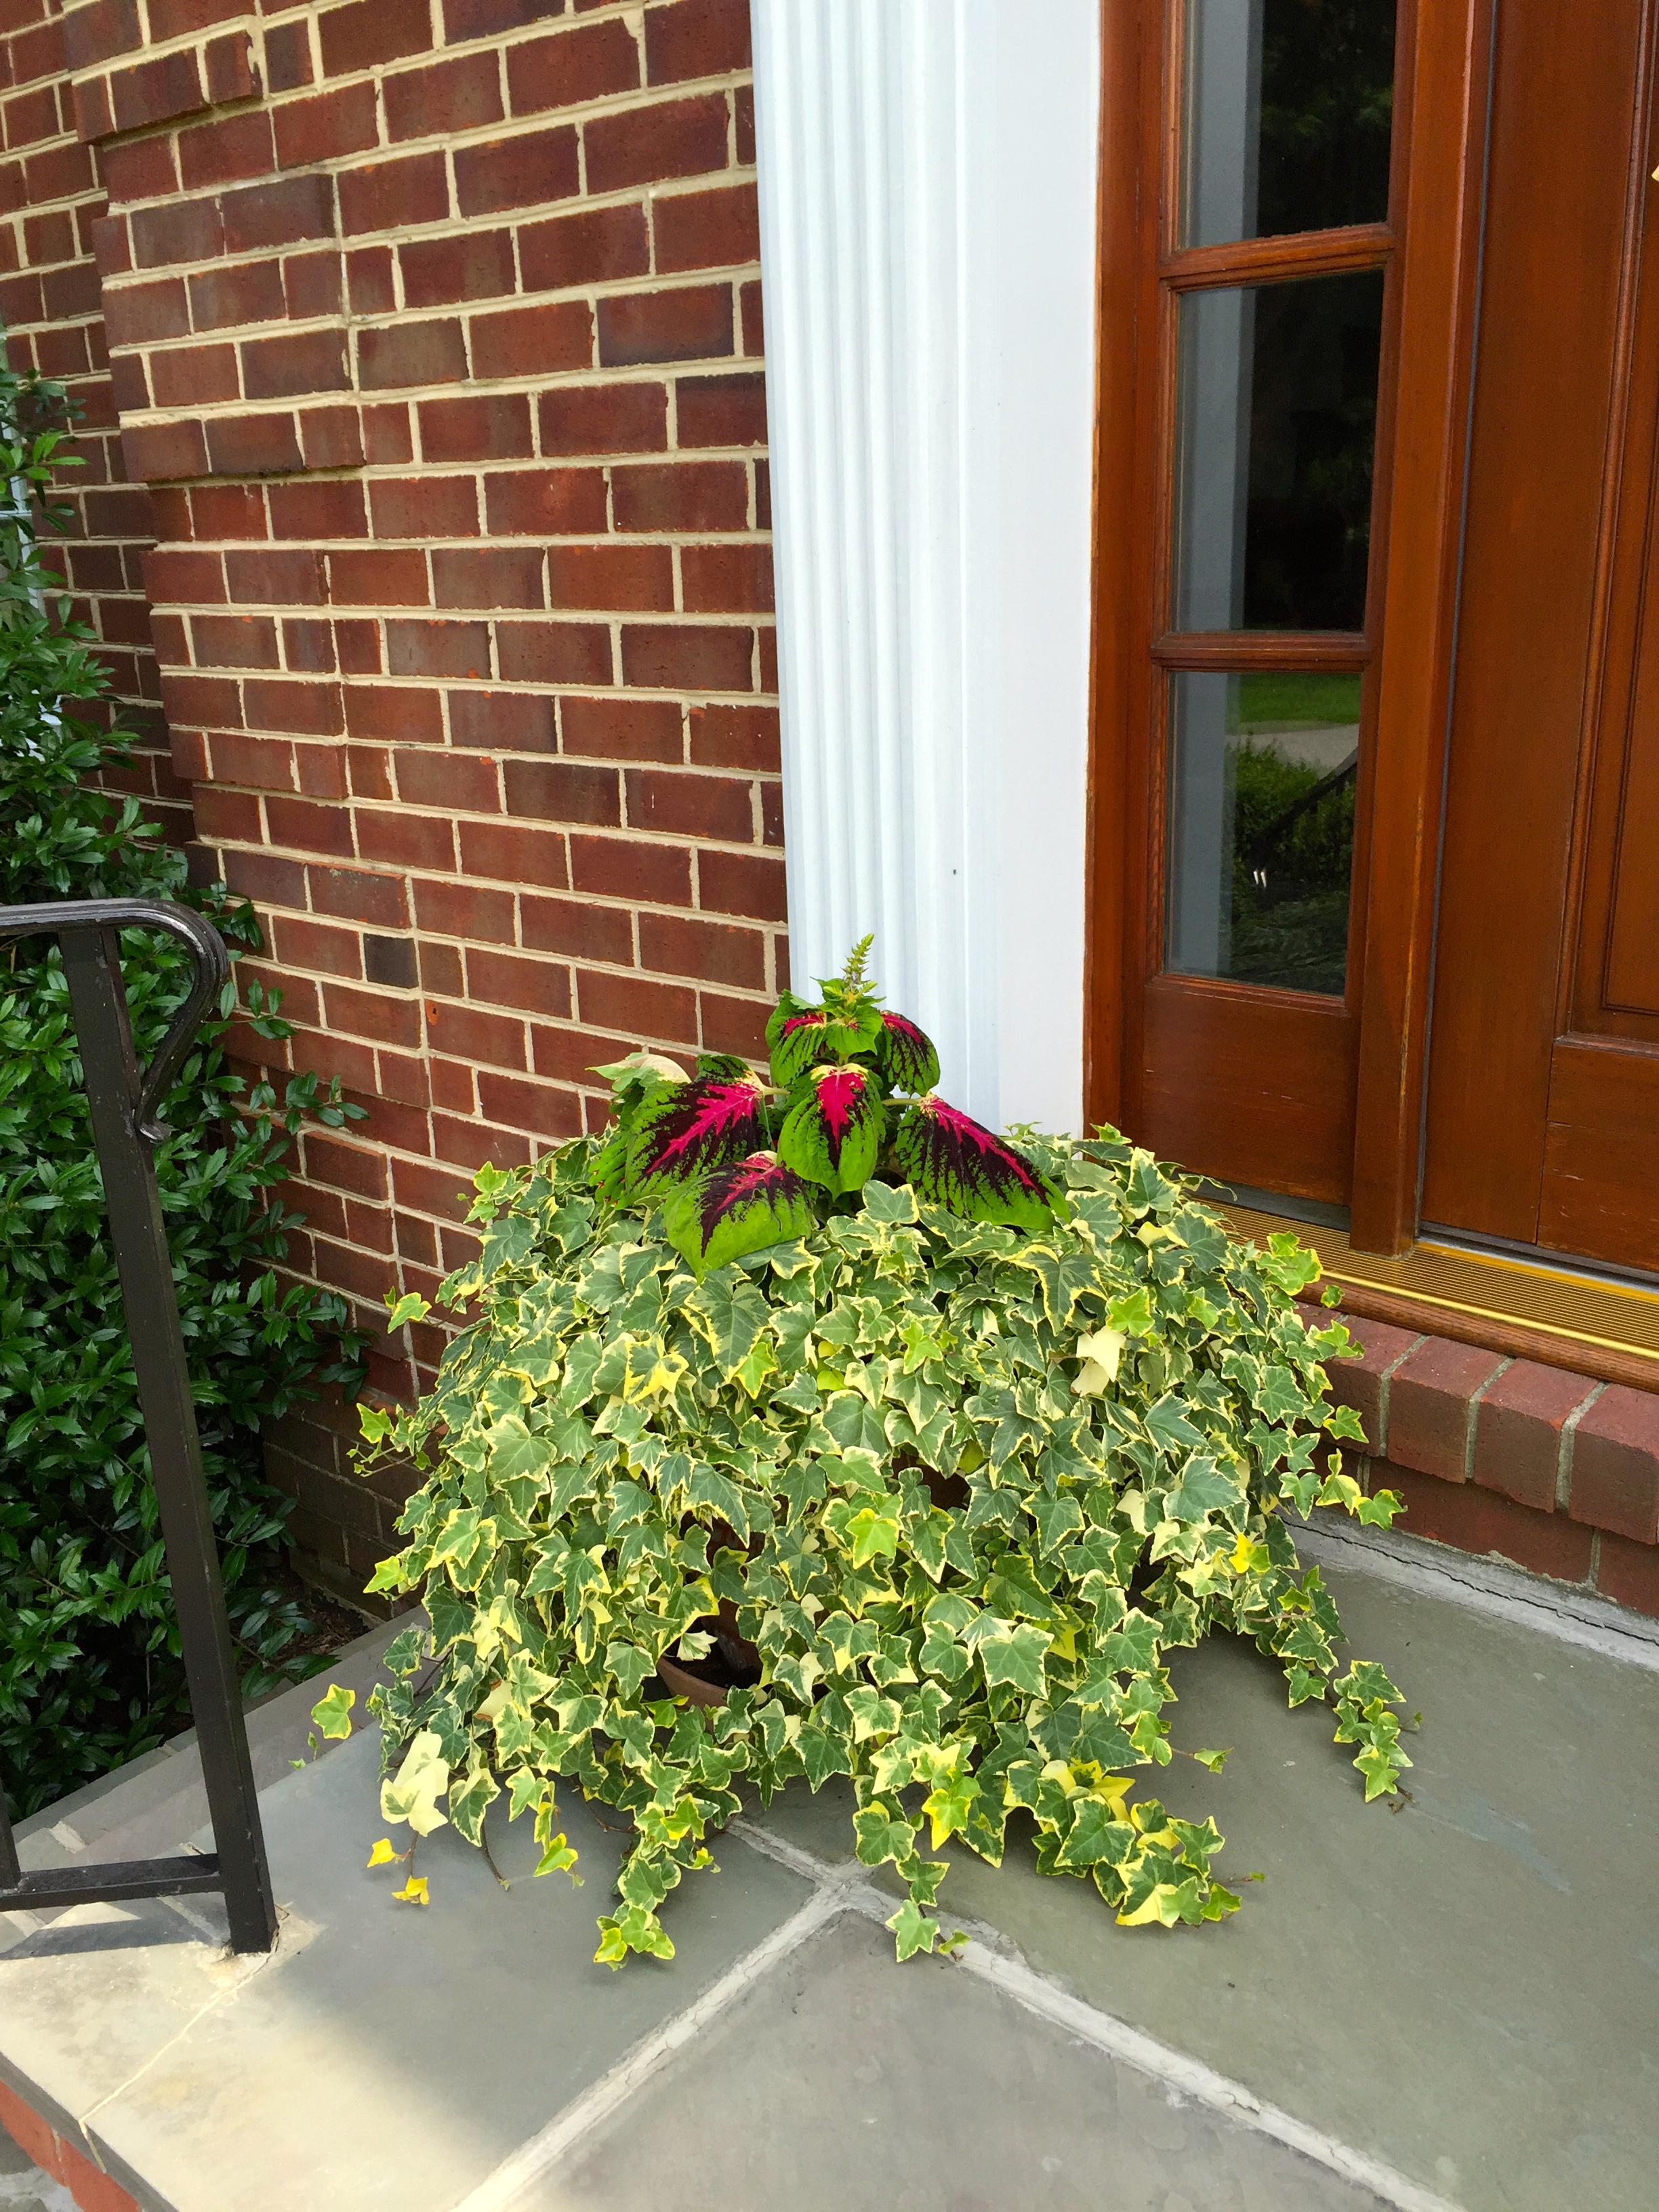
Next up was to add two more window boxes to the front of the house, for a total of four. The two largest ones I’ve had for years — one on the window above the front door and the other at the zig zag of the front walk. I added the two new ones on the front side of the garage. (They were given to me by my sweet daughter of choice! That makes them even more special.) For continuity, I filled each of them with botanicals and flowers in the same color combinations. There are more in pots on each of the front porches. Adding a bright splash of color is one of the quickest and best ways to amp up curb appeal!
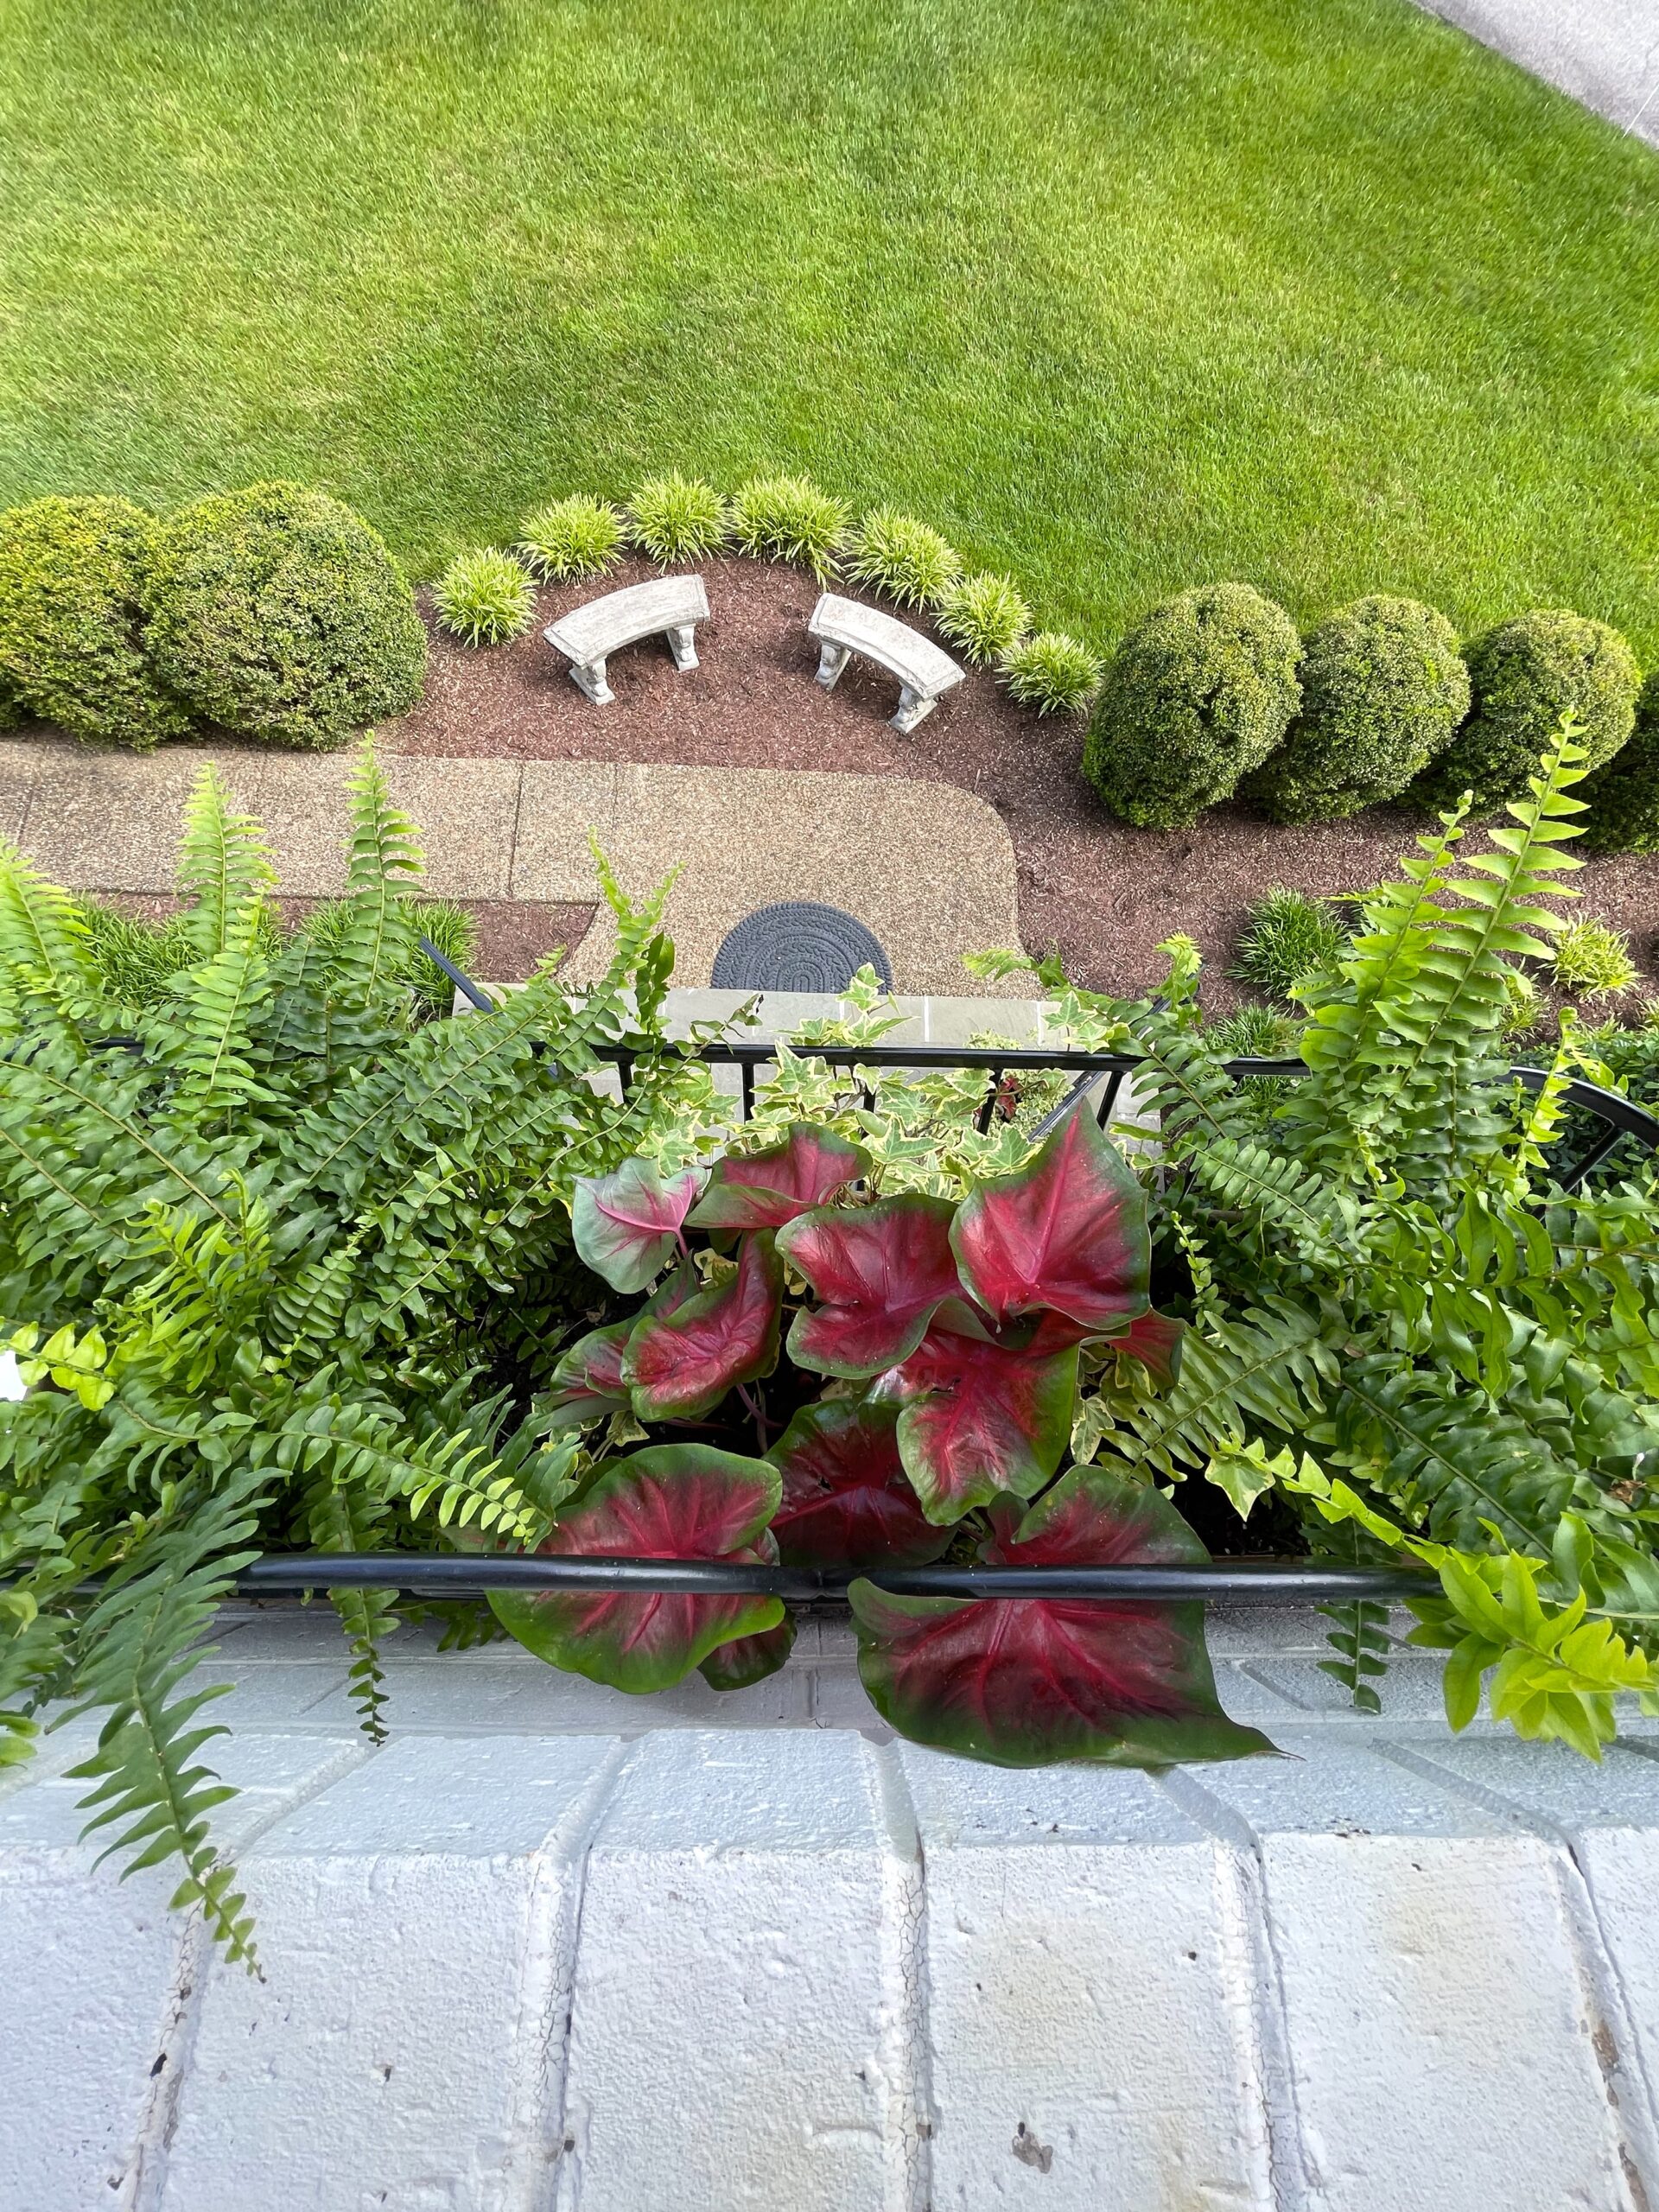
Here’s a bird’s eye view of the window box above the front door. I filled it with Boston fern, caladium, and variegated ivy.
The two window boxes on both sides of the garage were each filled with a Boston fern, and caladium. Here’s a photo from further back, so you can see the effect.
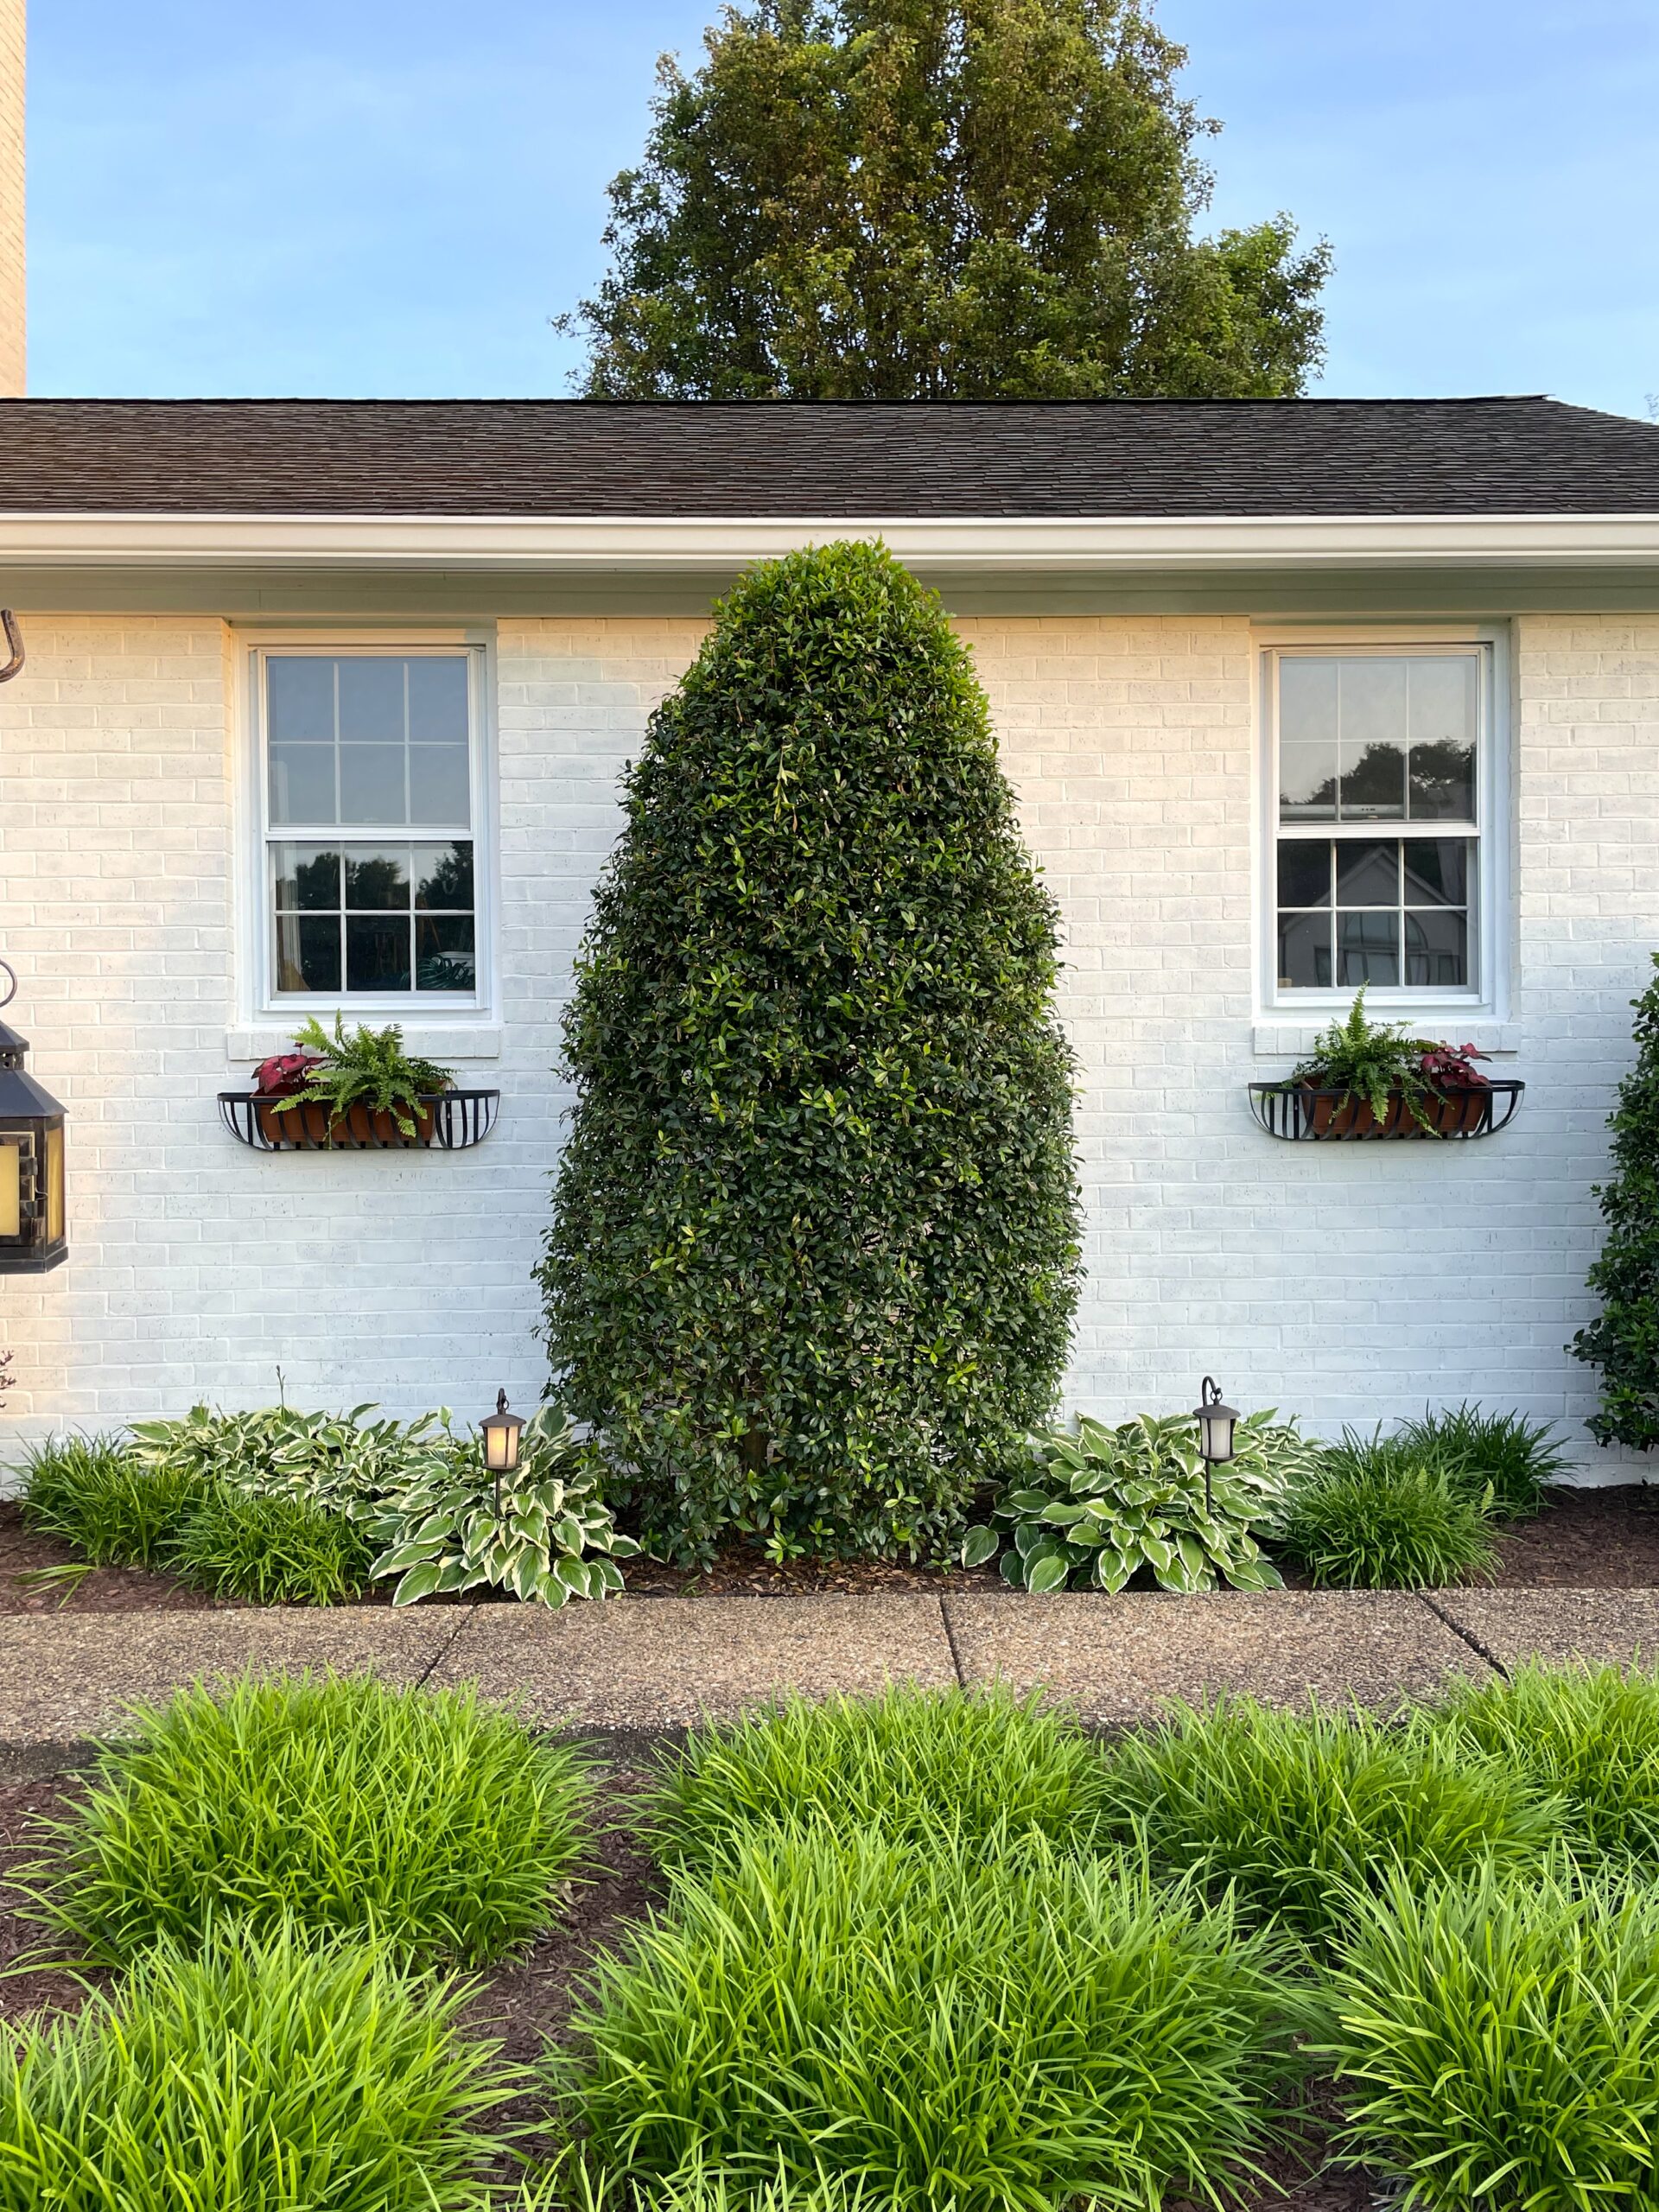
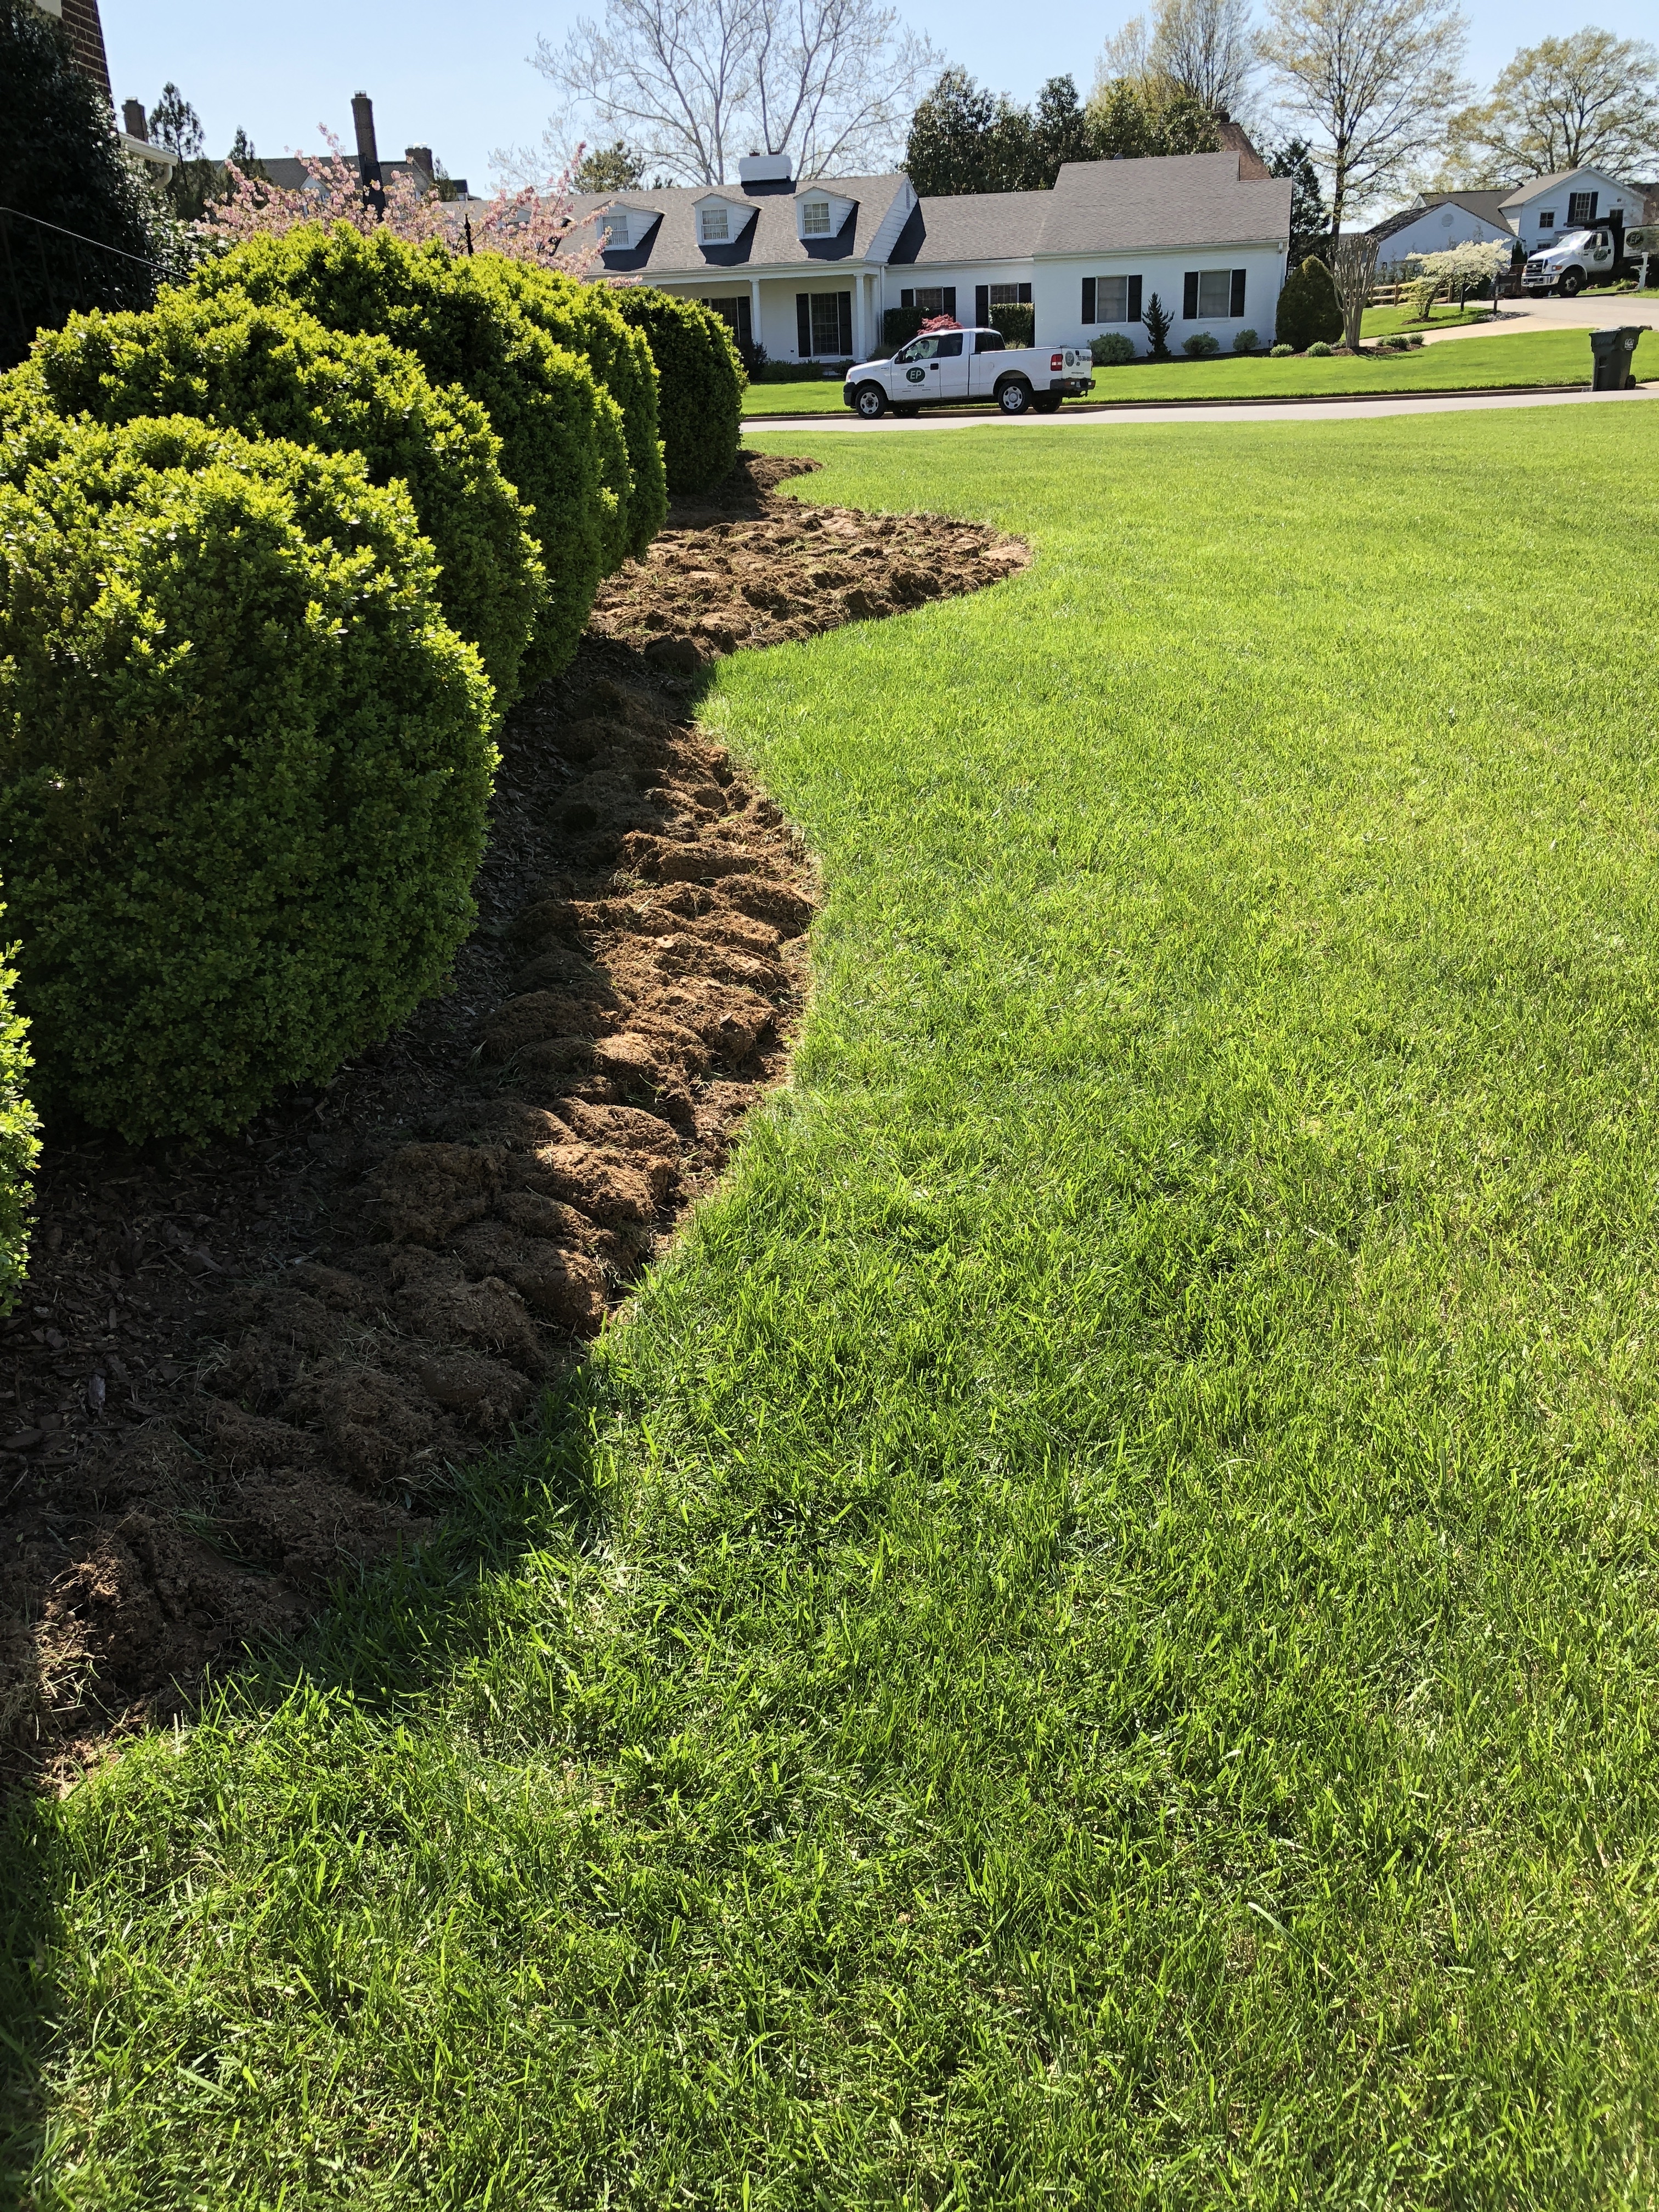
Also this year, I spent a week shaping the boxwoods and hollies. It makes a huge difference in the curb appeal to finally give the boxwoods a uniform height and symmetry! They had damage from snow and burn from chemicals (overspray from a roof cleaning) a few years back, both of which took a while to fill back out to a point where they could be shaped again. It’s a long process to get them uniform, but just take your time, and stand back every few minutes to check your work. It is gratifying to see them all uniform again, after seeing them looking sort of like lumpy blobs as they grew out the damage. And while at it, putting a nice edging on the gardens seals the deal.

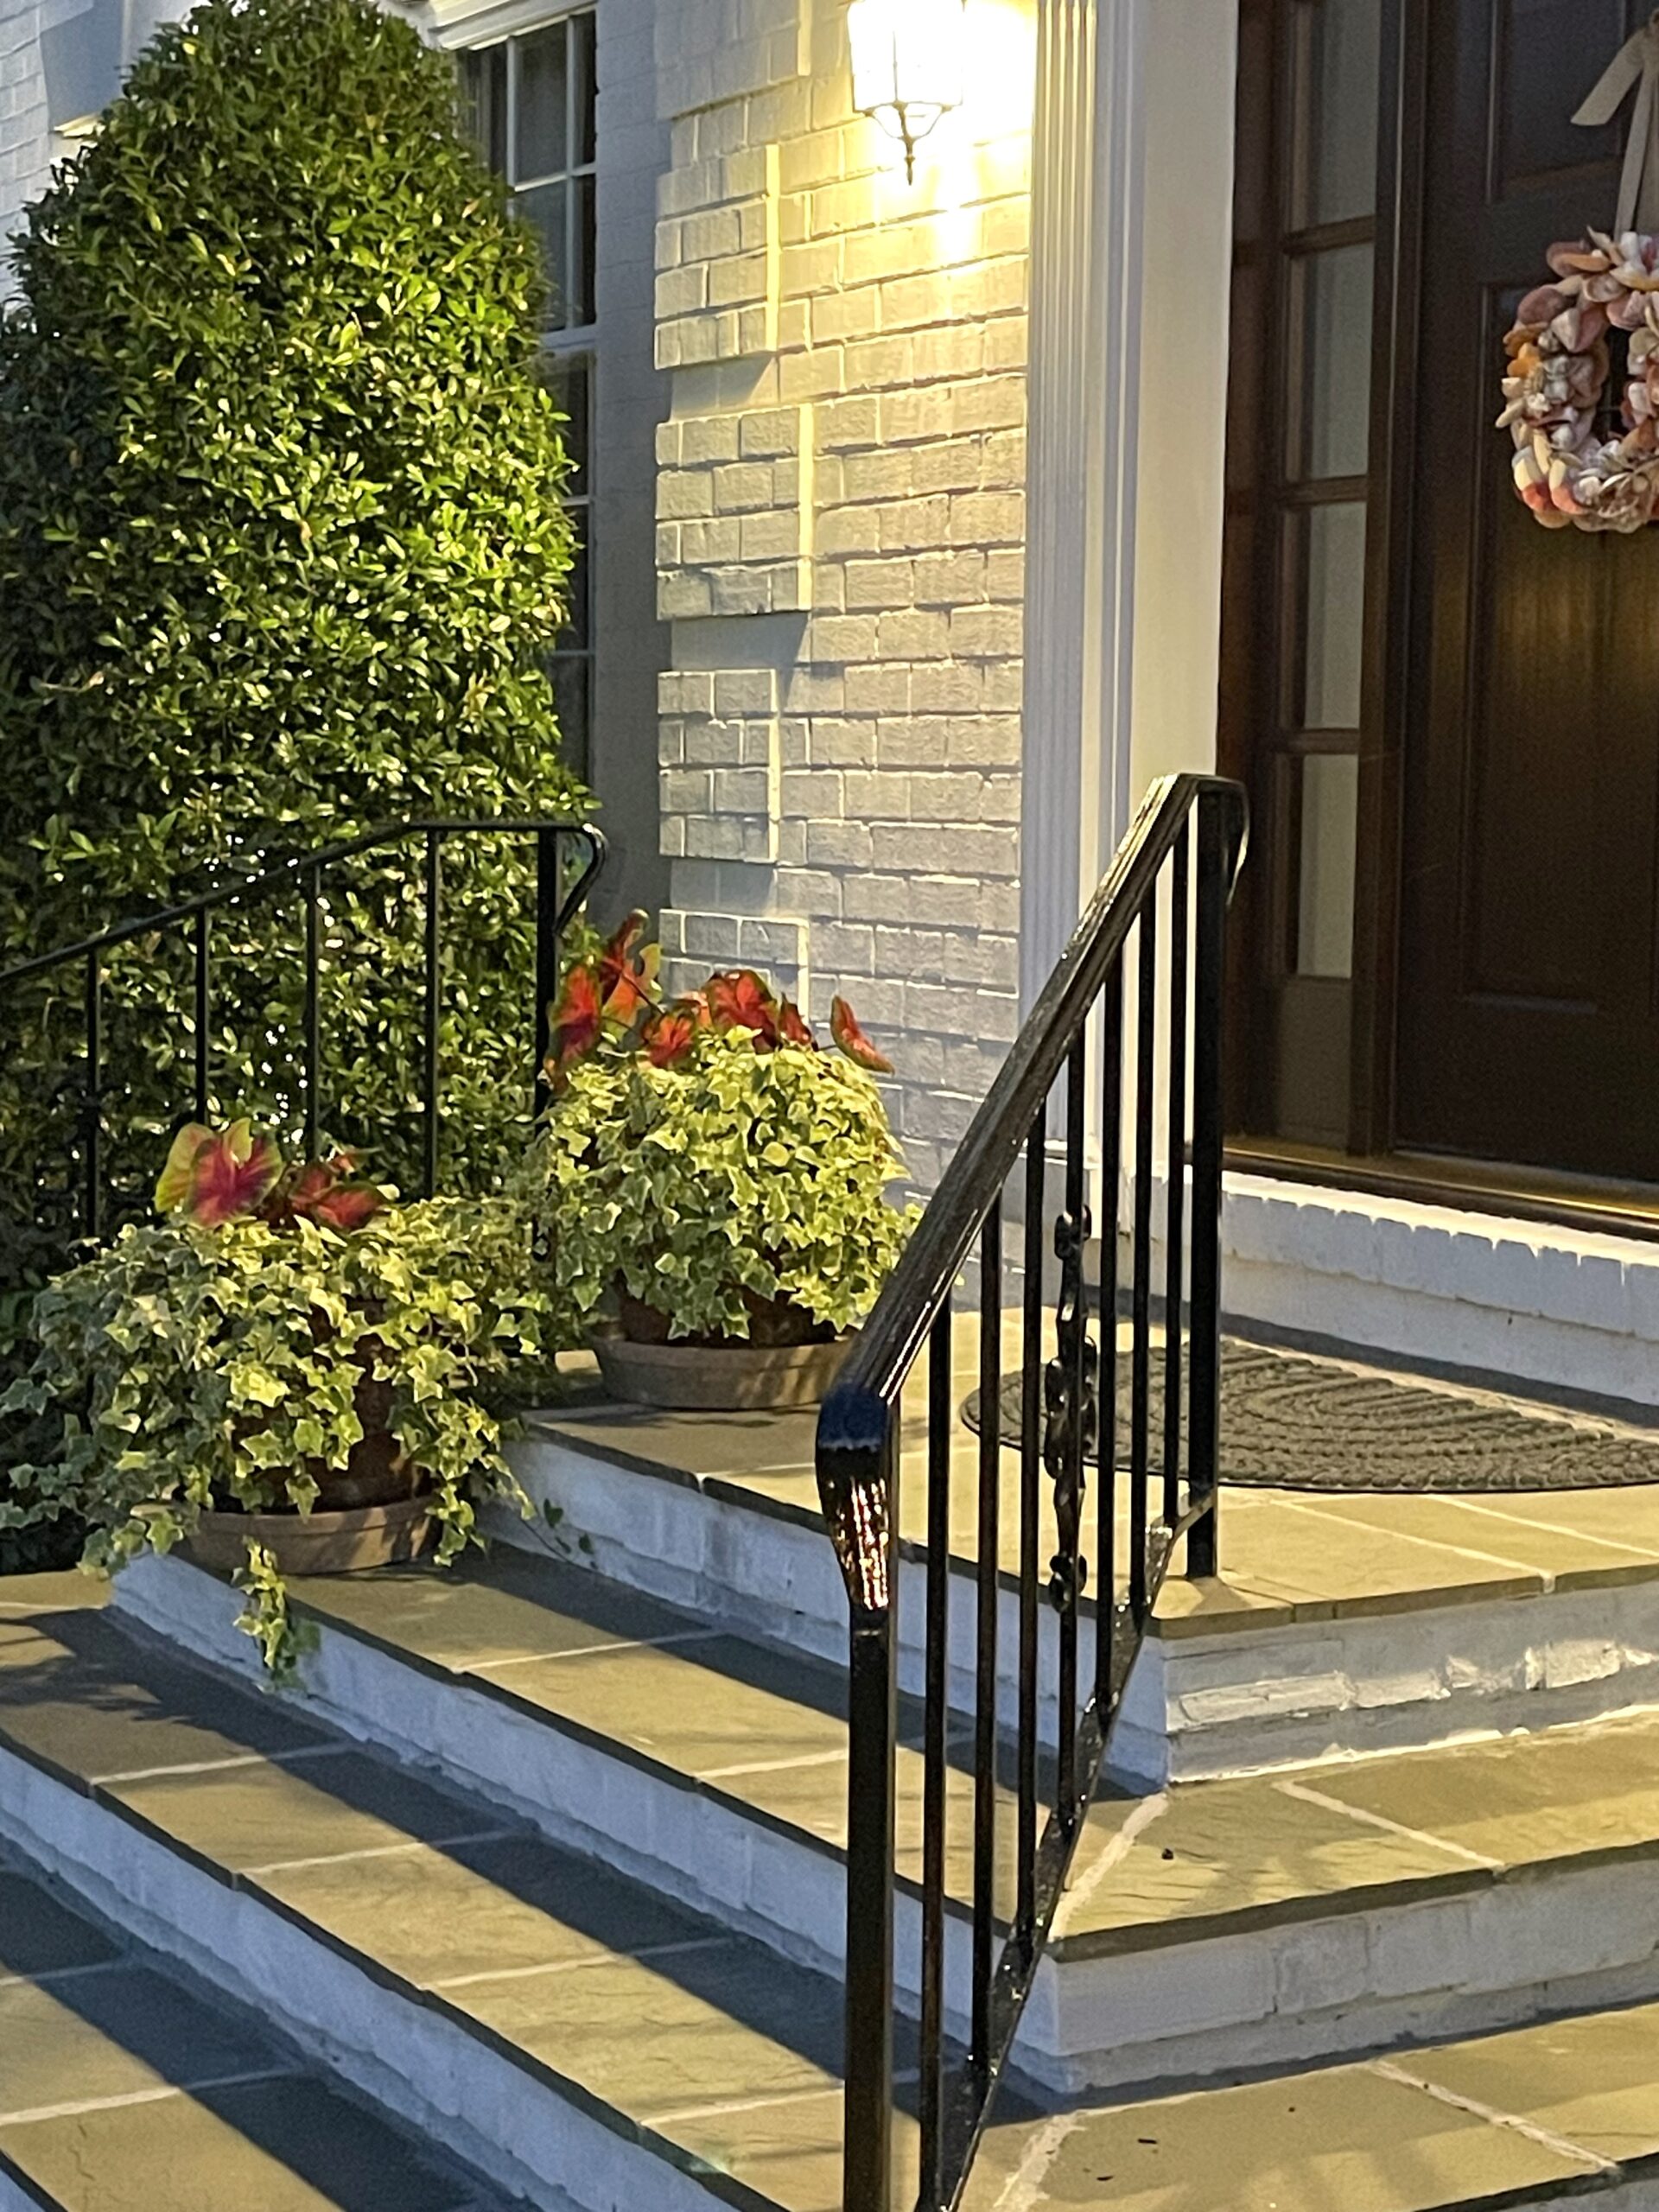
Above is a close up of the big pots on the front porch. Each were filled with caladium and variegated ivy. You might remember these pots from the last several years. I leave the ivy in them and swap out the flowers in the center each season. This ivy has been with me for at least 20 years or so, it creates the perfect “spiller” in a planter, and it’s easy to divide and transplant if it gets too large.
This window box at the zig zag of the front walk and mud room porch has coordinating flowers and trailing vines of mandevilla and vinca. Below is a better shot of the mud room porch. I know I say this a lot but, it’s amazing what a difference paint can make!
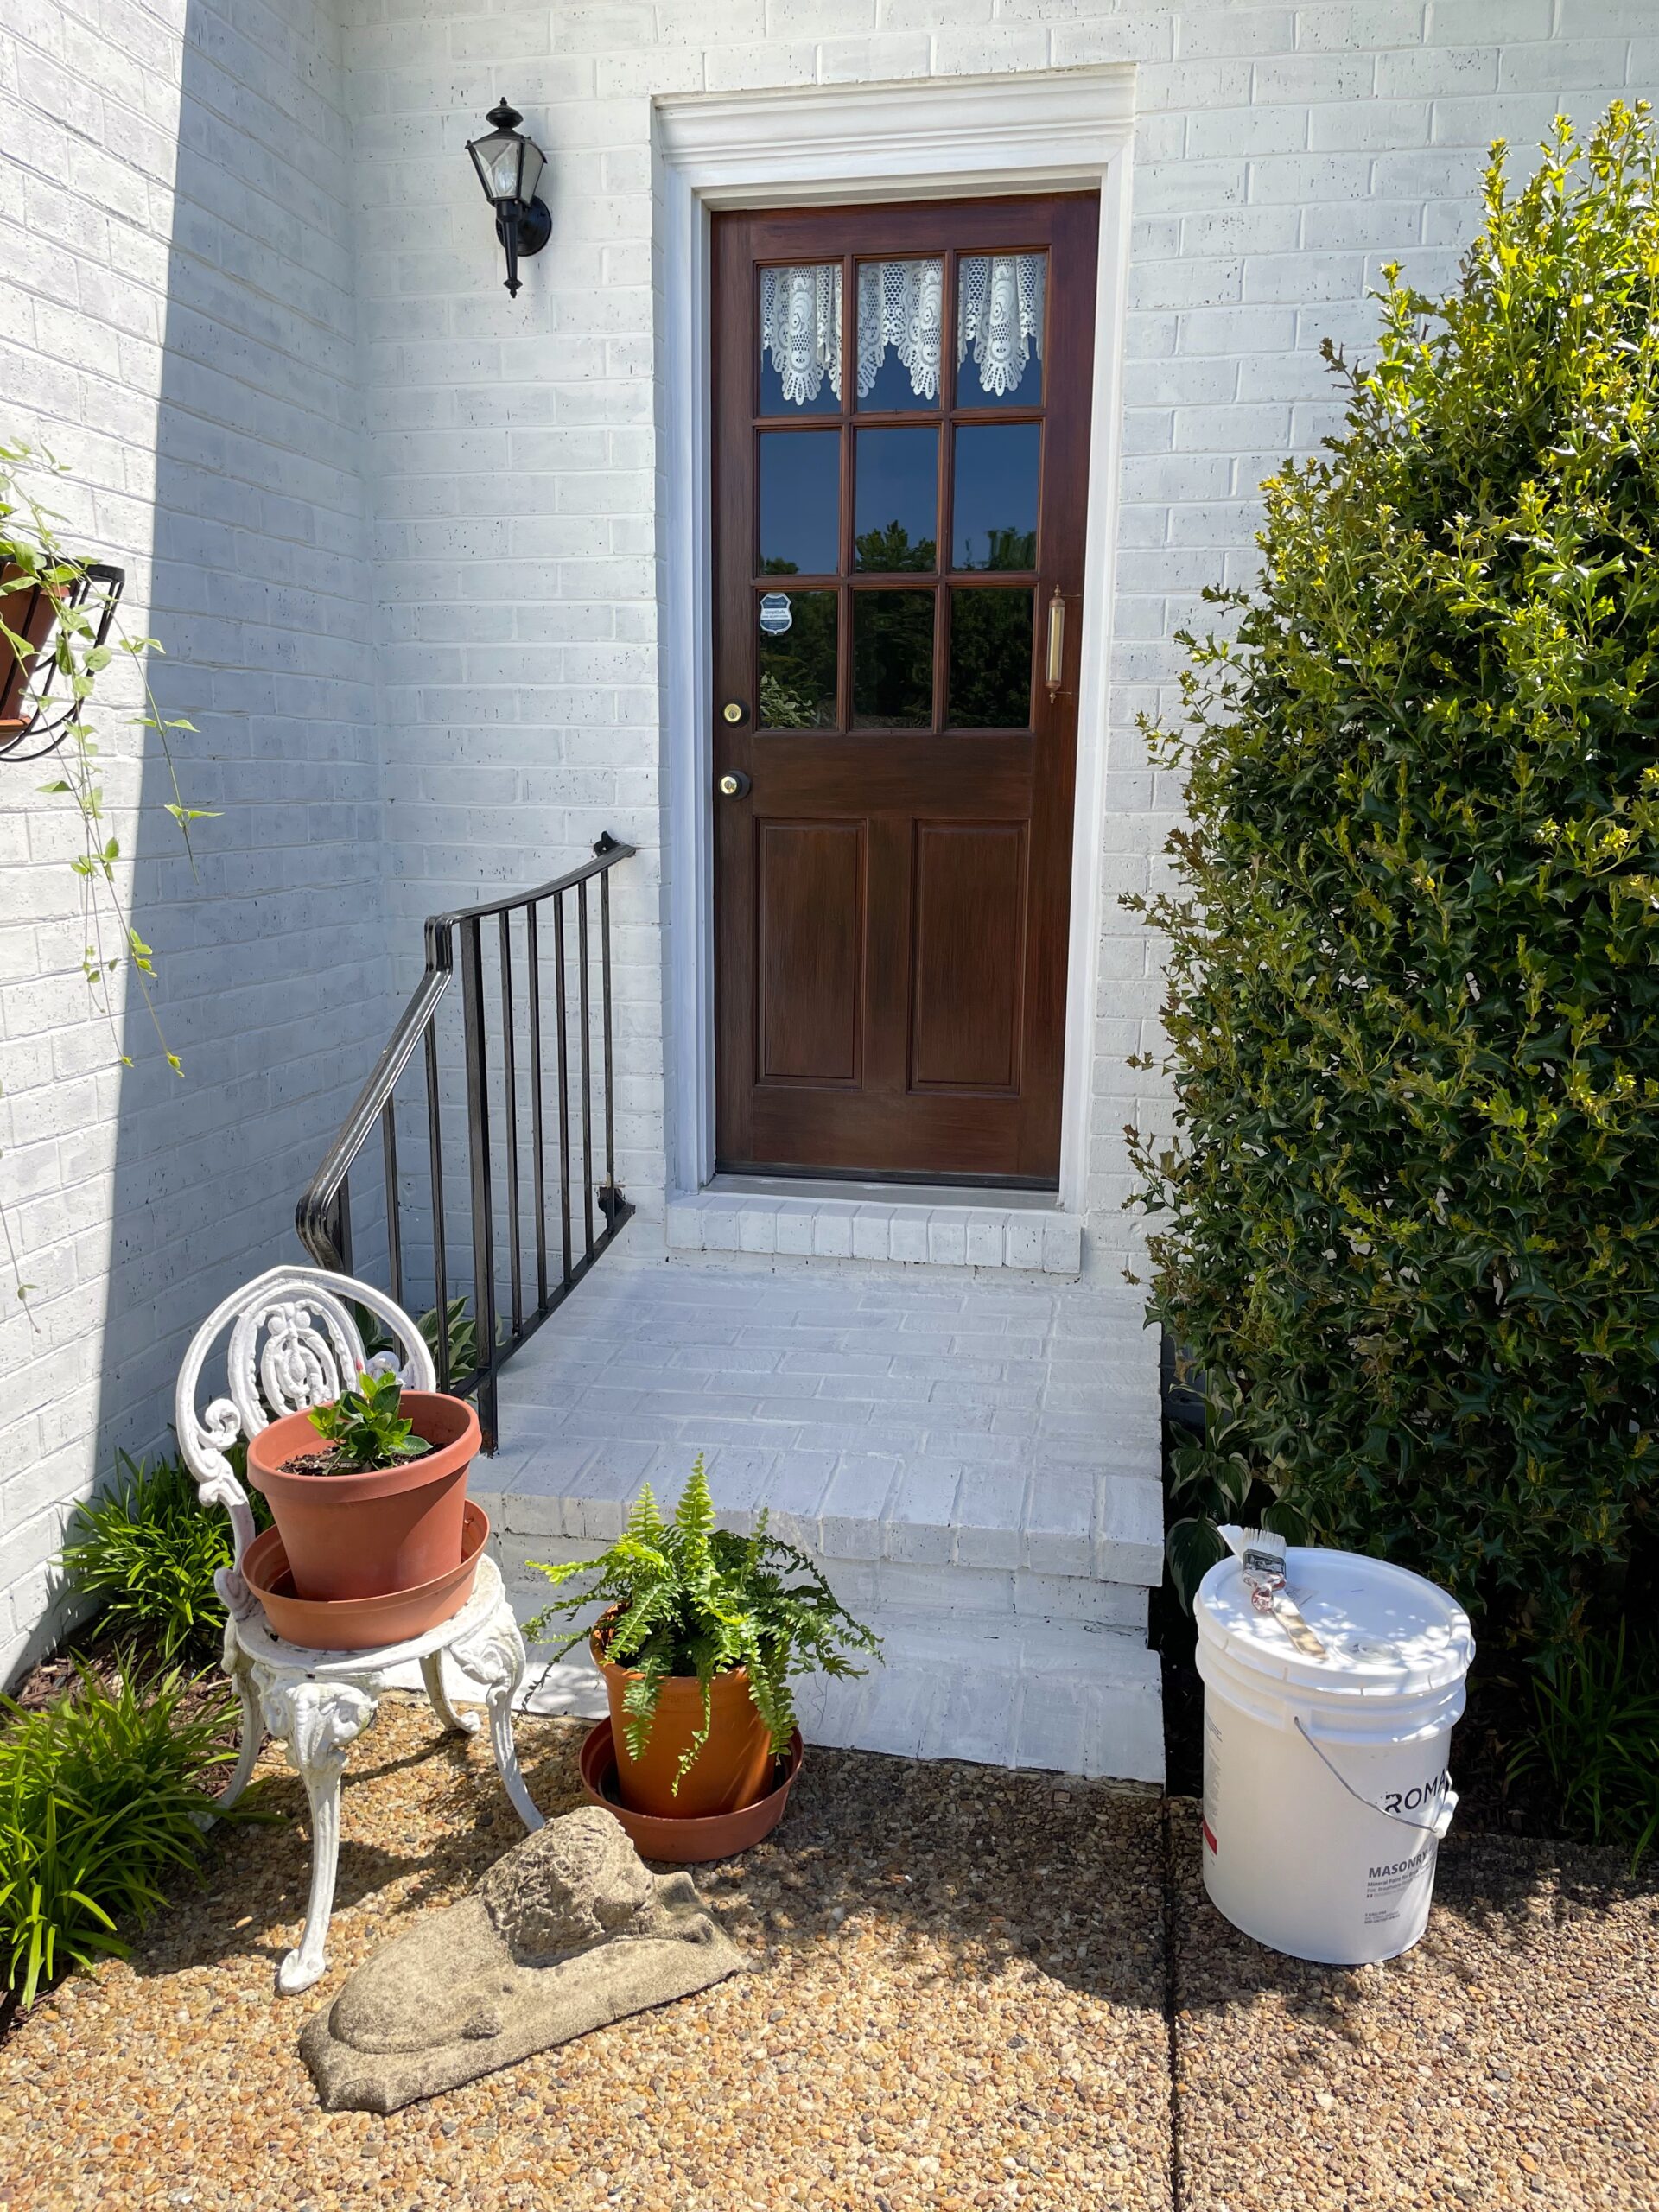
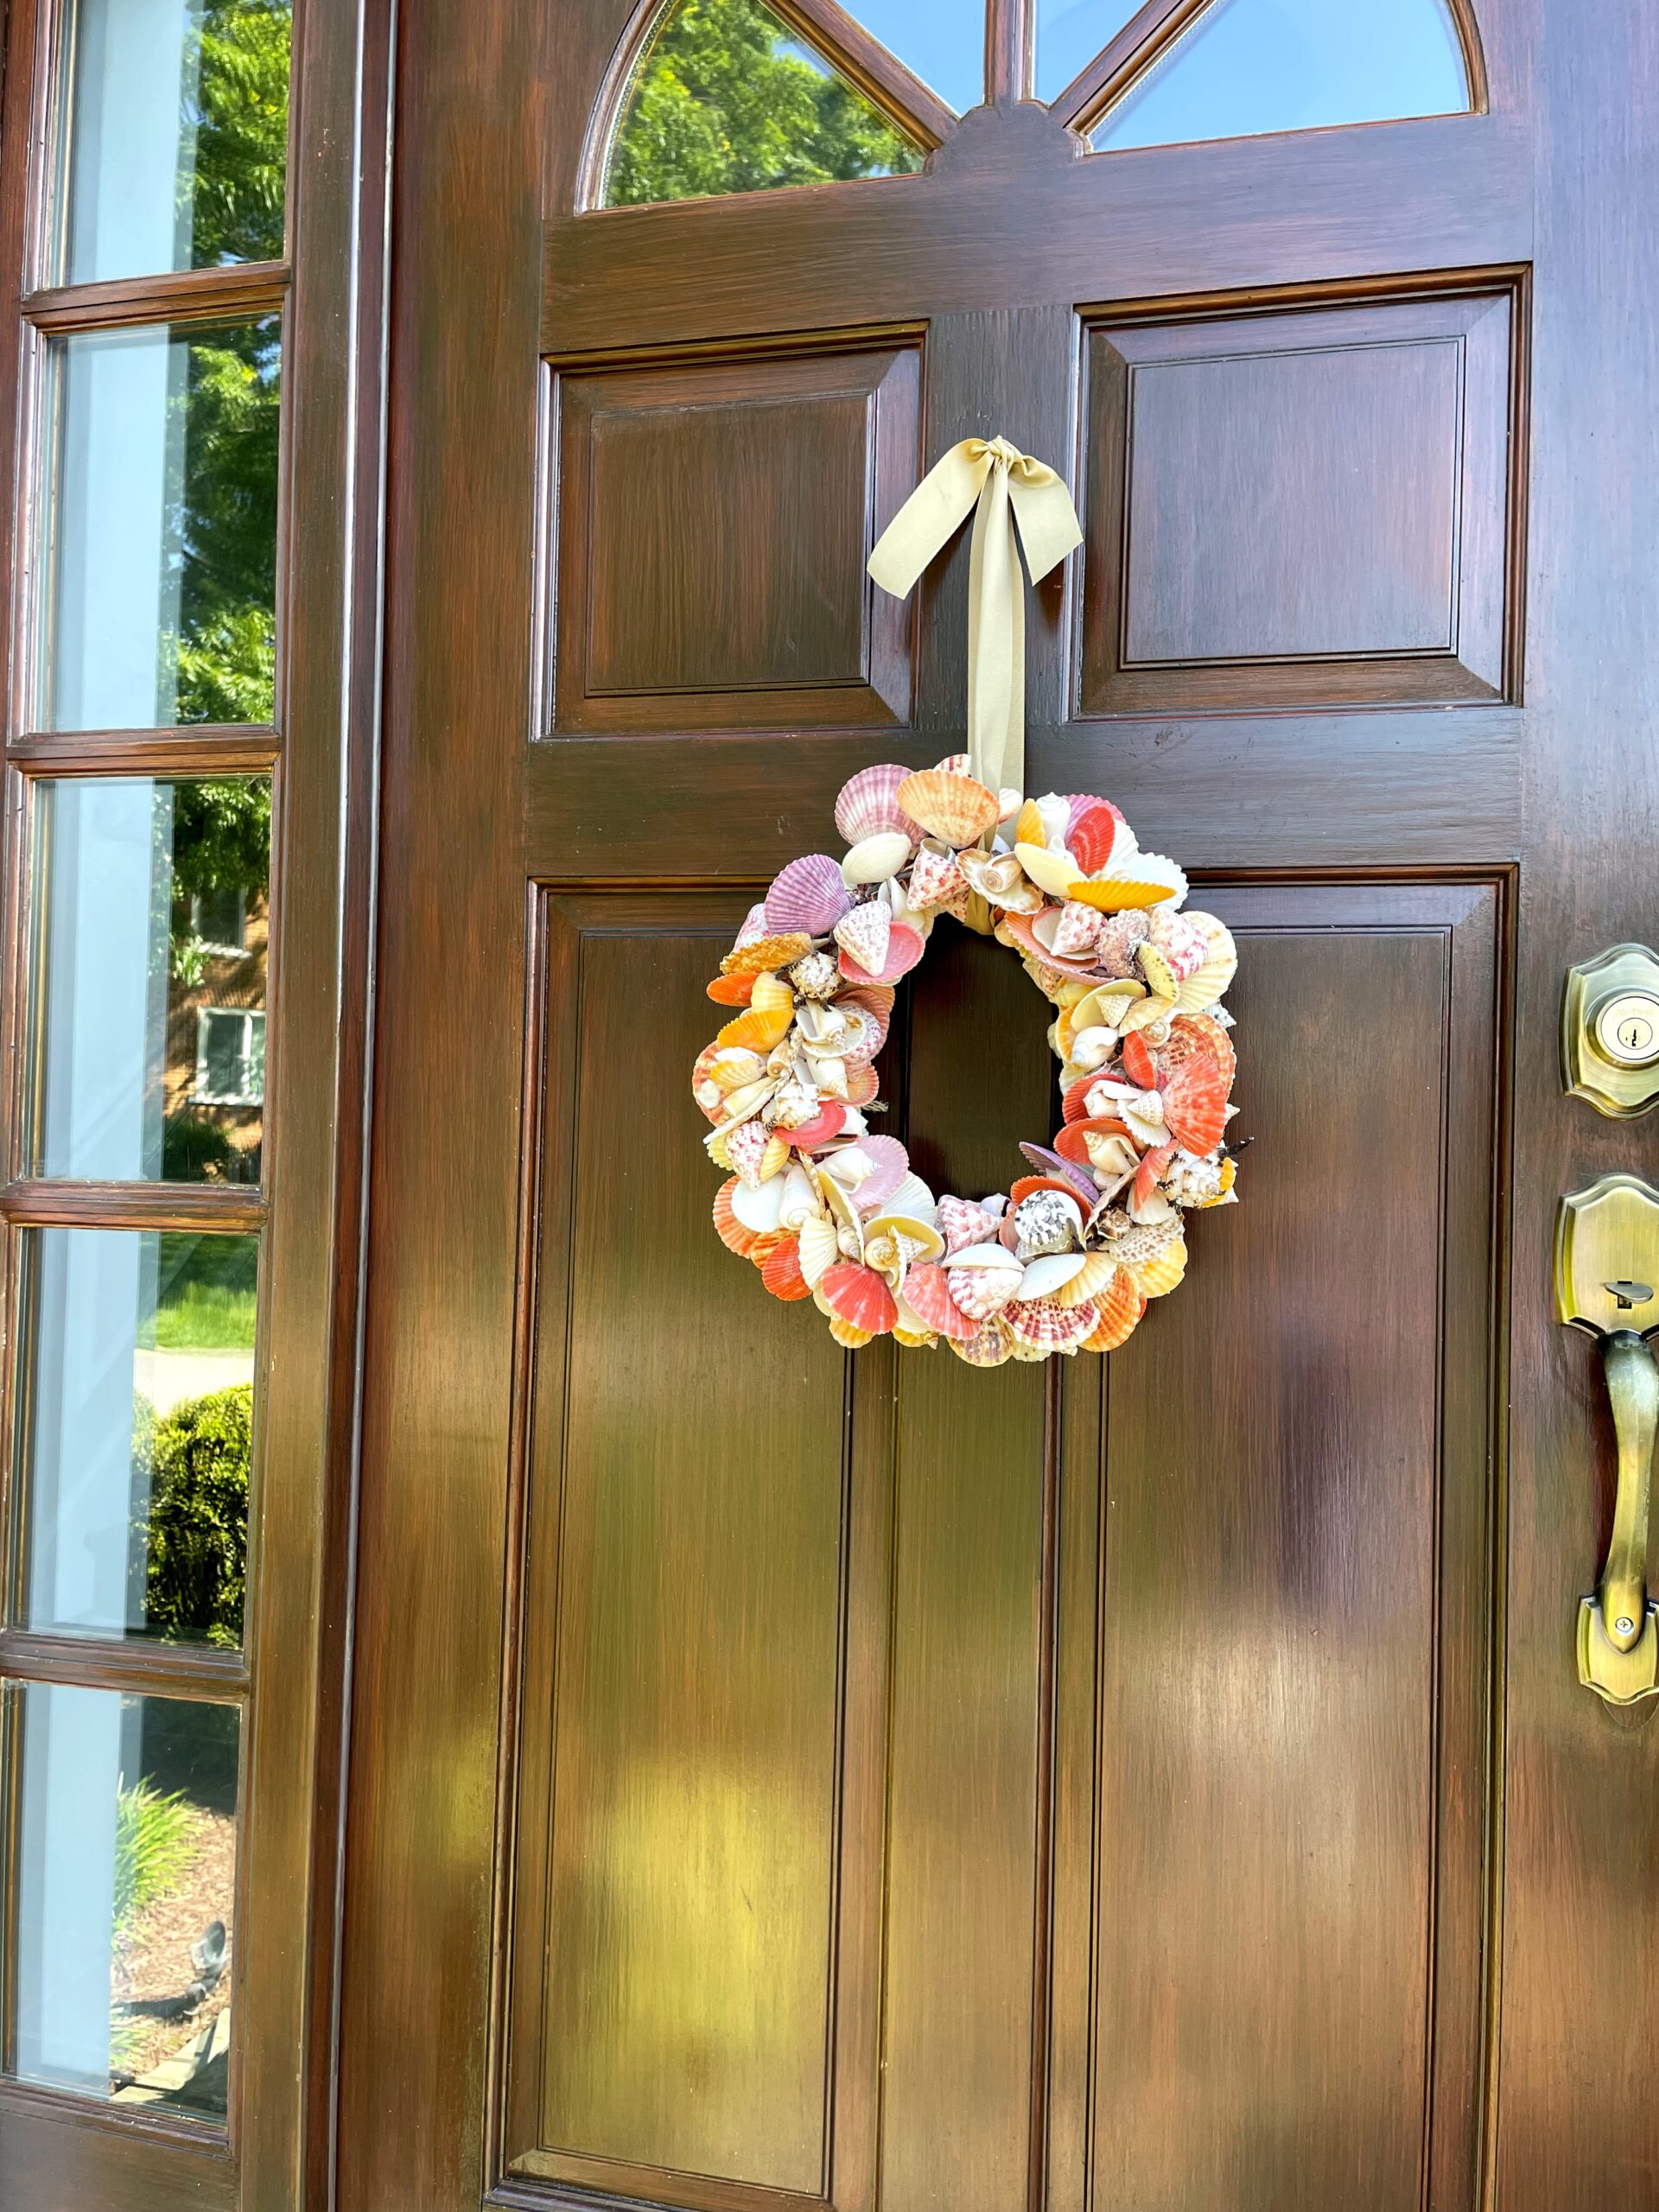
Another quick edit was changing out the wreath on the front door to a summer wreath. Adding a wreath is like adding jewelry. It’s an accessory that can showcase what your interests are. I love this shell wreath. OK — I love anything with shells, LOL!
I hope this leaves you with ideas you might incorporate at your own home. Some time invested a little bit here and a little bit there, and you will have it done! And as always, Happy Gardening!
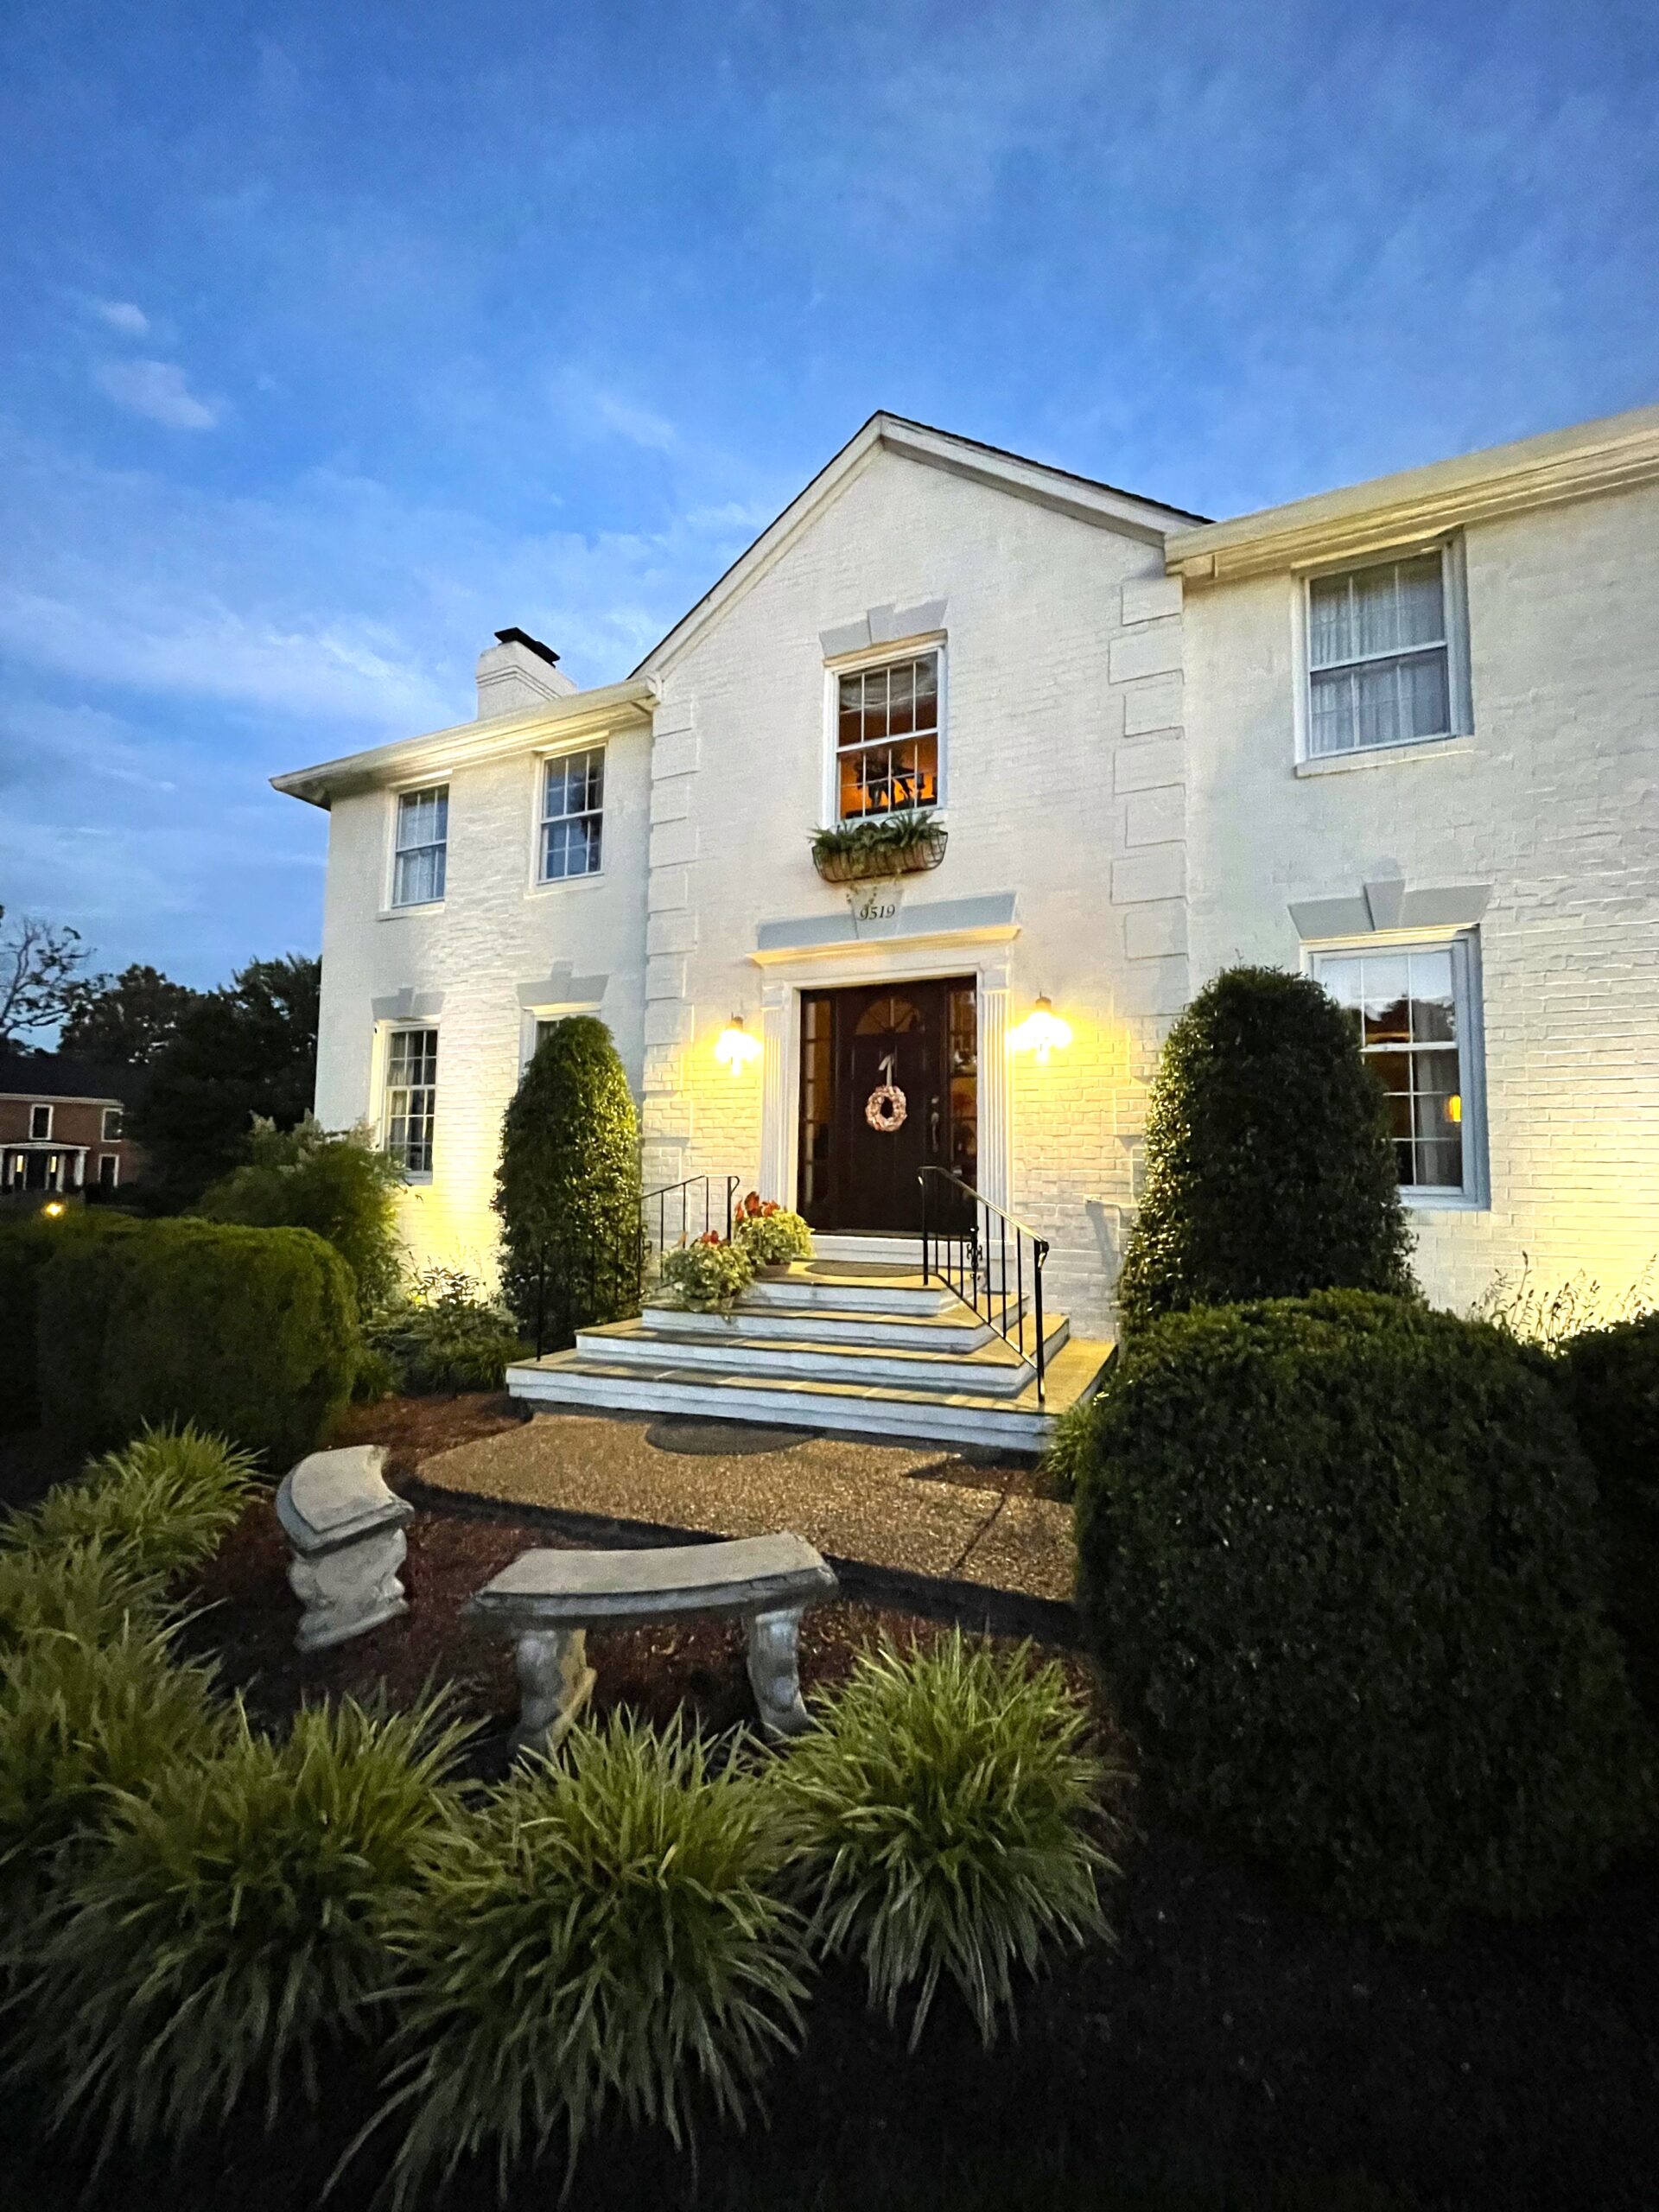
Hello everyone! I have some big changes to show you. After 23 years of living here, we decided that now was the time to do a house refresh. I have been wanting to lime wash the house for years, and my wish finally came true. The house is all brick. It was a very dark reddish brown, and the north-facing side never really was bright enough to show off the plants that surrounded it. Well, now that’s history! Come take a tour of our finished new look —

We chose to use a great product from Romabio Paints. Their formula is totally organic, mineral based, and the origins of lime wash go back several thousand years. It stands the test of time and mellows with each passing year in a natural way. The color we chose is Avorio White, which I love because as the hours of the day pass, the color shifts to take on the colors of the setting sun. And after dark, it truly glows.
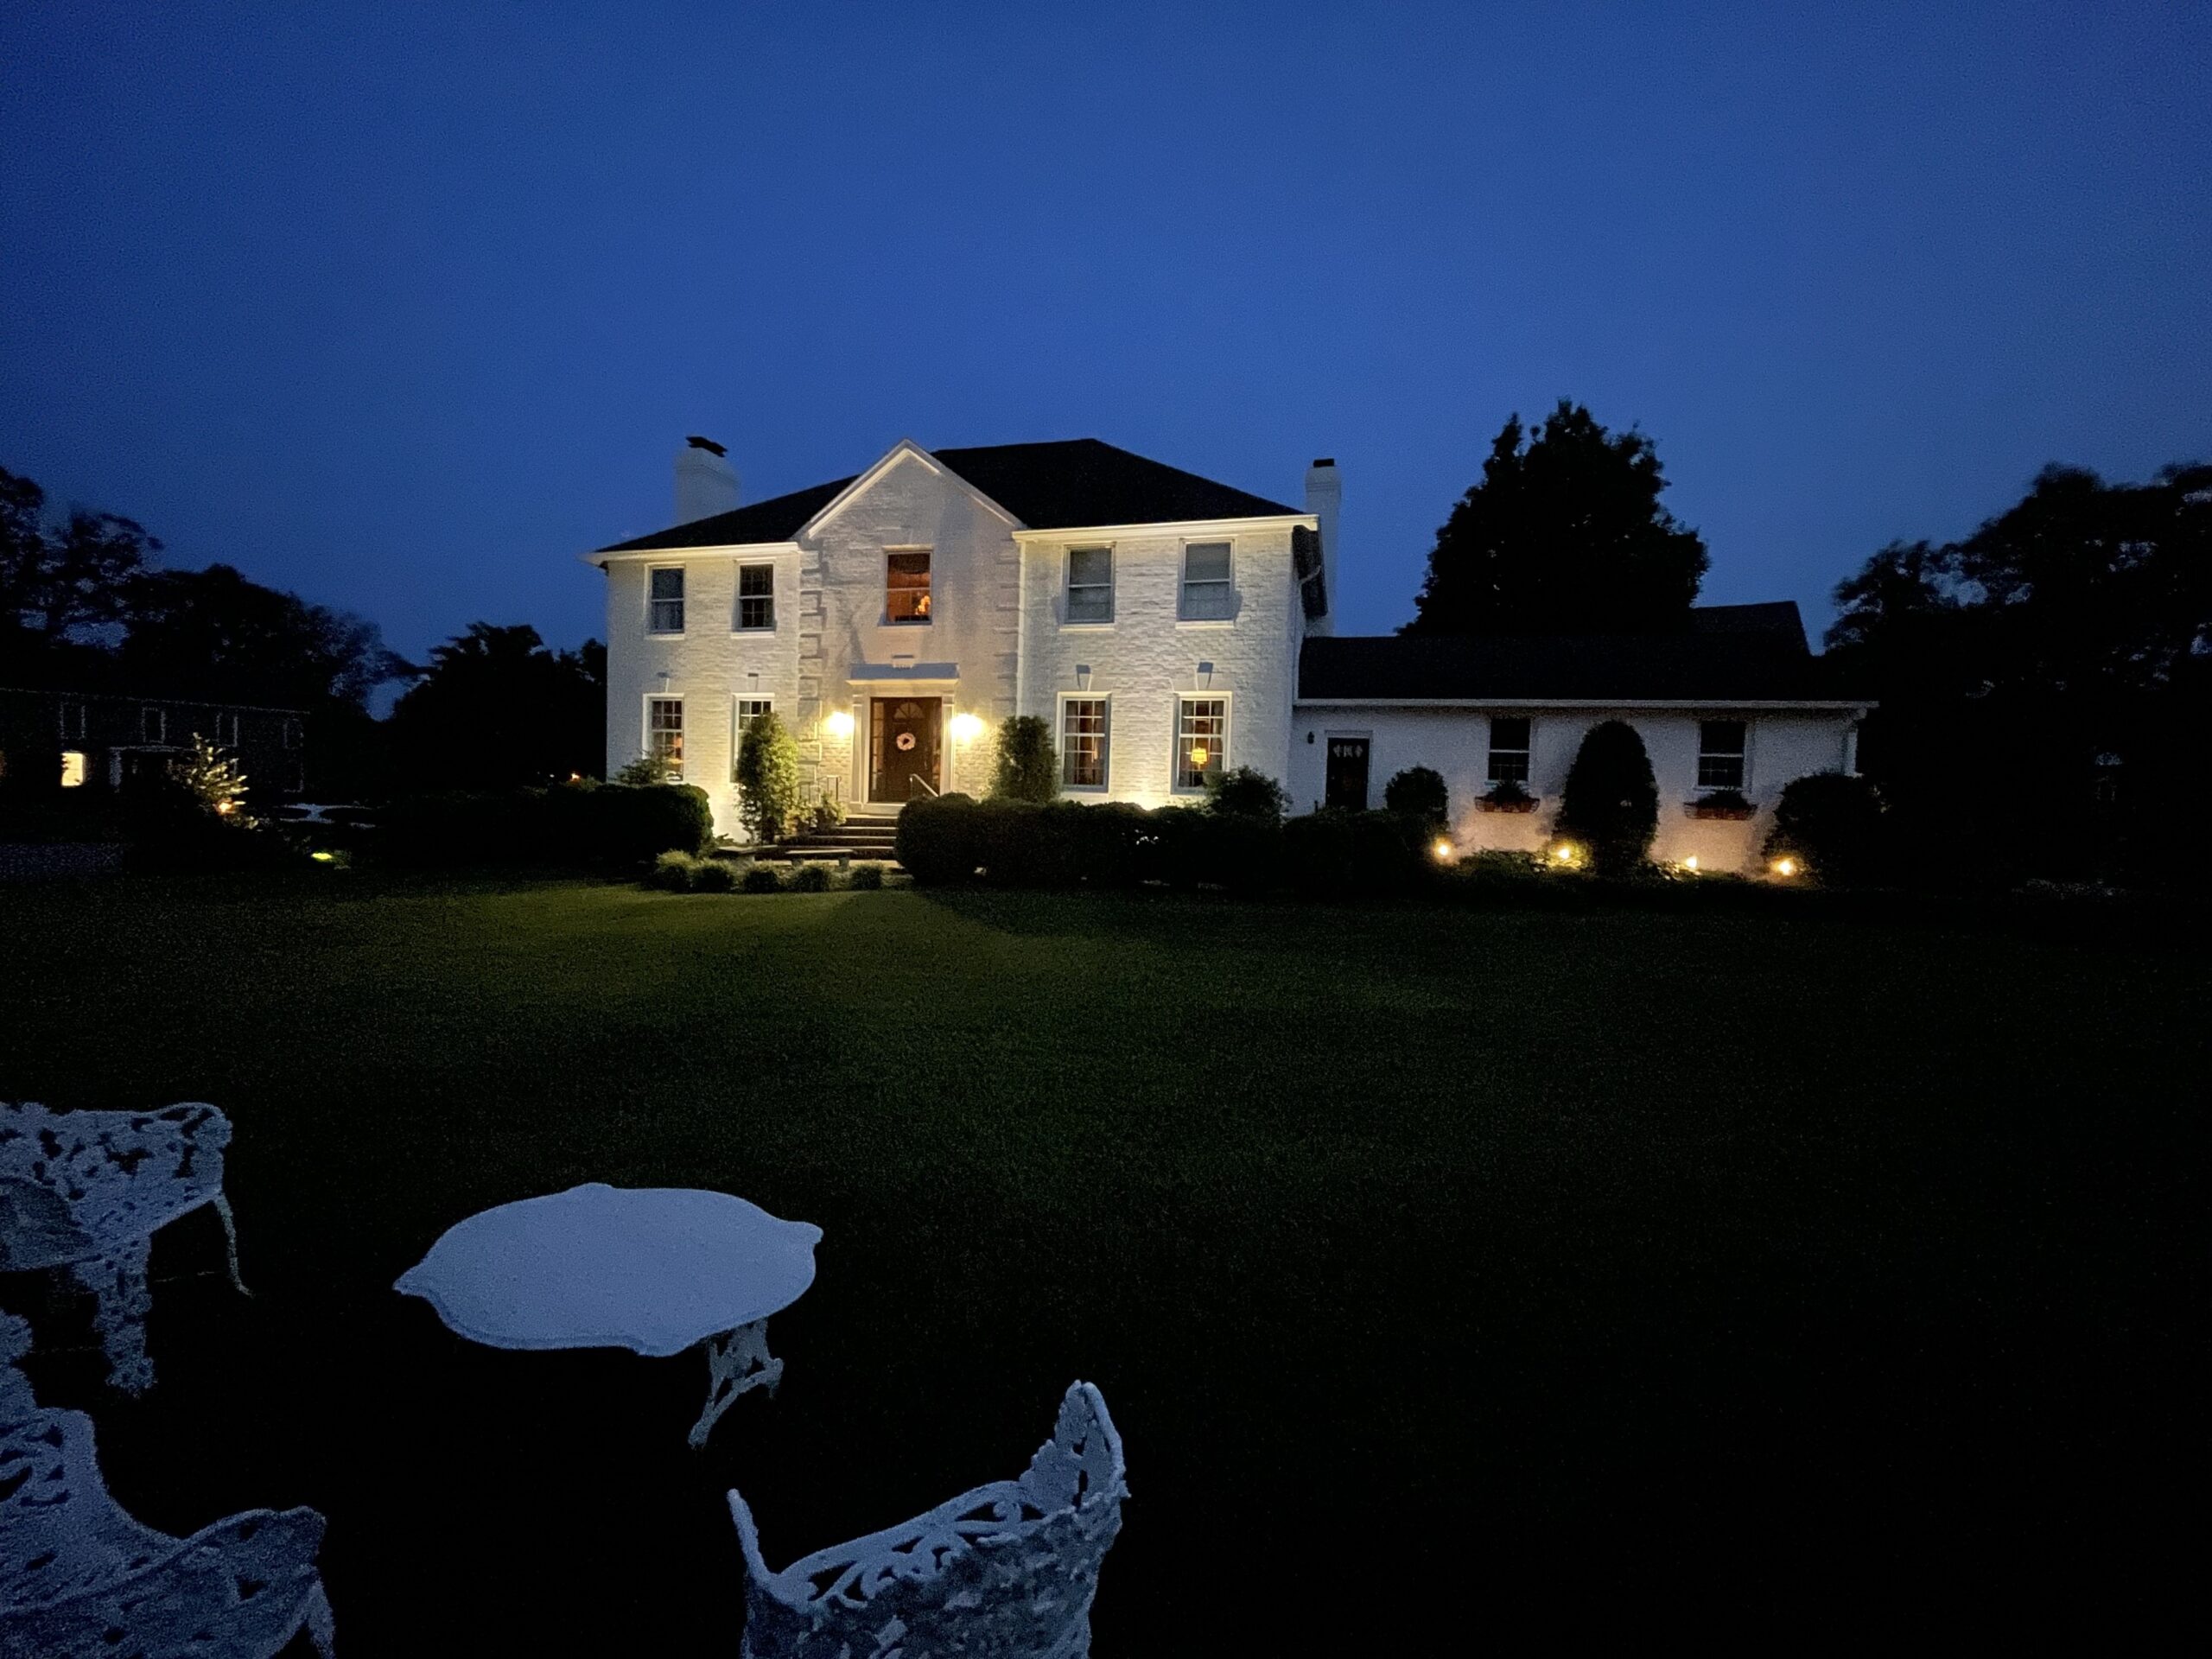
Another exciting aspect for me is I now have a light backdrop that shows off the garden. I can use the bright tropical colors of summer in flowers. I’ve filled the garden with magenta, coral, red and purple flowers. It’s so much fun! I’m already planning what colors to use in the autumn, and I am so looking forward to seeing how the house will look decorated for Christmas.

We hired a wonderful company — Brushes with Flair — to paint the top floor and very tall chimneys, while I painted the lower floors. The entire job took a couple of weeks to complete. The bricks are painted one at a time, carefully working the paint into all the mortar joints first, so the coverage is a very protective but breathable finish. It was time consuming, but well worth the effort. I chose not to wash it off for instant aging, but to rather let nature age it.

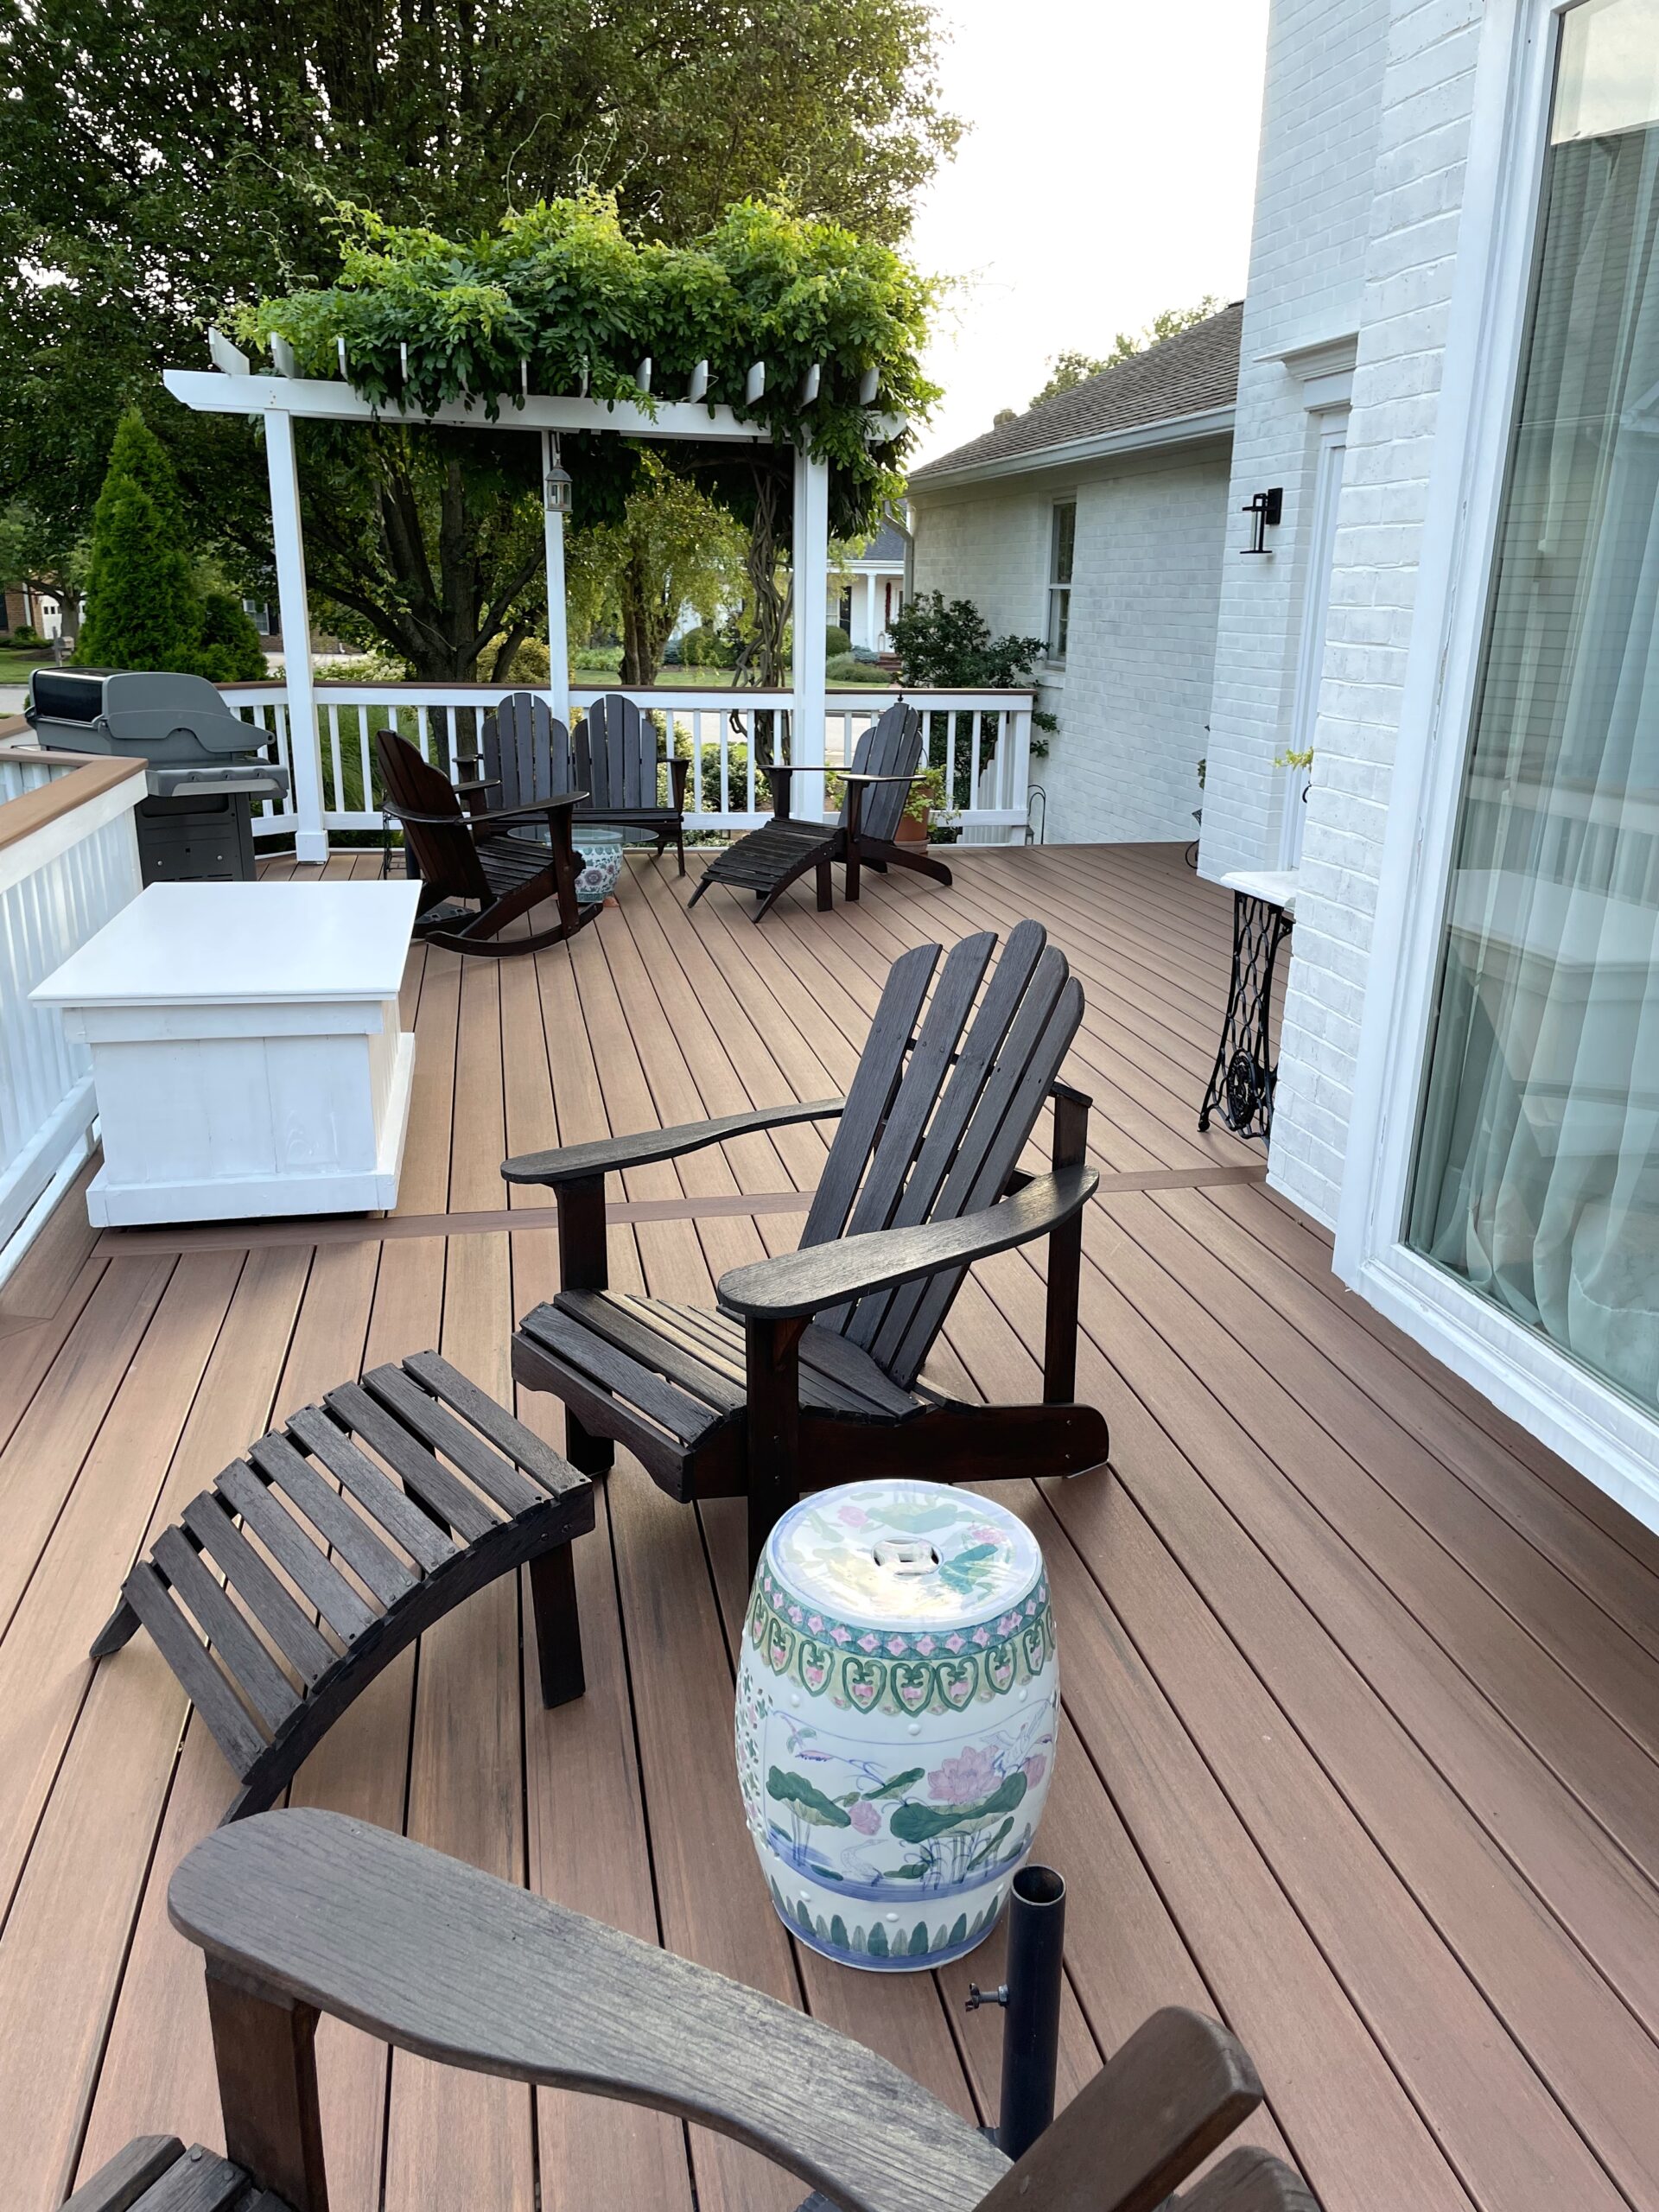
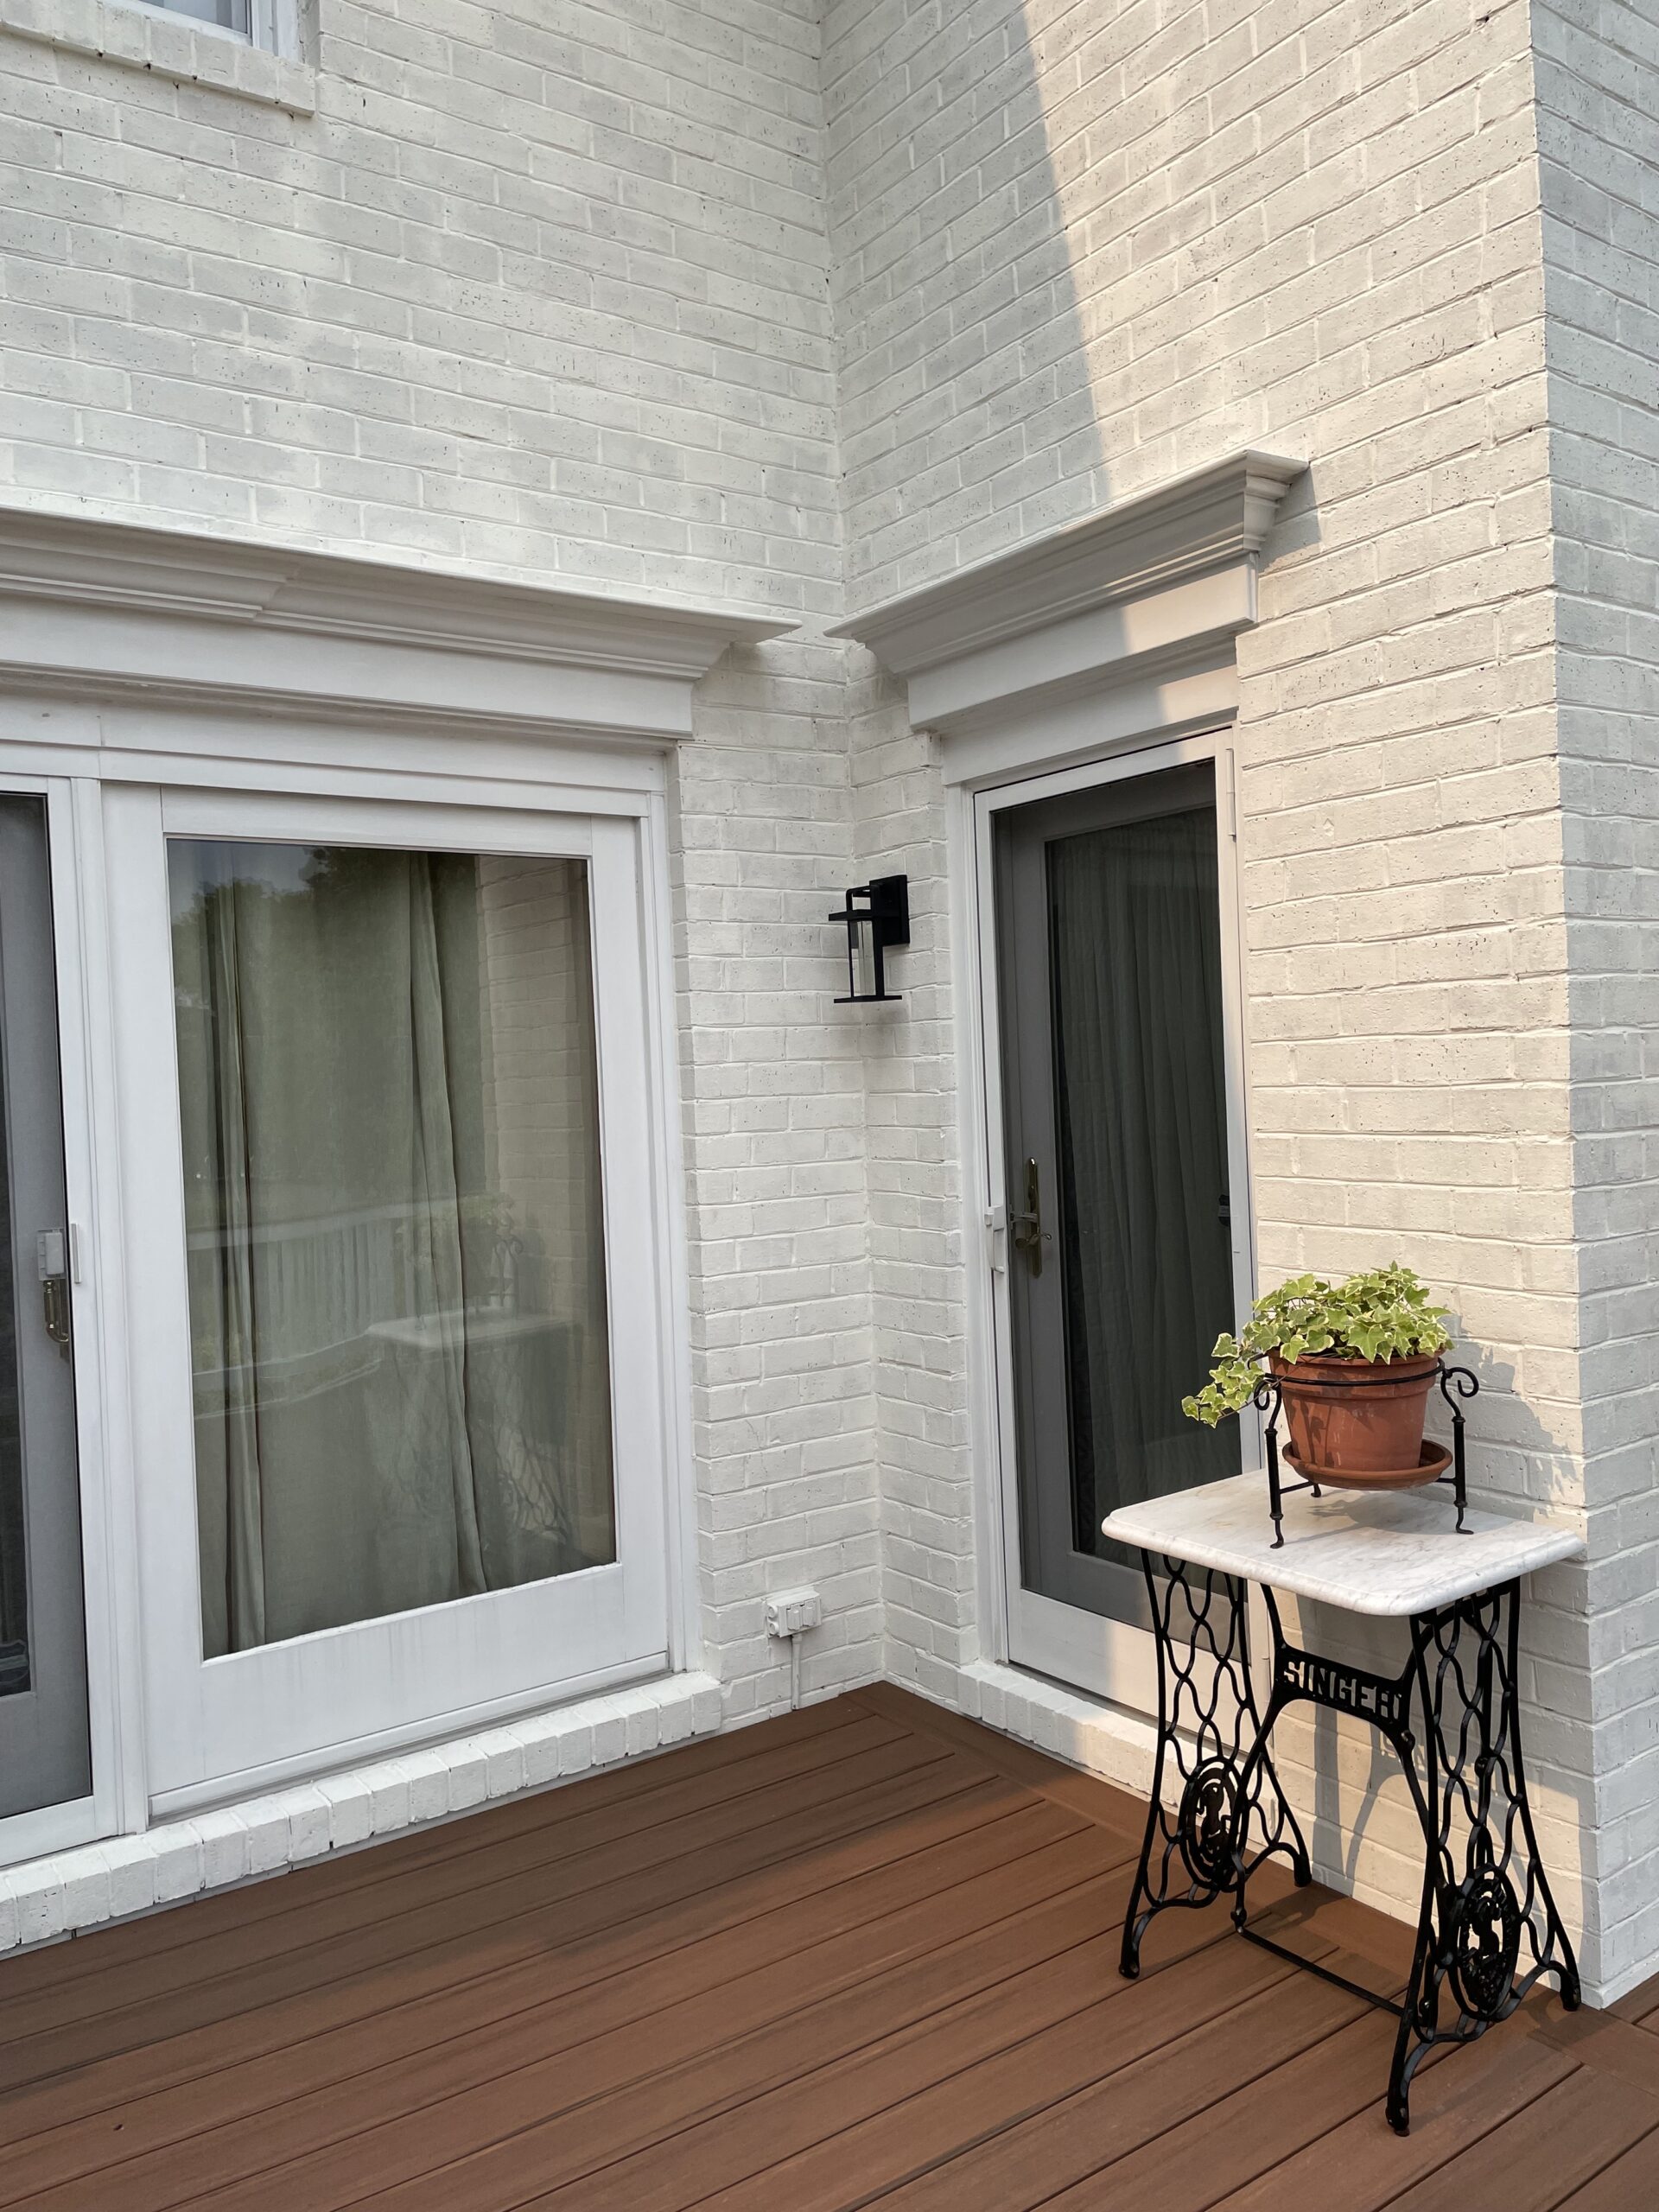
While were were at it, we also needed to deal with our deck. Until now, the deck was pressure treated wood, which I sealed each year. In the days of old, a new pressure treated deck would last a couple of decades. Although the deck here was only 13 years old, we had to replace many boards over the years due to rot, and we finally gave up on it. We chose a new product from Timbertech that is made from PVC and is warranted to last 50 years. I guess time will tell, but we are grateful not to get splinters like we had from the old decking. The joists were also replaced, and all new bracing for hurricanes underneath, so now we are good for a while! Updating the rails, which looked a bit dated before, made a big difference, and the new LED lights are our new favorites.
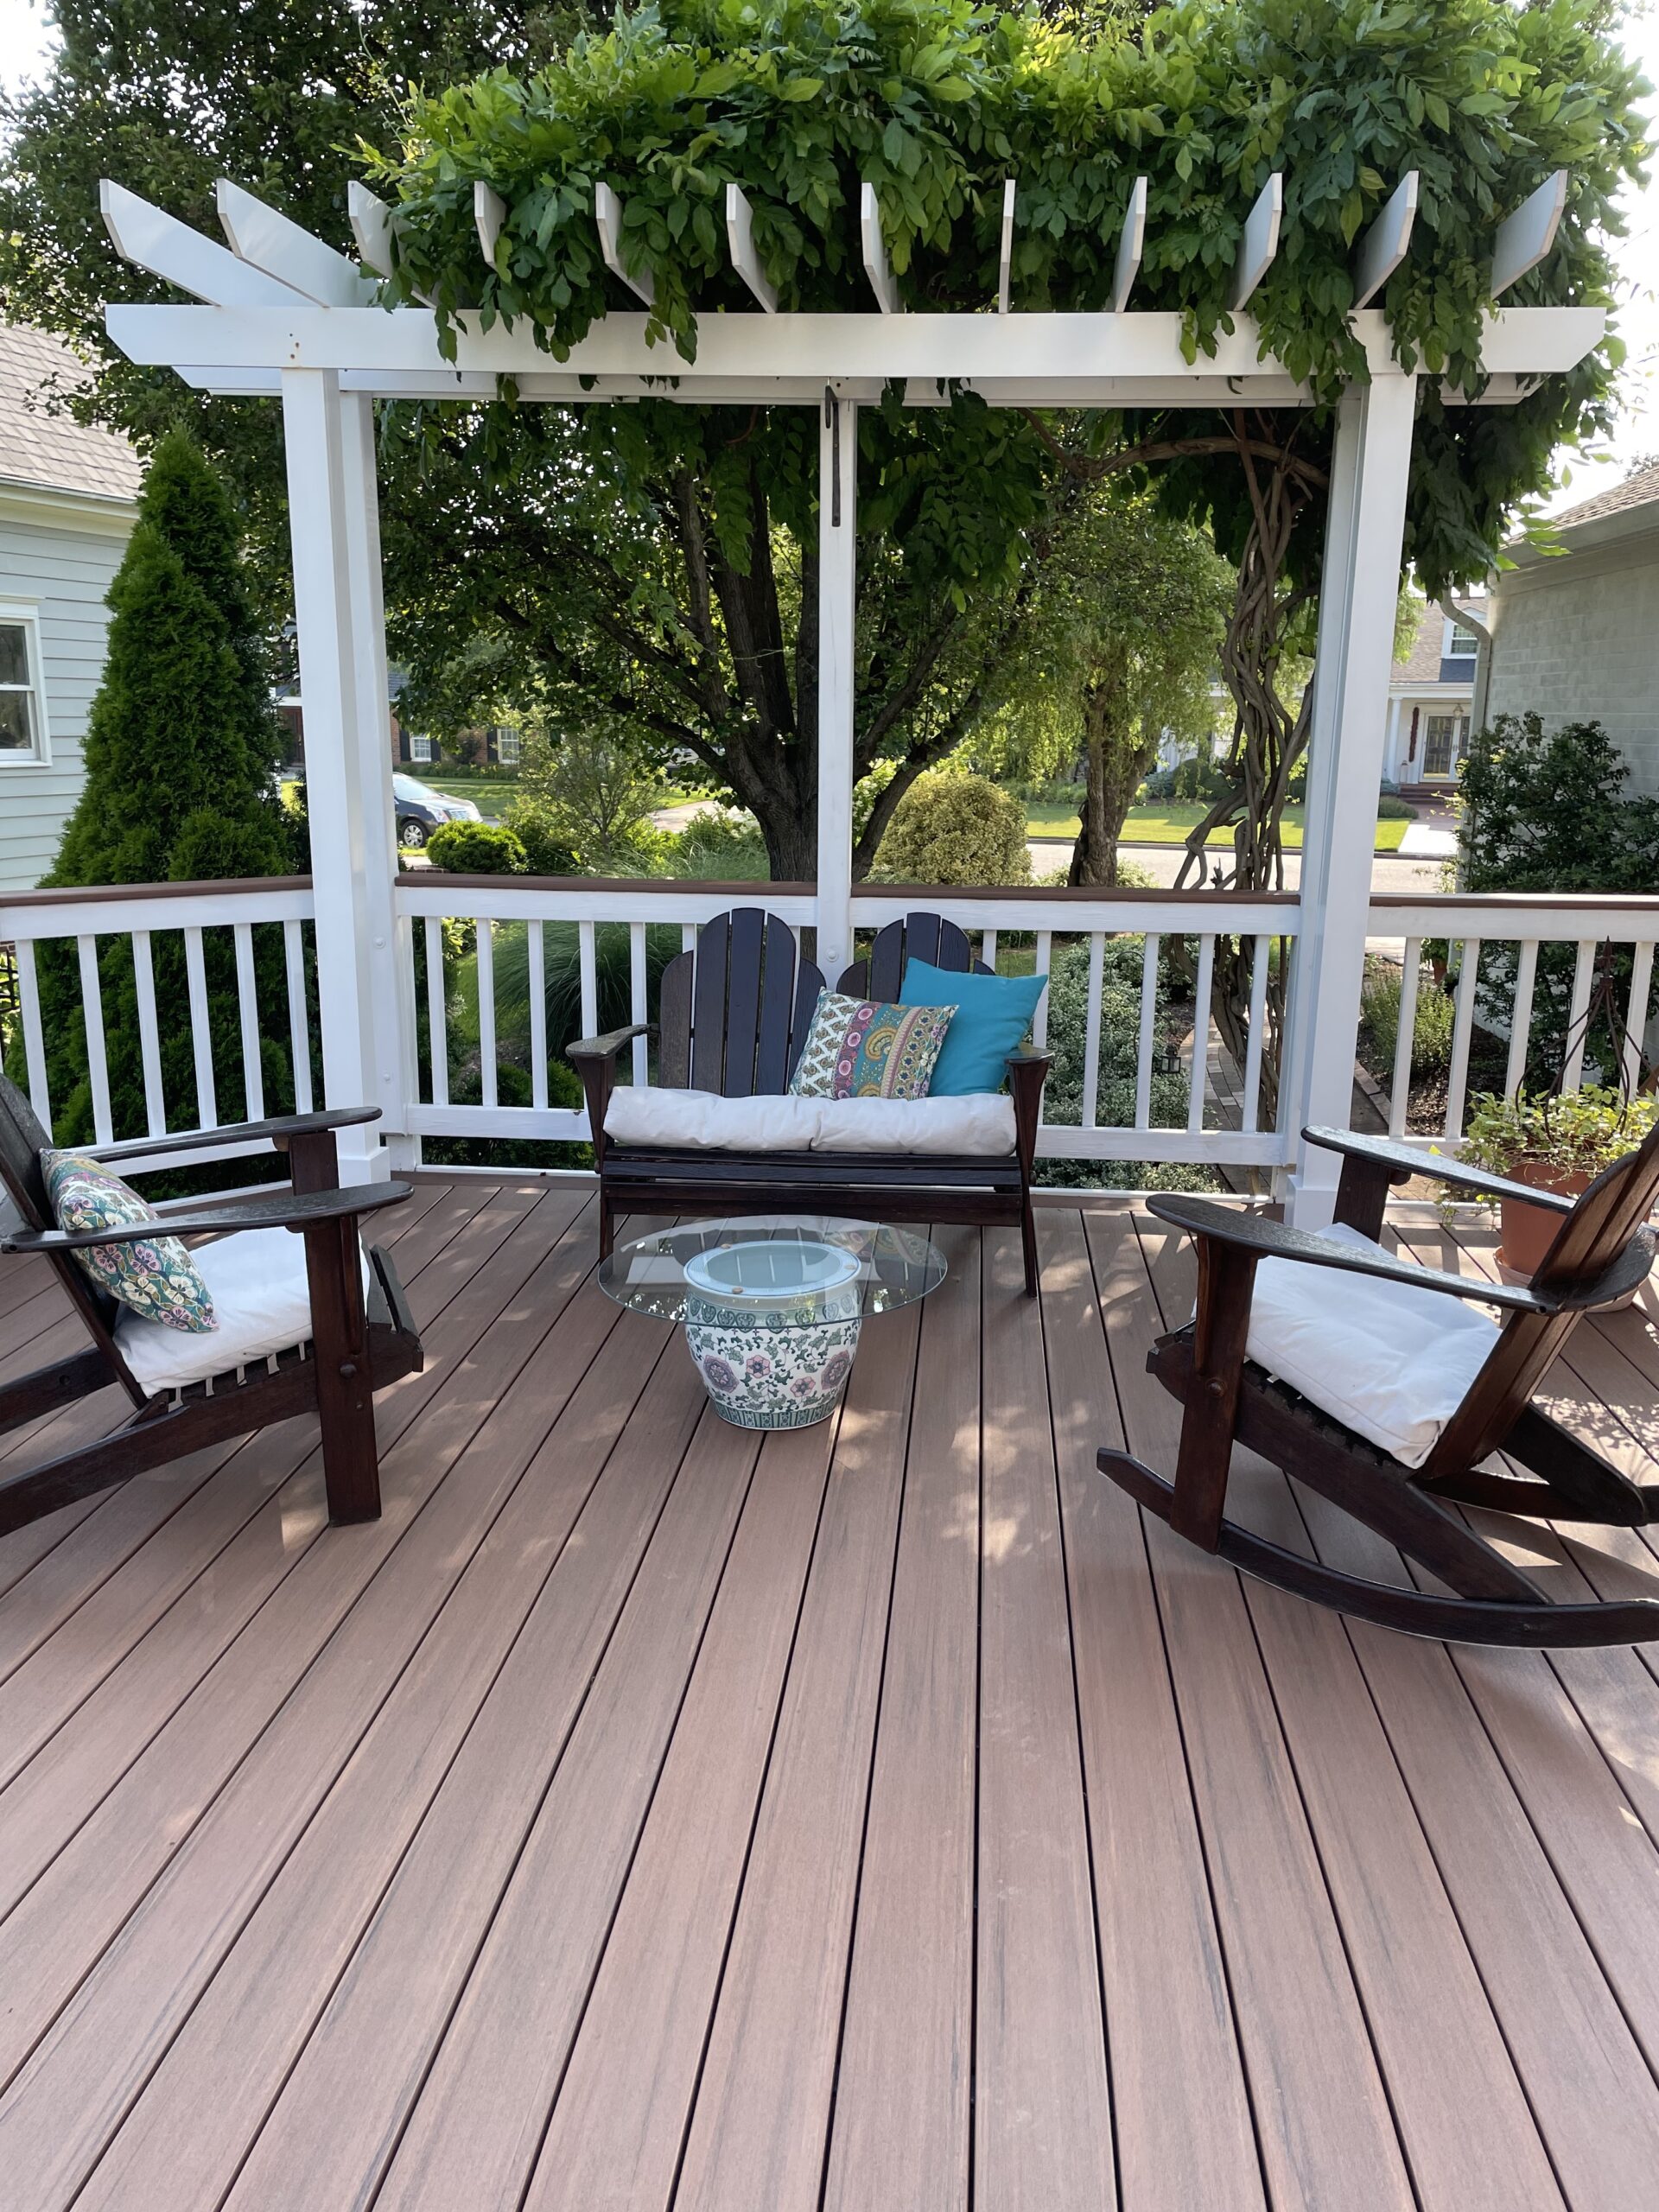
We are looking forward to enjoying the deck now, if only the heatwave would subside. At least we can look forward to doing so in the fall!
Hope you enjoyed the tour! Wishing everyone a happy and safe summer. Until next time!
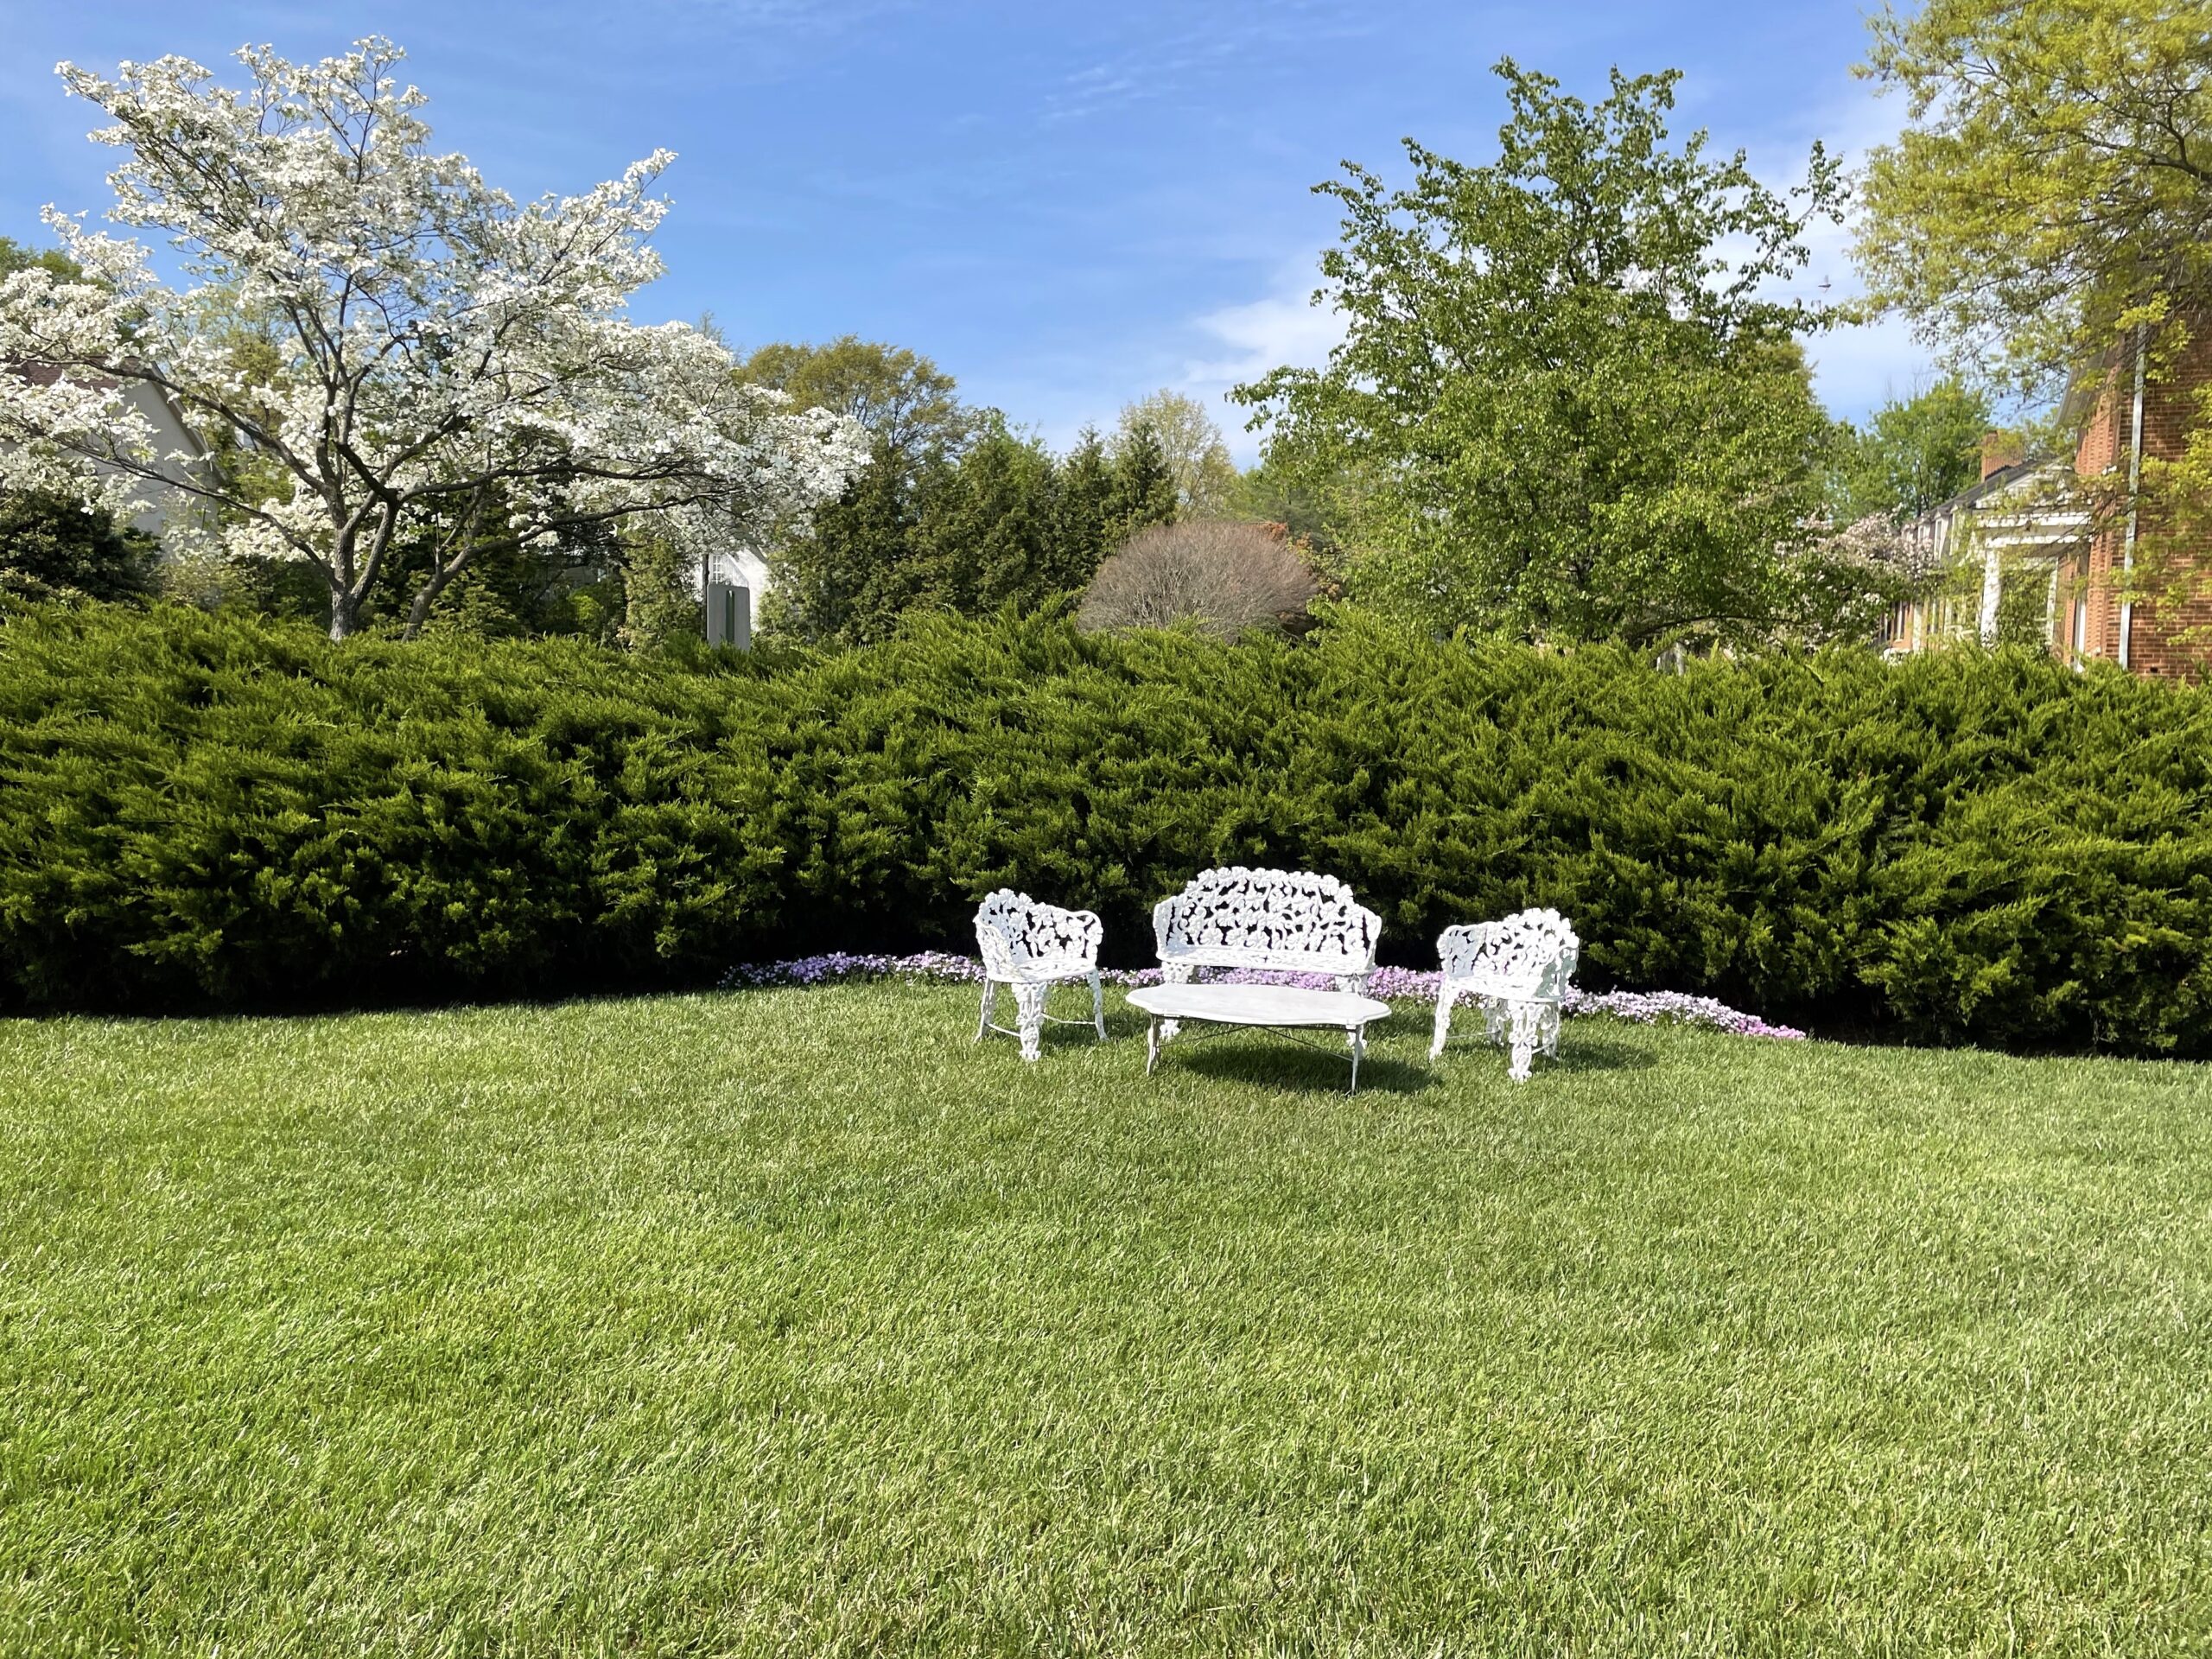
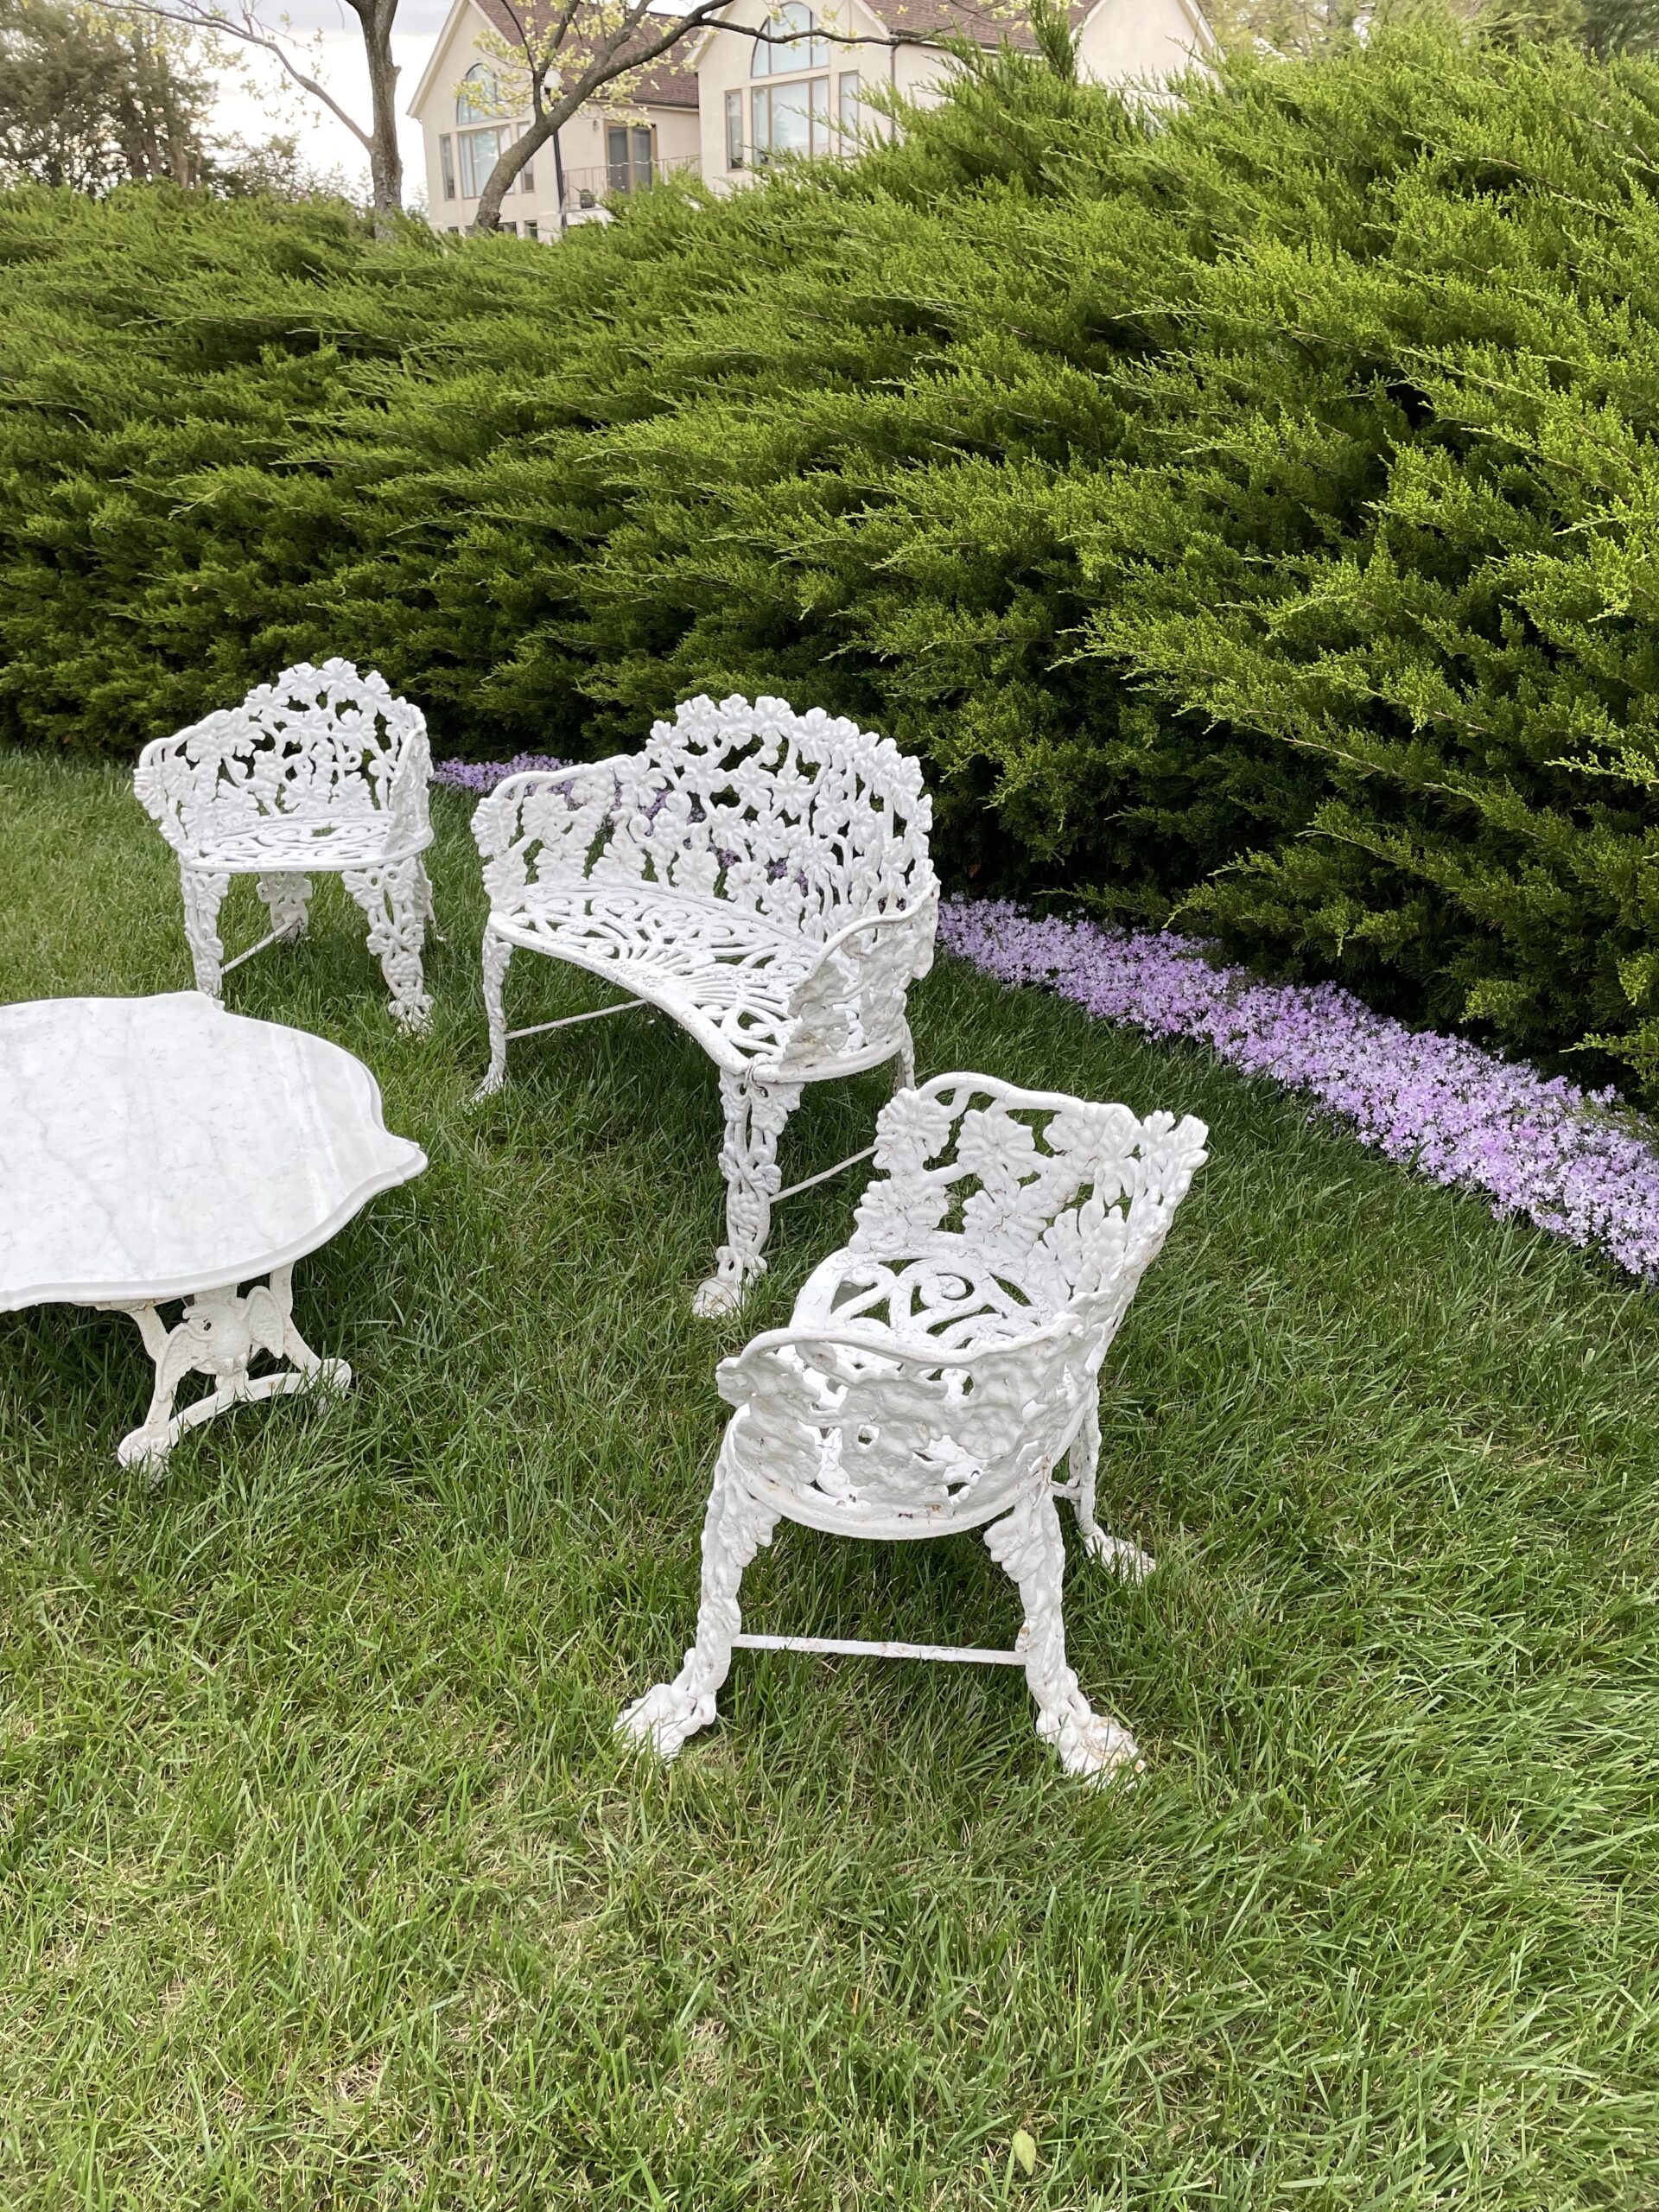
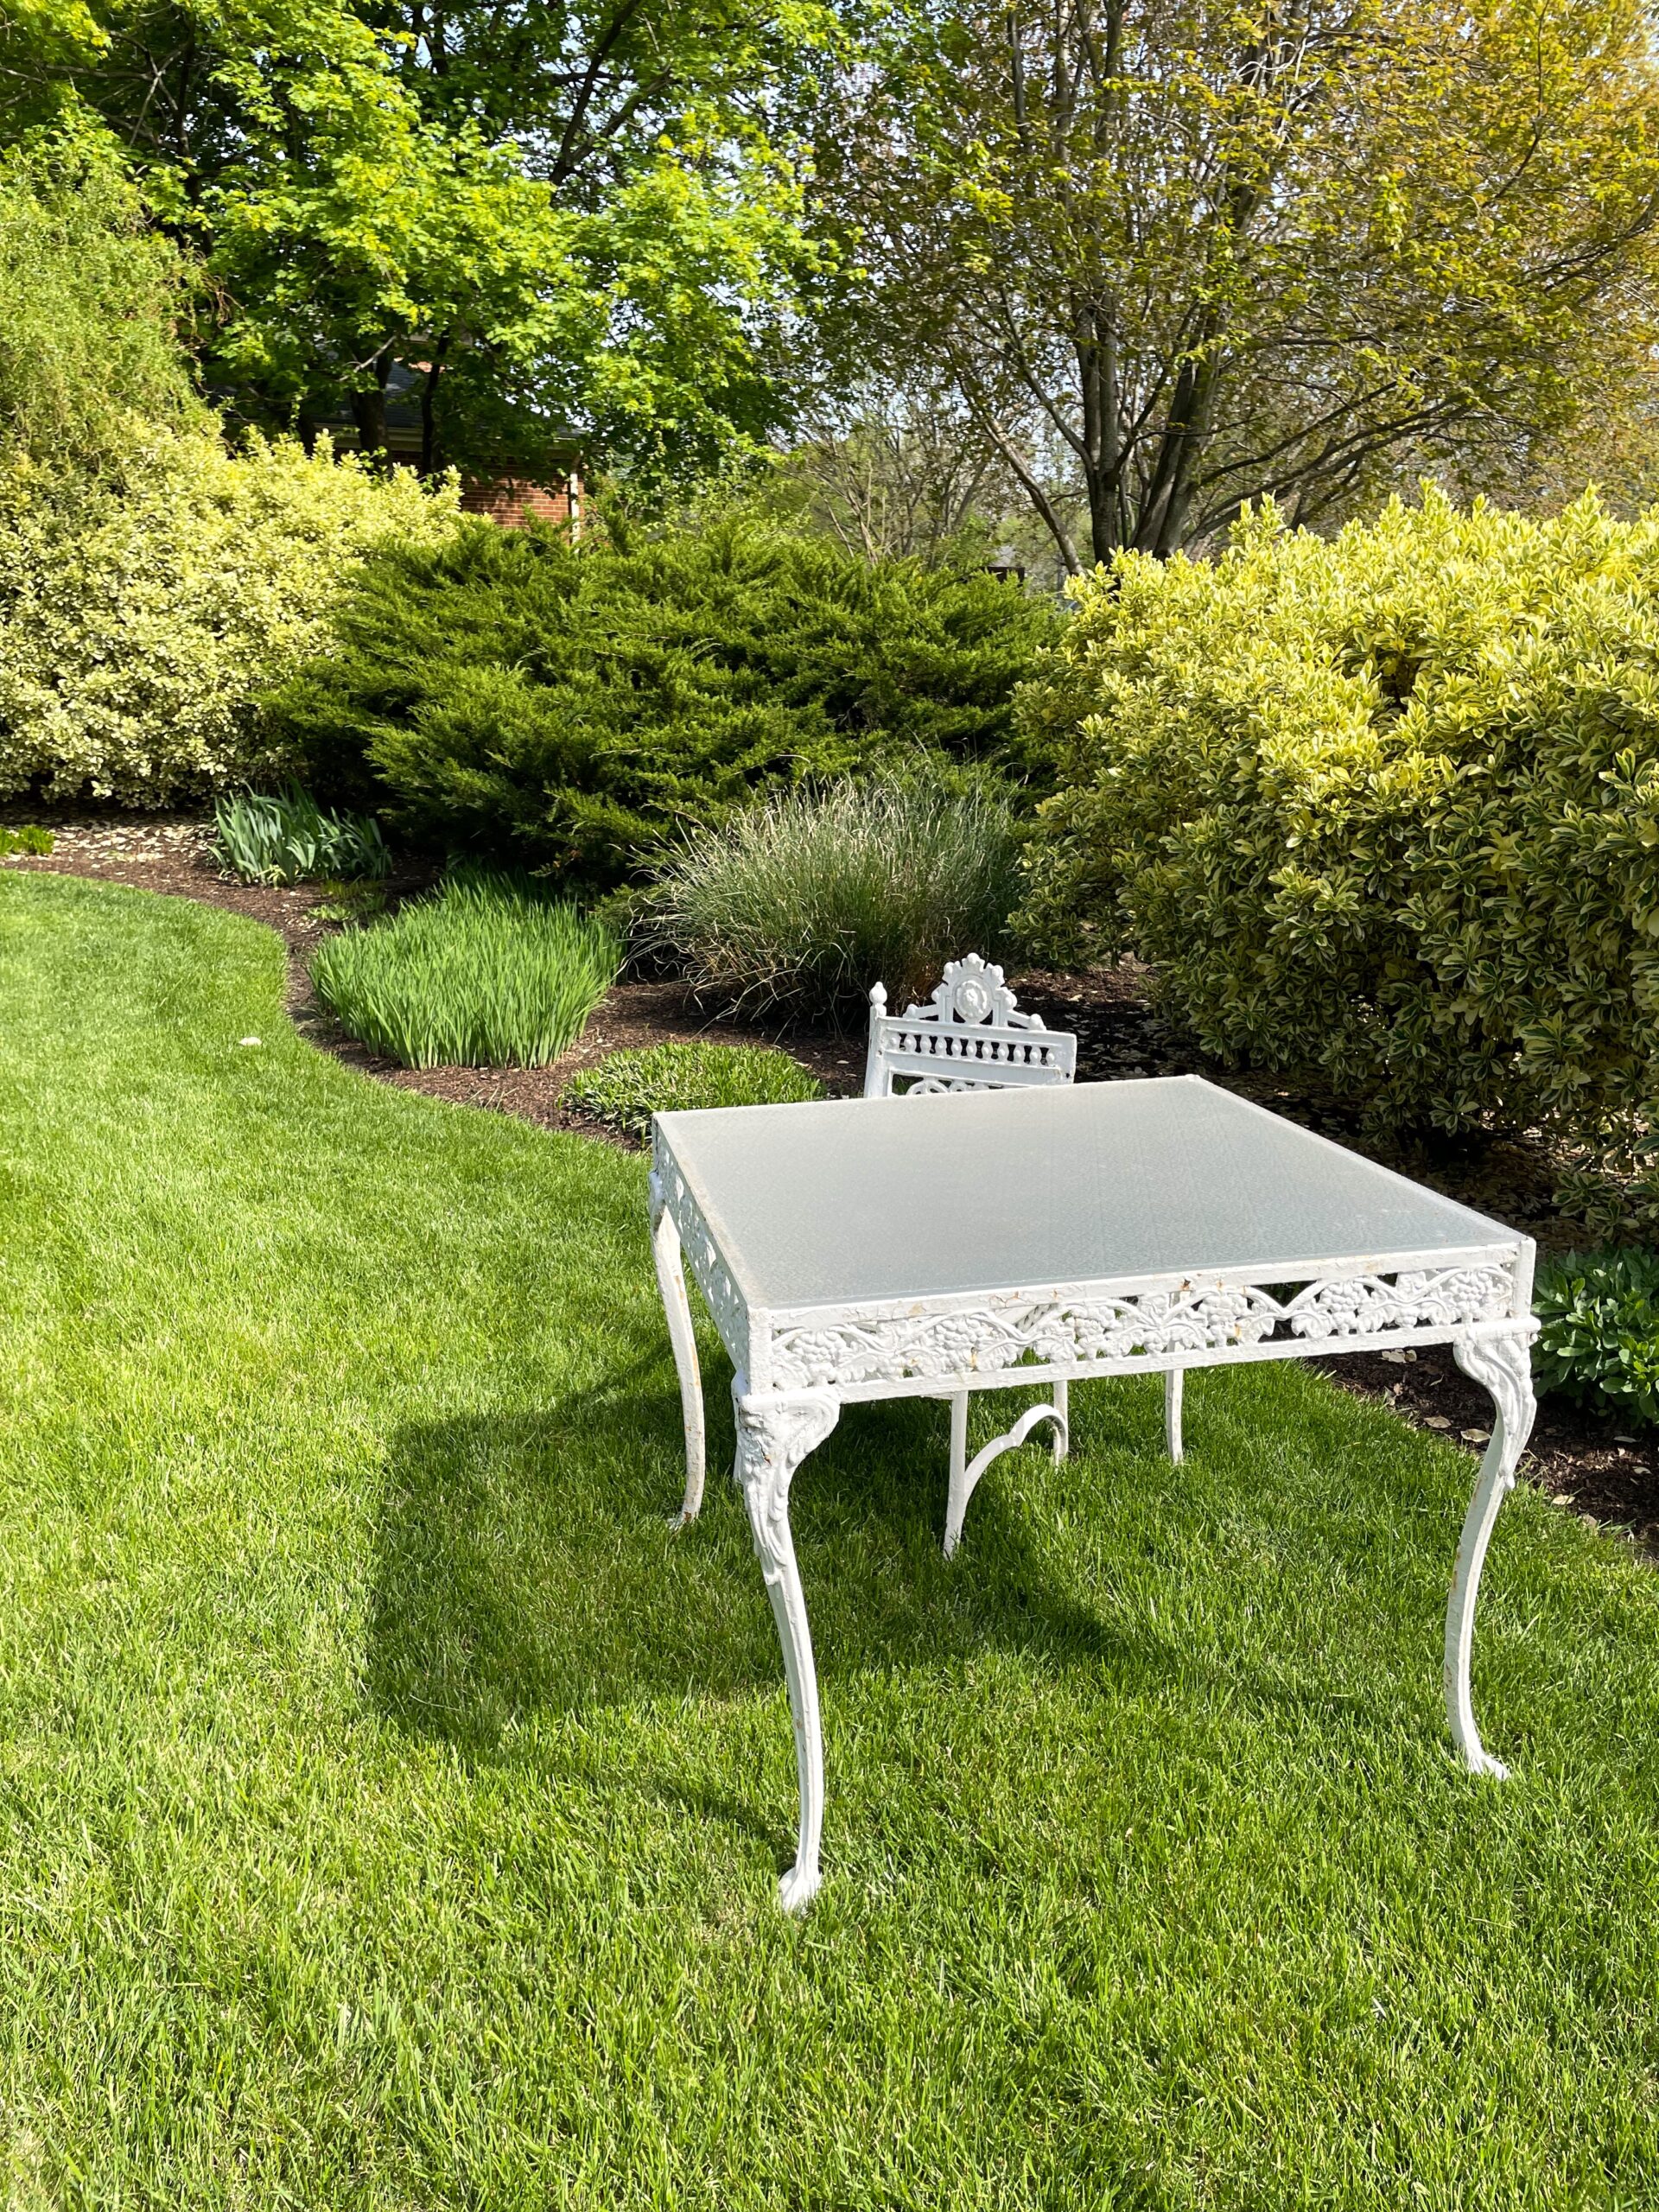
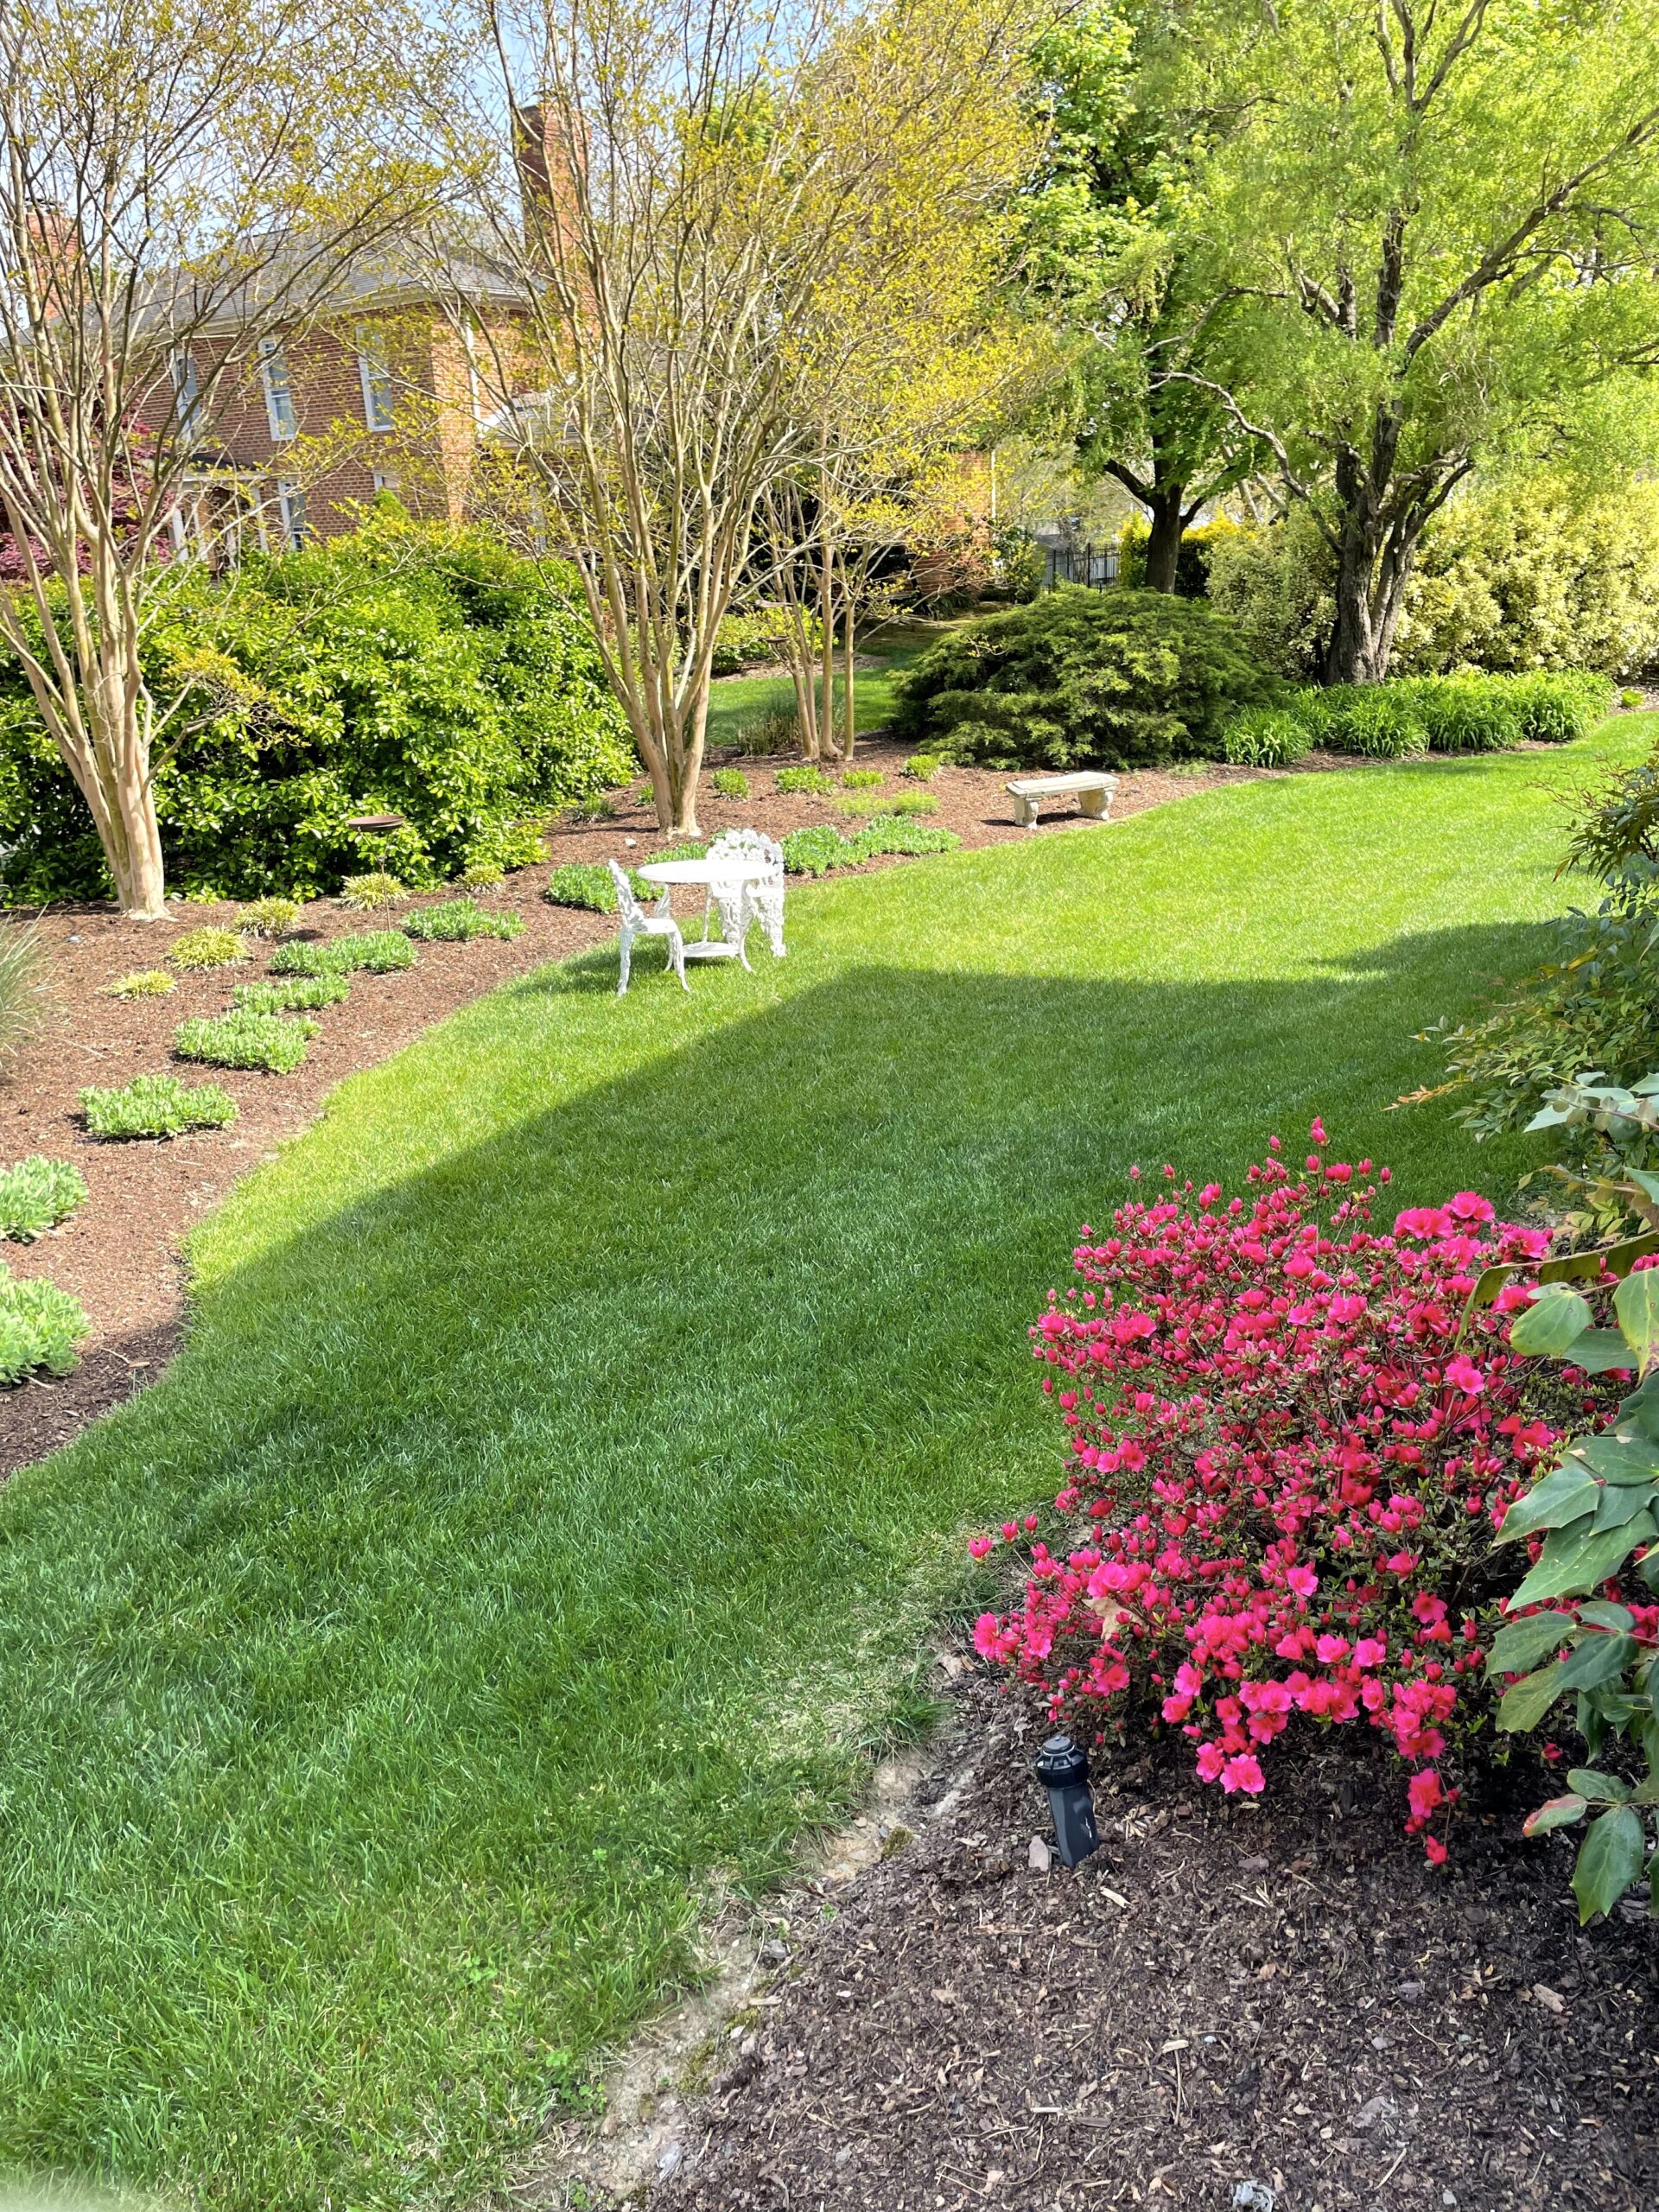
Hi friends! 2022 springtime is at full tilt here in our garden. It’s been a long time since my last blog, and much has changed. We lost my sweet 100 year old Mother-in-law last October, and it has been a difficult six months. To honor our dear Mom, we are using her beautiful antique iron outdoor furniture here in our garden. I think it makes the whole garden look inviting, and creates destinations in each of the prime areas in the yard. I can’t think of a more earth friendly way of recycling than to reuse lovely, old pieces, and to honor the fabulous lady from which they came. I will give you the tour, enjoy!

Hi everyone! We had an unbelievable amount of rain here this year, almost double our annual rainfall total. The air feels like a sauna even in October. It’s been hard to spend more than a few hours outside at a time in the heat and humidity — but you know I can’t stay inside, and there’s work to be done!
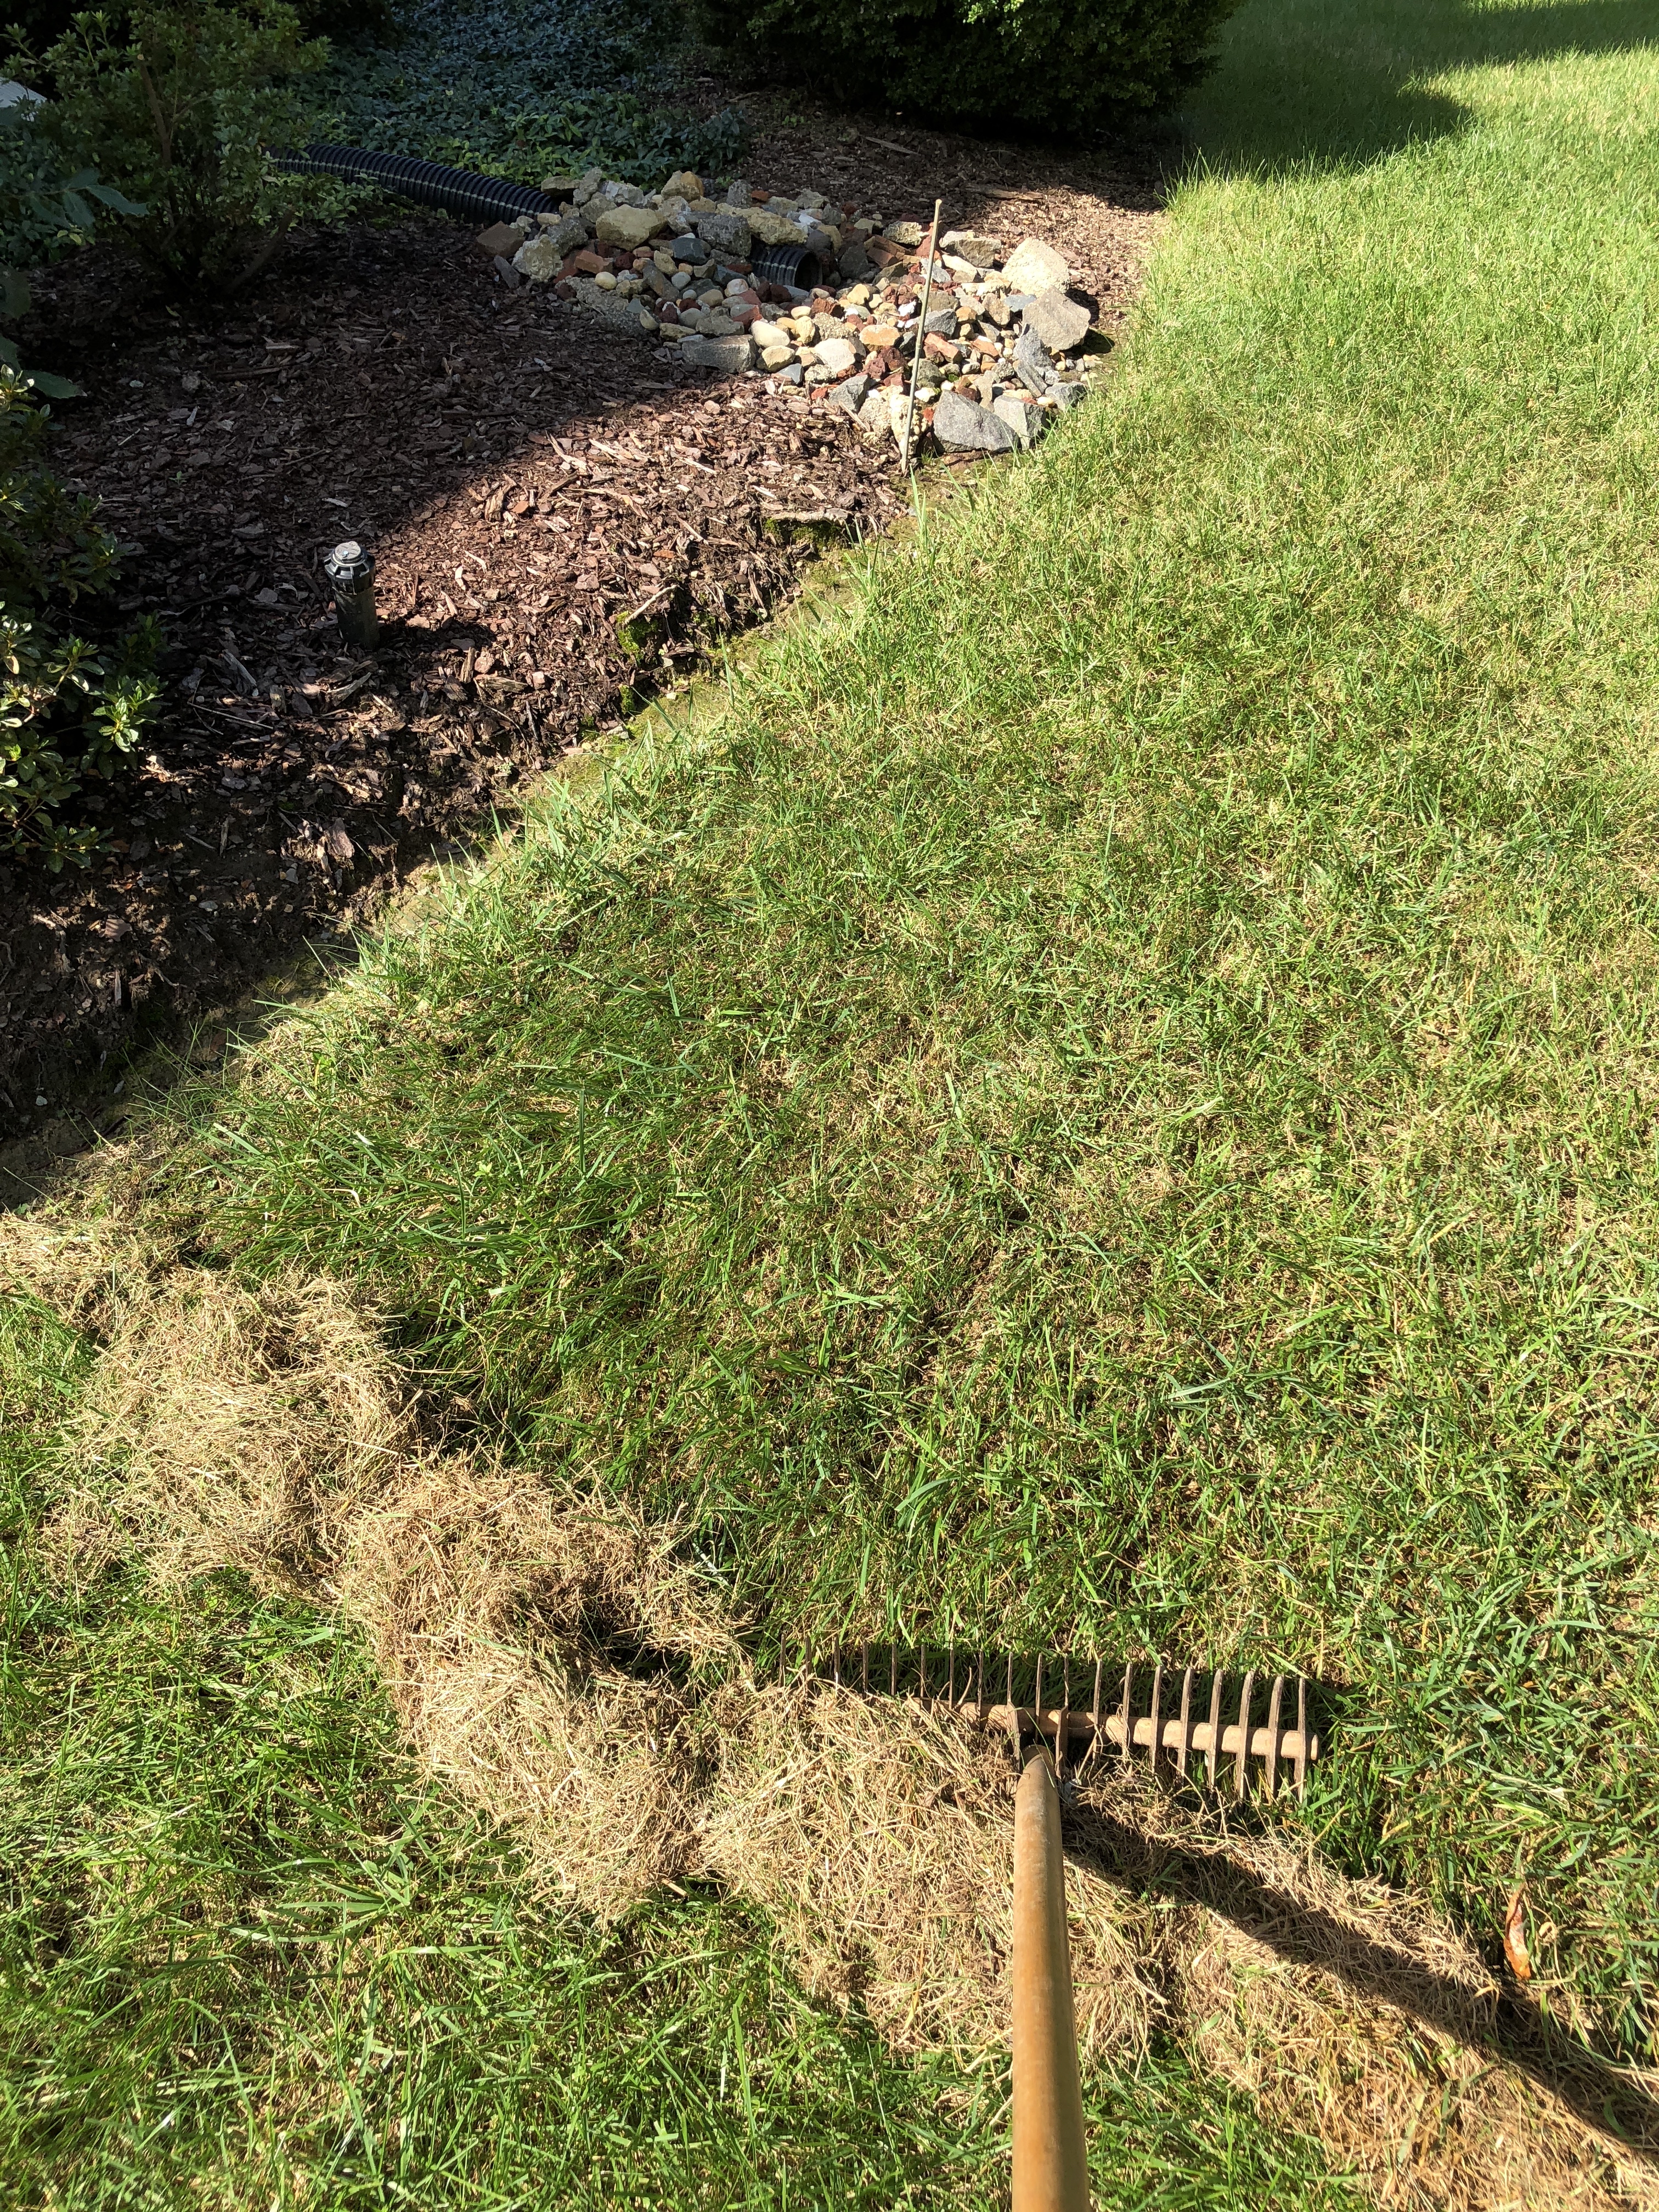
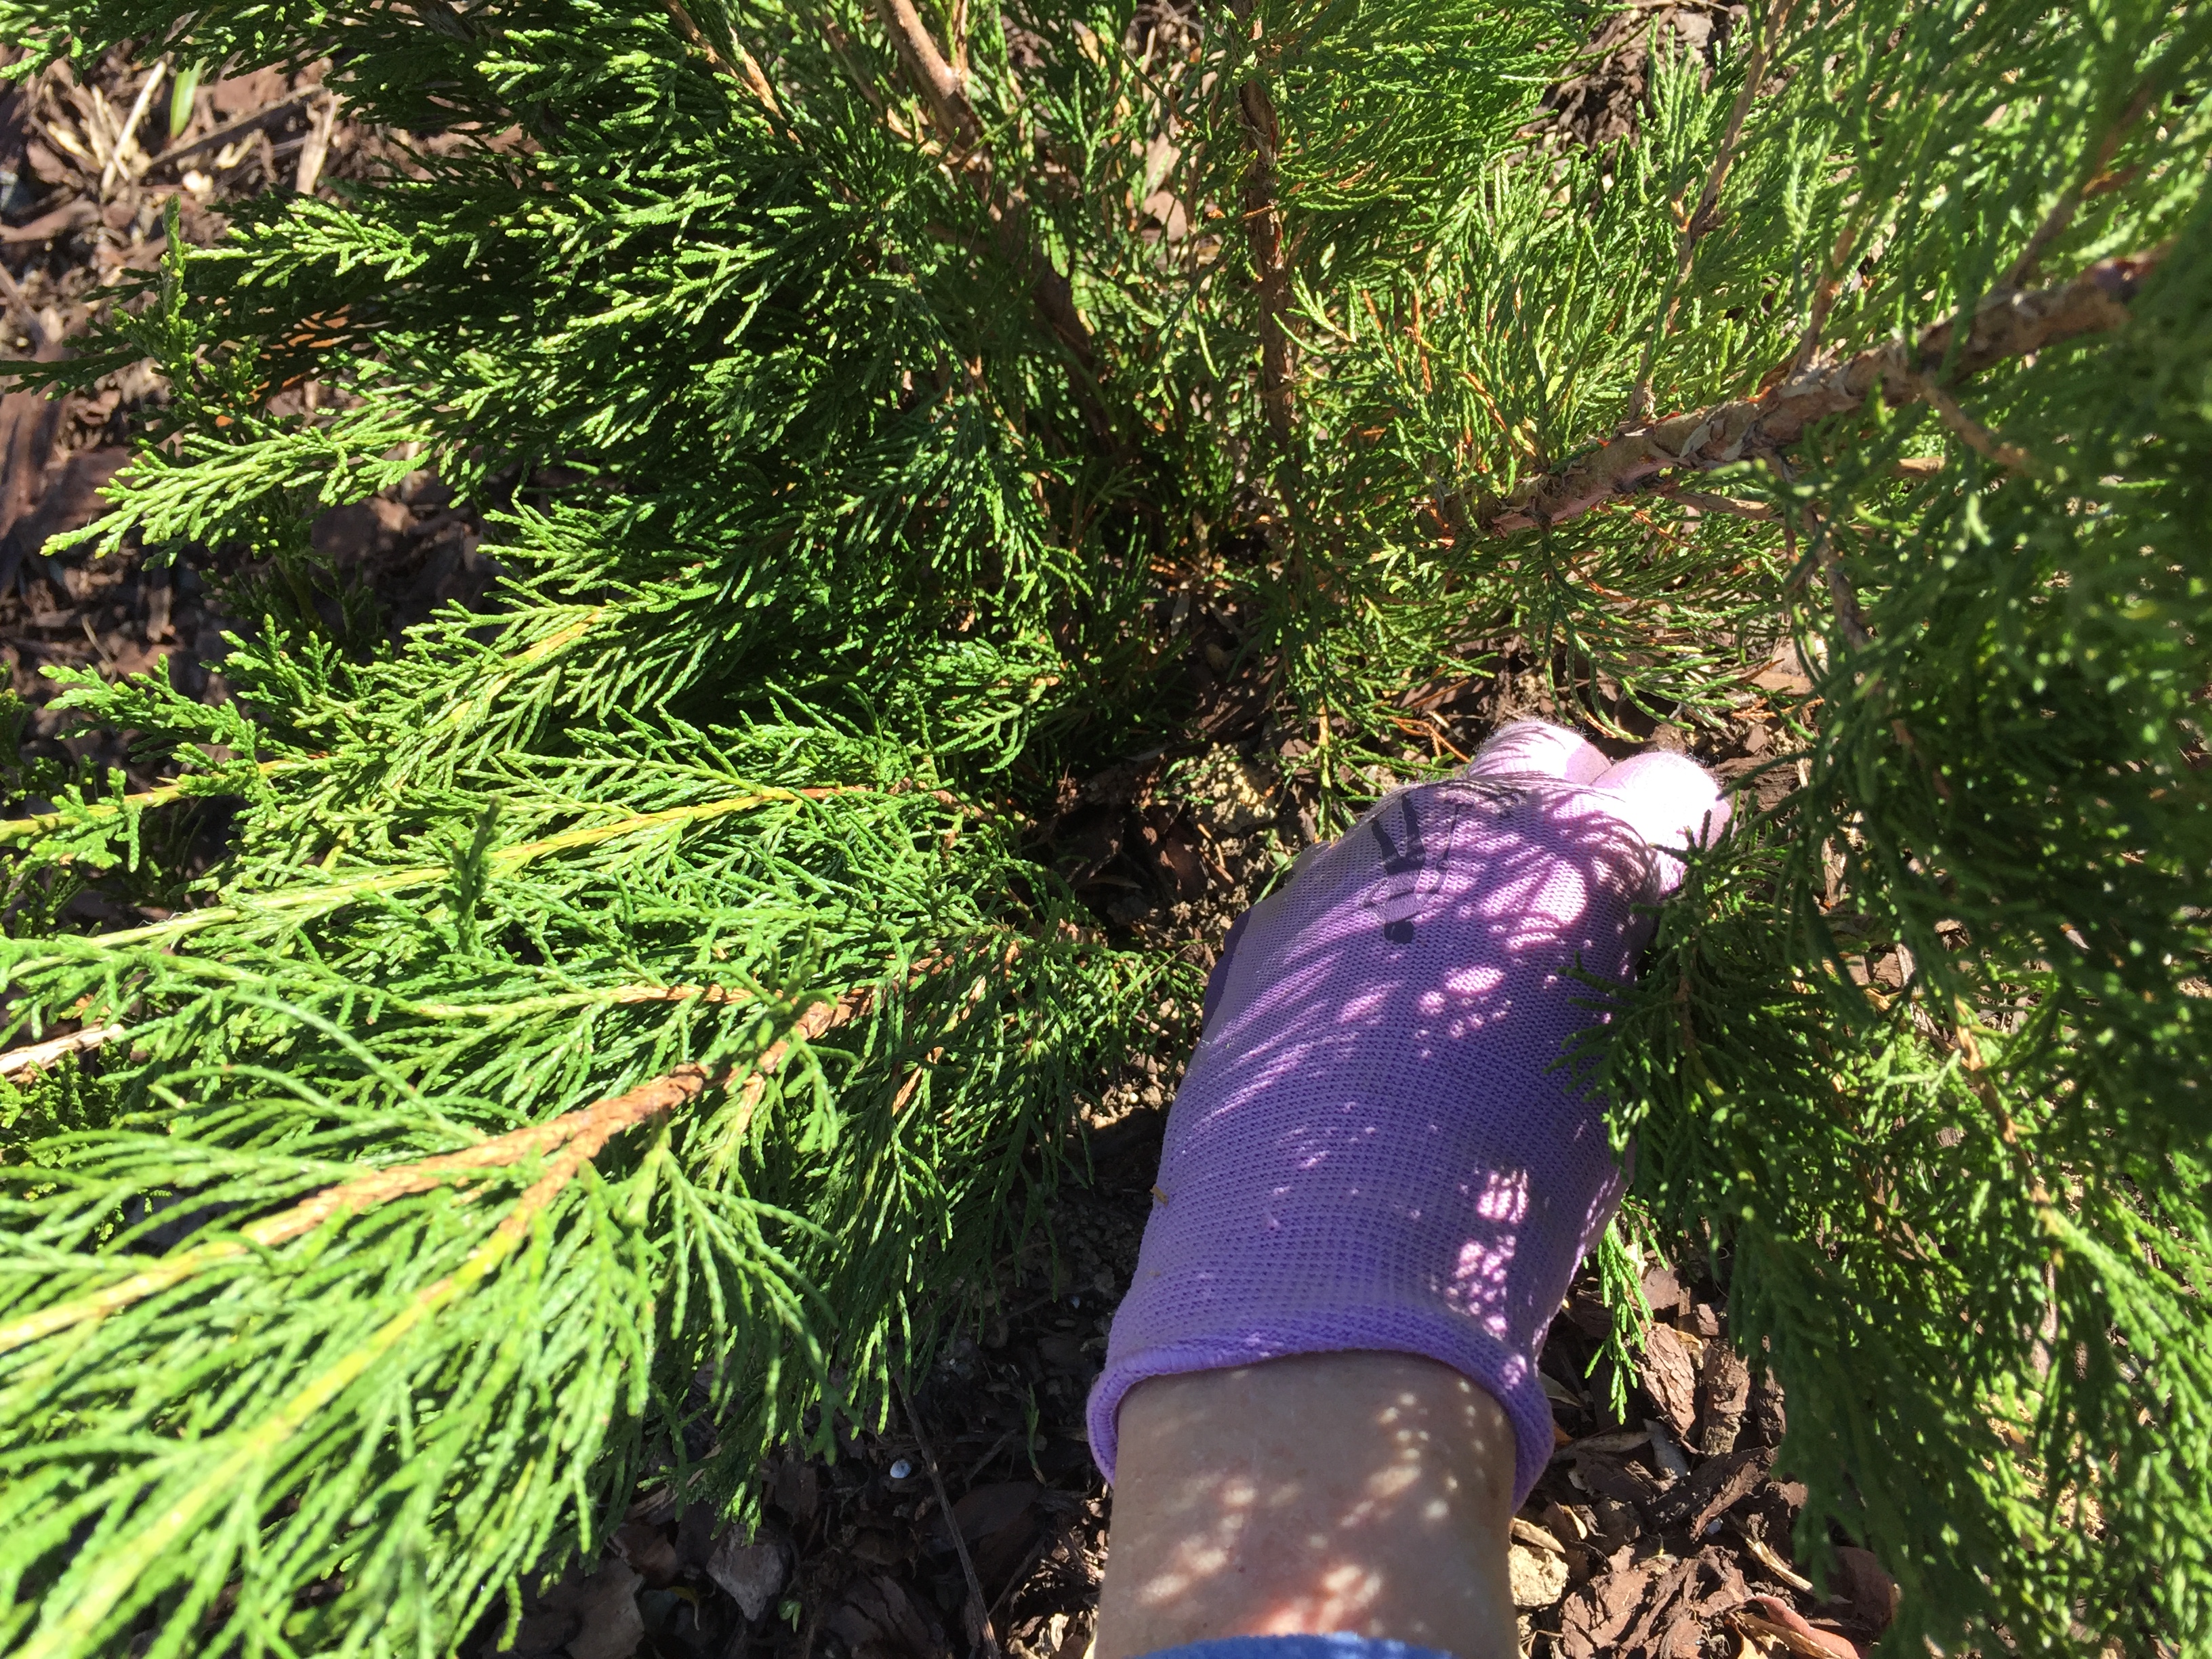
This type of steel rake is my favorite choice for de-thatching and preparing the soil for overseeding. Just look how much debris it removes!
My priority now is renovating the lawn. Normally, I would finish this completely in September, but the weather has put me behind schedule. To do this right, I started by weeding the entire lawn by hand, as opposed to using an herbicide. When planning to overseed, one needs to make sure not to have any chemicals on the lawn which could interfere with the new seed sprouting.
I am using a specialized steel rake to get every bit of thatch out of the lawn — a tool I inherited from my grandfather. This is THE most grueling step. After de-thatching two-thirds of the lawn, I have collected more than a dozen full bags of debris (don’t worry — you know it’s going to the compost heap). I’m impressed with how effectively this steel rake pulls out the thatch — and it loosens the surface, which makes for great new seed contact into the top soil.
Everyone who walks by while I’m working asks me why I don’t just use a machine for this, but if you saw how much better this works you’d know why!
This is what those plugging machines do. They really don’t get any thatch up, and compared to my steel rake — well, there is no comparison, not to mention that the plugs of soil the machines leaves behind look like, um, something else we don’t really want to see…
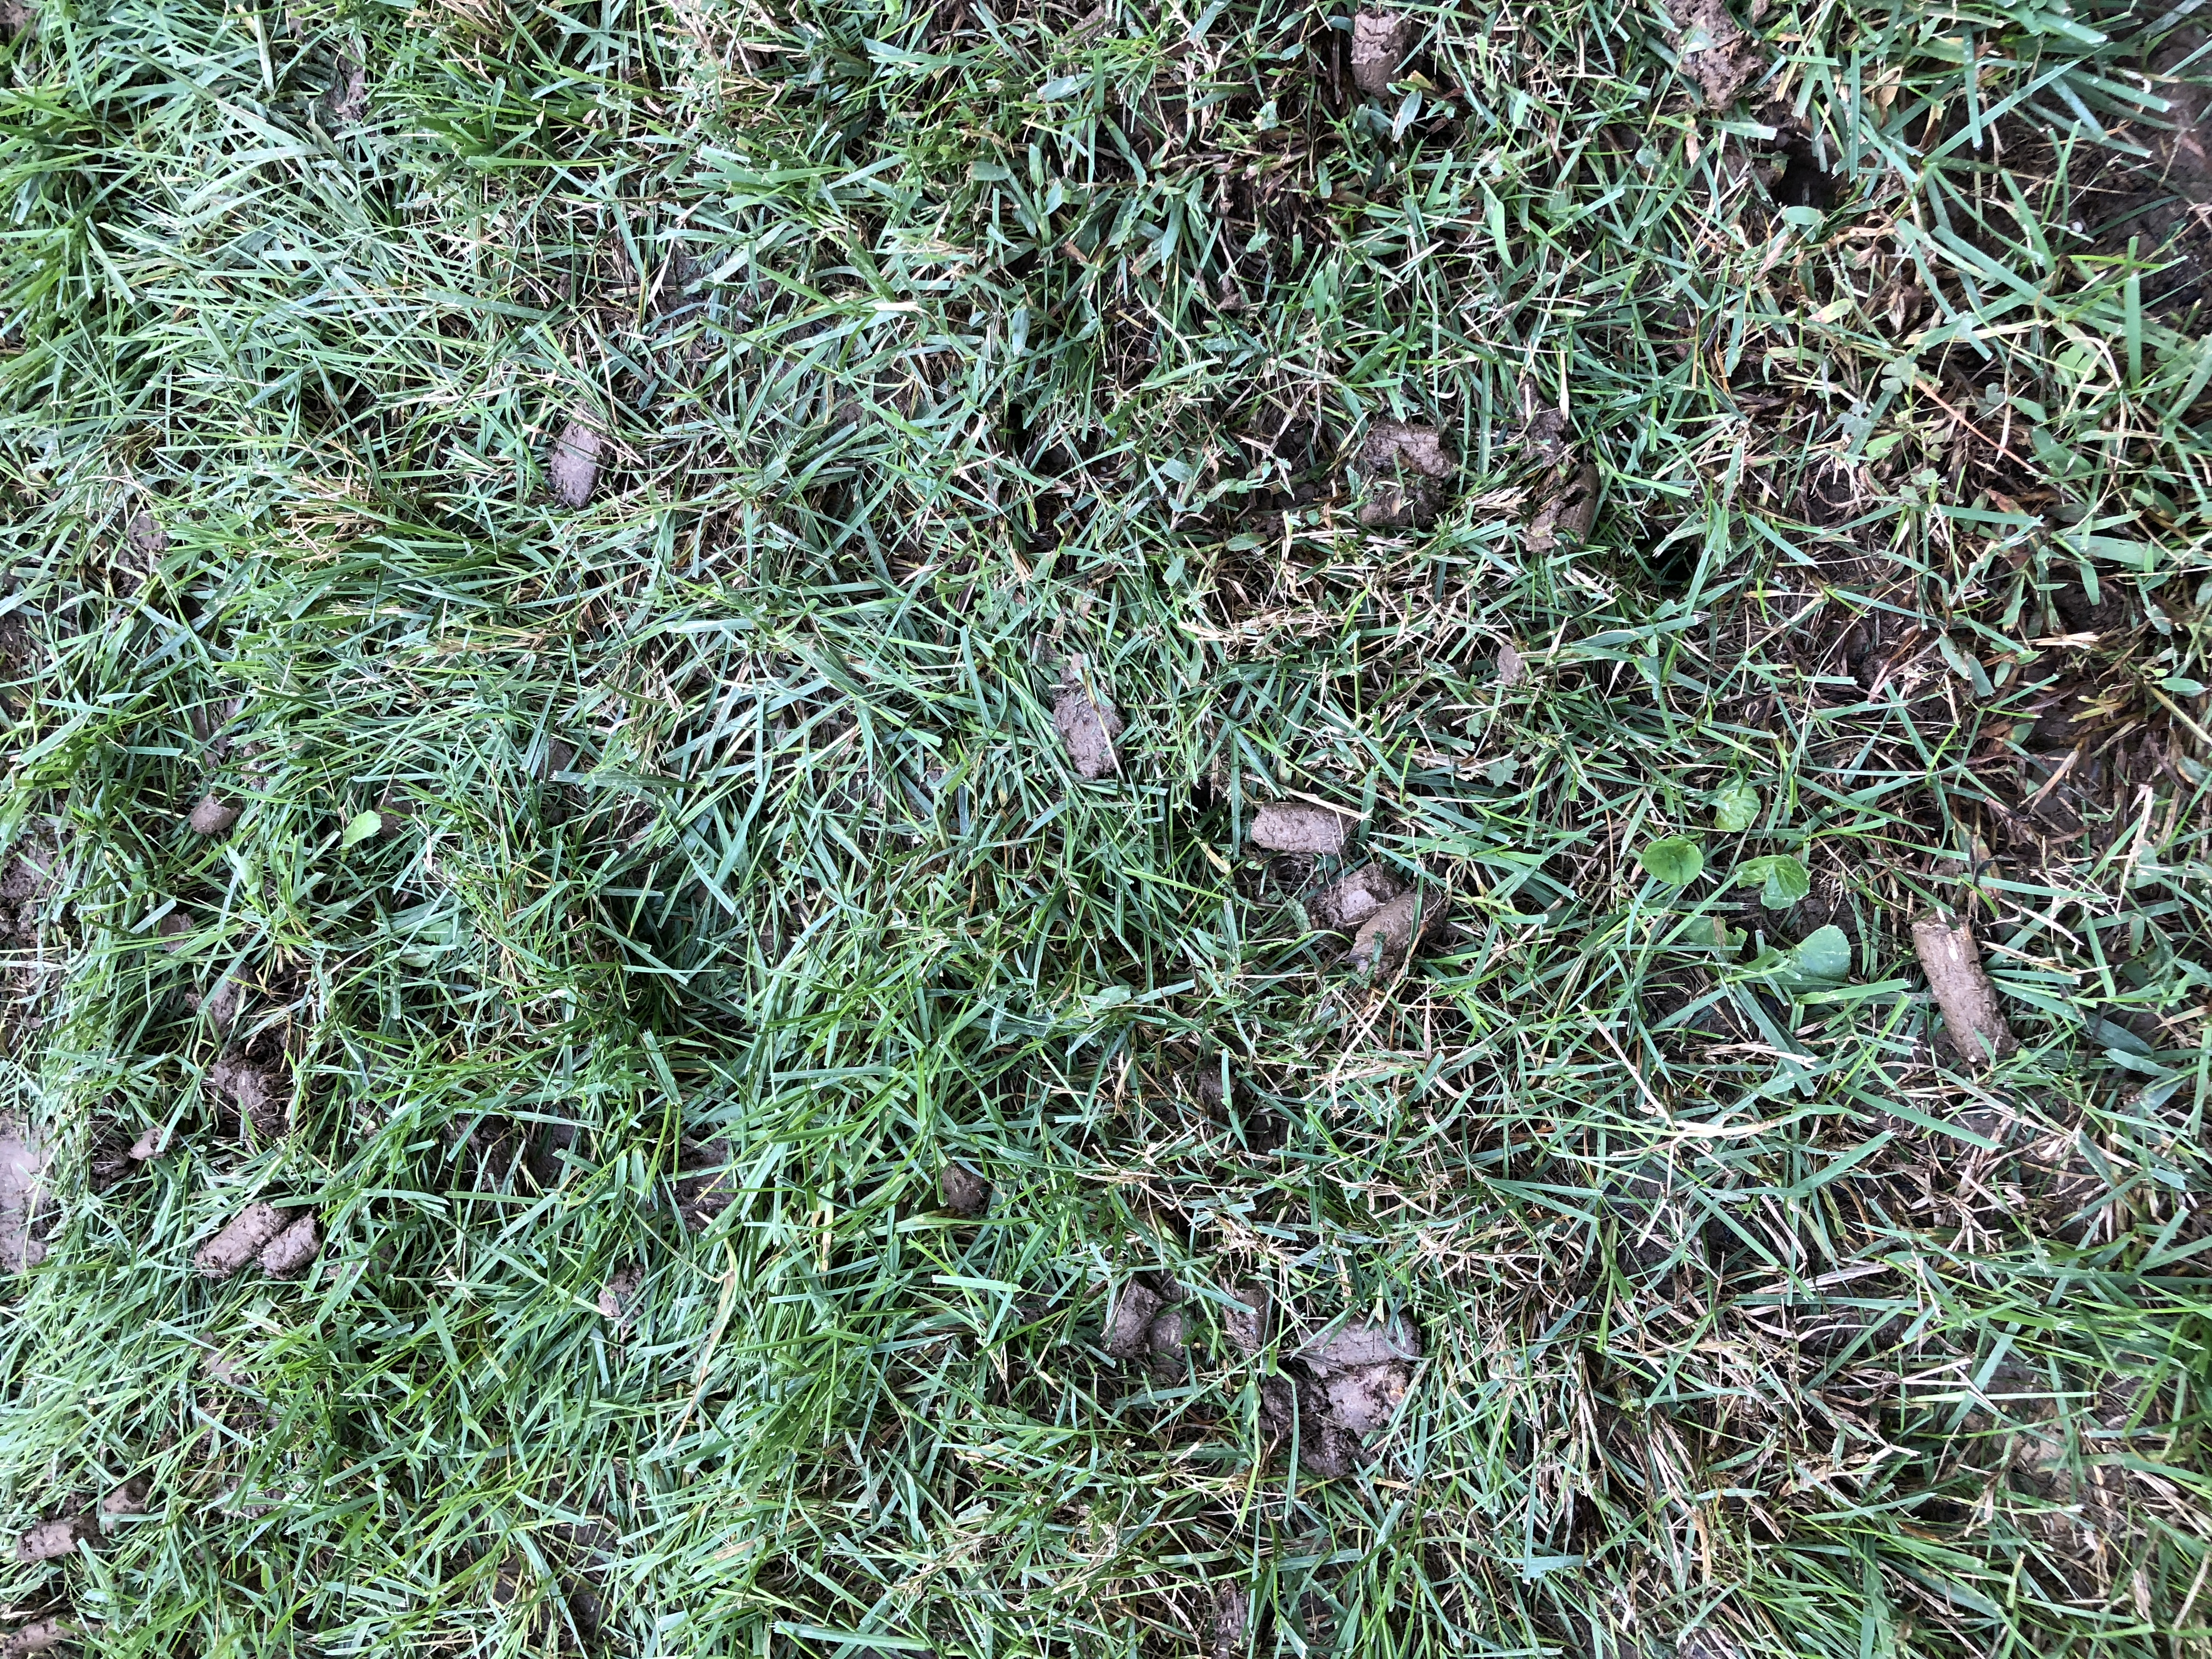
I bought a premium seed that has a variety of grass types: some that sprout within a week to stabilize the bare spots, and additional varieties that will be sprouting over the next few. This mix also had a seed-starting fertilizer mixed in, but if the variety you purchase doesn’t have this, I’d recommend using some.
Keeping things moist while the seeds are doing their magic is key, but with all the rain we’ve had, I’ve only had to water the new seed a few times.
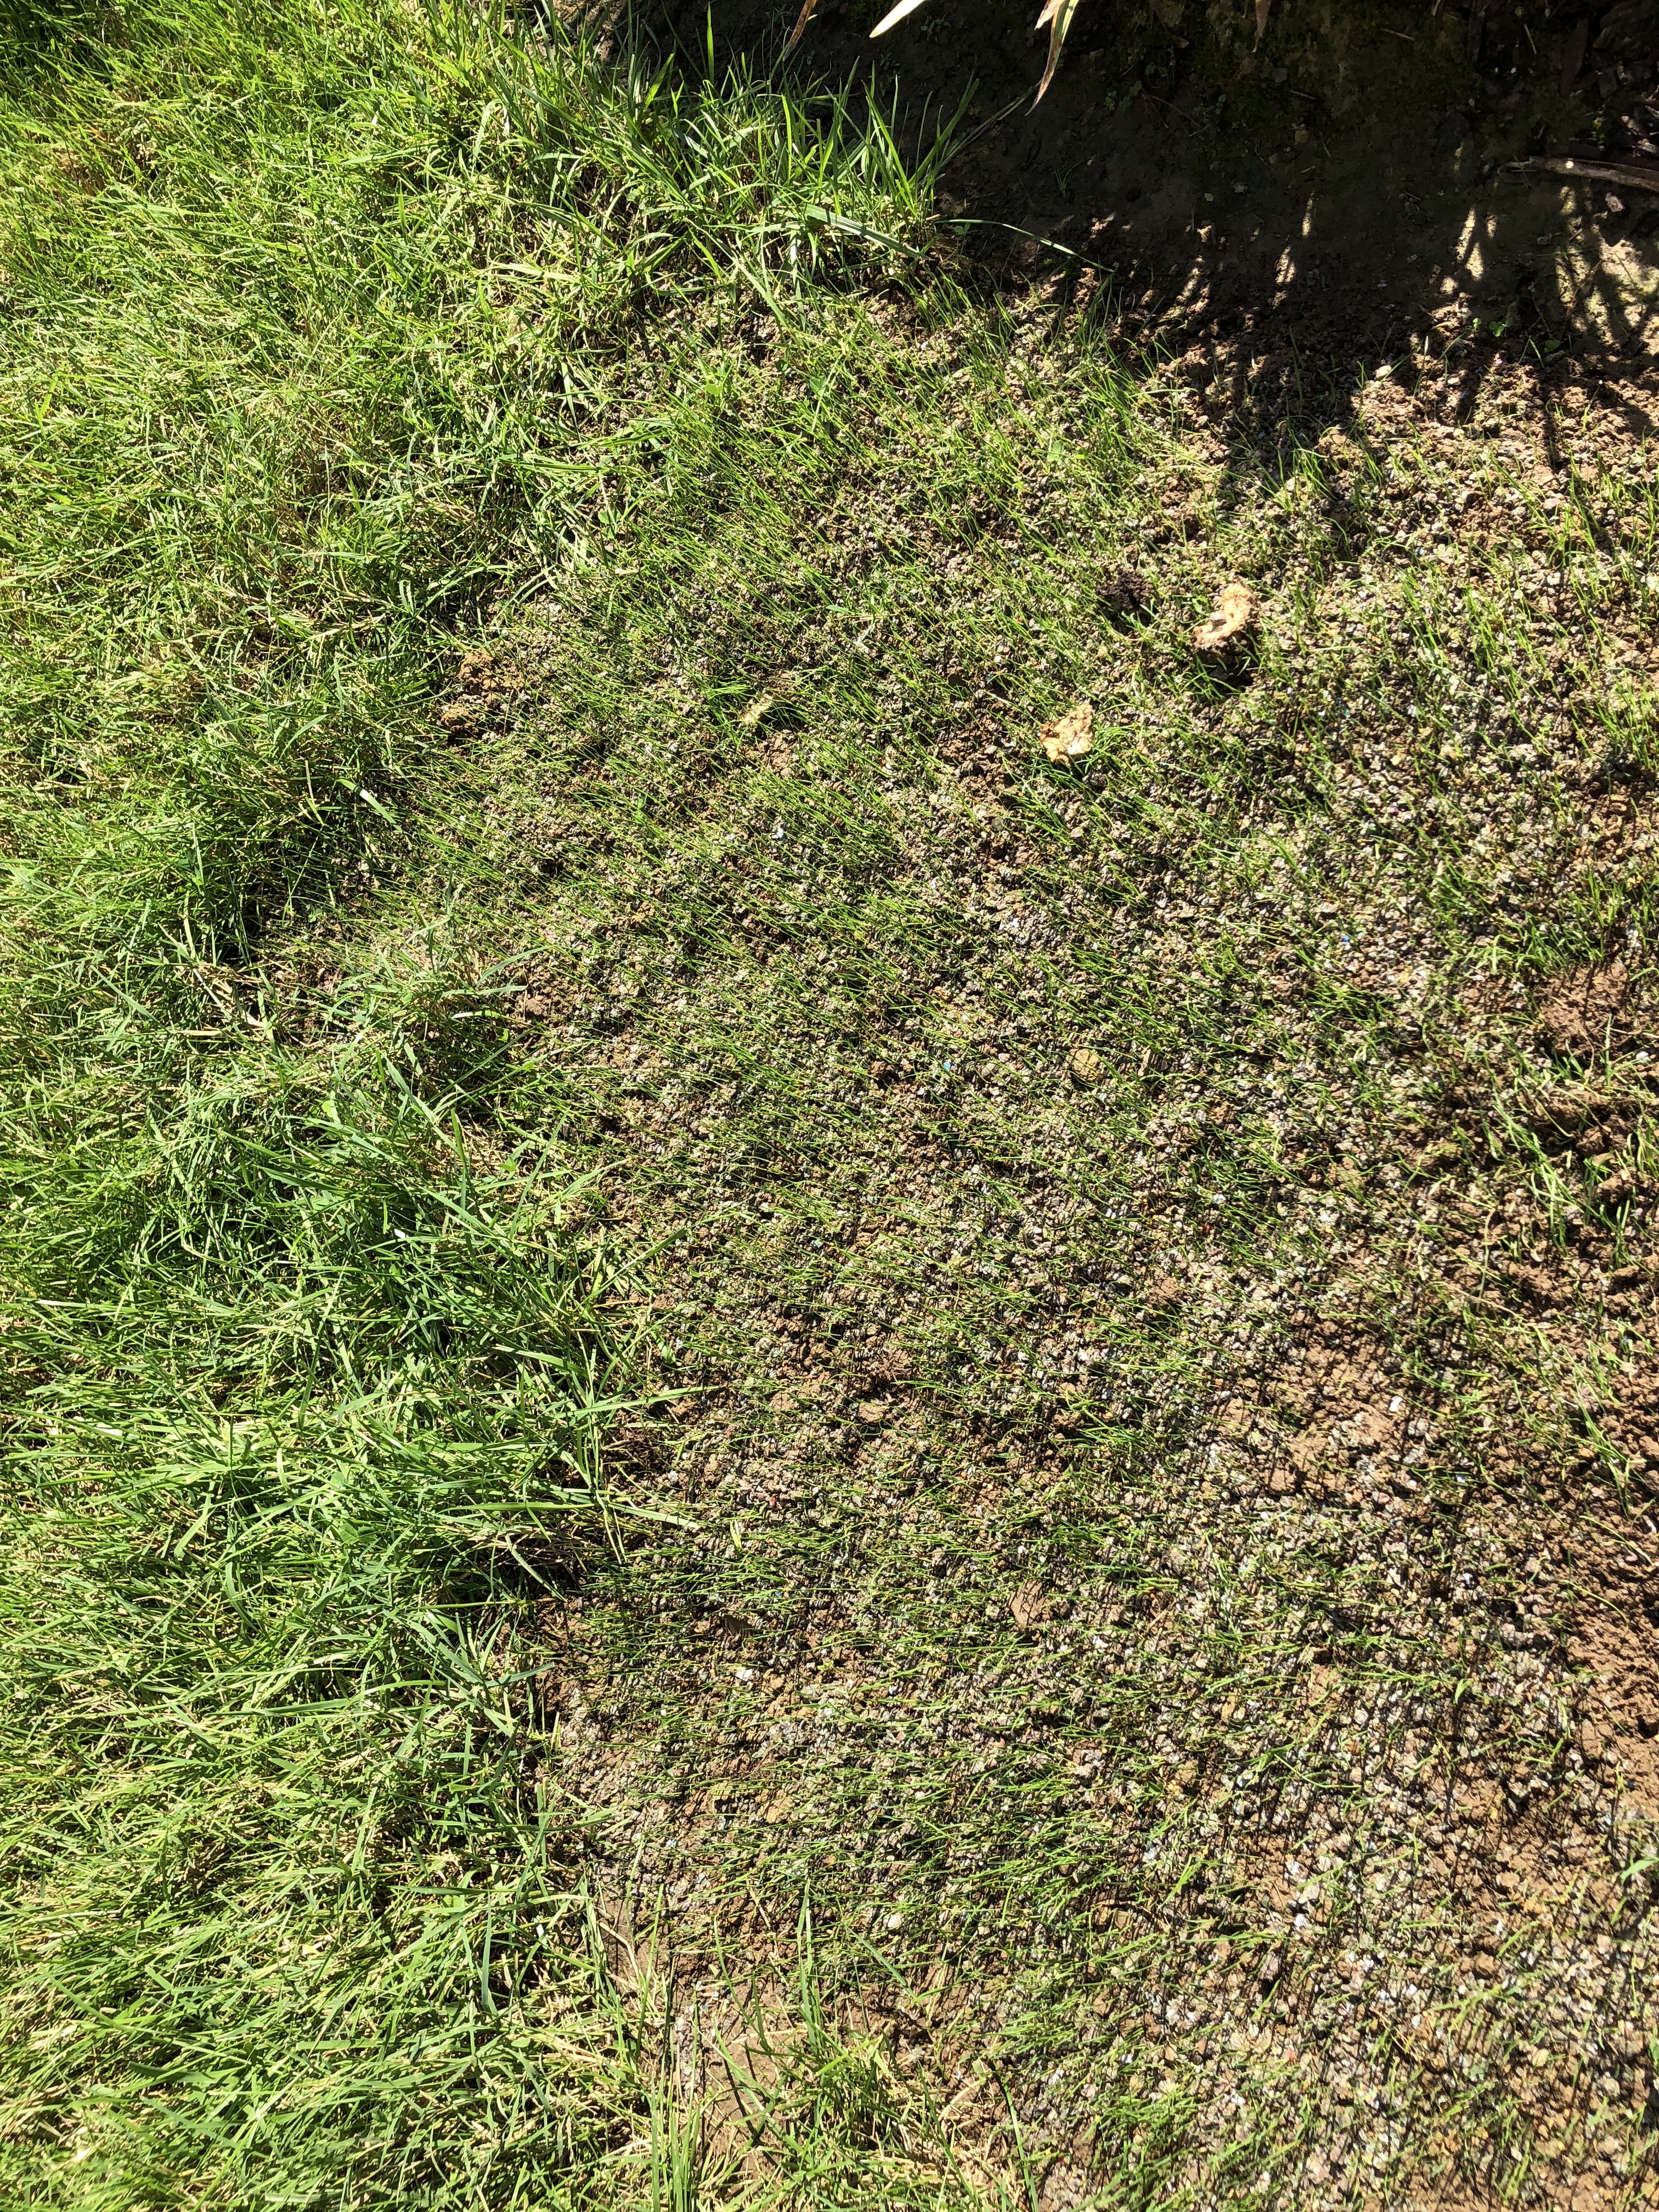
With the combination of sod, seed and fertilizer you can hardly see where the old tree stumps used to be!
I’m happy to say that I finally was able to easily pull out the last of the roots from two pear trees which used to grace the front yard. Now those areas are much smoother in elevation. The vast majority of the surface roots came out with the tree, but a few deep ones remained. On these areas, which were quite large, I used a couple of pieces of sod and more seed around the edges to completely fill it in. Now you’d never know that those were trouble spots!
Once the new seed reaches three inches tall, you can start mowing. We gave our newly-seeded lawn its first mow this week. I have a tip for this, too: Set your mower to highest level first, because after a few weeks of not mowing, the existing grass will definitely be quite long and would clog the bagging chute. In a couple of days, set your mower to the normal level and cut it again. This way your lawn won’t be stressed as much — and you won’t create new thatch by using a clogged mower!
Yes! Nice new seedlings emerging.
The front yard is finished, now on to the back…
I’m hoping the weather will cooperate so I can finish up my raking this week, but (if you can believe it) we have a new hurricane bearing down tomorrow night, and two more in the Atlantic pipeline. Hope everyone stays safe, and best of luck — I’ll be back with some pretty fall flowers next week!

Happy Fall!

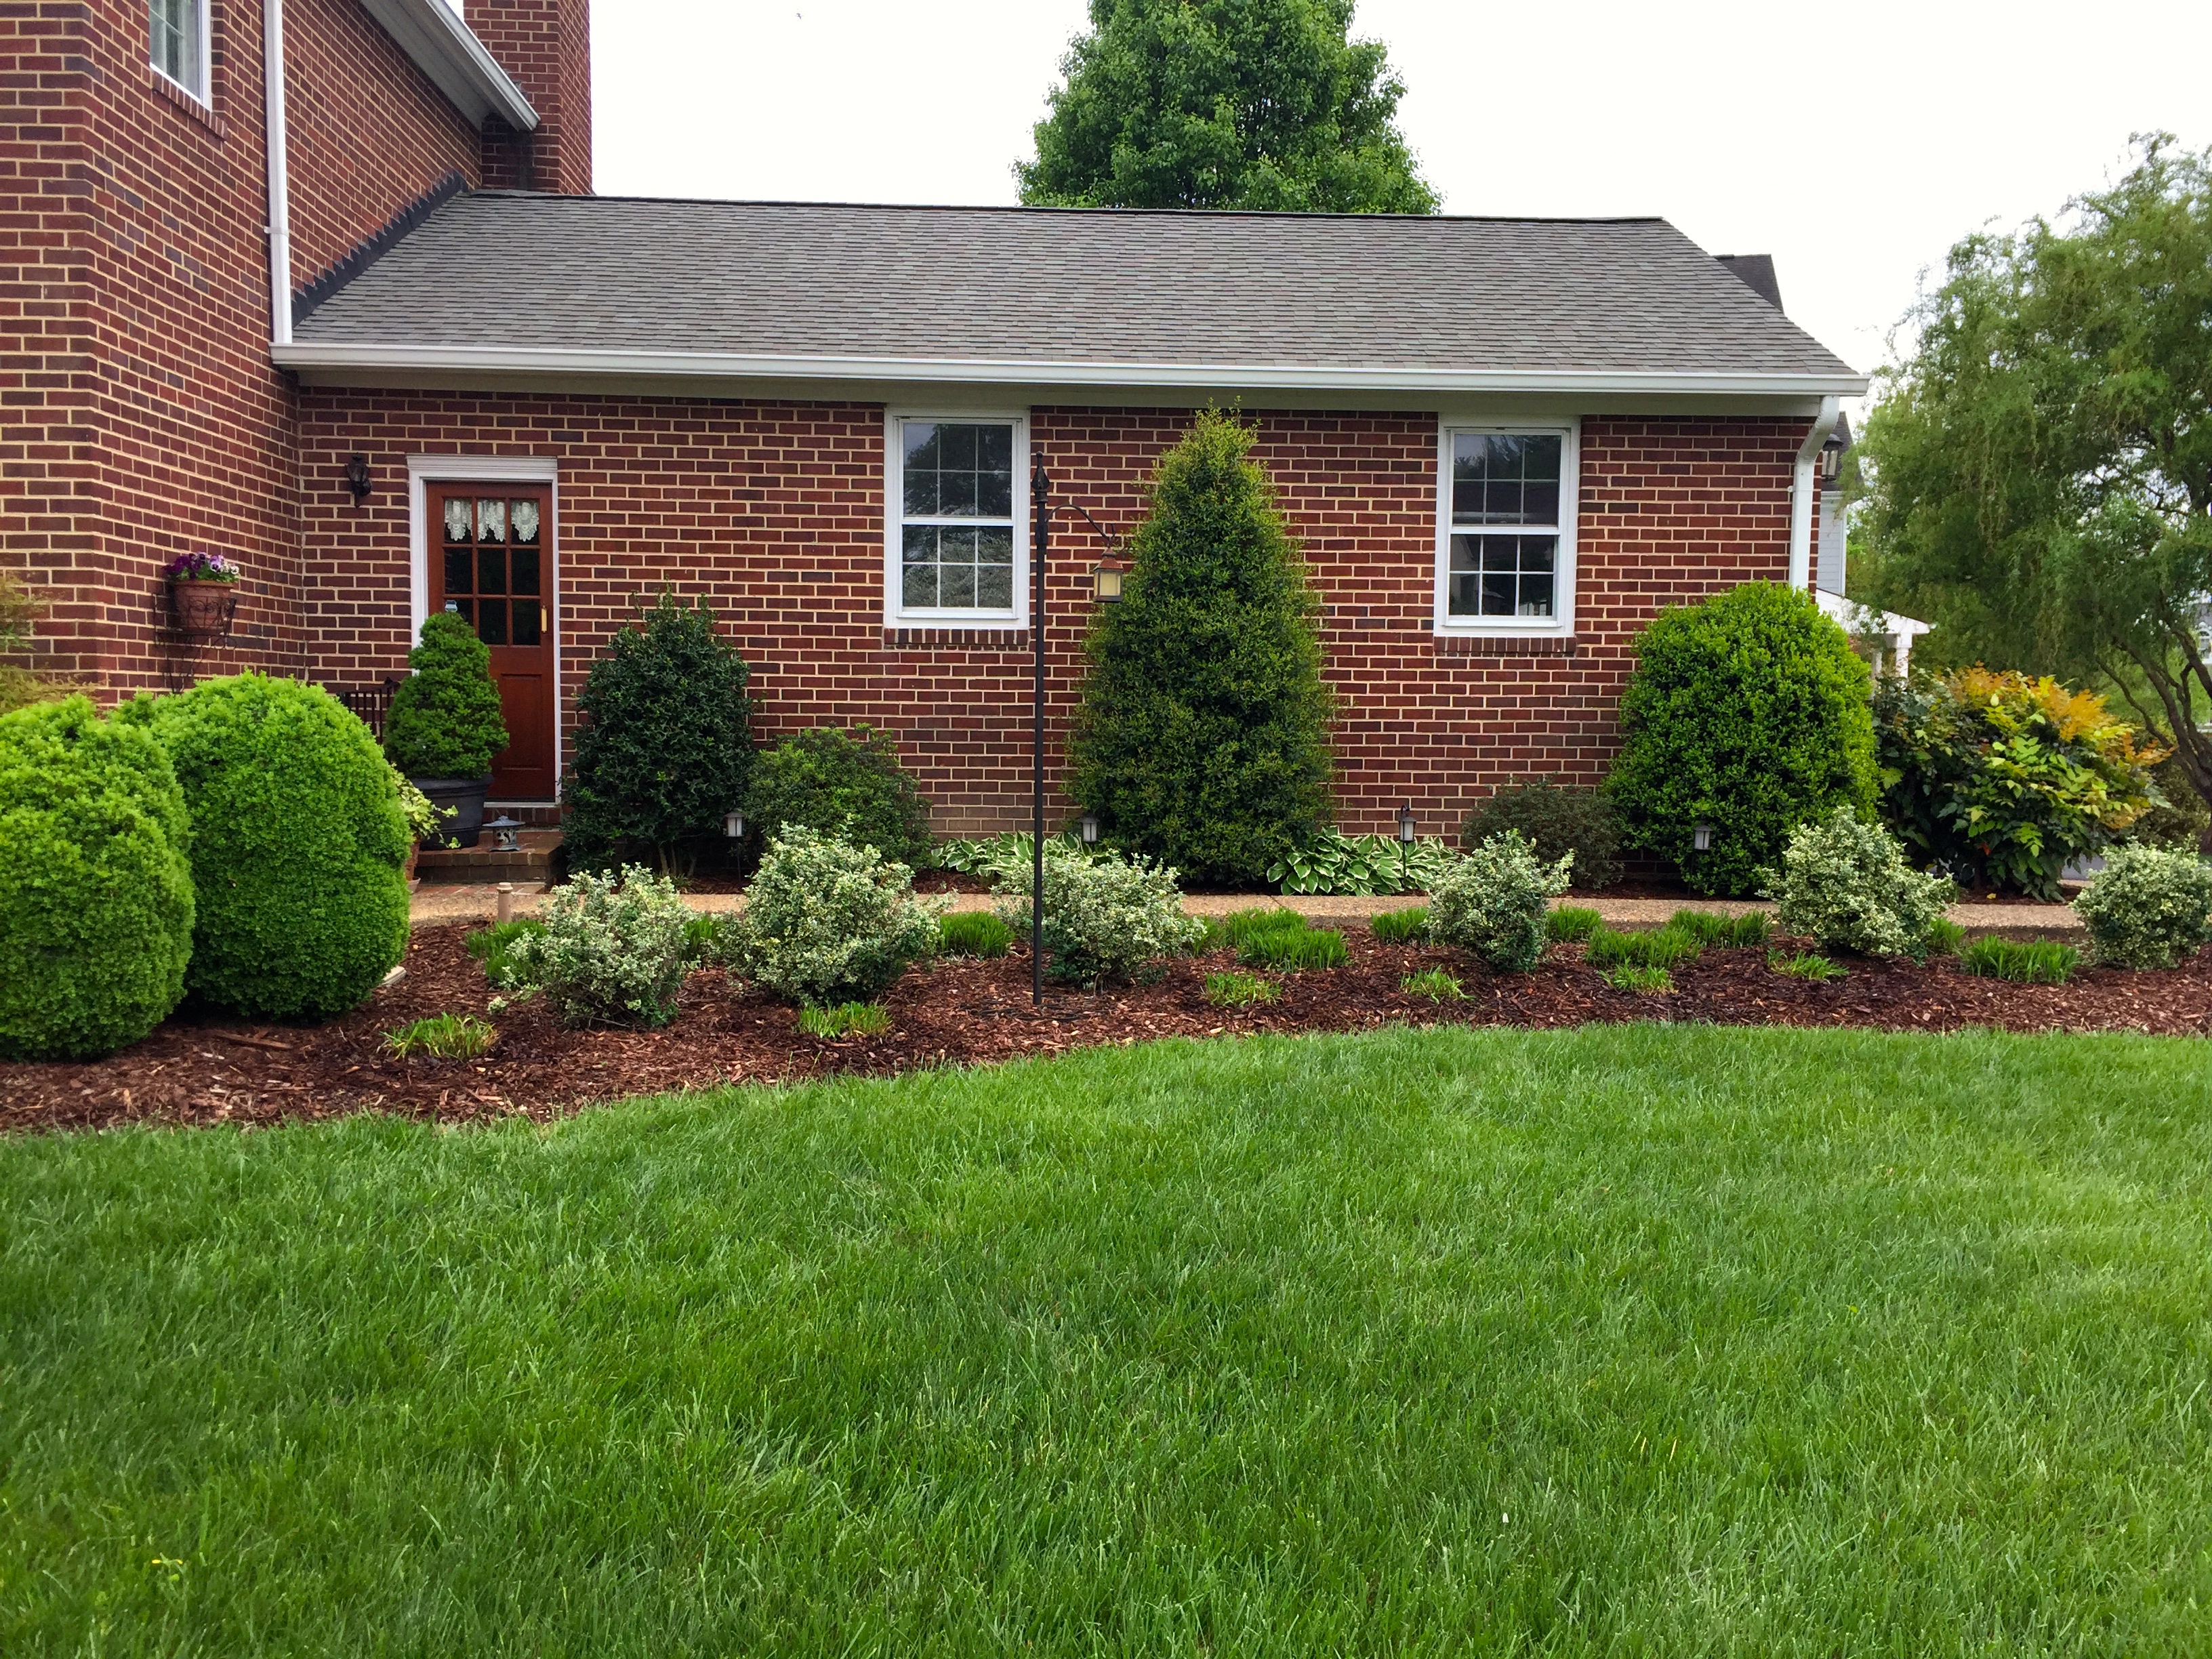
Here is the “before” photo of the front entrance garden. I want to fill in the area between the boxwoods with a seating area that will soften the straight edge of the walkway by adding curves.
Long ago, when I first designed the front yard of our house, I left a 15 foot wide gap between the boxwood bushes that wrap the front of the house. This was supposed to be very temporary. My intent was to change the path of the front walkway and bring it up the middle of the lawn instead of from the driveway on the side. Well, as years slipped by, I have had much more pressing projects. The front pathway took a back seat, but it’s time to get started with a new plan. I’ve changed my mind on moving the location of the walkway for now, but I still want to soften up the existing straight line of the boxwood garden. To improve curb appeal, I added some seating and space for seasonal color by the front entrance. I’ll show you how I went about it, step by step.

First, I laid out a long rope to define where I wanted to expand the edge of the garden bed and marked the new edge with landscape paint. Then, the hard part — cutting the edge with a scallop edger, and turning all the turf over with a rounded shovel. This is back breaking work, but I prefer this to a cultivator — you have far less grass growing back up, almost none! You can see already how the curvy edge softens up the row of boxwoods.
Here’s another angle from the side that shows the new edge. Once it had rested for a few days, I broke up the shovelfuls of turf to smooth it out. Over time the turned grass will degrade, providing nutrients for the new garden area.

Here is the “after” shot: I added stone benches, transplanted pachysandra and annuals, and finished it out with a nice topping of mulch. You already hardly notice the straight line of the walkway. I’m planning to add some flagstone pieces to the side bordering the walkway and fill in with more pachysandra between the stones in the fall when the weather is cooler. Until then, I’m happy with the progress, and the more welcoming look!
I’m not quite finished with it, but already I’m much happier with the amped-up curb appeal, and a new place to sit in the garden. I’ll post another photo in the fall when I add some flagstone pieces to transition from the walkway to the benches. I’ll transplant more ground cover to fill it in when the weather cools off. Hope you all have a safe and wonderful 4th of July! Happy gardening!
Happy Spring- welcome to the garden!
Hi all! I think I am finally ready to show you some of the garden areas I have been working on since last fall. My goal was to open up the areas that had gotten a bit too crowded and simplify the overall design. While we walk through the yard, I’d like to show some tricks and tips that might help solve similar dilemmas that many of us deal with.
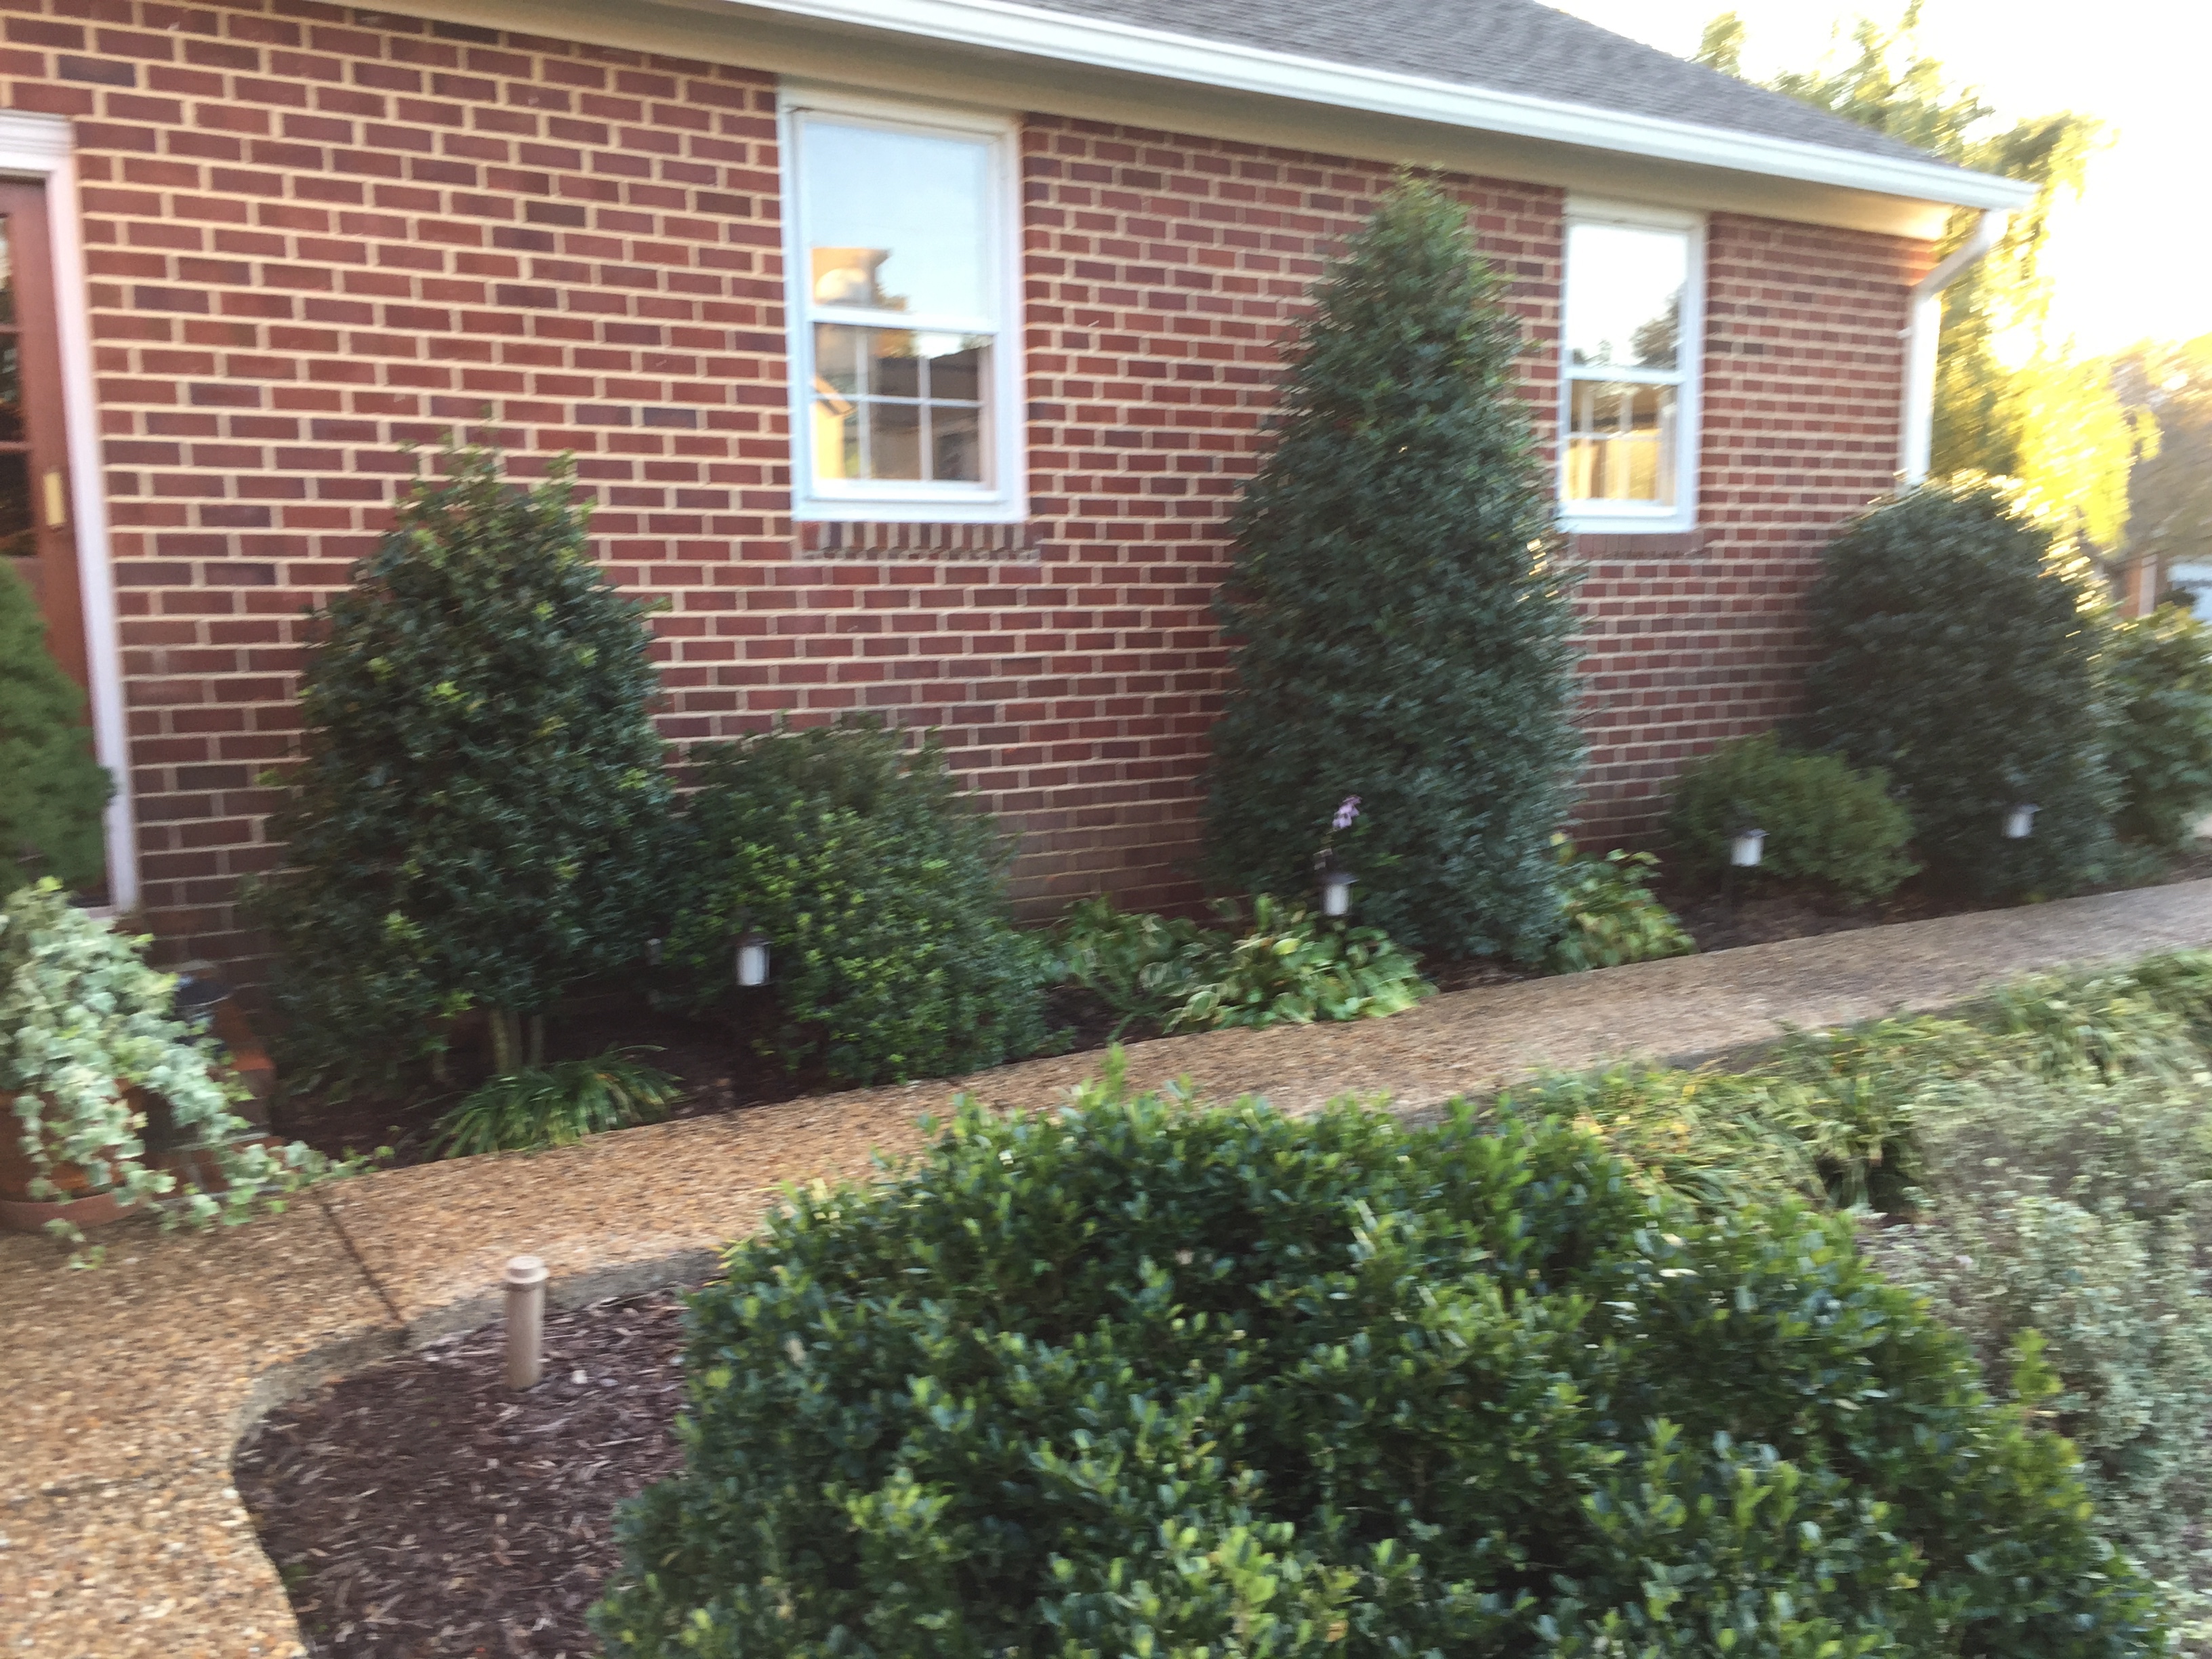
Closeup on the front corner of my yard. A row of juniper does double duty shielding the windows from headlights of vehicles rounding the corner, as well as defining the edge of the property.
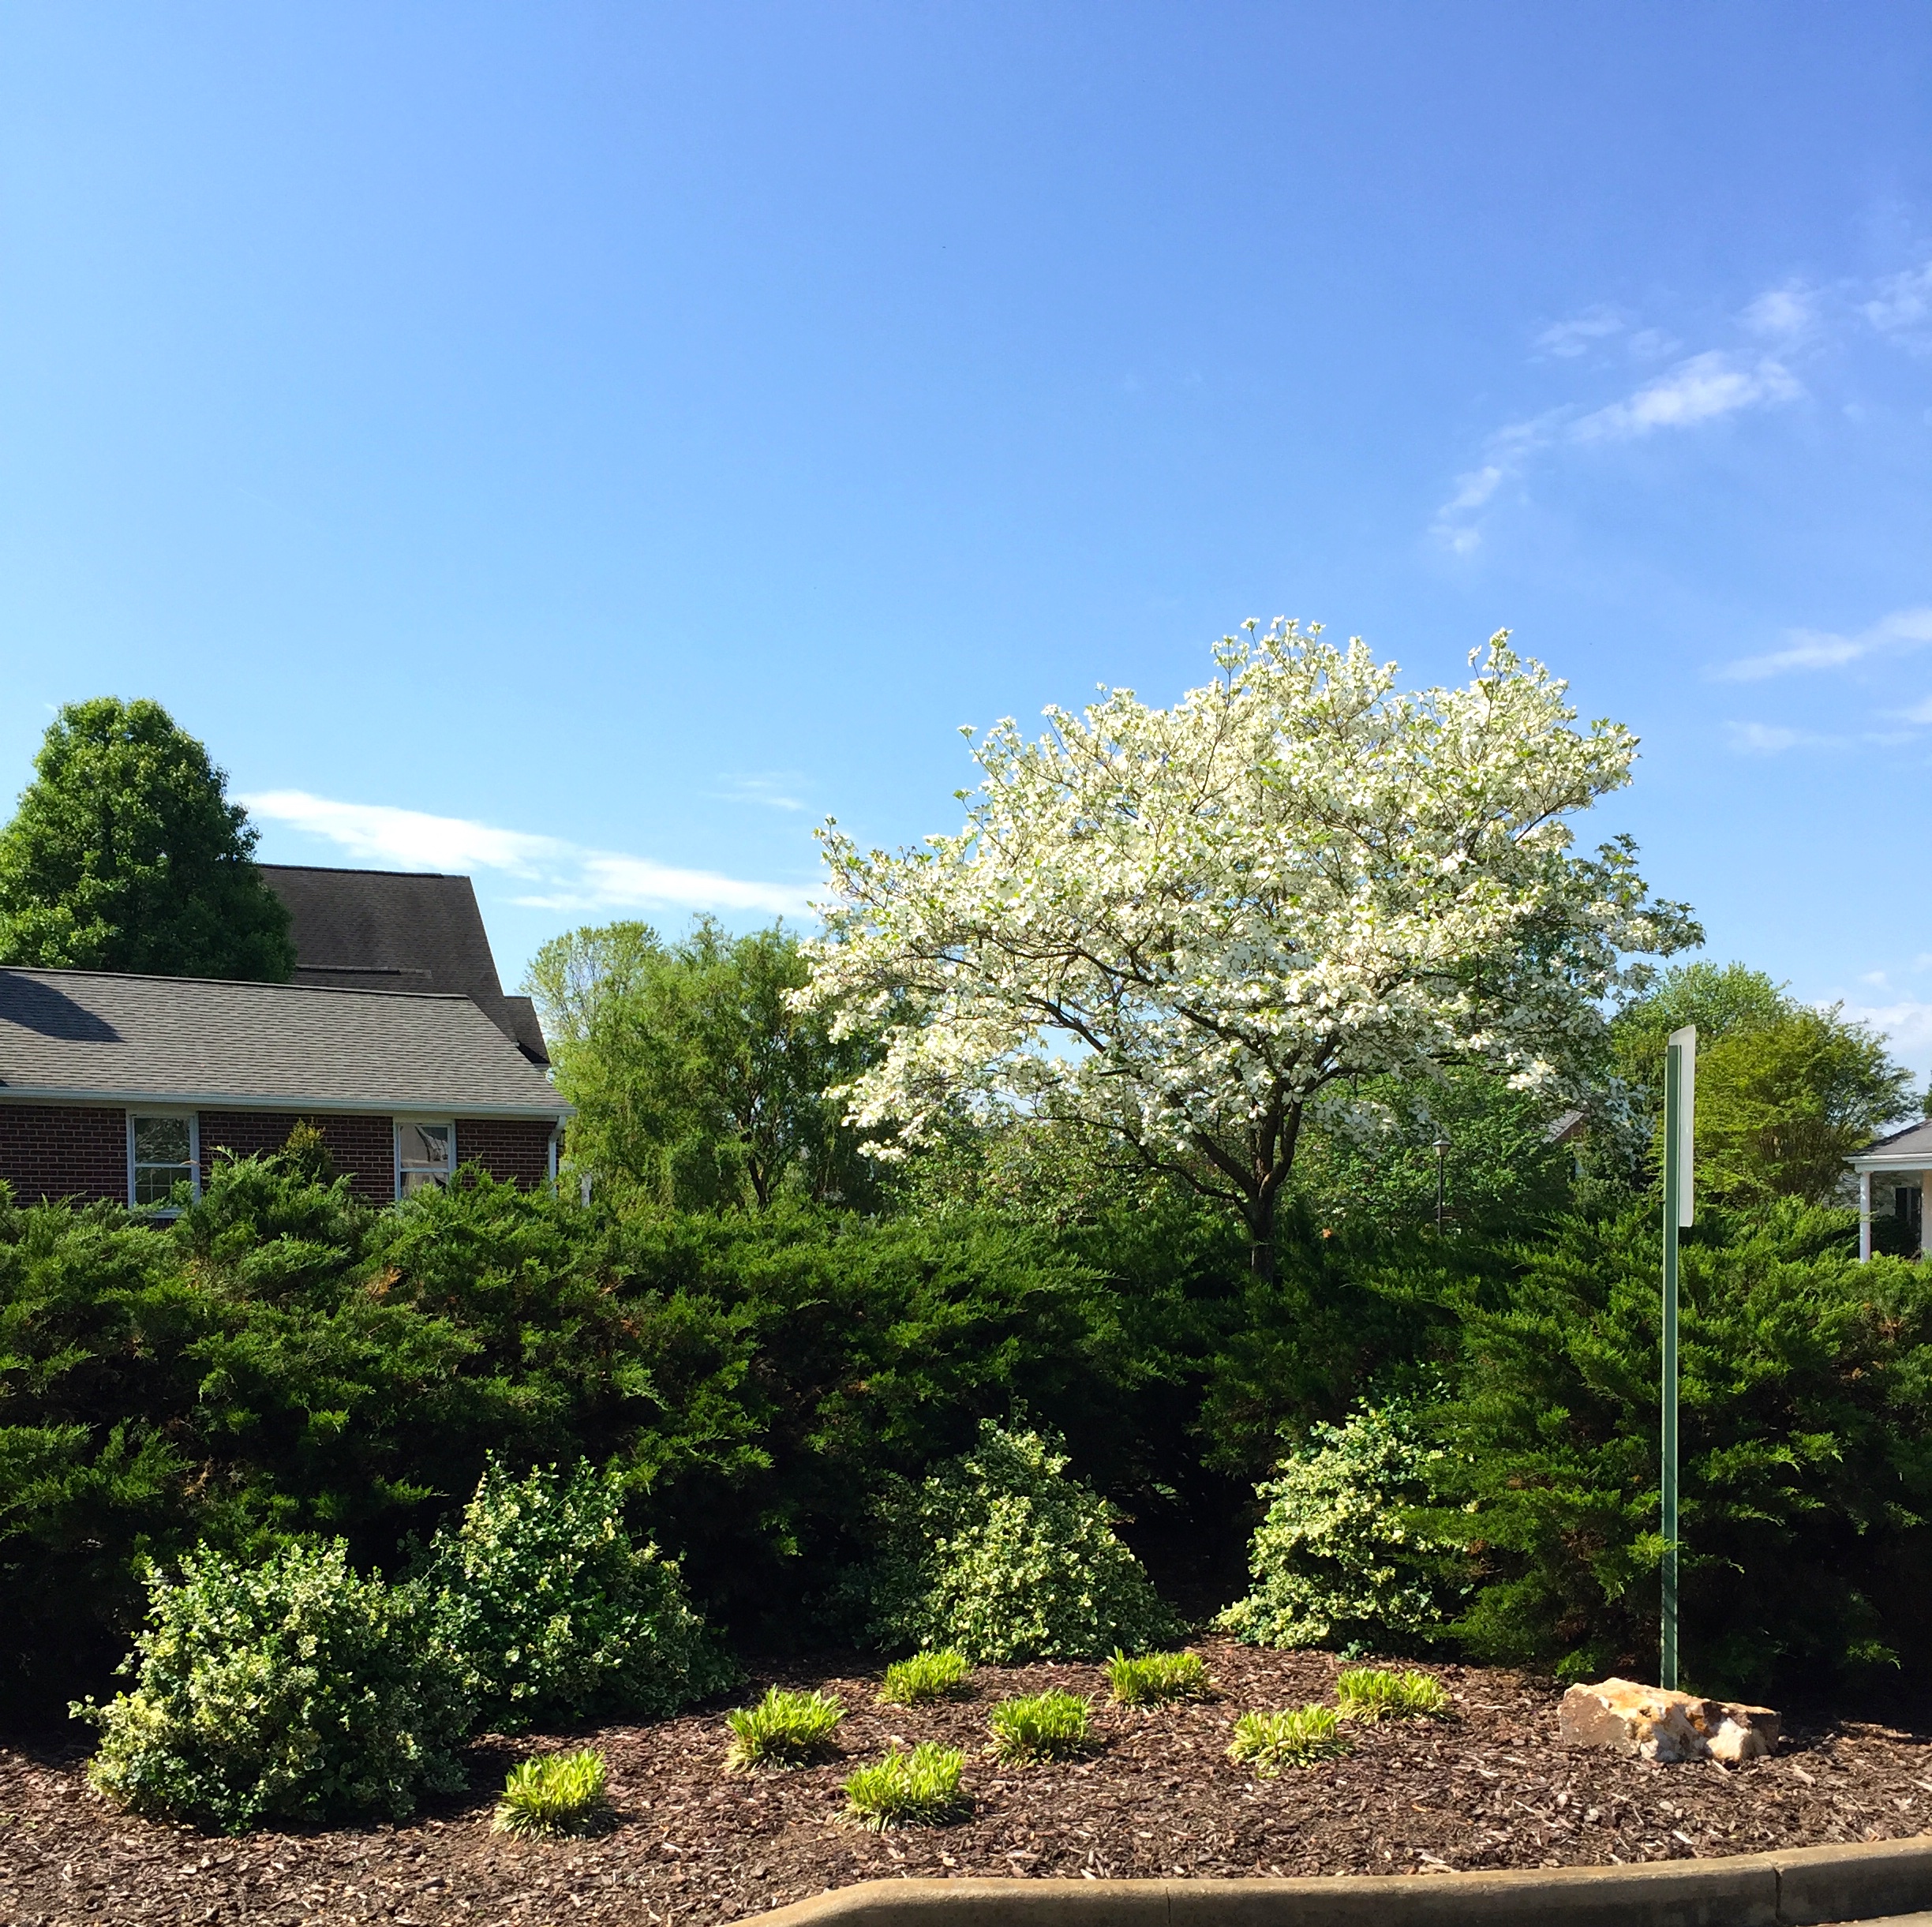
I have never shown a closeup of this garden area on the blog before. It is the front corner of my front yard, where the cul-du-sac meets the street. Here on the corner a low wall of juniper bushes are very strategically placed. As cars round the corner at night into the cul-du-sac, this blocks the headlights, shielding the windows from the bright headlights. All you need is 3 or 4 foot high evergreen bushes in order to protect the house from an oncoming vehicle’s headlights. No one wants to feel like a search light is spraying the inside of your home, and this does the trick! This garden is layered with euonymous and liriope on the street side, and anchored in at the corner with a dogwood tree. We have an up-light that shines at night into the canopy of tree, which right now looks like a cloud of beautiful white blossoms.
Front walk has been opened up by removal of some larger bushes and layering in lower plant material in foreground.
Here is the updated front walk. I cleared out some of the jungle of large plants on either side of the Nellie Stevens holly and highlighted it by relocating the hostas to either side in a semi circle to add some visual depth and light to that side of the walk. The liriope on the lawn side of the walk were all divided and will stay low. They will add some seasonal interest in the late summer with their purple flowers. These carry through the front of the other two garden beds on either side of the front door to create a nice flow from one garden to the next.
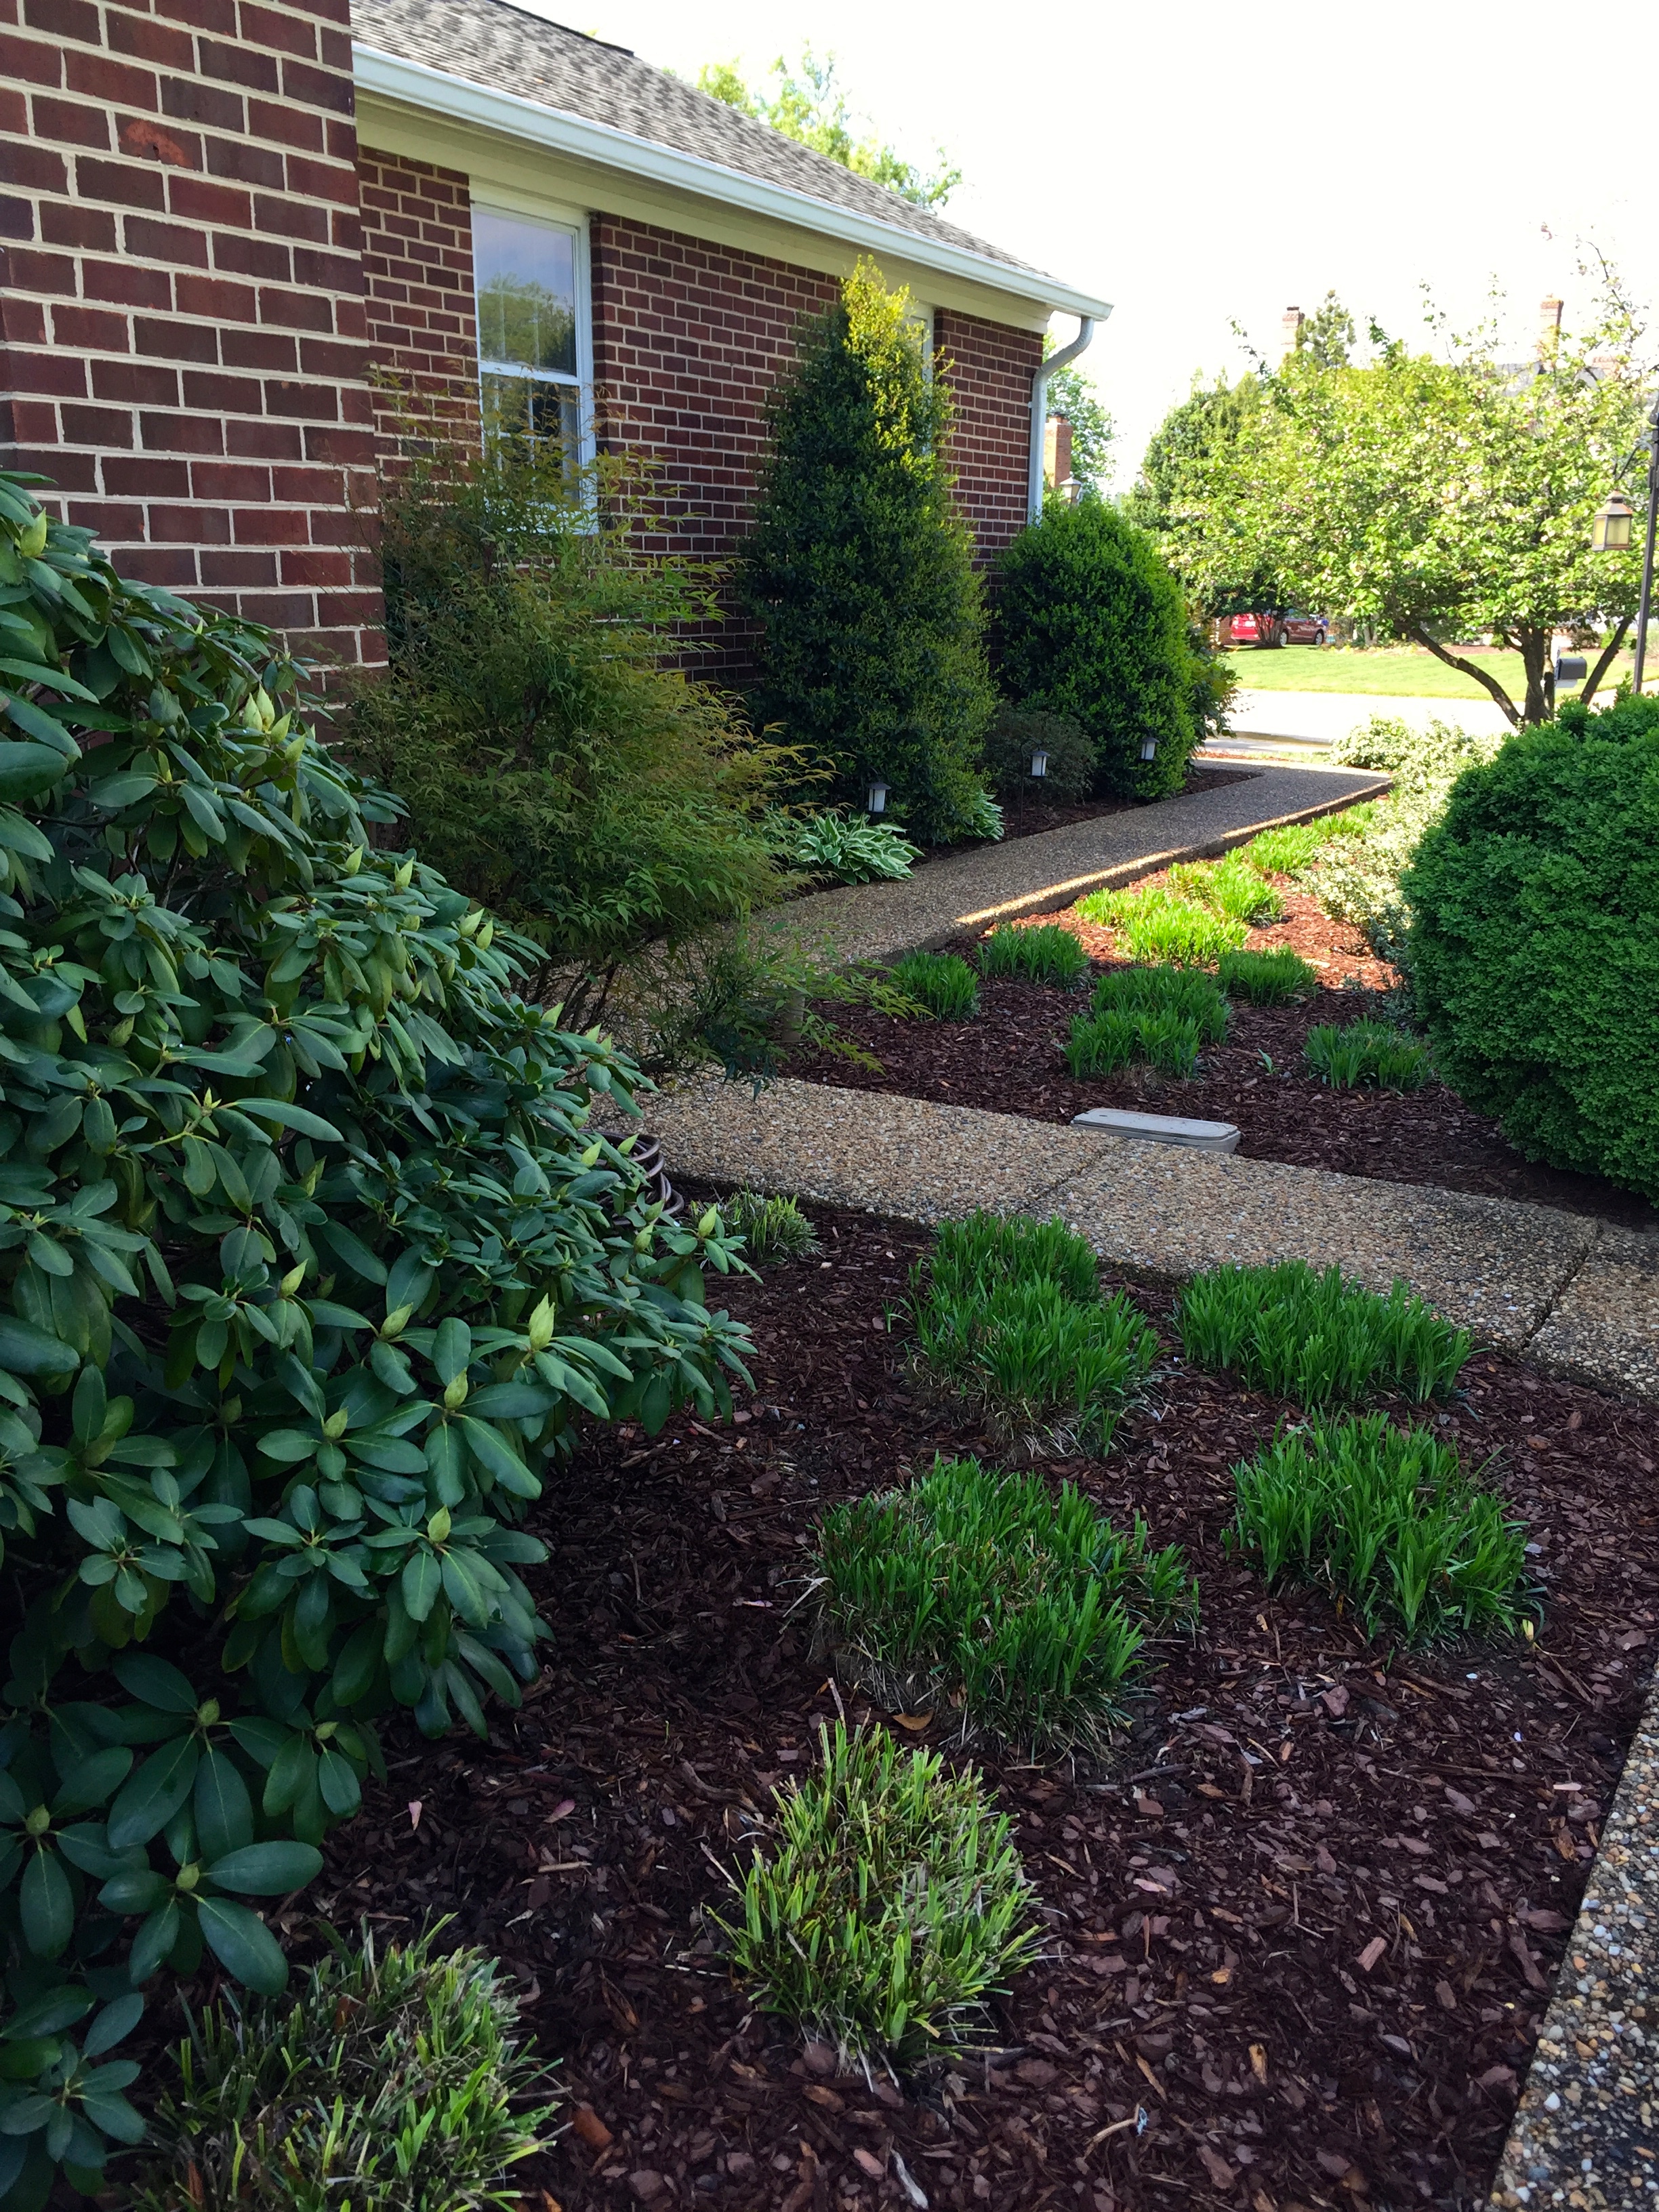
Here’s the walkway from the front stoop. The zig zag is not the best layout. I smoothed out the visual flow by running the liriope through all three of the front garden beds.
I inherited the layout of the walkway, but if I were to design it myself, I would have brought this odd zig zag section forward to match up with the rest of the walkway and made the whole walkway 4 to 5 feet wide. It’s always nice to be able to walk side by side with someone on a front walk, and being on the north side of the house, it would have been smarter to bring the walk out of the shadow of the house. If I ever win the lottery this is one of the things on my wish list – LOL!
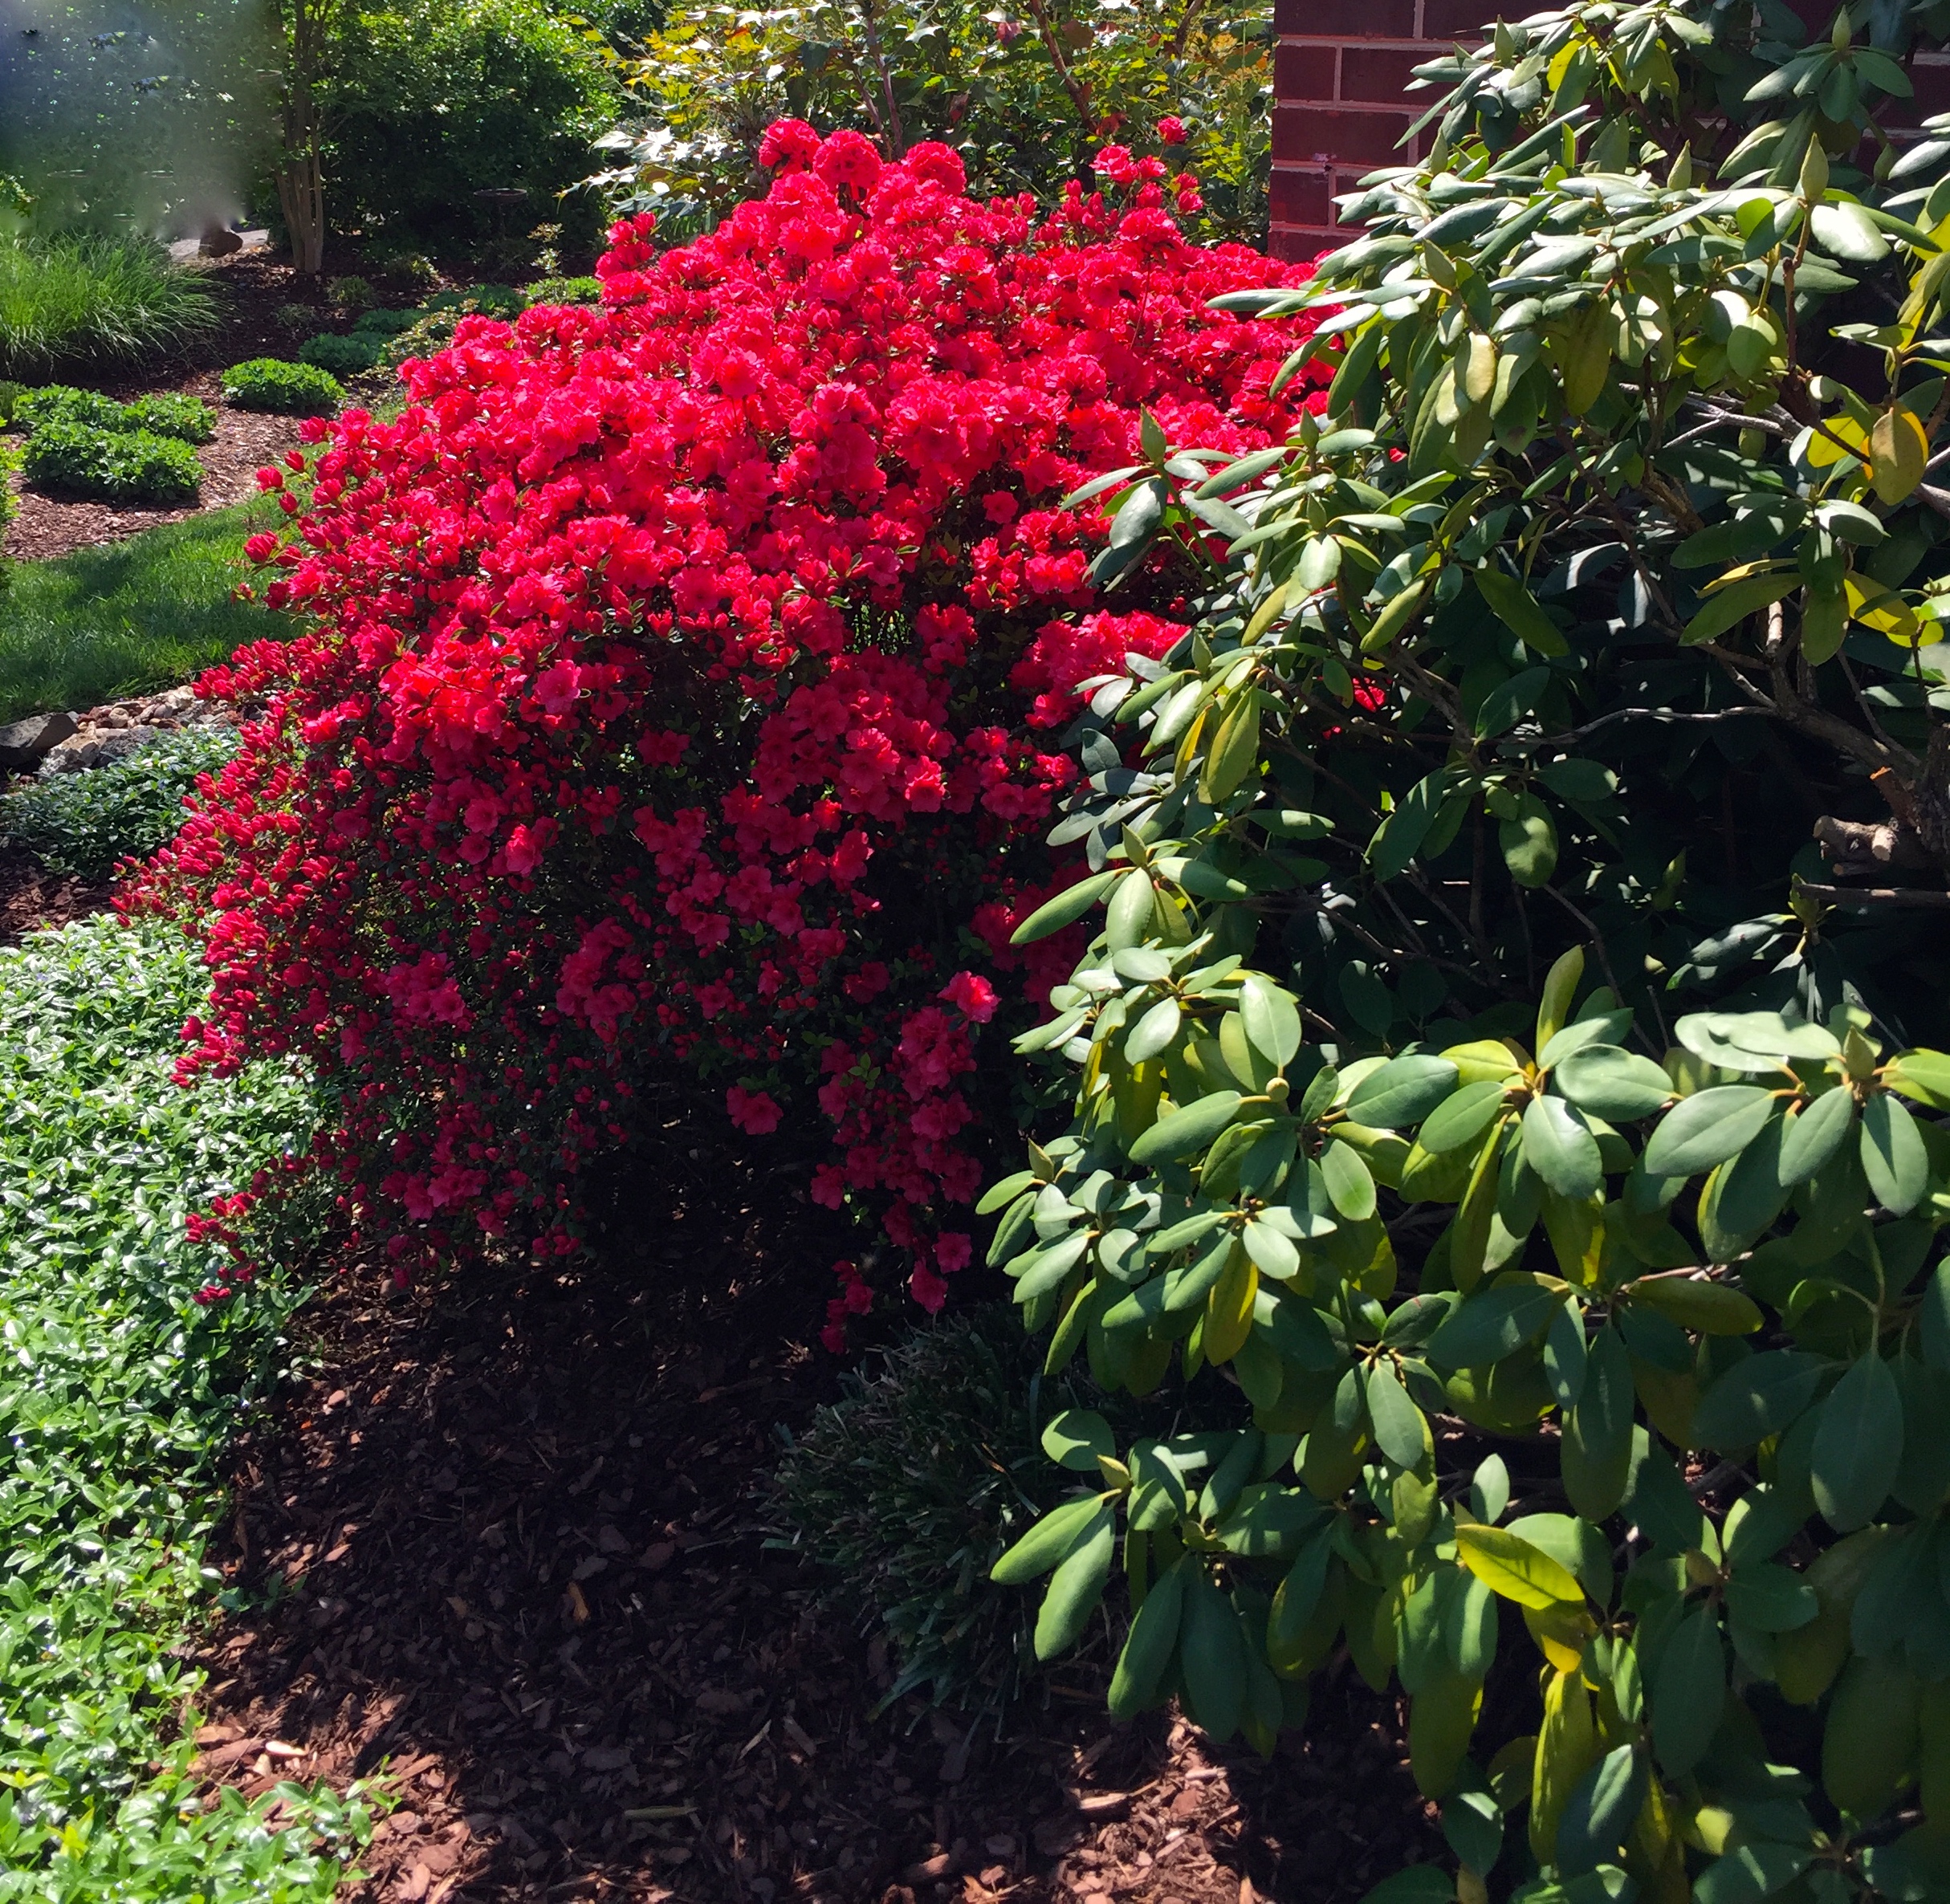
Rounding the corner the azalea is in full bloom right now, underplanted with a sea ofperiwinkle to move your eye around to what’s next in the side garden.
This side of the east garden was opened up a bit removing some of the iris and lamb’s ears and extending a few new waves of color into the existing design. In a couple of weeks this will be teaming in color.
Moving around to the east side of the garden I have done a lot of work. There were many of the older perennials that needed dividing, and some areas requiring removal, like the lamb’s ears which never was happy in that location and the beautiful iris which were overwhelming their area. All is smoothed out, and in a few weeks this area will be teaming with color. I have simplified many of the waves of color on this side, and interspersed some of them with liriope and periwinkle which will provide more year round interest. I also want to suggest to those looking to brighten up an area that placing lighter colors or variegated plants in the dark recesses under trees will draw your eye in and create more dimension. Repeating the plant material, colors and varying the numbers of plants in a group is also helpful to pull your eye through.
One more thing worth mentioning in this region of the country and other drought-prone areas: limit the amount of lawn that is in your yard. For example, in my yard the side and back are fairly hilly, so the lawn is kept to a minimum through there, and treated more like a wide pathway flowing through the yard and the garden beds are much wider. In the front, the yard is flat, so we have kept a larger patch of lawn for activities– perfect for throwing a Frisbee, or a game of croquet. This limits the amount of water, nutrients needed, and even helps with the amount of time you need to spend mowing — bonus!
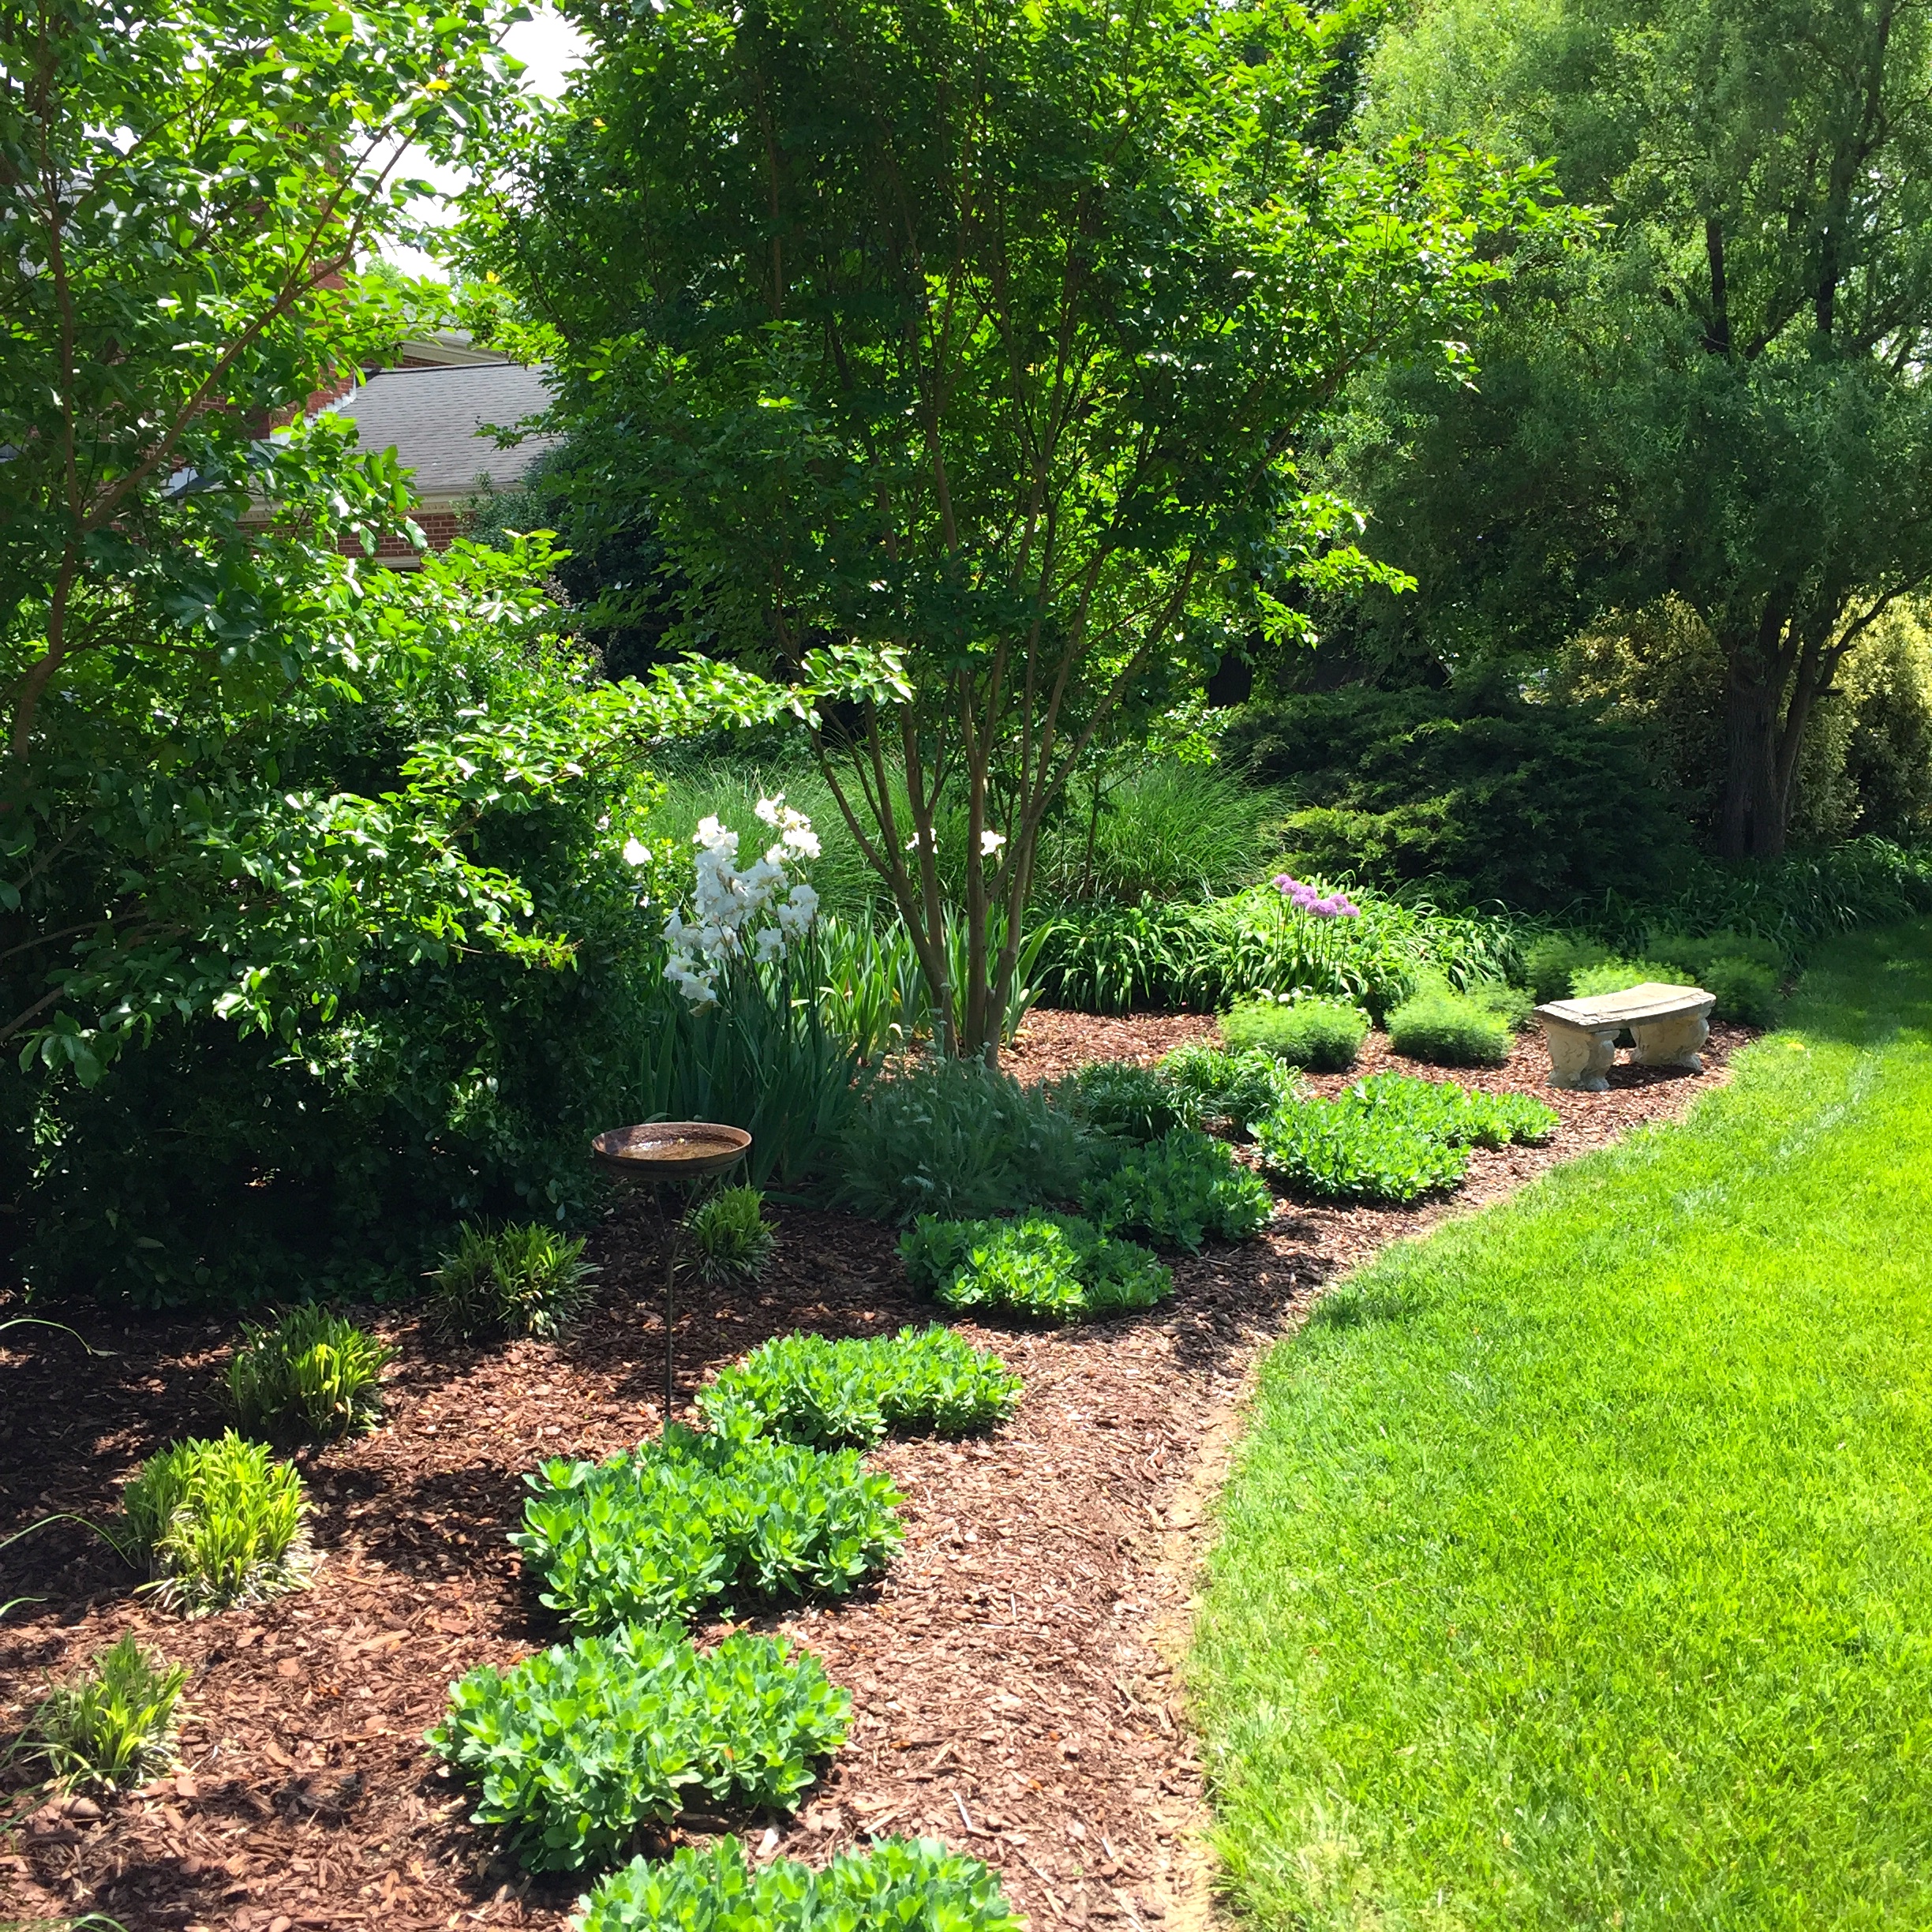
Moving around into the back garden, I’m really happy to see that all the roses I transplanted are really flourishing in the full sun. This is where I have amped up the flower power, and have sedum, orchids, astilbe, hellebores, ginger, lamb’s ears, yarrow, iris, peonies, lily of the valley and hummingbird vine. Many of these were started from gifts from my gardening friends! The idea was to have something blooming for as much of the year as possible. The only time there is a void is February, and don’t worry, I’m on it. I think I’ll add some crocus bulbs in the fall to make it year round. Will I ever be done? No, but that’s the fun for me!
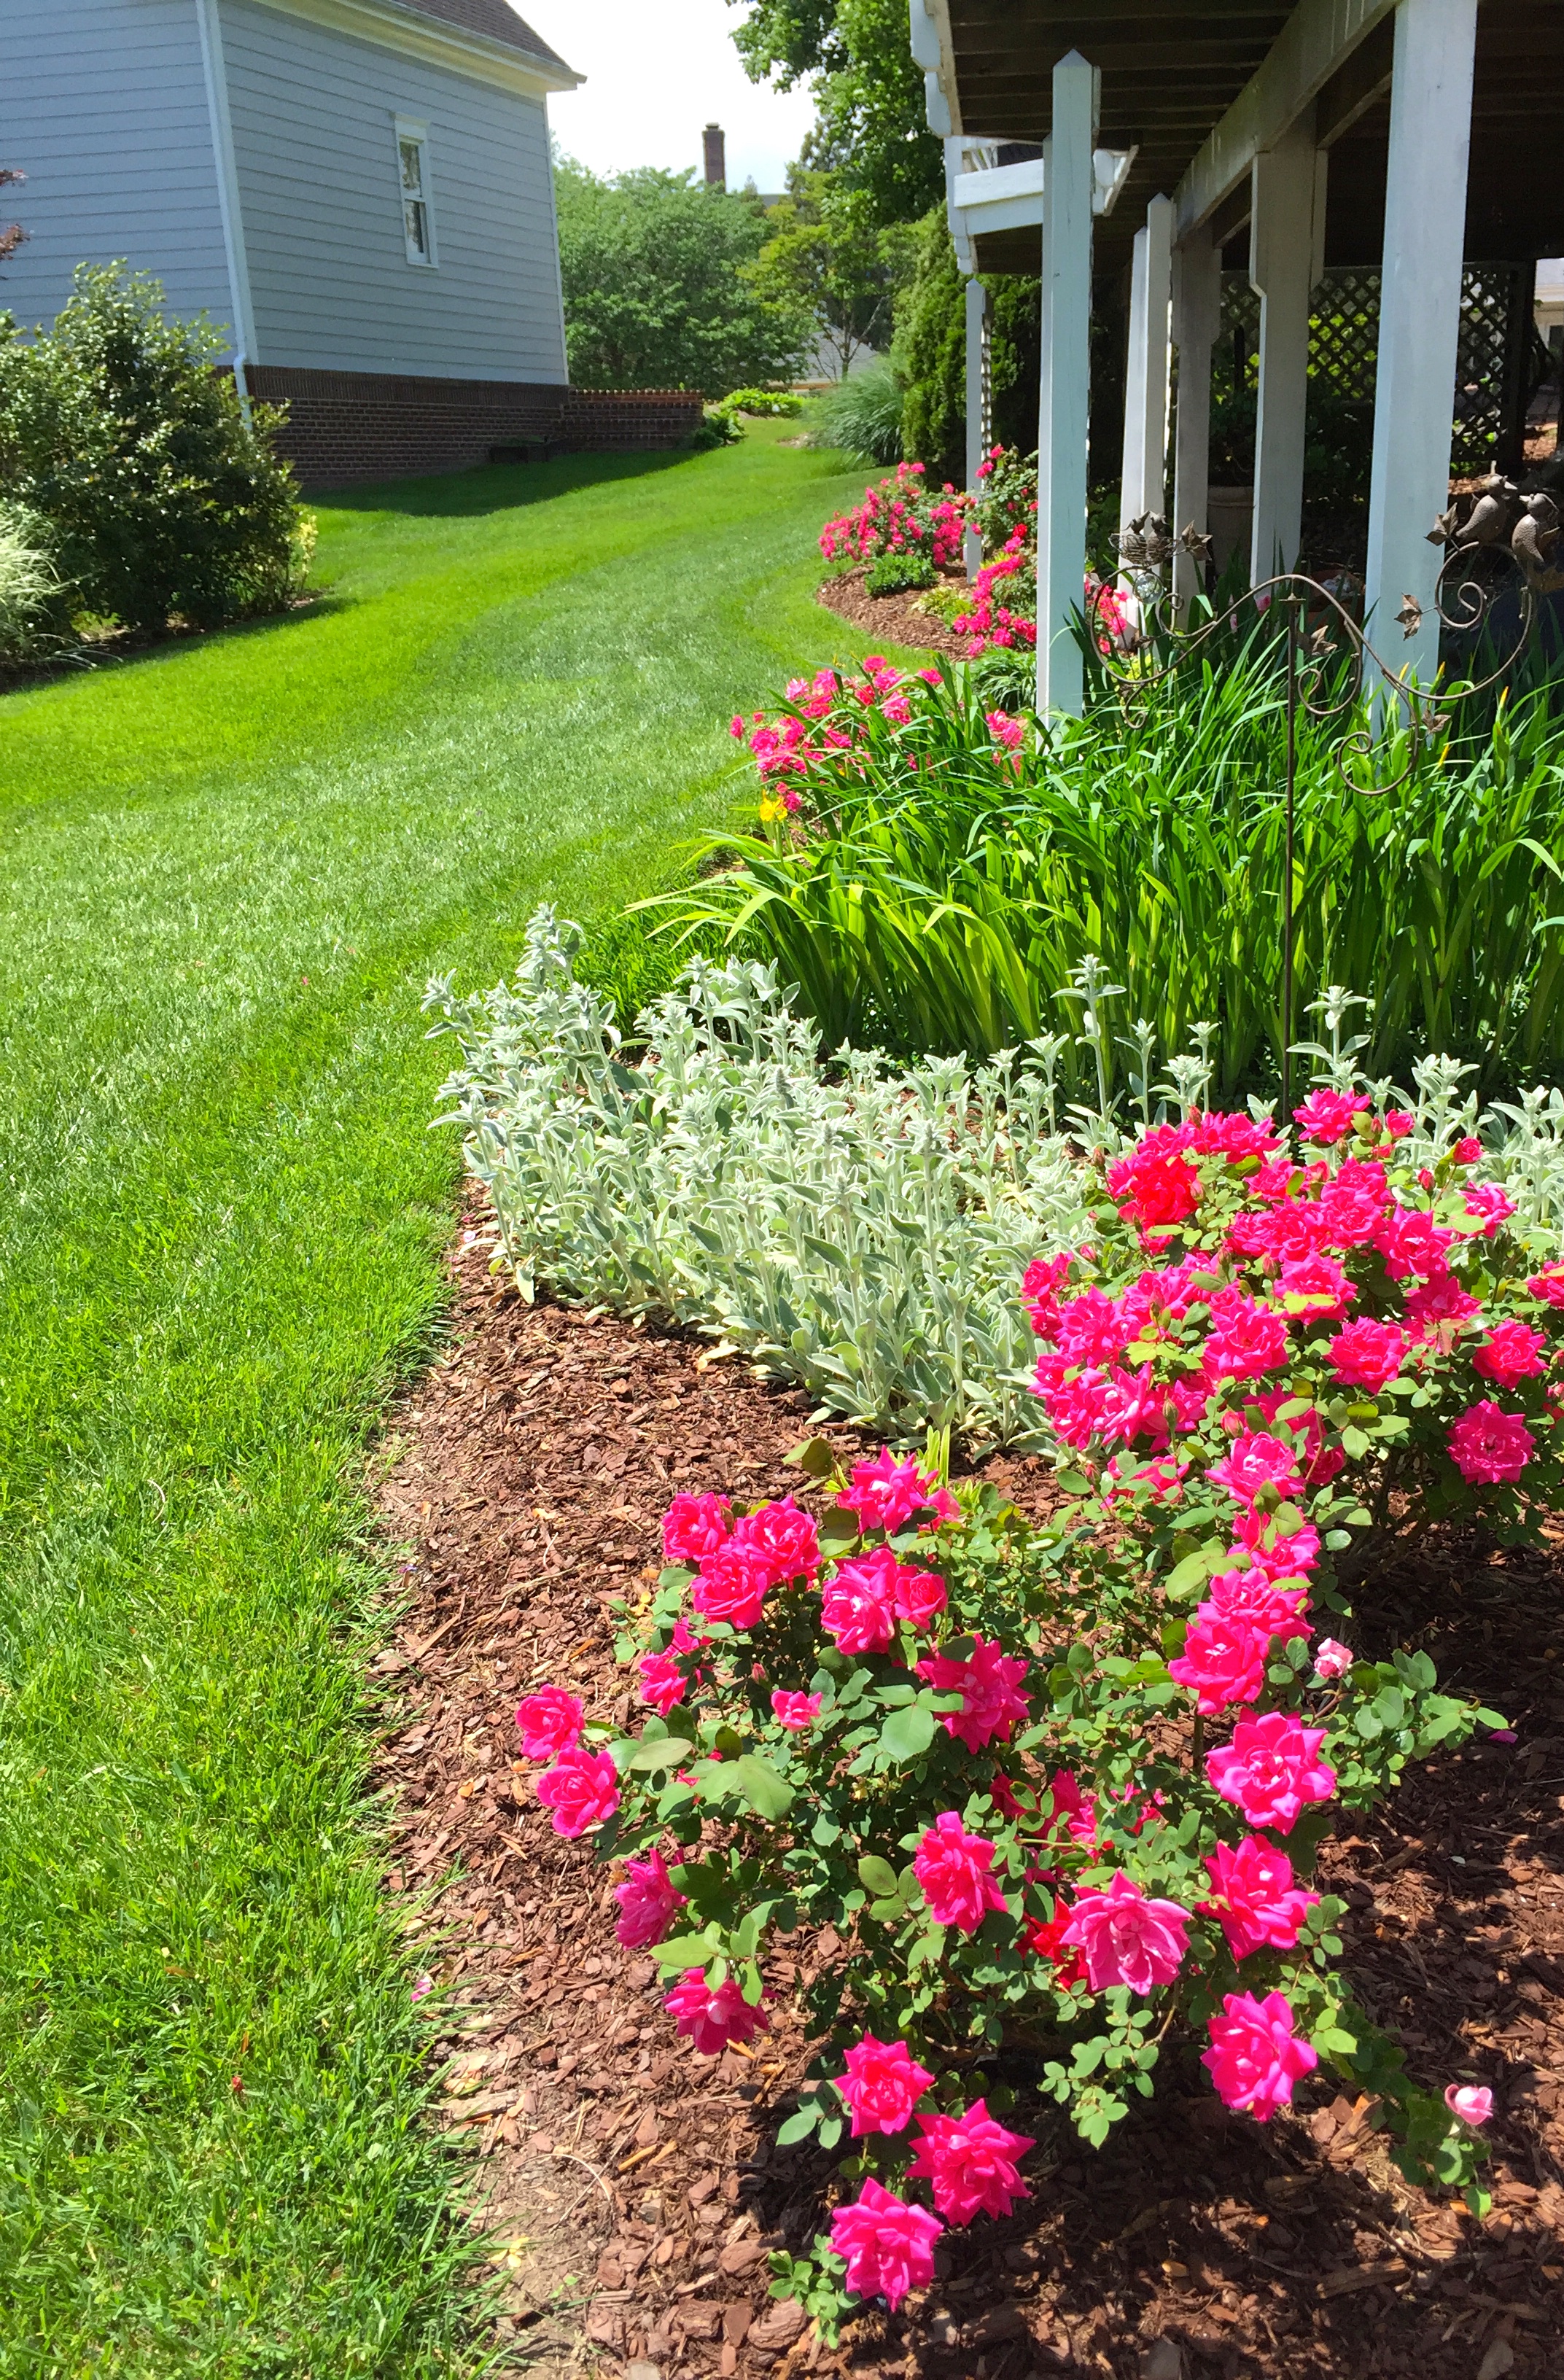
A long view of the newly revamped back yard border. It now has flowers blooming almost all year. It is half in full sun, and half in shade under the deck, so I’m able to have a wide variety of plant material.

Don’t forget — April showers bring May flowers! Here’s a rainbow from our last April shower – bring on the May flowers! Happy gardening!

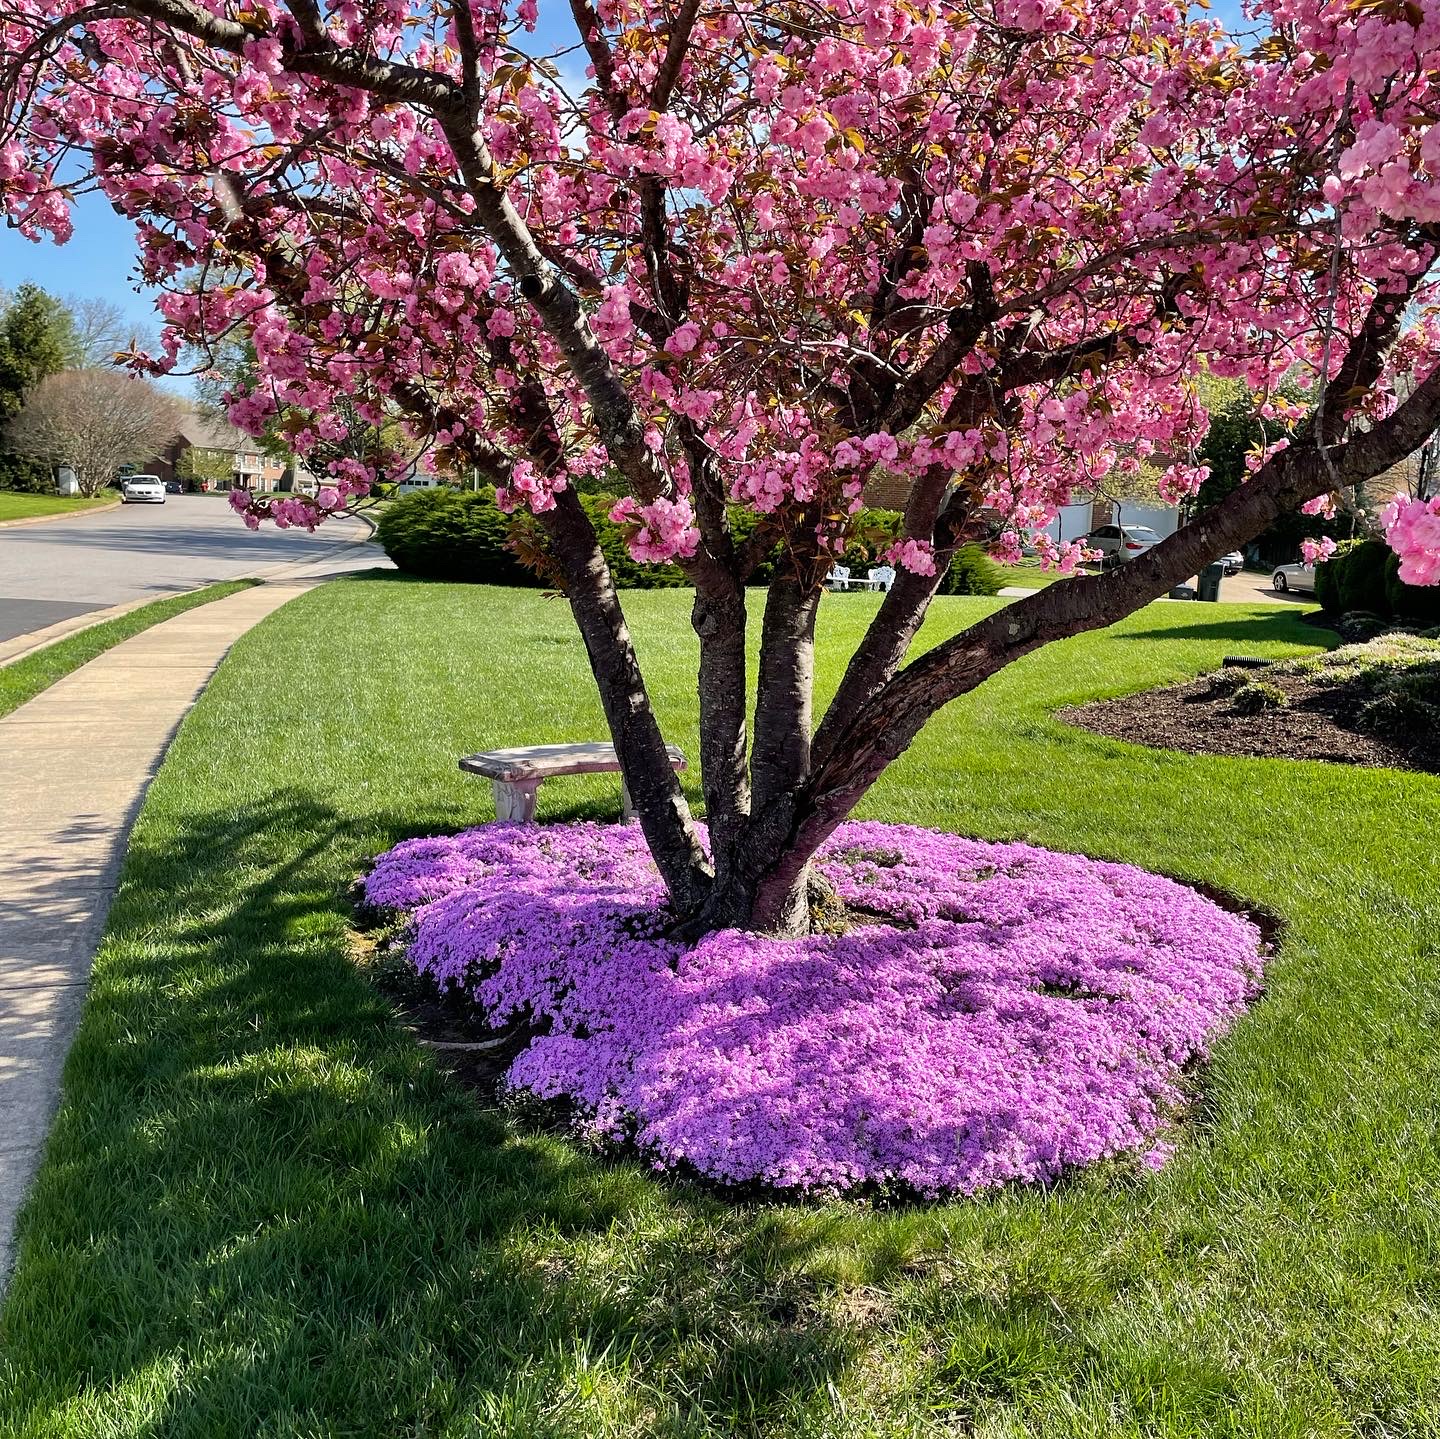
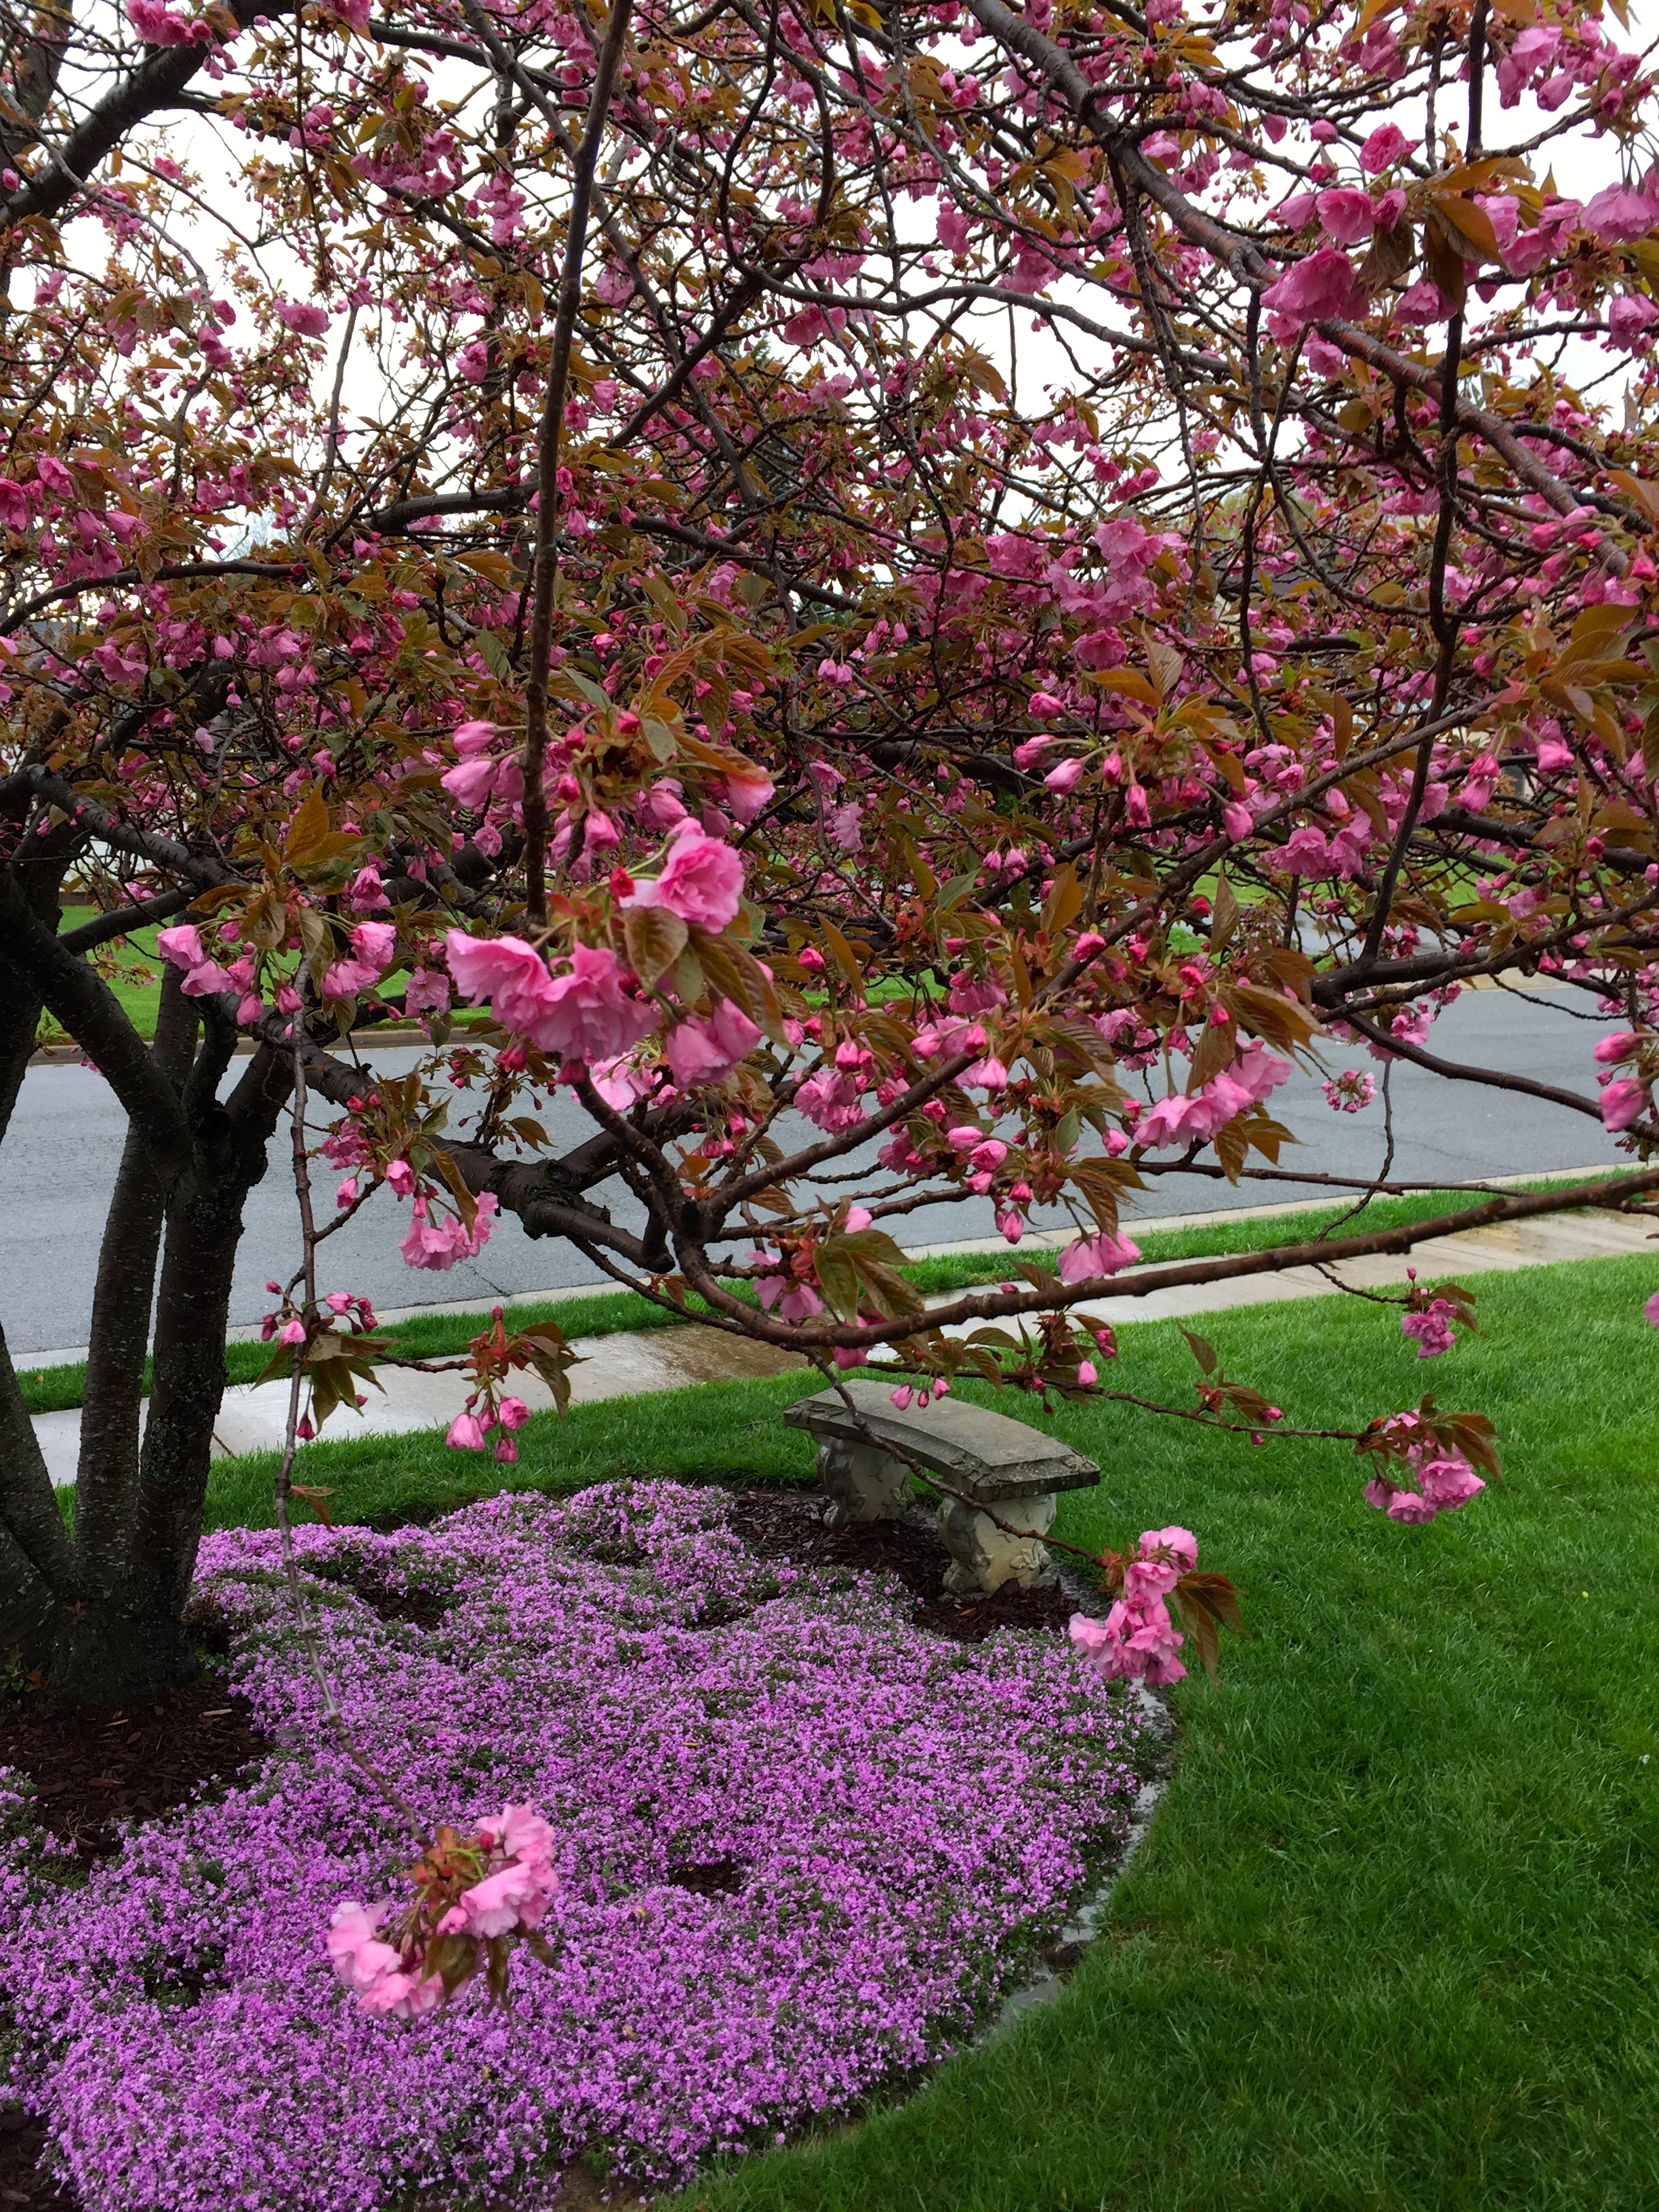
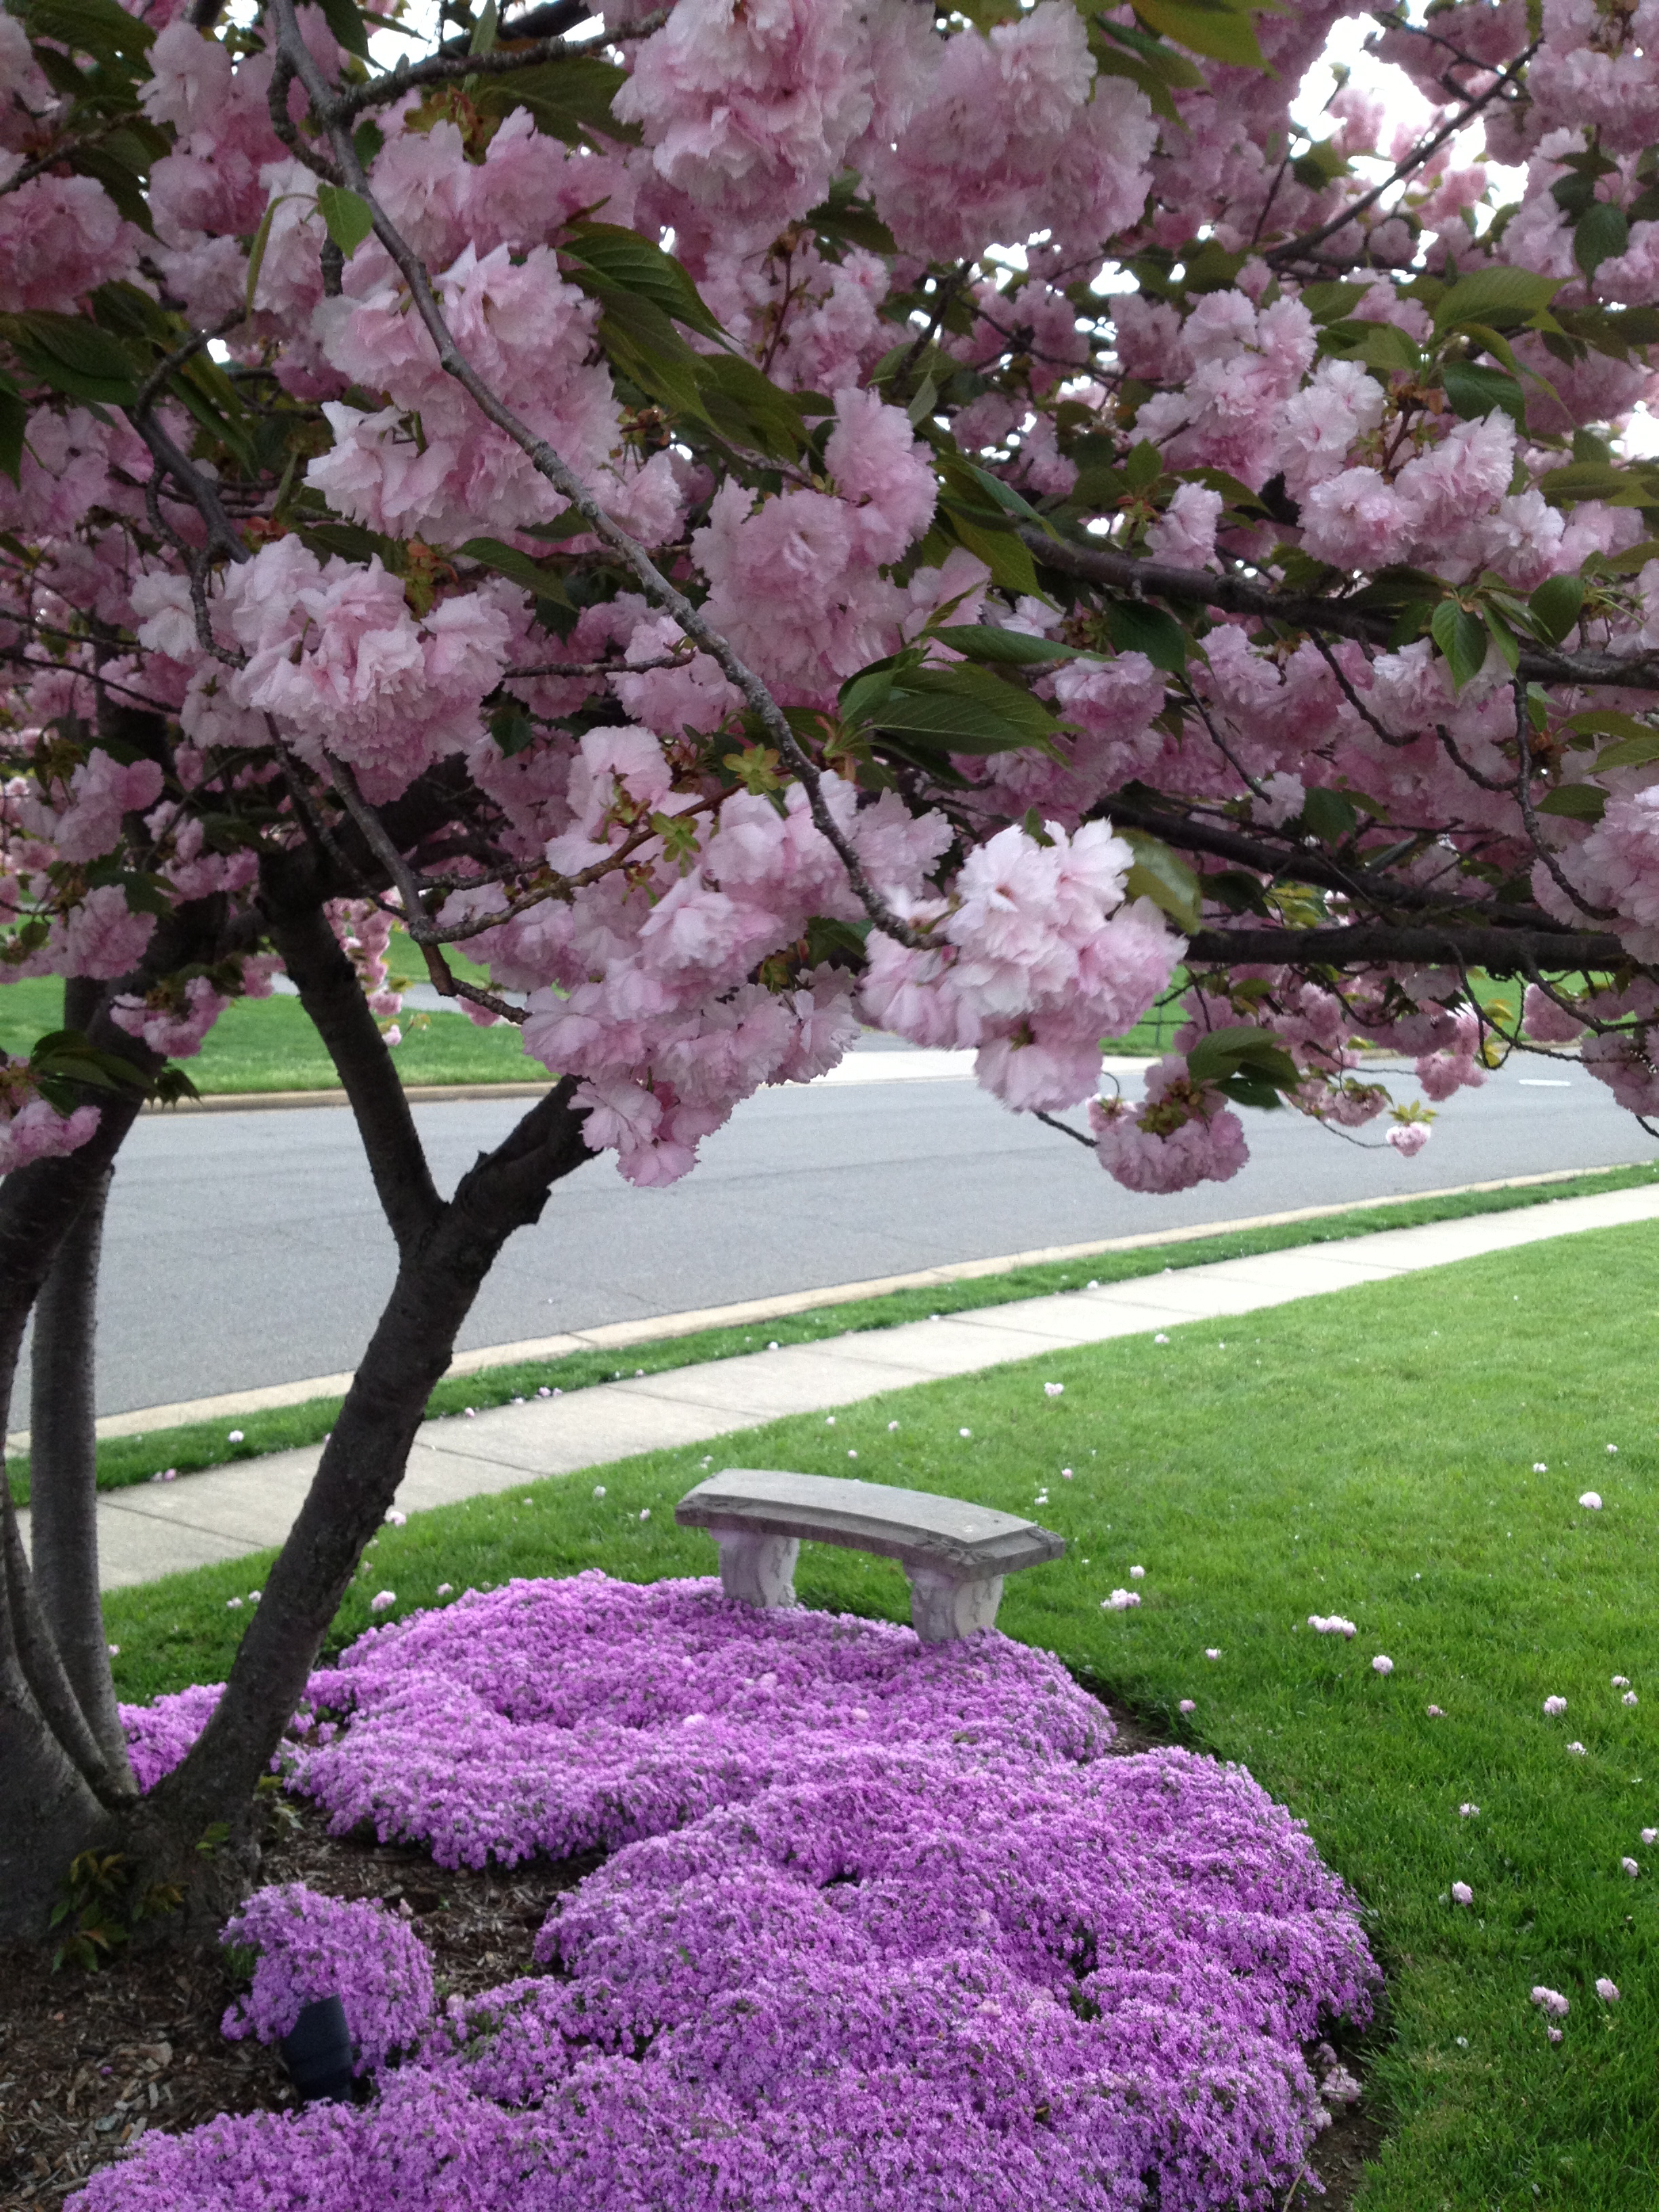
Anxiously waiting for the cherry tree to bloom.
Every year I’m working against the clock to have the yard looking at its peak when the cherry tree blooms. This year we have had an inordinate number of warm days, and I have almost finished — well, at least the front yard. It’s hard work, but the weeding, edging, mulching (90 bags!) and lots and lots of pruning are almost completed. We have lots of people who drive by and a few who take Easter pictures here when the tree blooms coincide with Bunny Day. I think this year I was lucky that this tree is a little behind the Tidal Basin cherry trees in D.C. The cold snap and late ice and snow storm that collided with them didn’t harm mine, just delayed it a few days. For those who are as in love with these trees as I am, this is a Kwansan variety. Its double flowers are magical!
The “Charleston pink” phlox that surrounds the tree is at its peak right now, and the tree is hours away from exploding with color, so this is just a teaser and I will post another photo when the tree is blooming — until then, Happy Spring!
Update, April 6th – The tree has started to open. I’ll post a photo each day until it’s fully open. We had an incredible Spring storm that blasted through here just now with intense wind and the darkest clouds I’ve ever seen. Everyone in its path — stay safe!
You can see now how many flowers have opened in just a day. More to come in tomorrow’s update!
Update, April 7th – She is now in all her glory! It’s always worth the wait. I feel so happy to have her in my garden.

Full bloom! Always worth the wait! Happy Easter everyone…
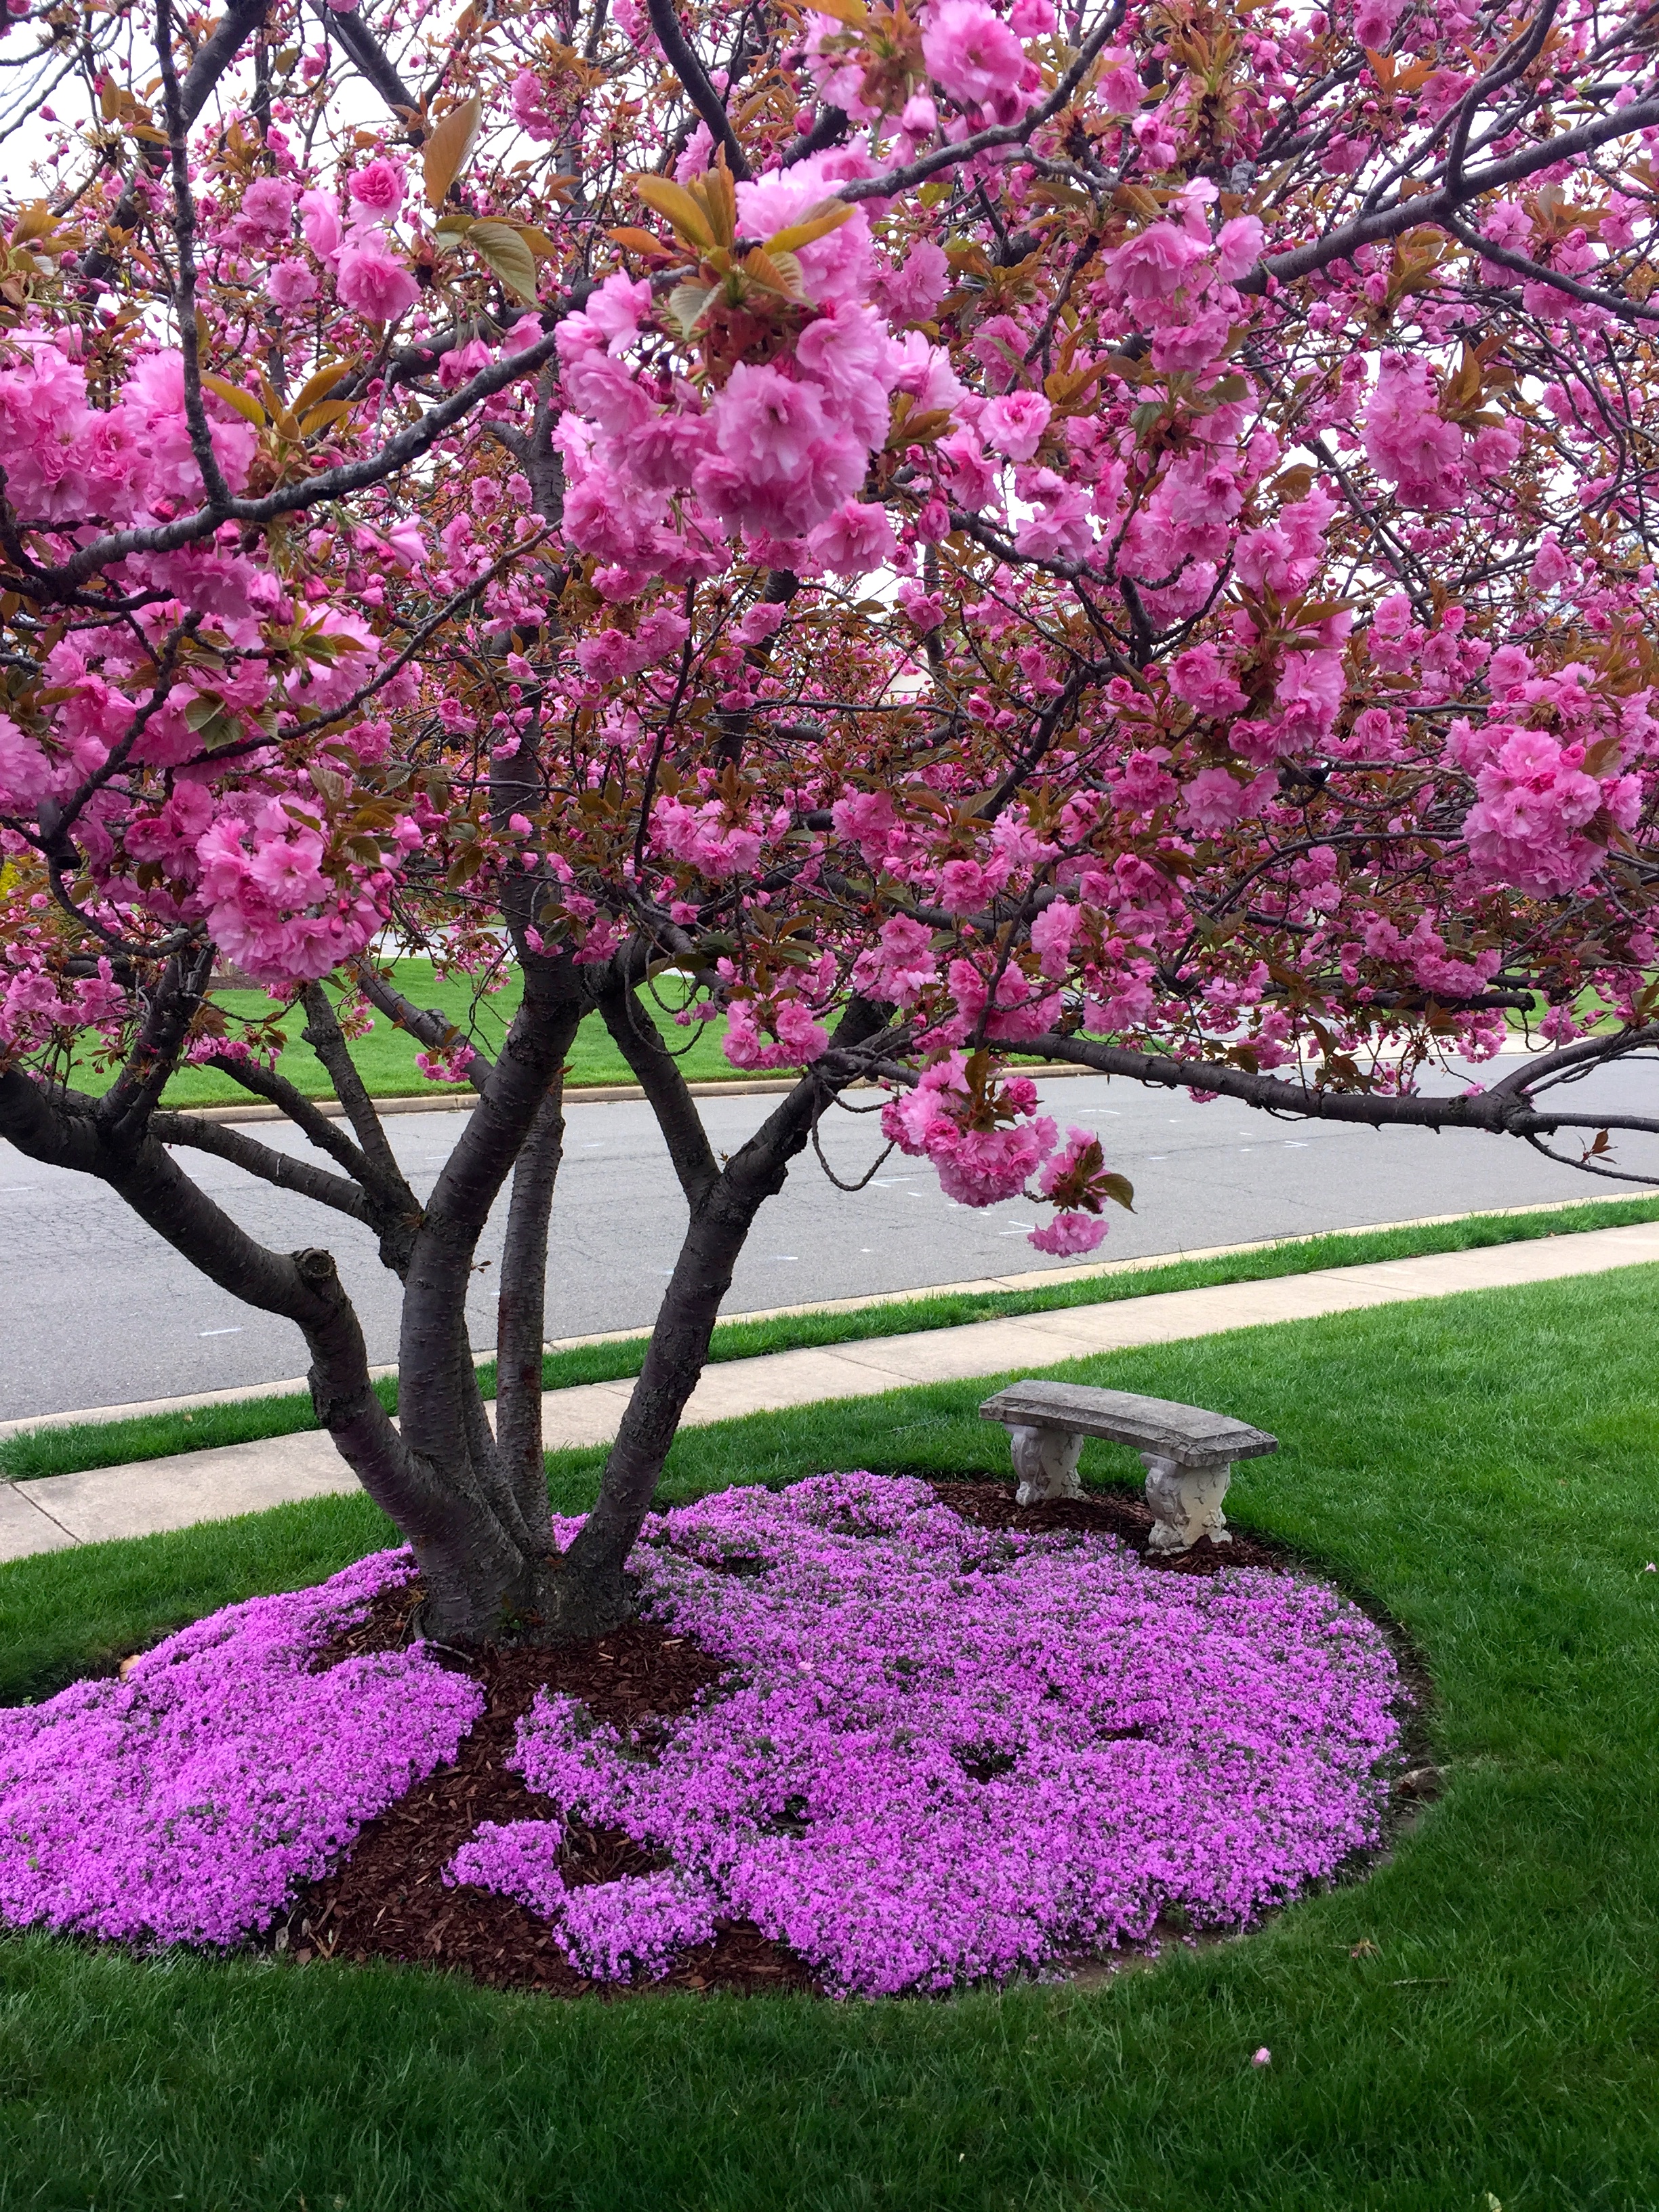
One more close up for posterity! How I love this tree!

A new year is starting — time for some new gardening goals!
Hi there! It’s been a hard few months for me, trying to not worry too much about the future, but I’m doing my best to re-focus on what I can do. I urge all to stay aware of clean gardening practices and what we can do for the environment: not using chemicals, recycling/composting, participating in clean-up efforts in our communities, and last but not least, sending your Senators and Representatives a call or an email asking them to keep as many environmental protections in place as they can. You can reach them all at (202) 224-3121. The Capitol operators can help you find your Senators or Representatives, even if you don’t know their names.
We have a lot of work ahead of us! I don’t mean to rant on, but really, who doesn’t want a clean and healthy world? I think we can all agree on that! I think that is my biggest dream. I hope we can curb our losses at the EPA. Climate change is real!
Here in my little corner of the world, I managed to get quite a lot finished up in 2016, but I still have so much to do. This year’s main focus is on improving the areas under and around the deck.
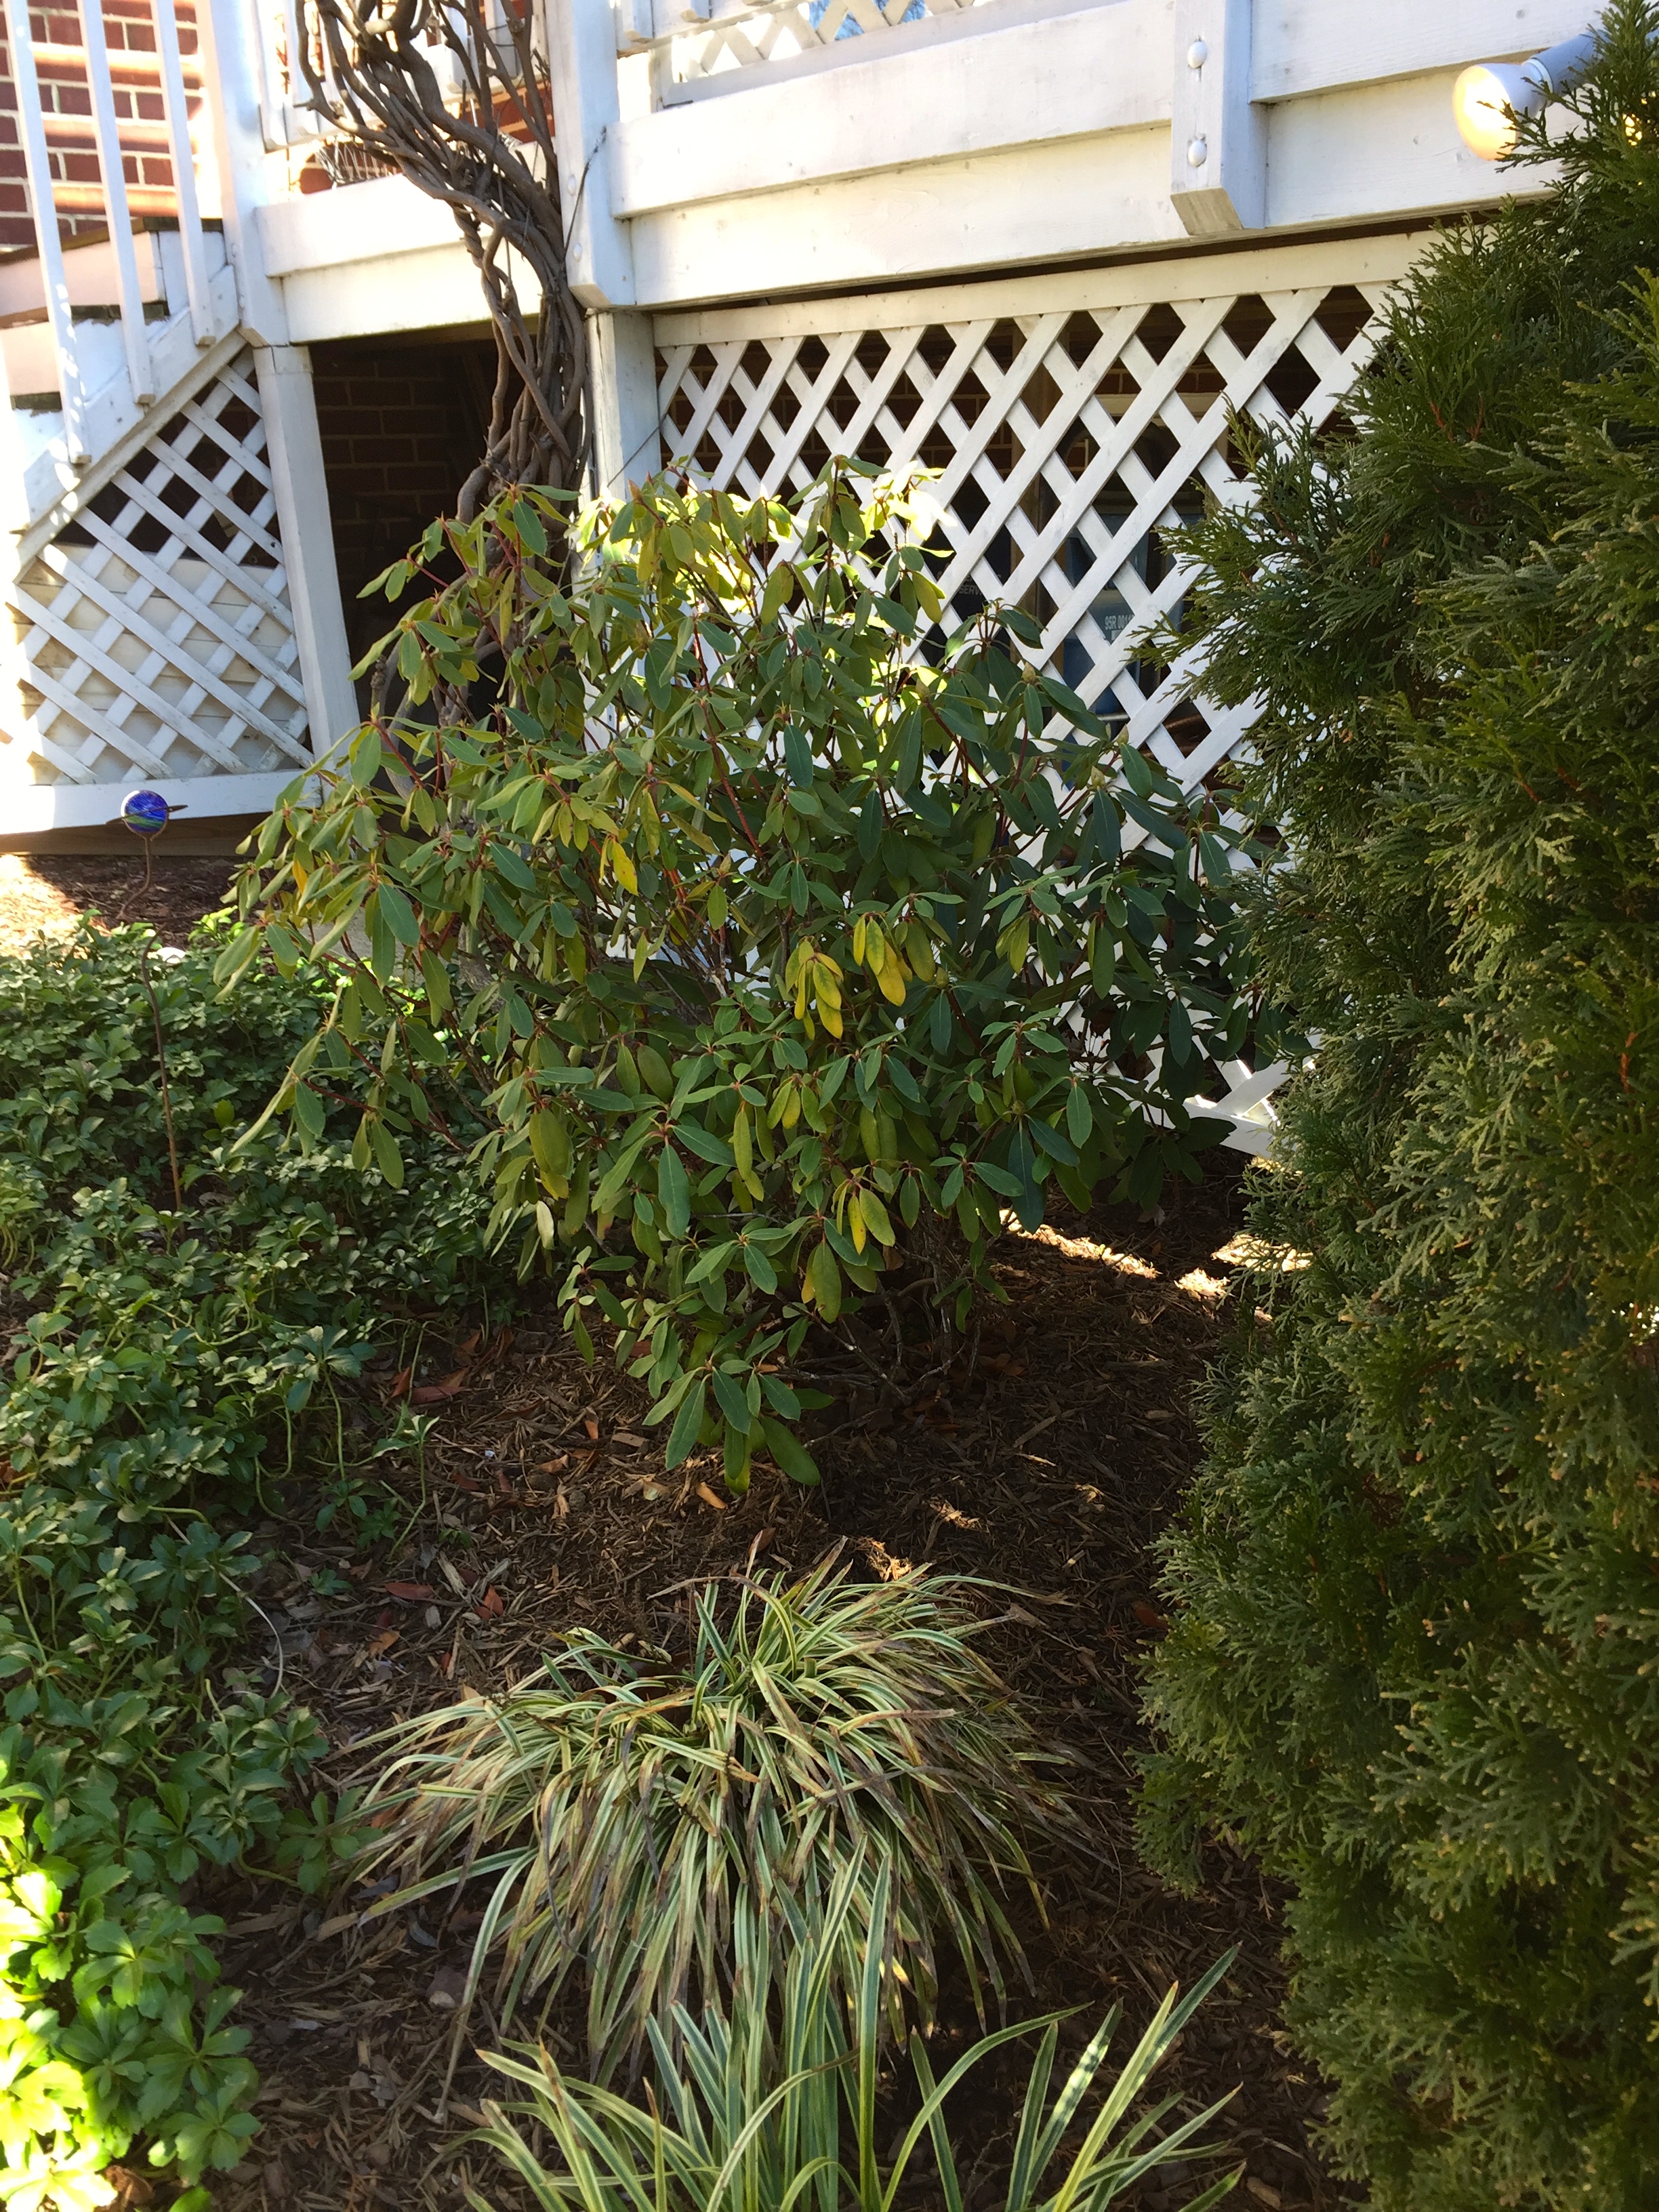
It was time for an edit in this garden. With more shade from a tree, it was out with the sedum and in with a transplanted rhododedron.
Here are my goals: I’ll make an designated area to place the trash can and recycling bins that is both out of sight, but still easy to roll out to the curb. This also will improve the area where I store my flower pots, extra hoses, etc. And, there is one area I couldn’t work on last fall because I ran out of time — I need to lift some of the bricks on the back walkway and level them. After sixteen years, the ground has sunk around the plexi pipe that carries the runoff water from the downspout — should be an easy fix! Third, I will use my brick saw to cleanup the edge of the walkway where it connects to the driveway.
All the cosmetic work will boost the curb appeal, too — always a plus. When spring arrives, the garden around the base of the deck will get some annuals to really fill out the space and give some added color. Looking at the winter garden, when most everything is bare or died back to the ground for the season, things look bleak, so I will post a picture when everything has sprung back to beautiful life and show some before and after shots in a few months.
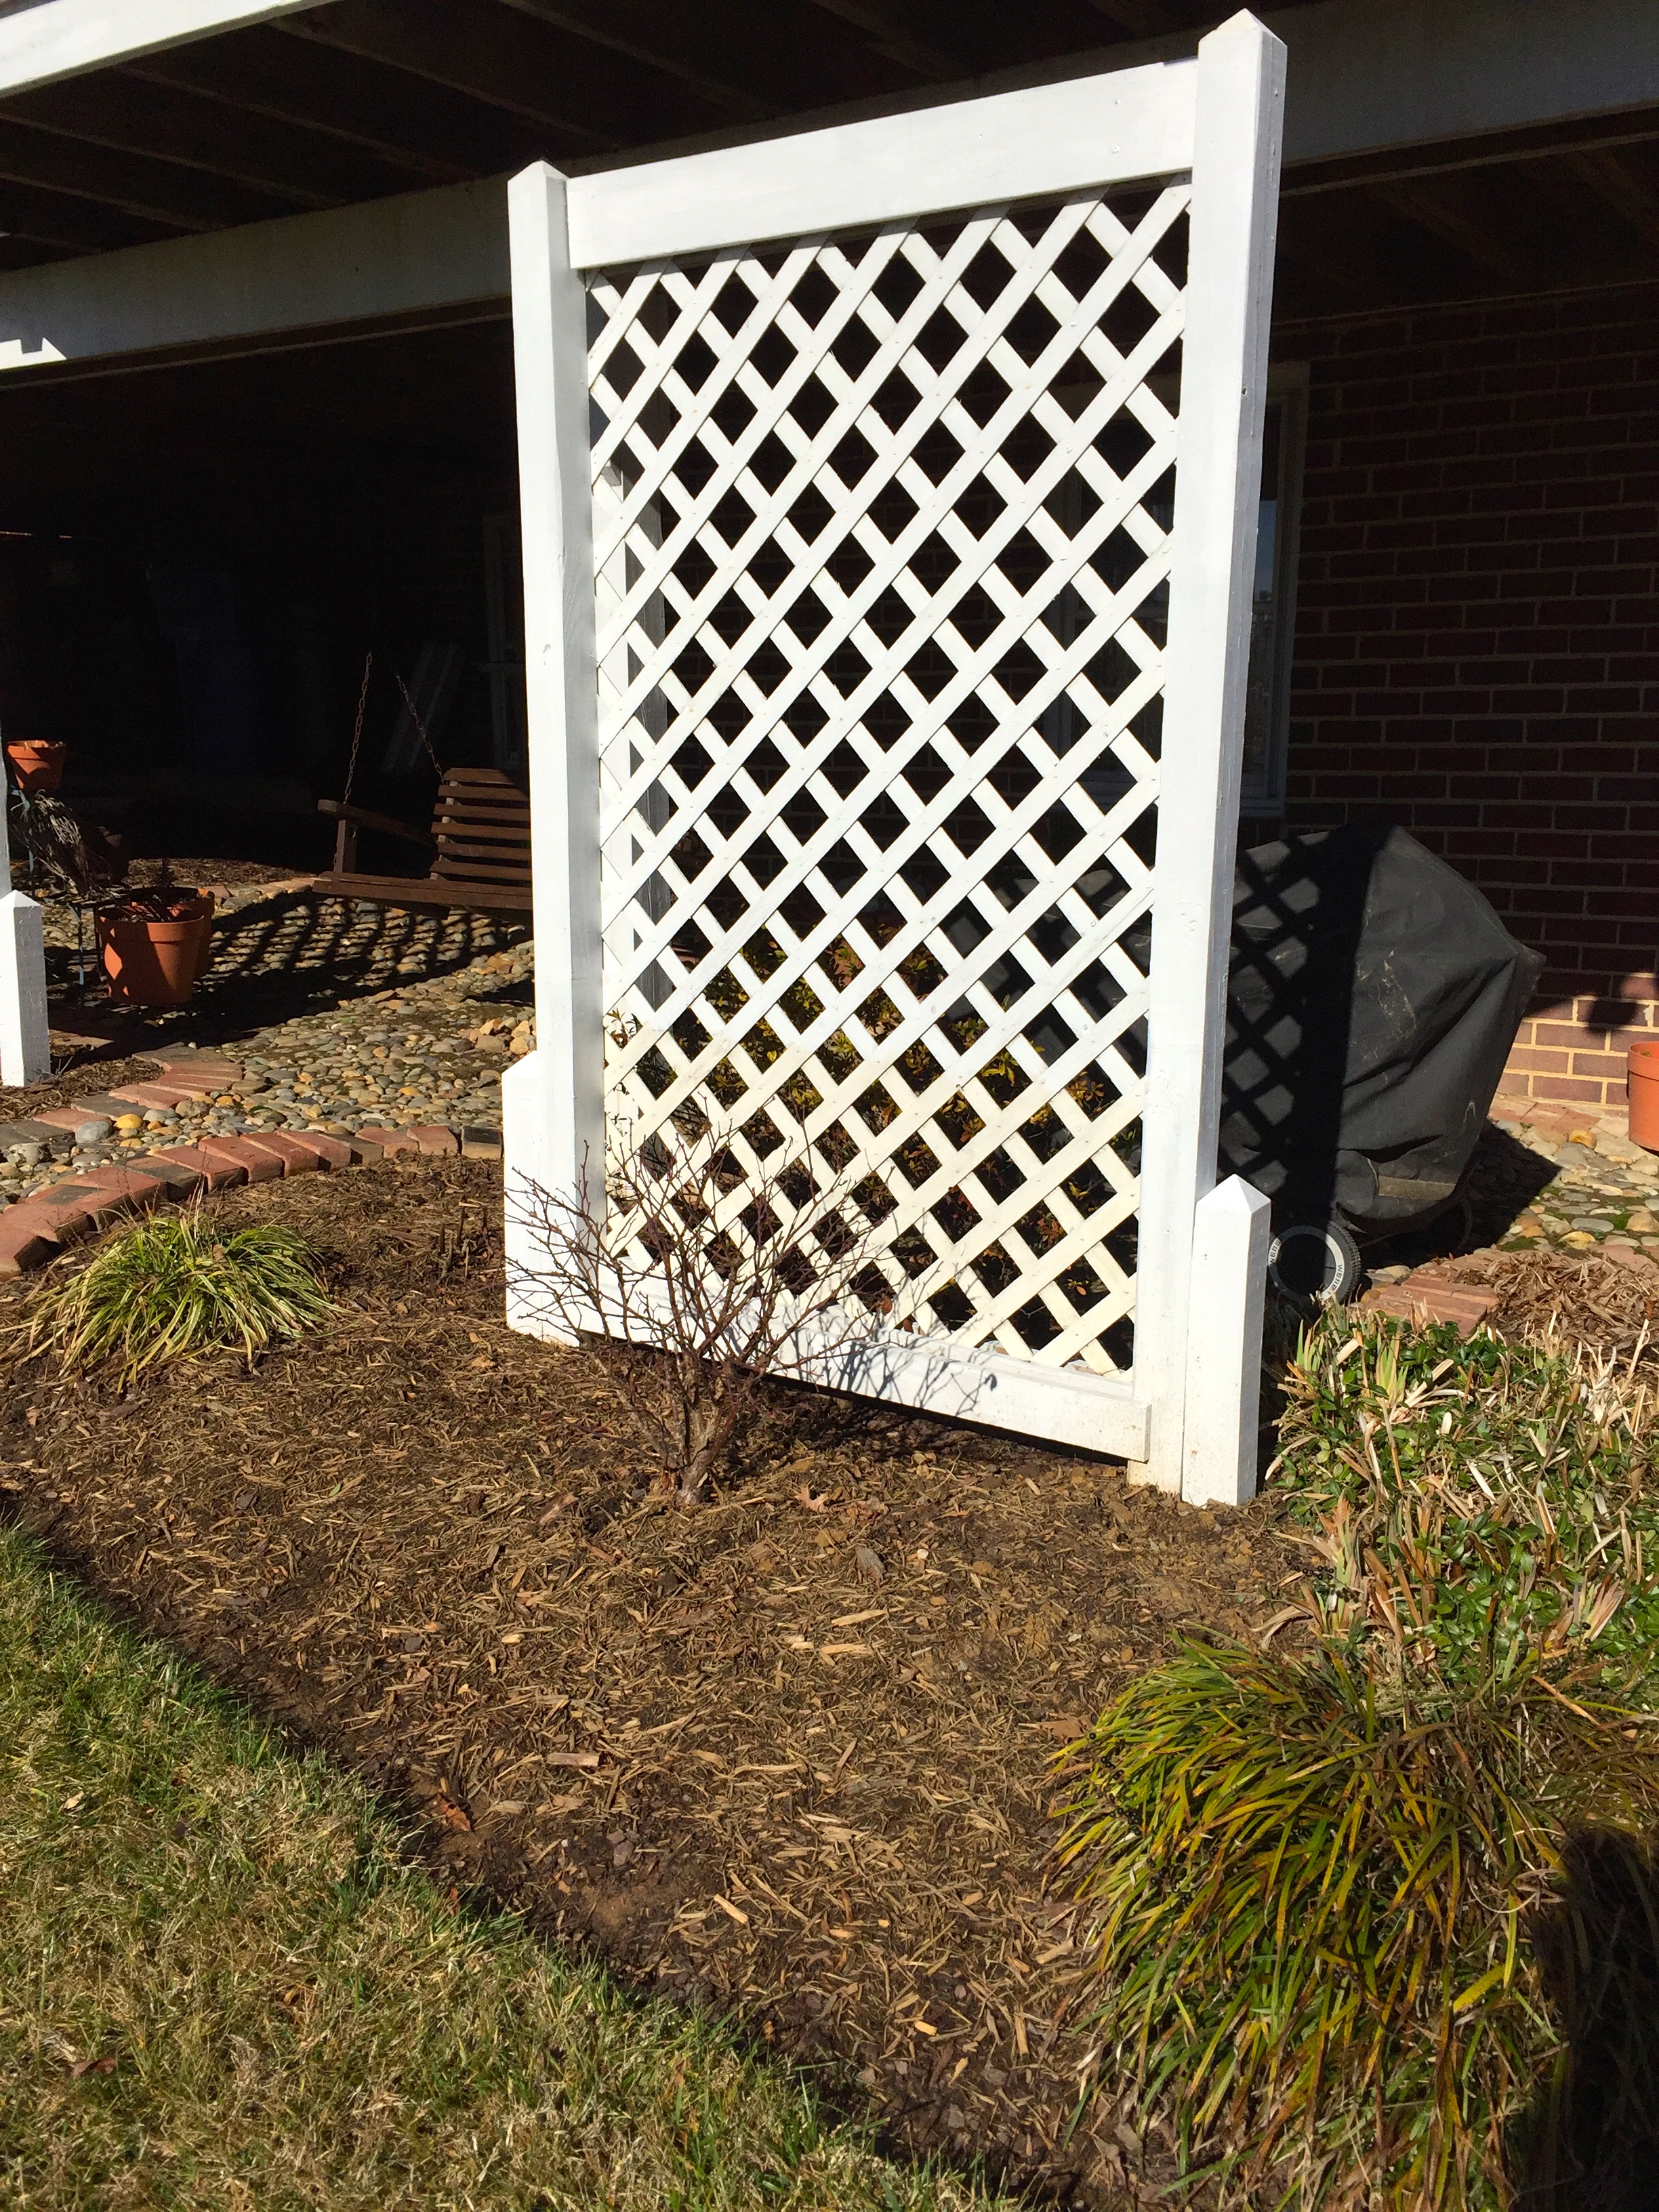
Here’s a photo of my re-make of the old planters into privacy screens. I removed the rotted supports and replaced them with posts I had saved. These are buried 3 feet into the ground, with no cement, so they can be re-positioned later if I want. I’ll be sure to post again when everything is in leaf and bloom, but while the bushes are bare you can see the screen more clearly.
When I manage to finish all of that, the upper trim around the house and gutter system needs a complete cleaning and painting. Lots of the basics — weeding, mulching, trimming, mowing and edging — go on pretty much year round. Here’s a winter tip to make quick work of a messy, windswept yard: We find that it is much easier to run the mower over the grassy areas every month or so even in winter to pick up the leaves that blow in and smooth out the clumps of grass than it is to rake the whole yard over and over.
Here is another area that I edited. It had become crowded and one of the bushes had died. I balanced out the azalea bushes on either side of the Holly tree and divided and replanted the hosta in a wave. An edit every few years it helps to keep things fresh.
Last fall I did manage to finish re-making the planters and arbors and reinstall them. Using the leftover lumber from other jobs that I had stored in the garage, I added extra posts so that the planters could be used as privacy panels (hiding the less-than-pretty necessities that are stored under the deck). Then I planted the rose bushes, which had been in pots before, and divided and replanted the liriope to fill out the garden. Also, five other areas of the garden were edited and simplified. Plants had grown so out of bounds over the years, and it was time to selectively remove and transplant many to new locations. Now there is some breathing room, with nothing crowded. I added another three cubic yards of mulch to spruce up the beds, and then the cold weather set in.
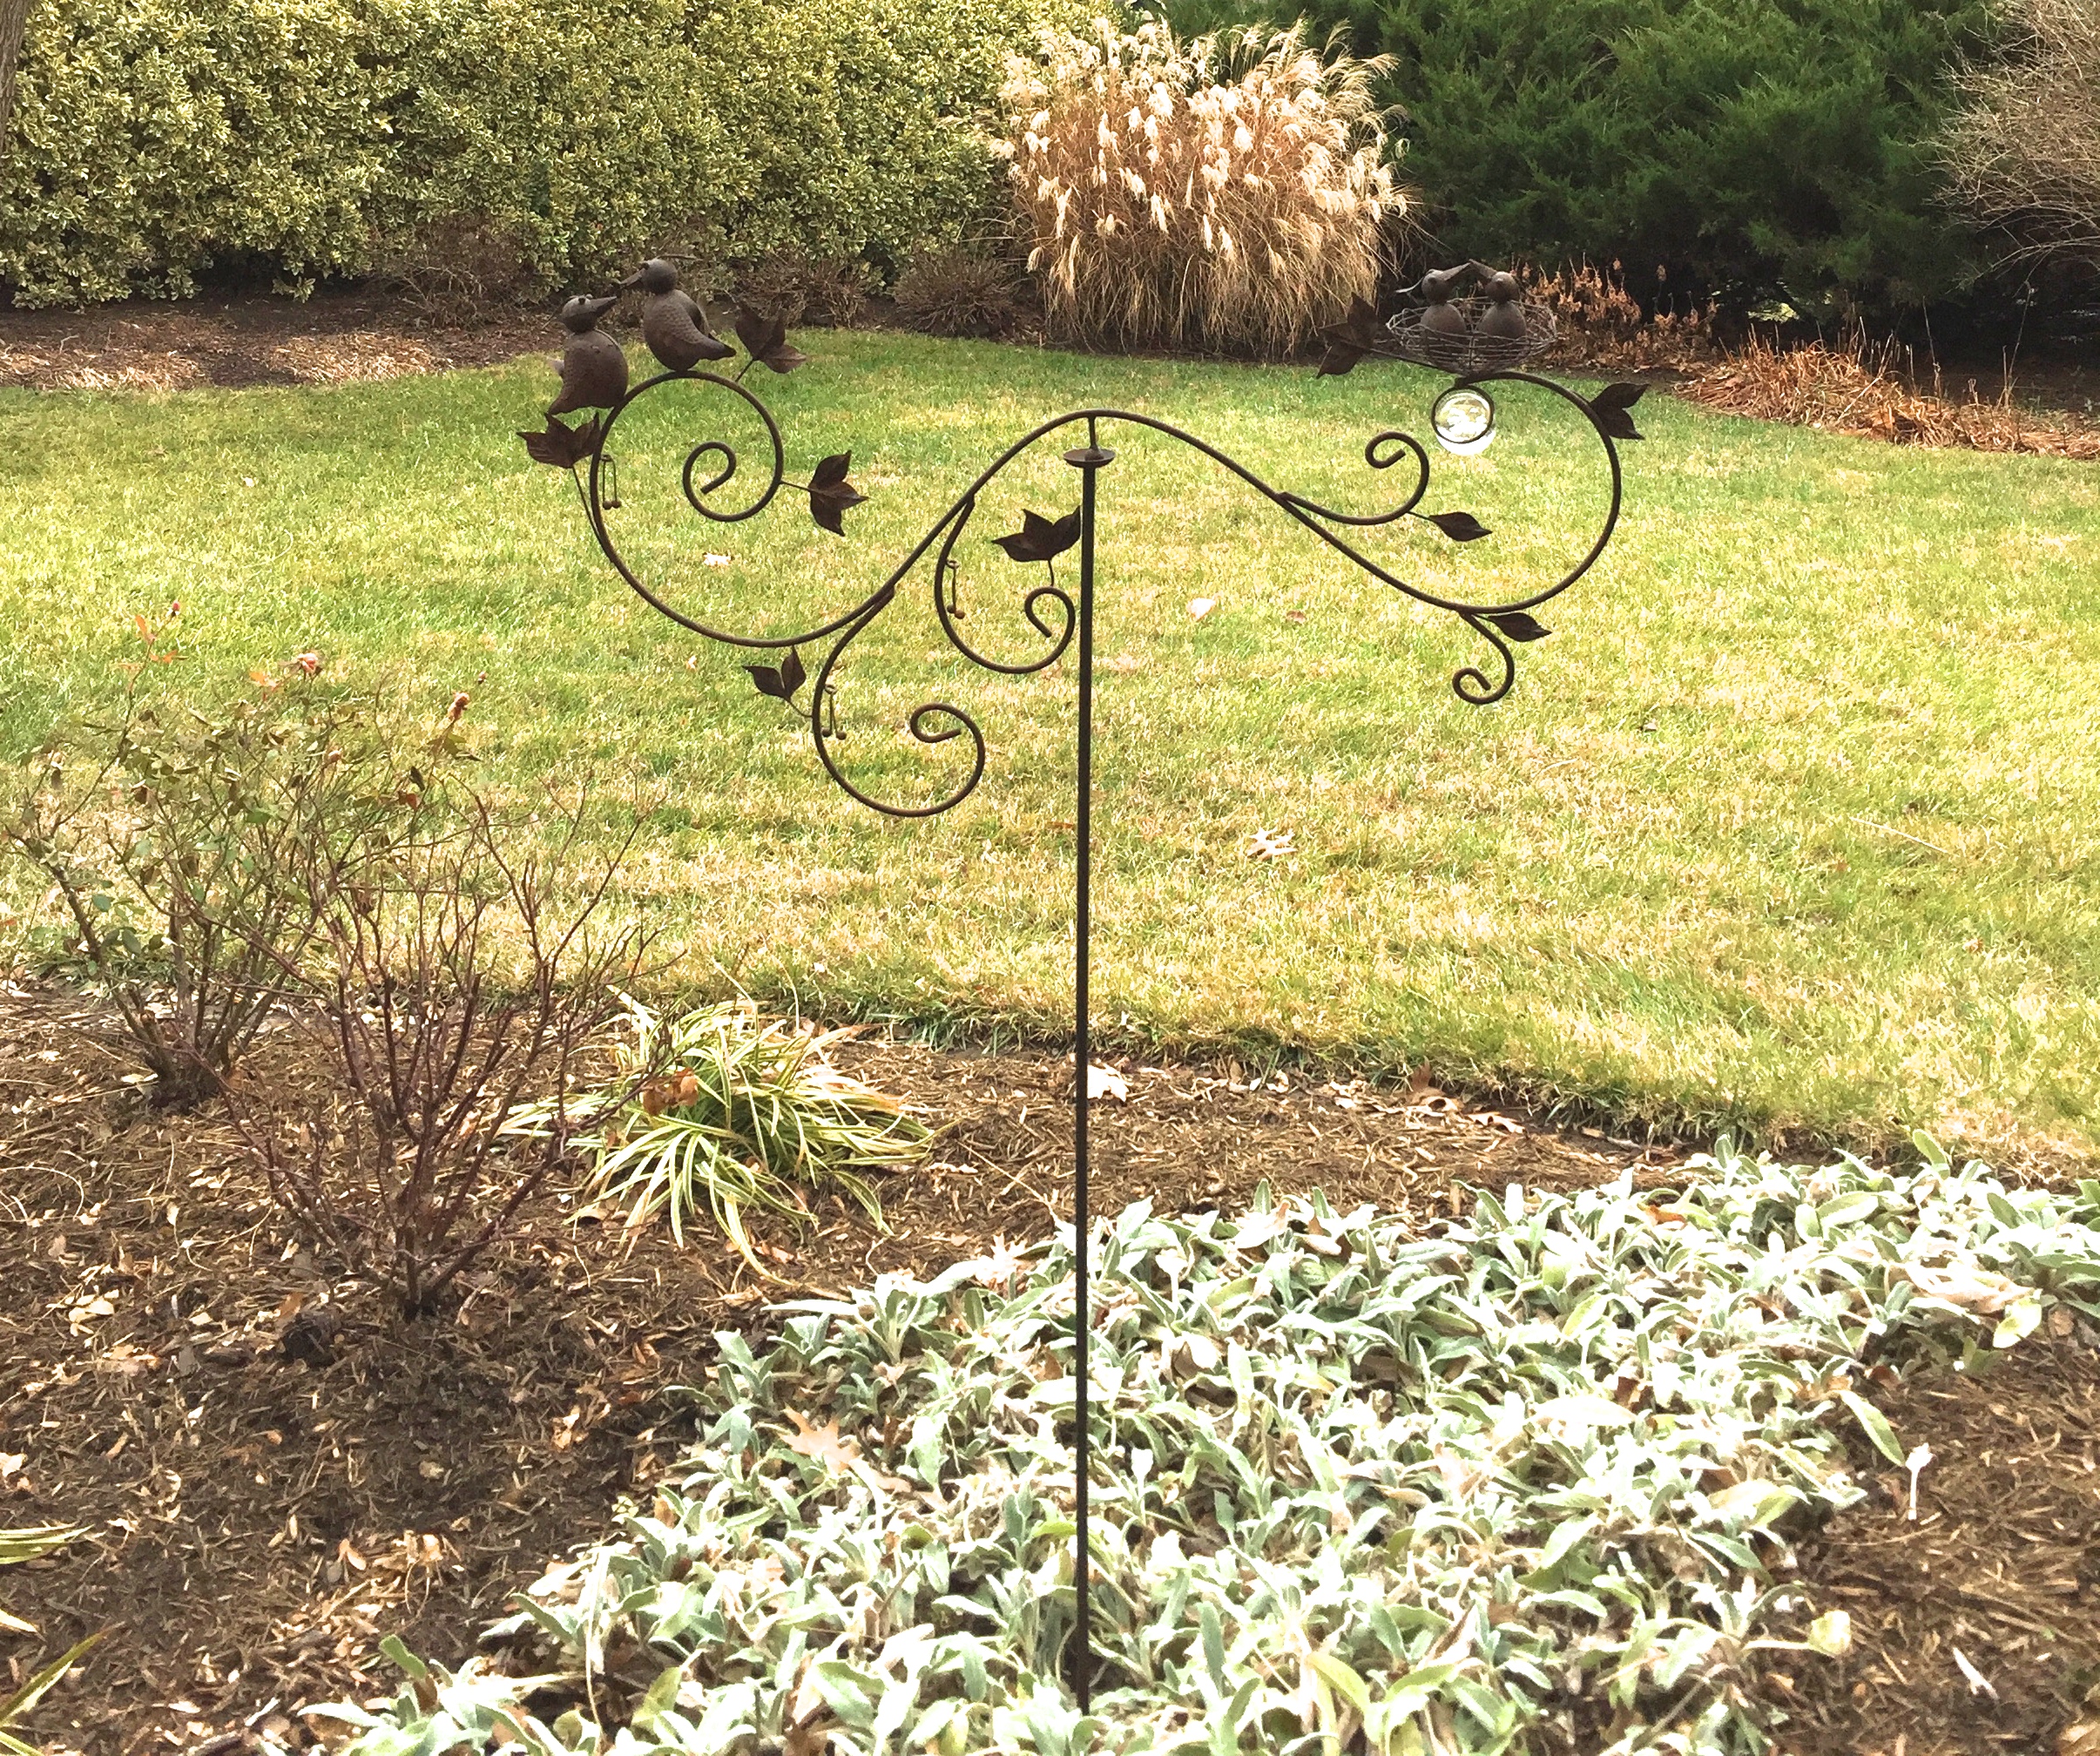
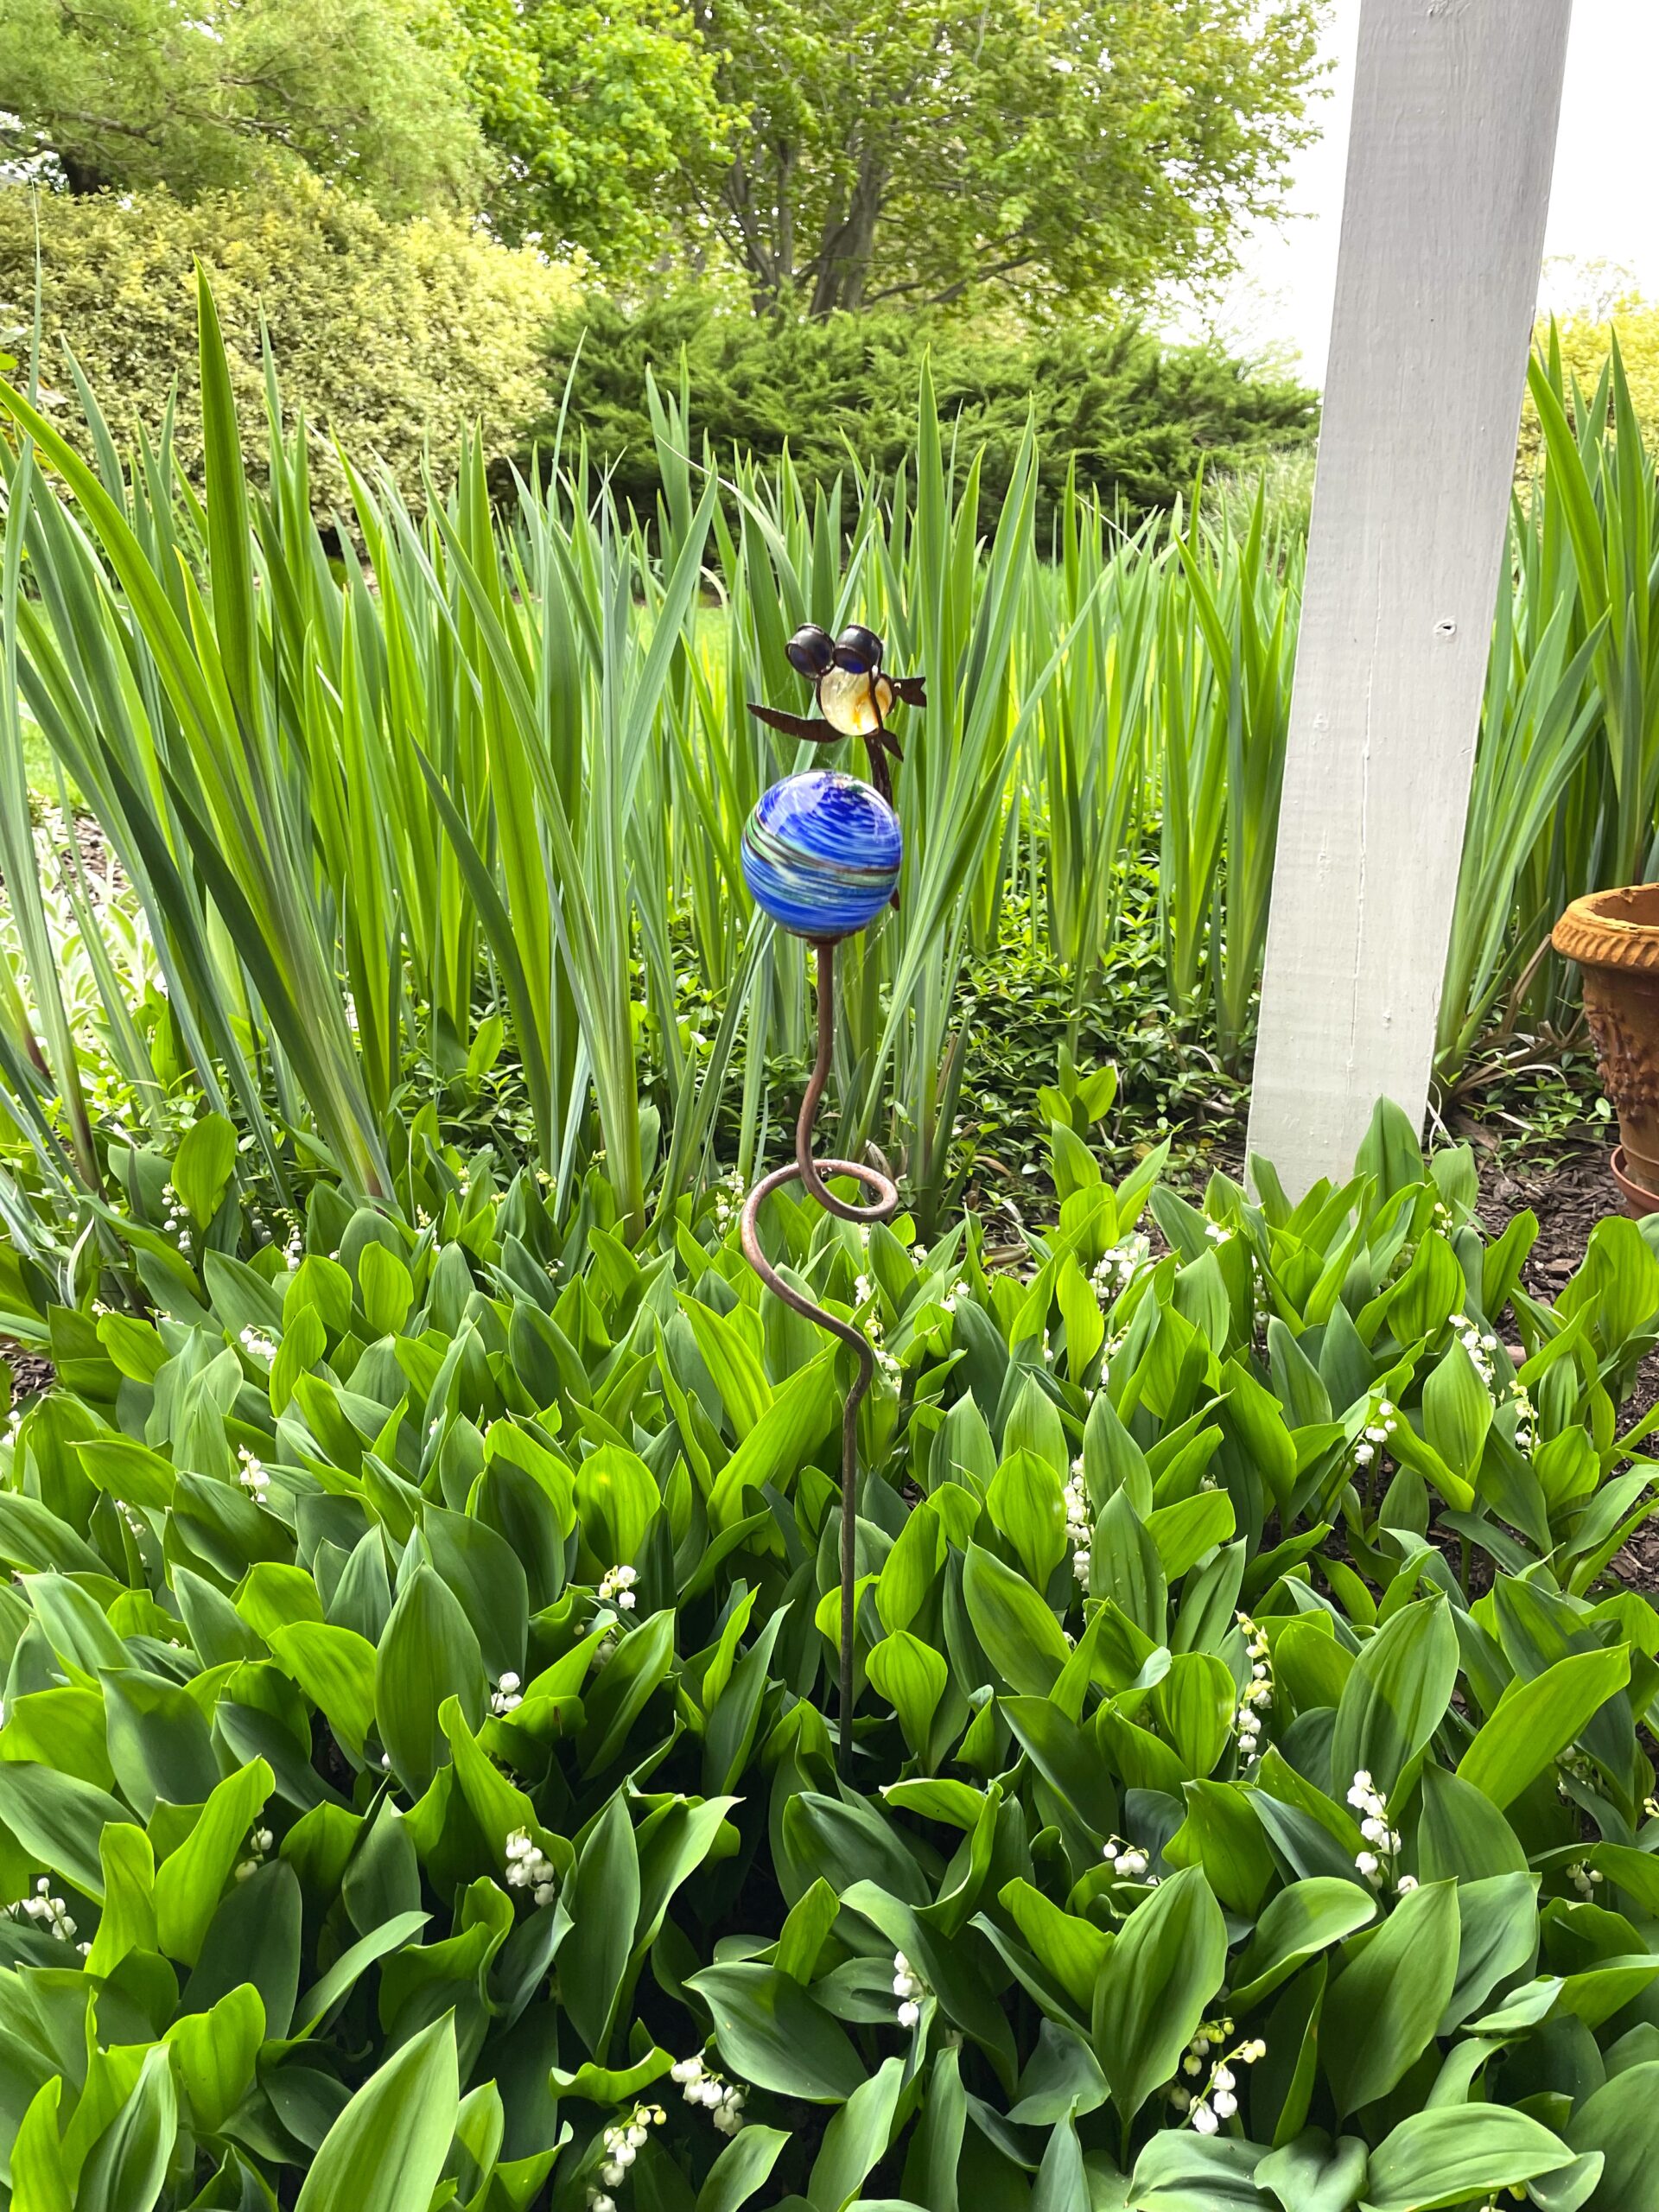
This fun garden ornament that I was gifted has so much personality. It spins and bobs in the wind! I would love to incorporate a few more interesting things throughout the gardens like this.
On the creative side of things, I’m looking forward to making some stepping stones to access some of the deeper garden beds more easily.
Lastly, I received a really fun garden ornament from my sister, and it adds so much personality to the garden. Thank you, Tracy! It makes me want to incorporate a few more special things to spice things up! More on that later…
What are your goals for 2017 out in the garden? I’d love to hear!

So very hot! Almost 100° outside! Stay hydrated…
It’s summer, all right! With temperatures approaching 100° here, there is no more comfortable place to be than in my basement at the computer, blogging without feeling guilty that I should be out working the garden. We have just passed the 4th of July, and now we move on to the “3H” time of summer: Hazy, Hot and Humid. No matter how long you live in the D.C. area, you never really get used to it. Water of all kinds is your friend — whether it’s the beach, pool, sprinkler or hose! And, please make sure to drink your eight glasses a day; it’s not fun to get dehydrated.
When it gets this hot, it helps to keep the weeds down and moisture in by stirring up and adding some additional mulch in thin spots. Your flowers and veggies will love it, and also boosts the curb appeal!
With the exception of a couple of weeks in early June, this has been a very rainy season for us, and that has caused not only extreme growth on established bushes and trees, but also annuals and vegetables to rot because of heat and moisture. I had to replace all of mine, but they are looking fantastic now.
I have coleus in the planters this year. I love the bright splash of color, and they are very hardy in the heat-
After losing the first set of annuals at the front door due to too much rain, I put in coleus. Sometimes I see plants in the nursery that seem to be doing so much better than others, so that’s what I bought. I love the huge colorful leaves! I have more of it growing on the back deck and in the window box — love it there, too.
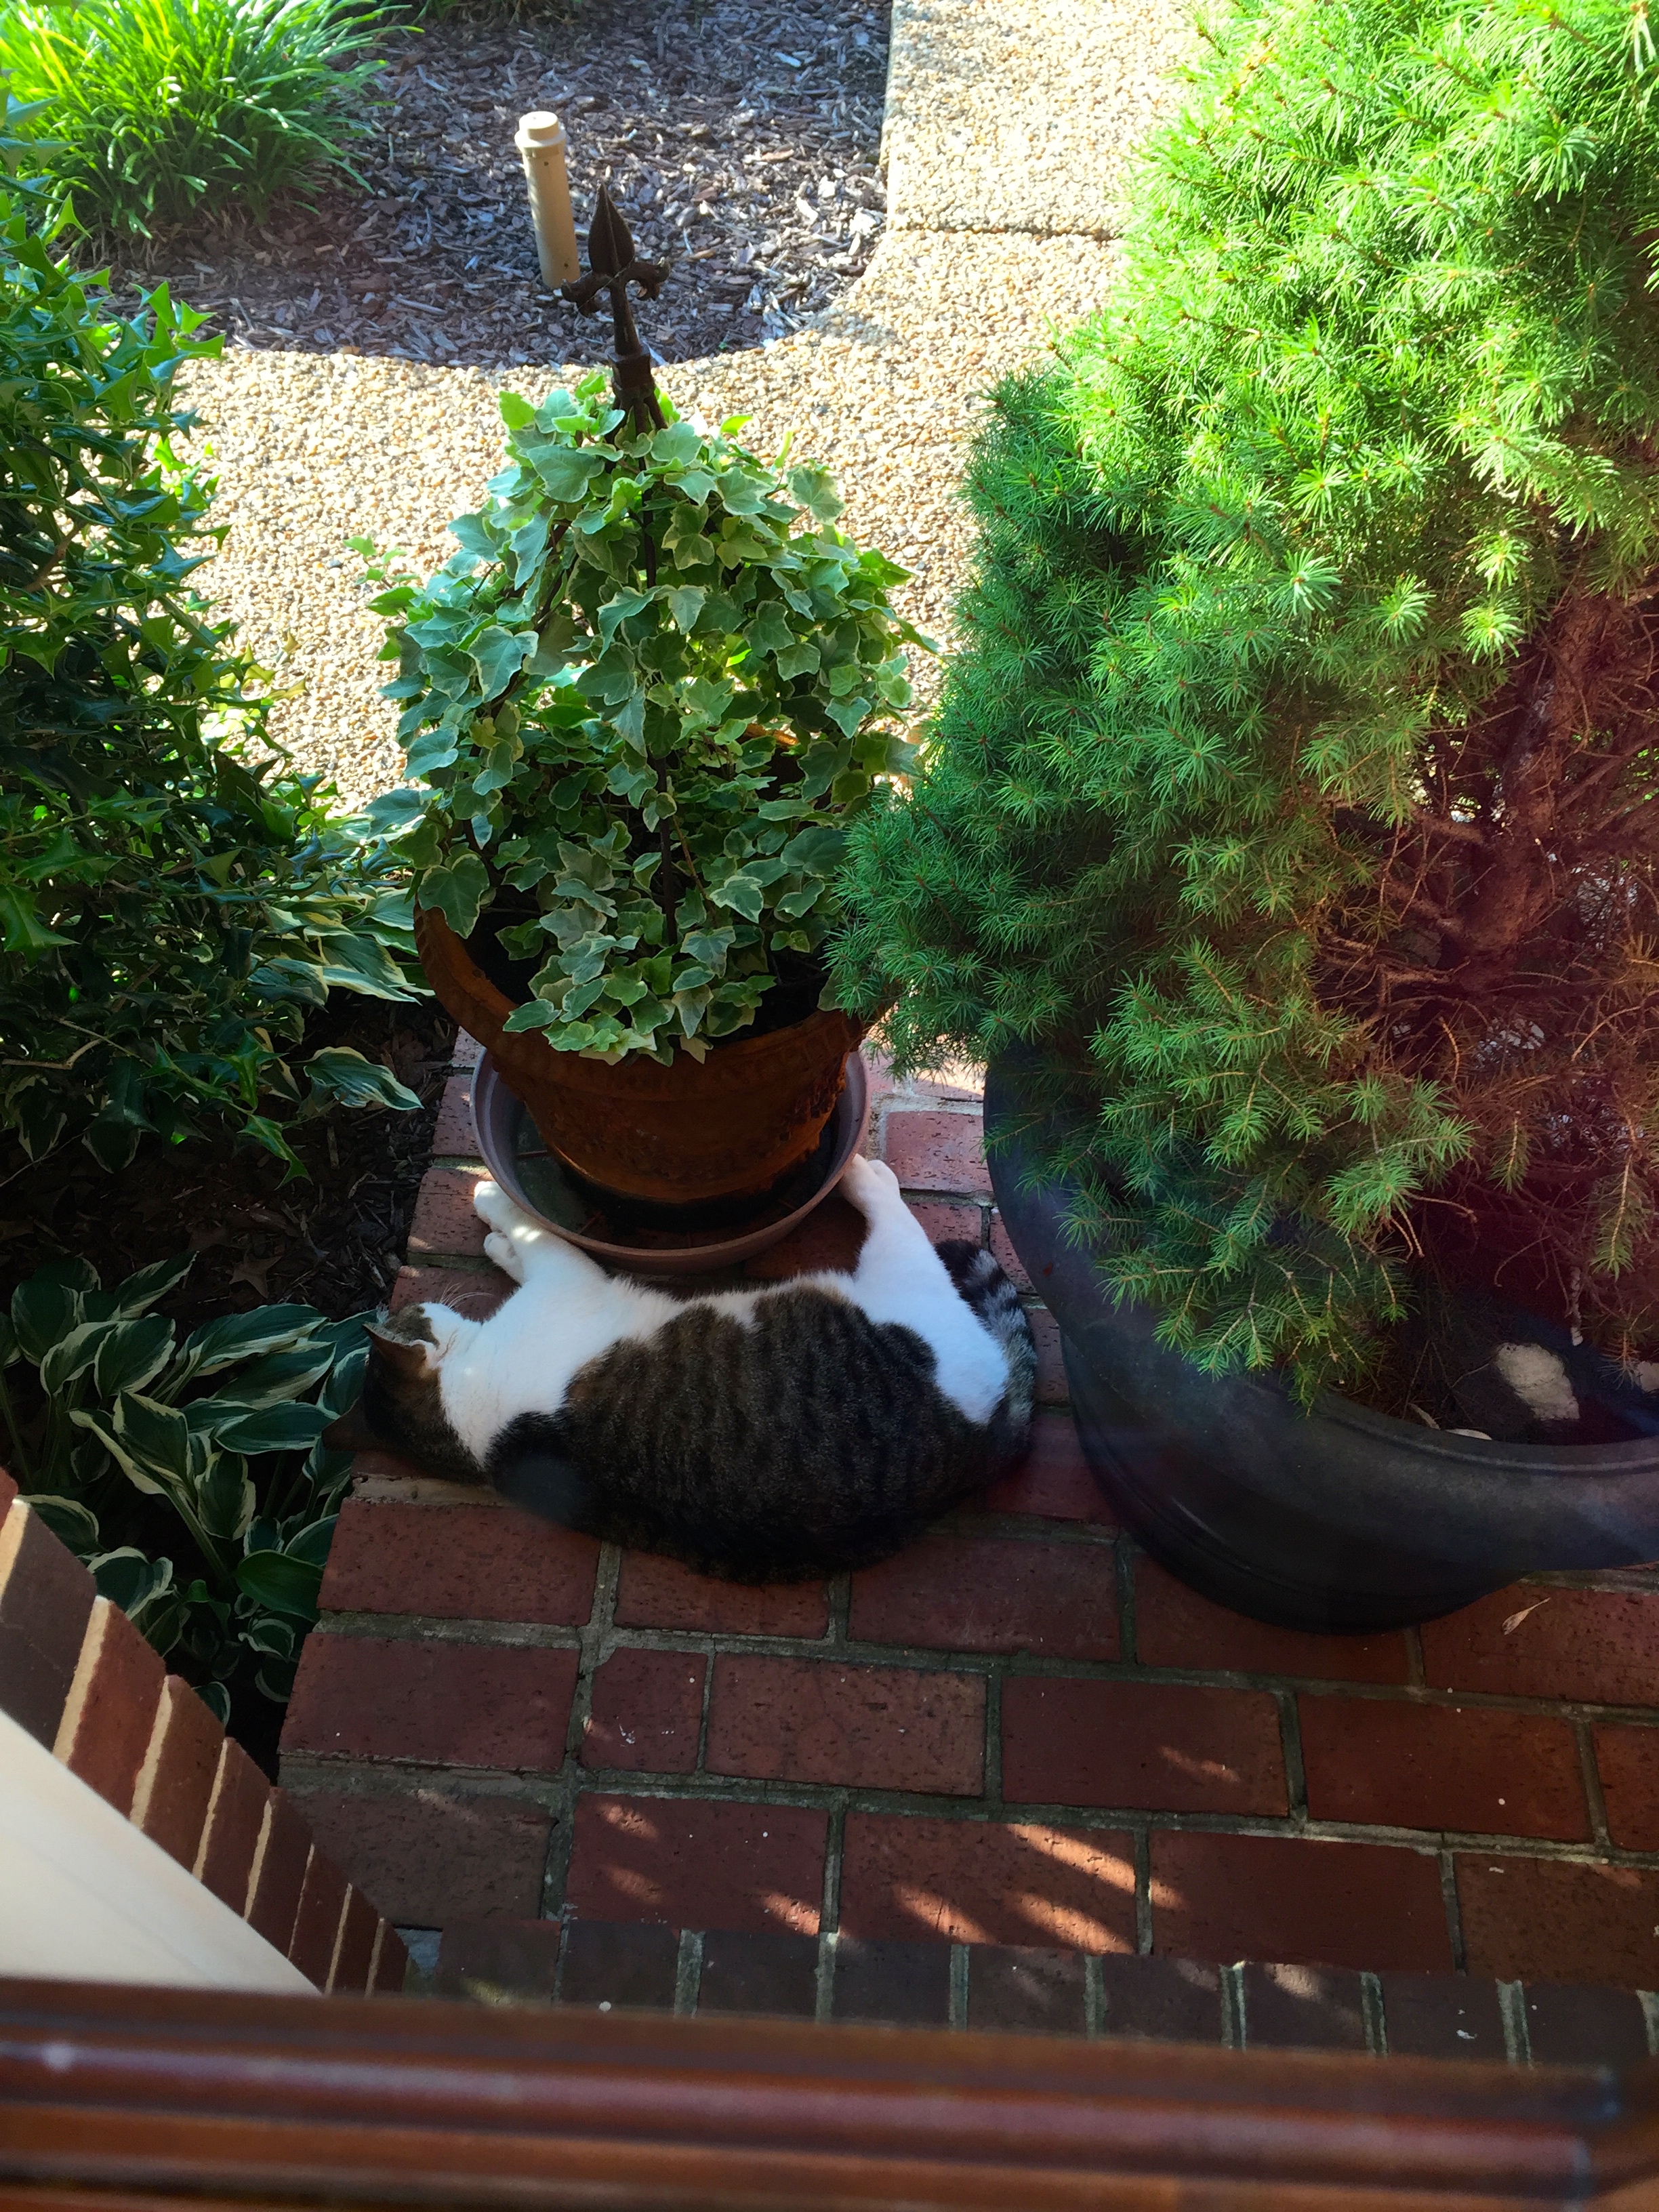
Stomper would like me to request that everyone set out some water in the shade for four-pawed friends — it’s greatly appreciated!
I want to put out a reminder in this heat to please keep your bird baths filled with fresh water and a dish or two of water ideally in a shady spot for the wildlife. It’s sometimes hard to find clean water this time of the year for them, and it’s much appreciated!
I find myself just trying to keep up with the weeds when it gets hot like this even though I use a weed preventer in the garden beds. I’ve been adding some extra mulch here and there where it’s become thin and stirred it with a rake in other spots for good airflow to soil. This is a good practice to get into this time of year, and it boosts the curb appeal, too!

Look what I found while weeding and edging!
And while I was edging the other day, I found this wonderful heart shaped rock, nature’s gift!

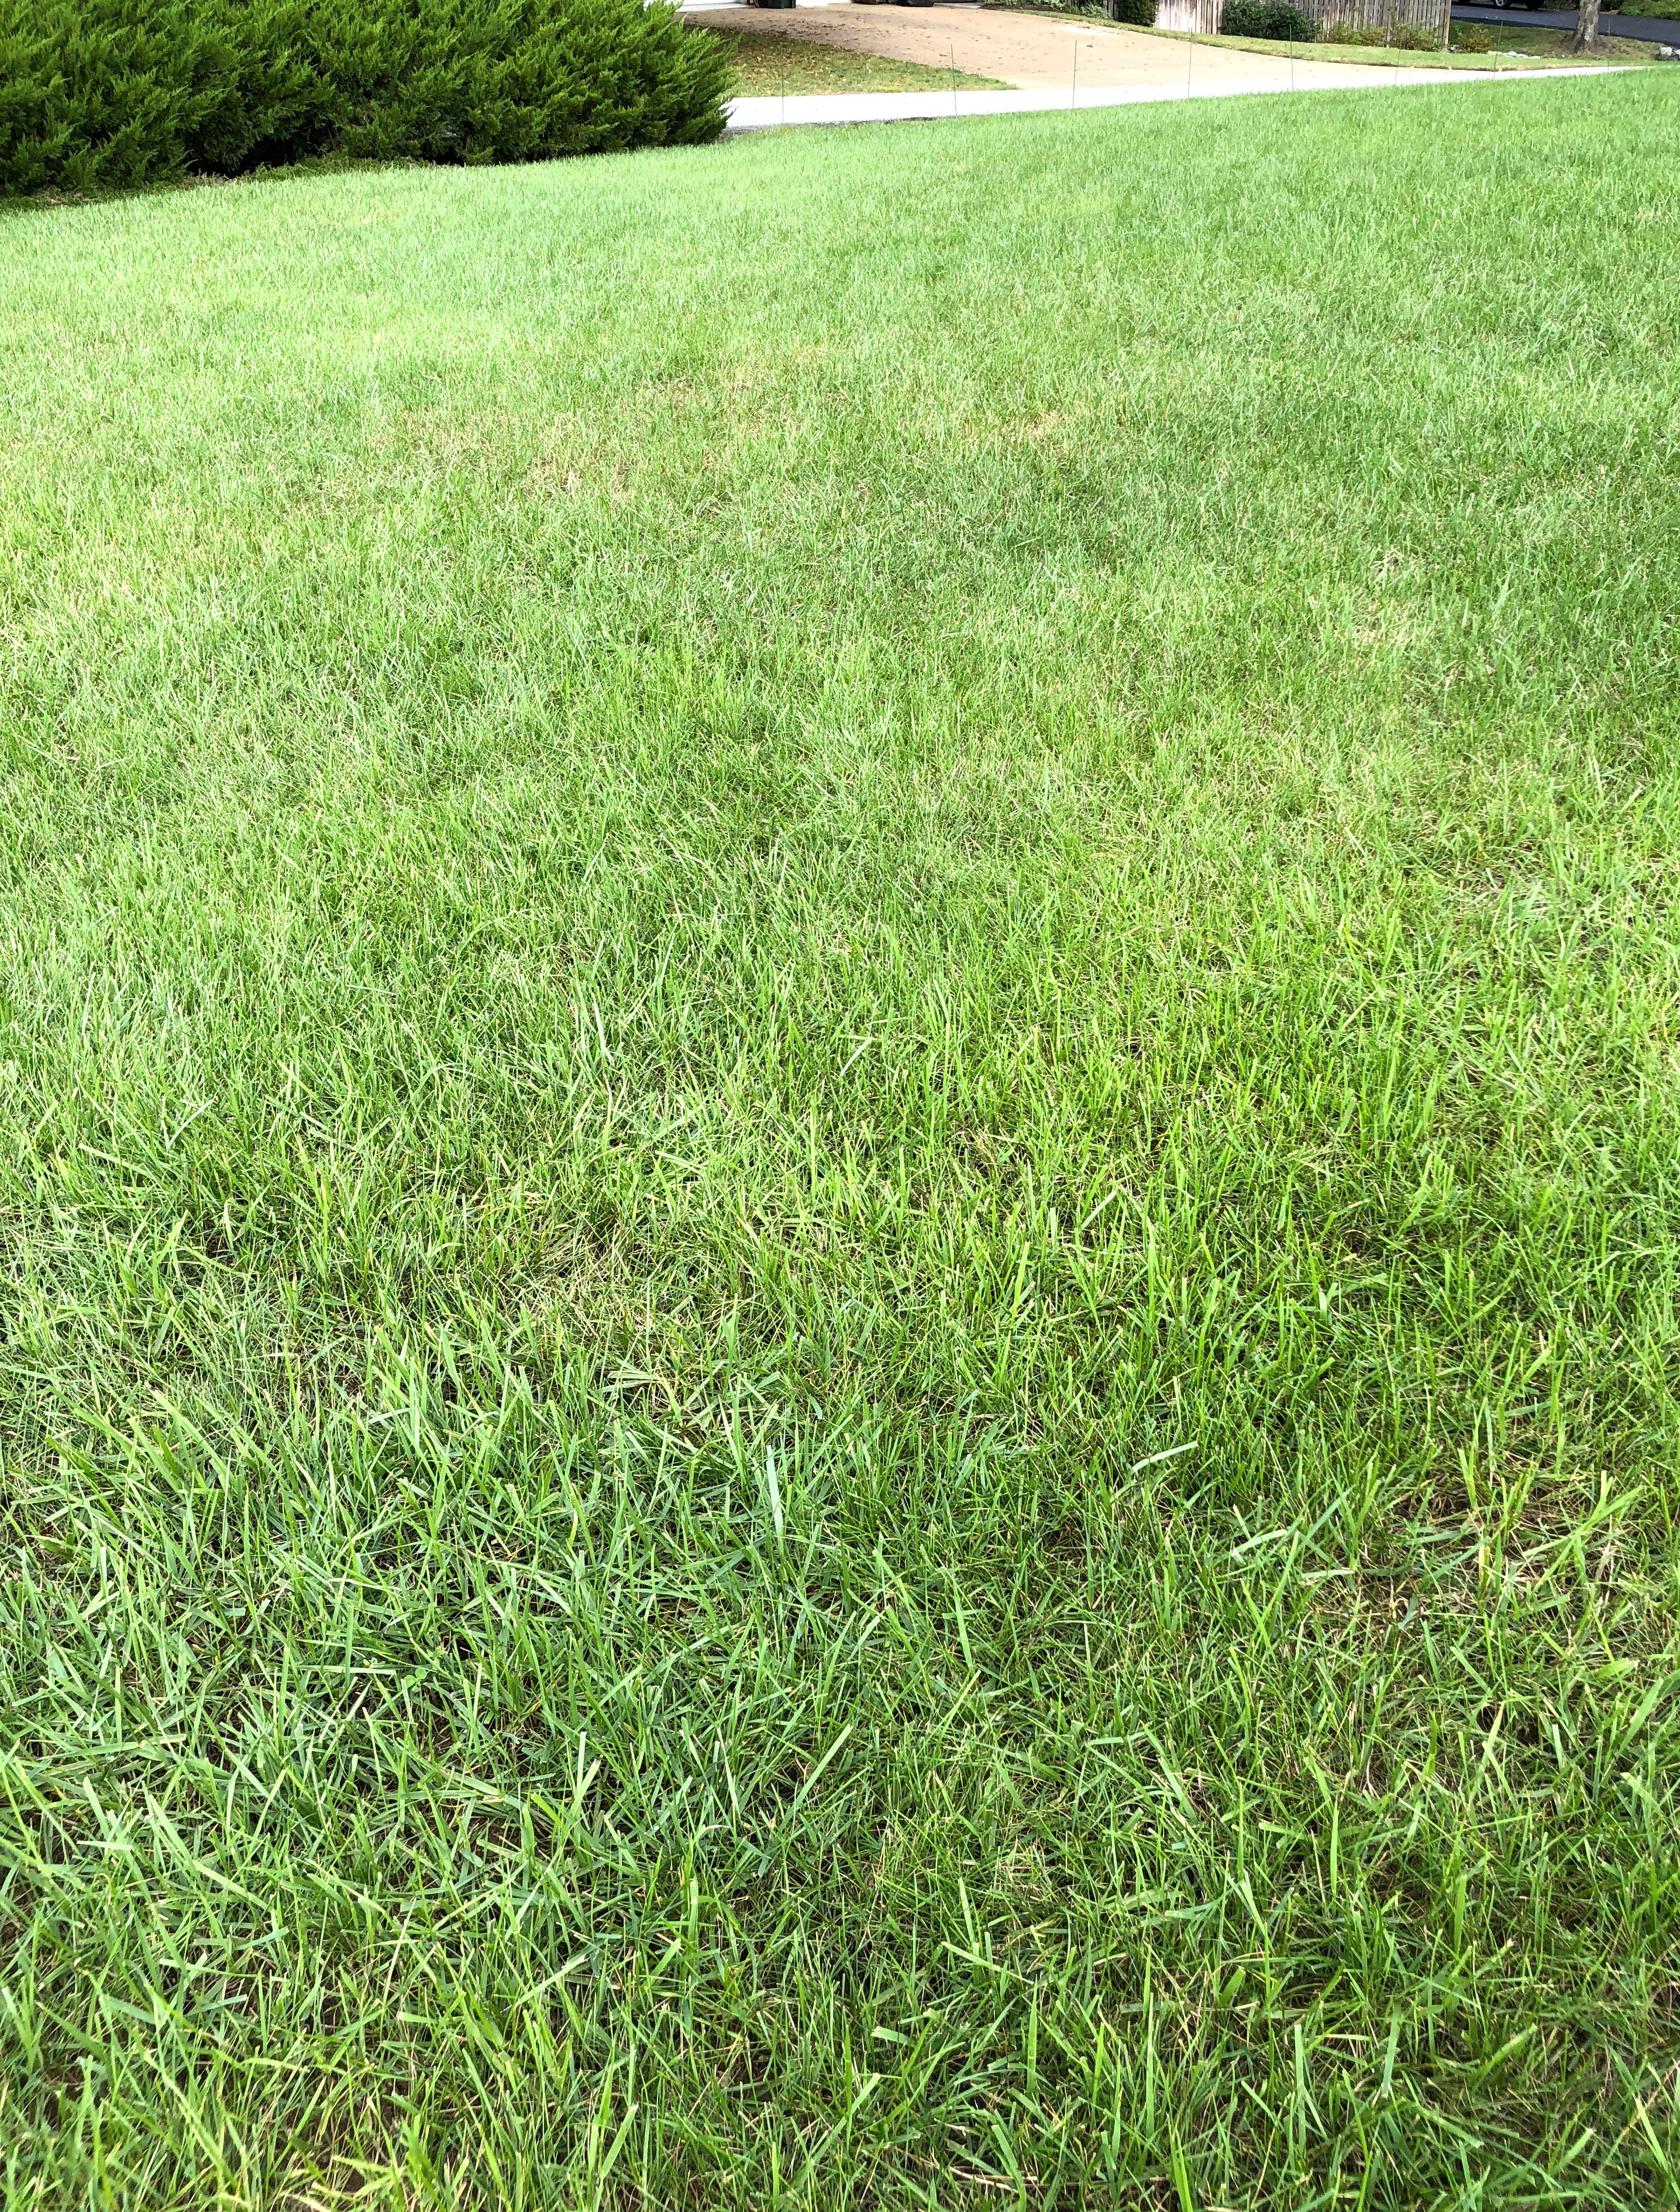
I have a new lawn mystery to solve. Brown spots! I think these have been caused by lawn grubs. More on this soon.
I’m noticing about 100 brown spots in the grassy areas. They can be caused by so many things: fungus from too much rain, or a dull mower blade, pet spots or grubs like fire flies. I’m not sure what is causing mine, but I’m leaning towards the grubs idea. I’ll report more on this soon, and have a remedy for you, too, when I do.
Until then, try to stay cool — Happy Summer!
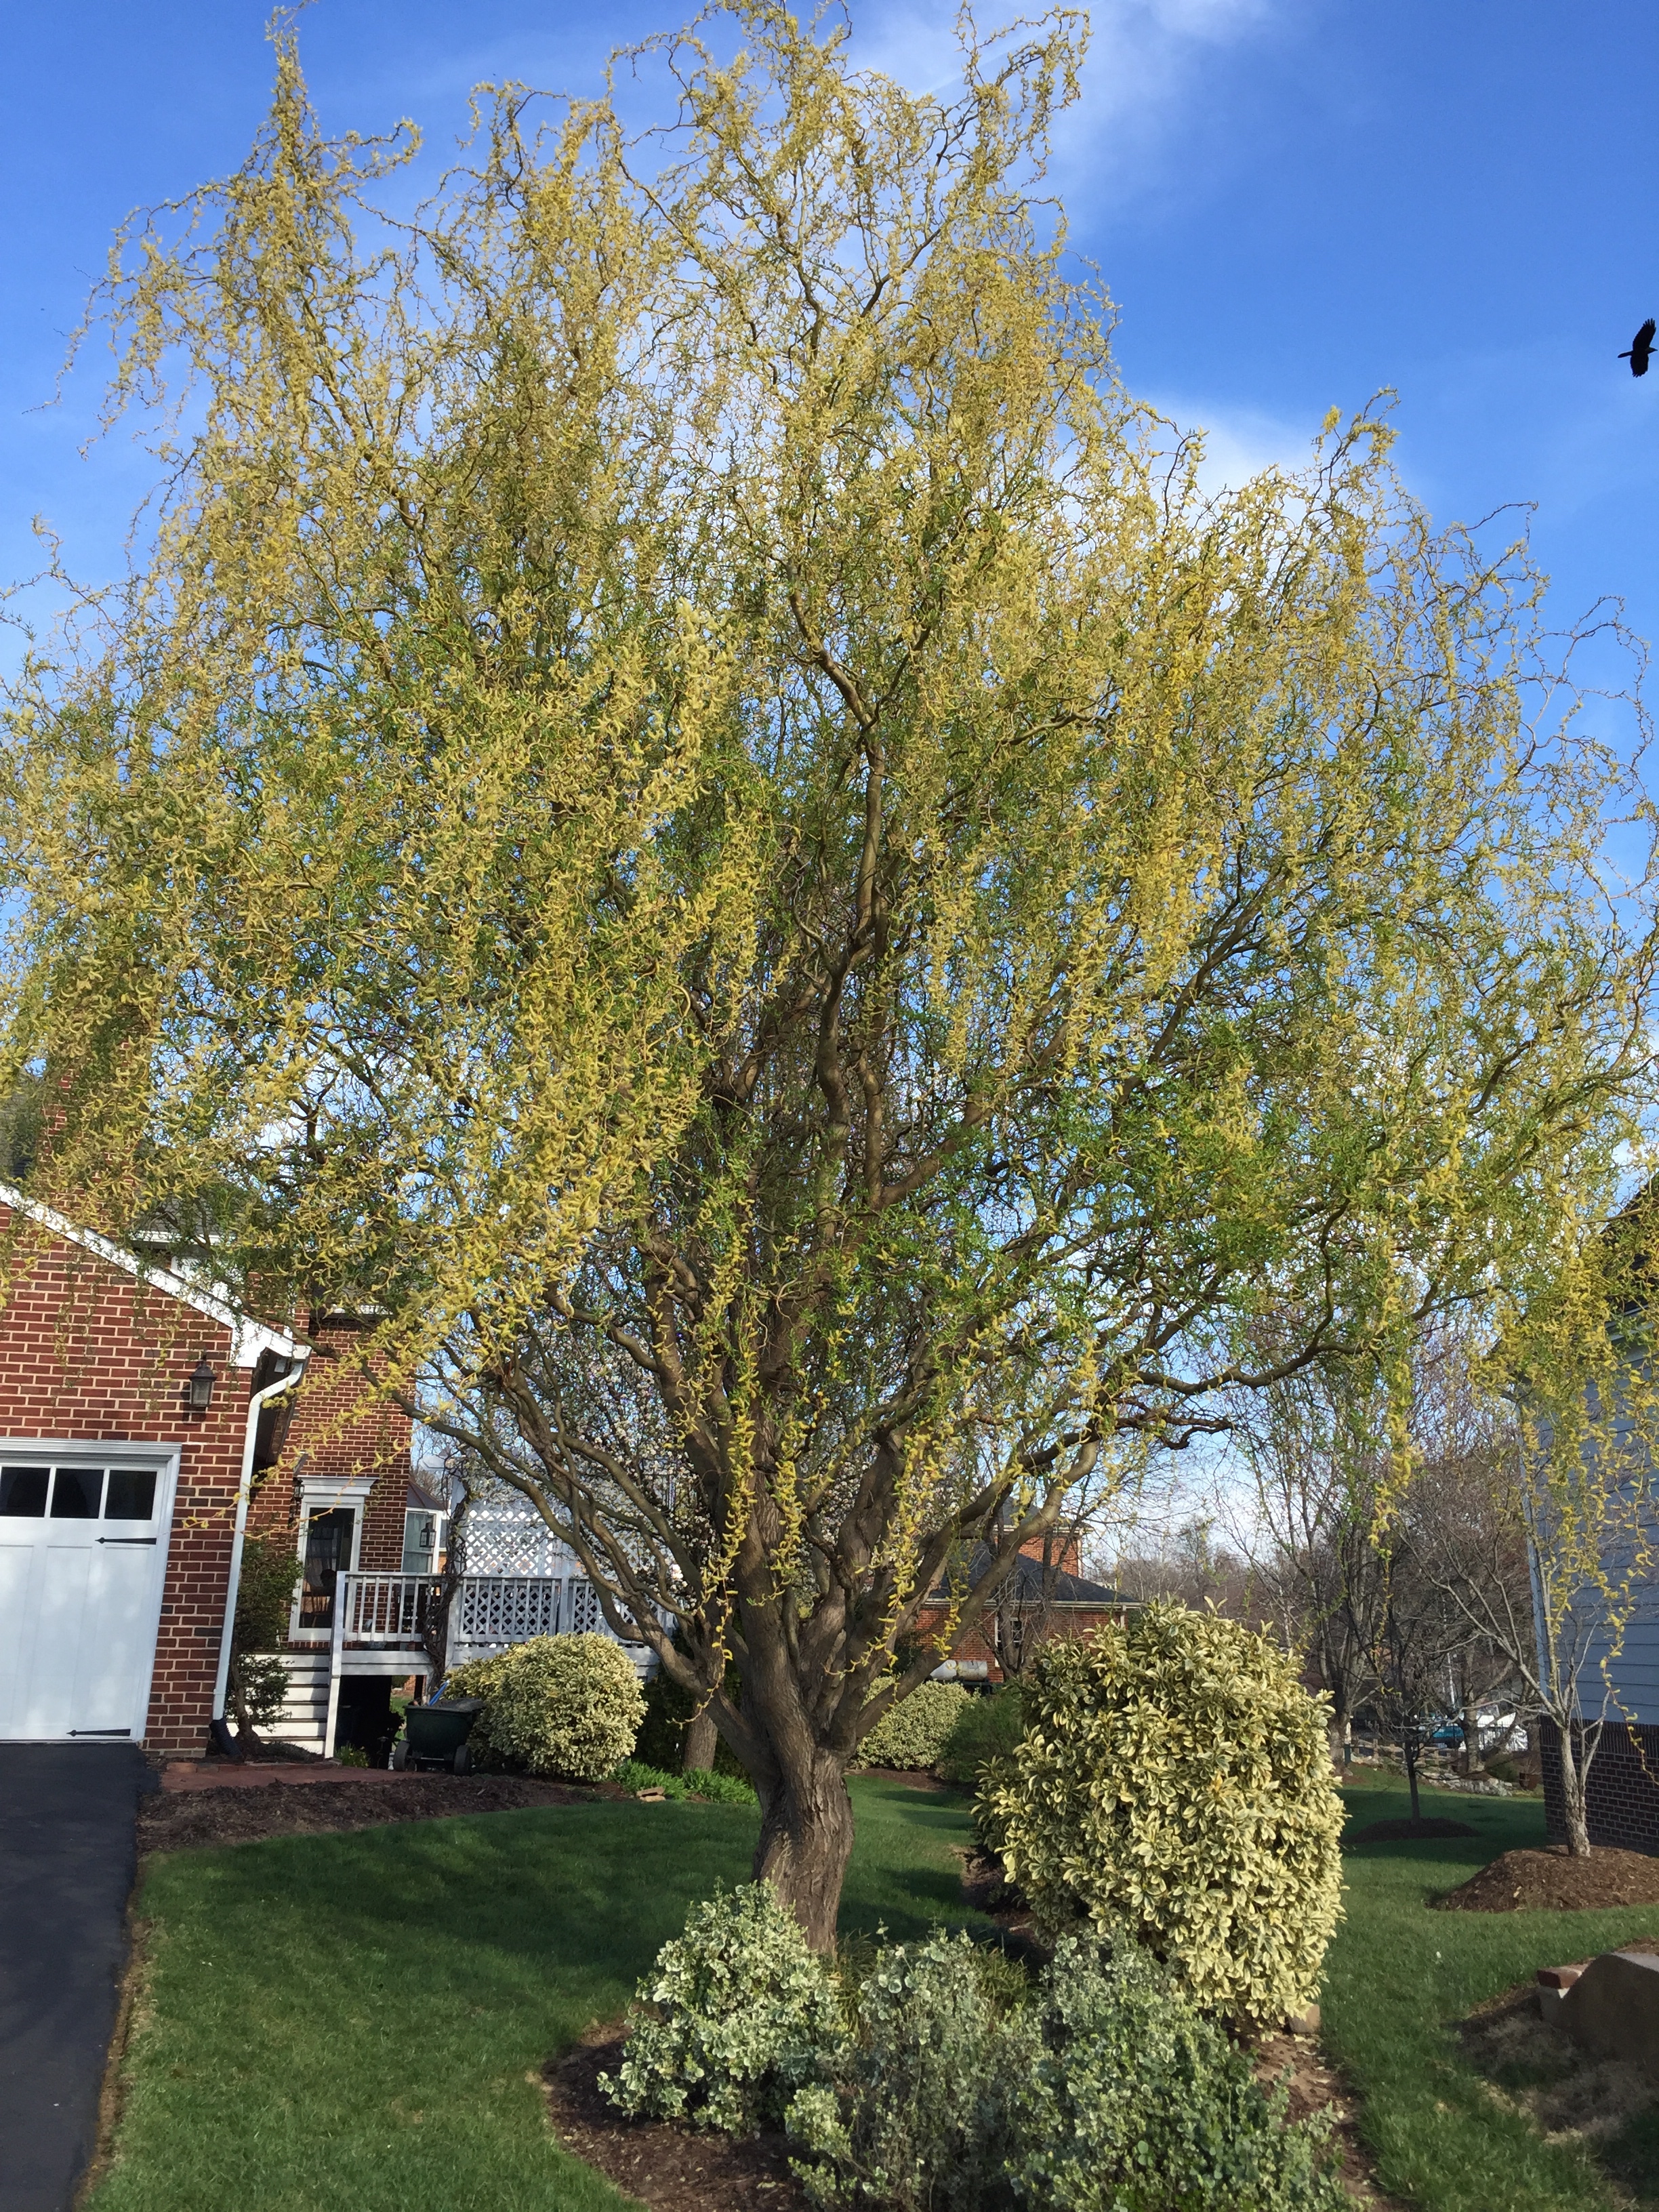
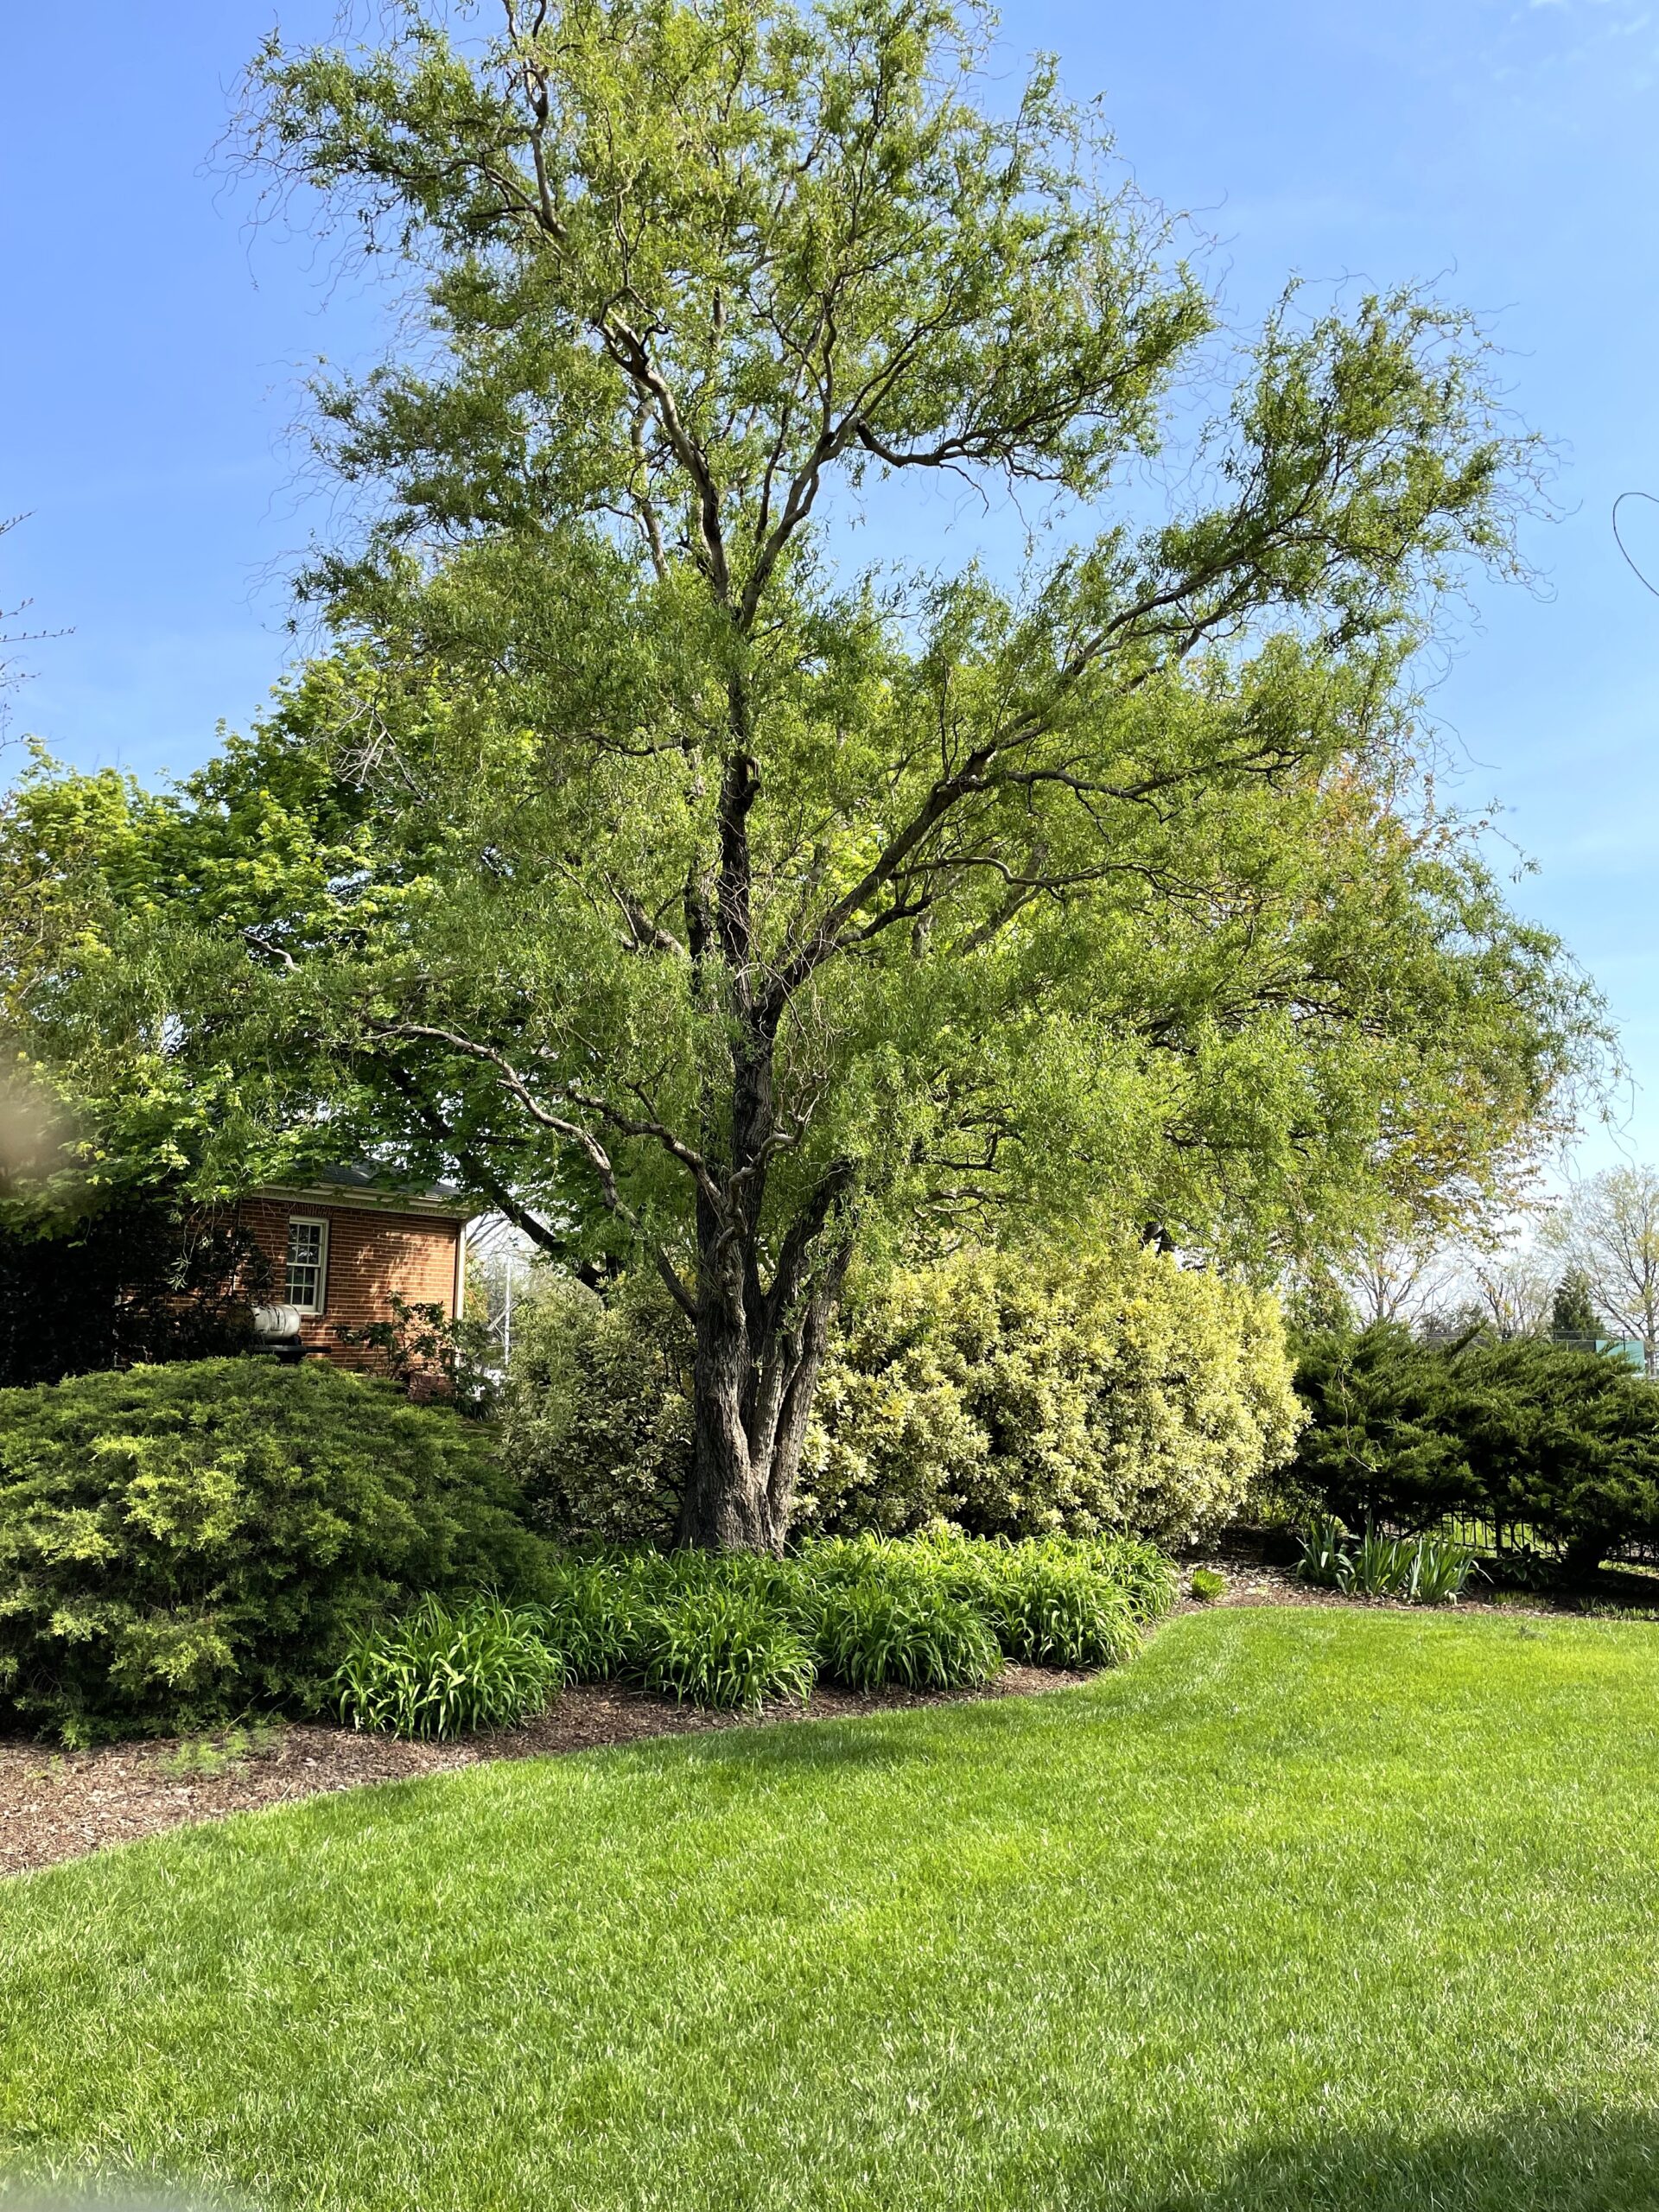
The curly willow was the first tree in my garden to start its new growth. This year, it has doubled in size!
This has been a very strange spring so far, with weather not being able to make up its mind between winter, spring or summer. There have been some really turbulent wind storms as well. Even still, I’m doing my best to get the garden and house in tip-top shape. There are many projects underway and inspections taking place. I will walk you through a few of the big ones that you might find helpful in relation to your own home and garden.
While I’ve been getting the perennials and bushes trimmed up and ready for new growth, the cleaning outside has started from the top down.

Here’s the before picture of our roof taken at the end of summer. You can see the black streaks appearing.
It’s been five years since we had our roof cleaned, and it had developed black streaks from algae and air pollution again. Last time only the north-facing front was grungy, but this time there were streaks on all four sides. The method of cleaning has improved greatly since the last time. Now the technicians spray the roof with a special soaking nozzle using a detergent that makes quick work of cleaning the shingles. This is far better because it does not damage or wear the roof like the machine scrubber of the past.
Here’s the after photo — all clean now and squirrel damage repaired. Now it’s good as new!
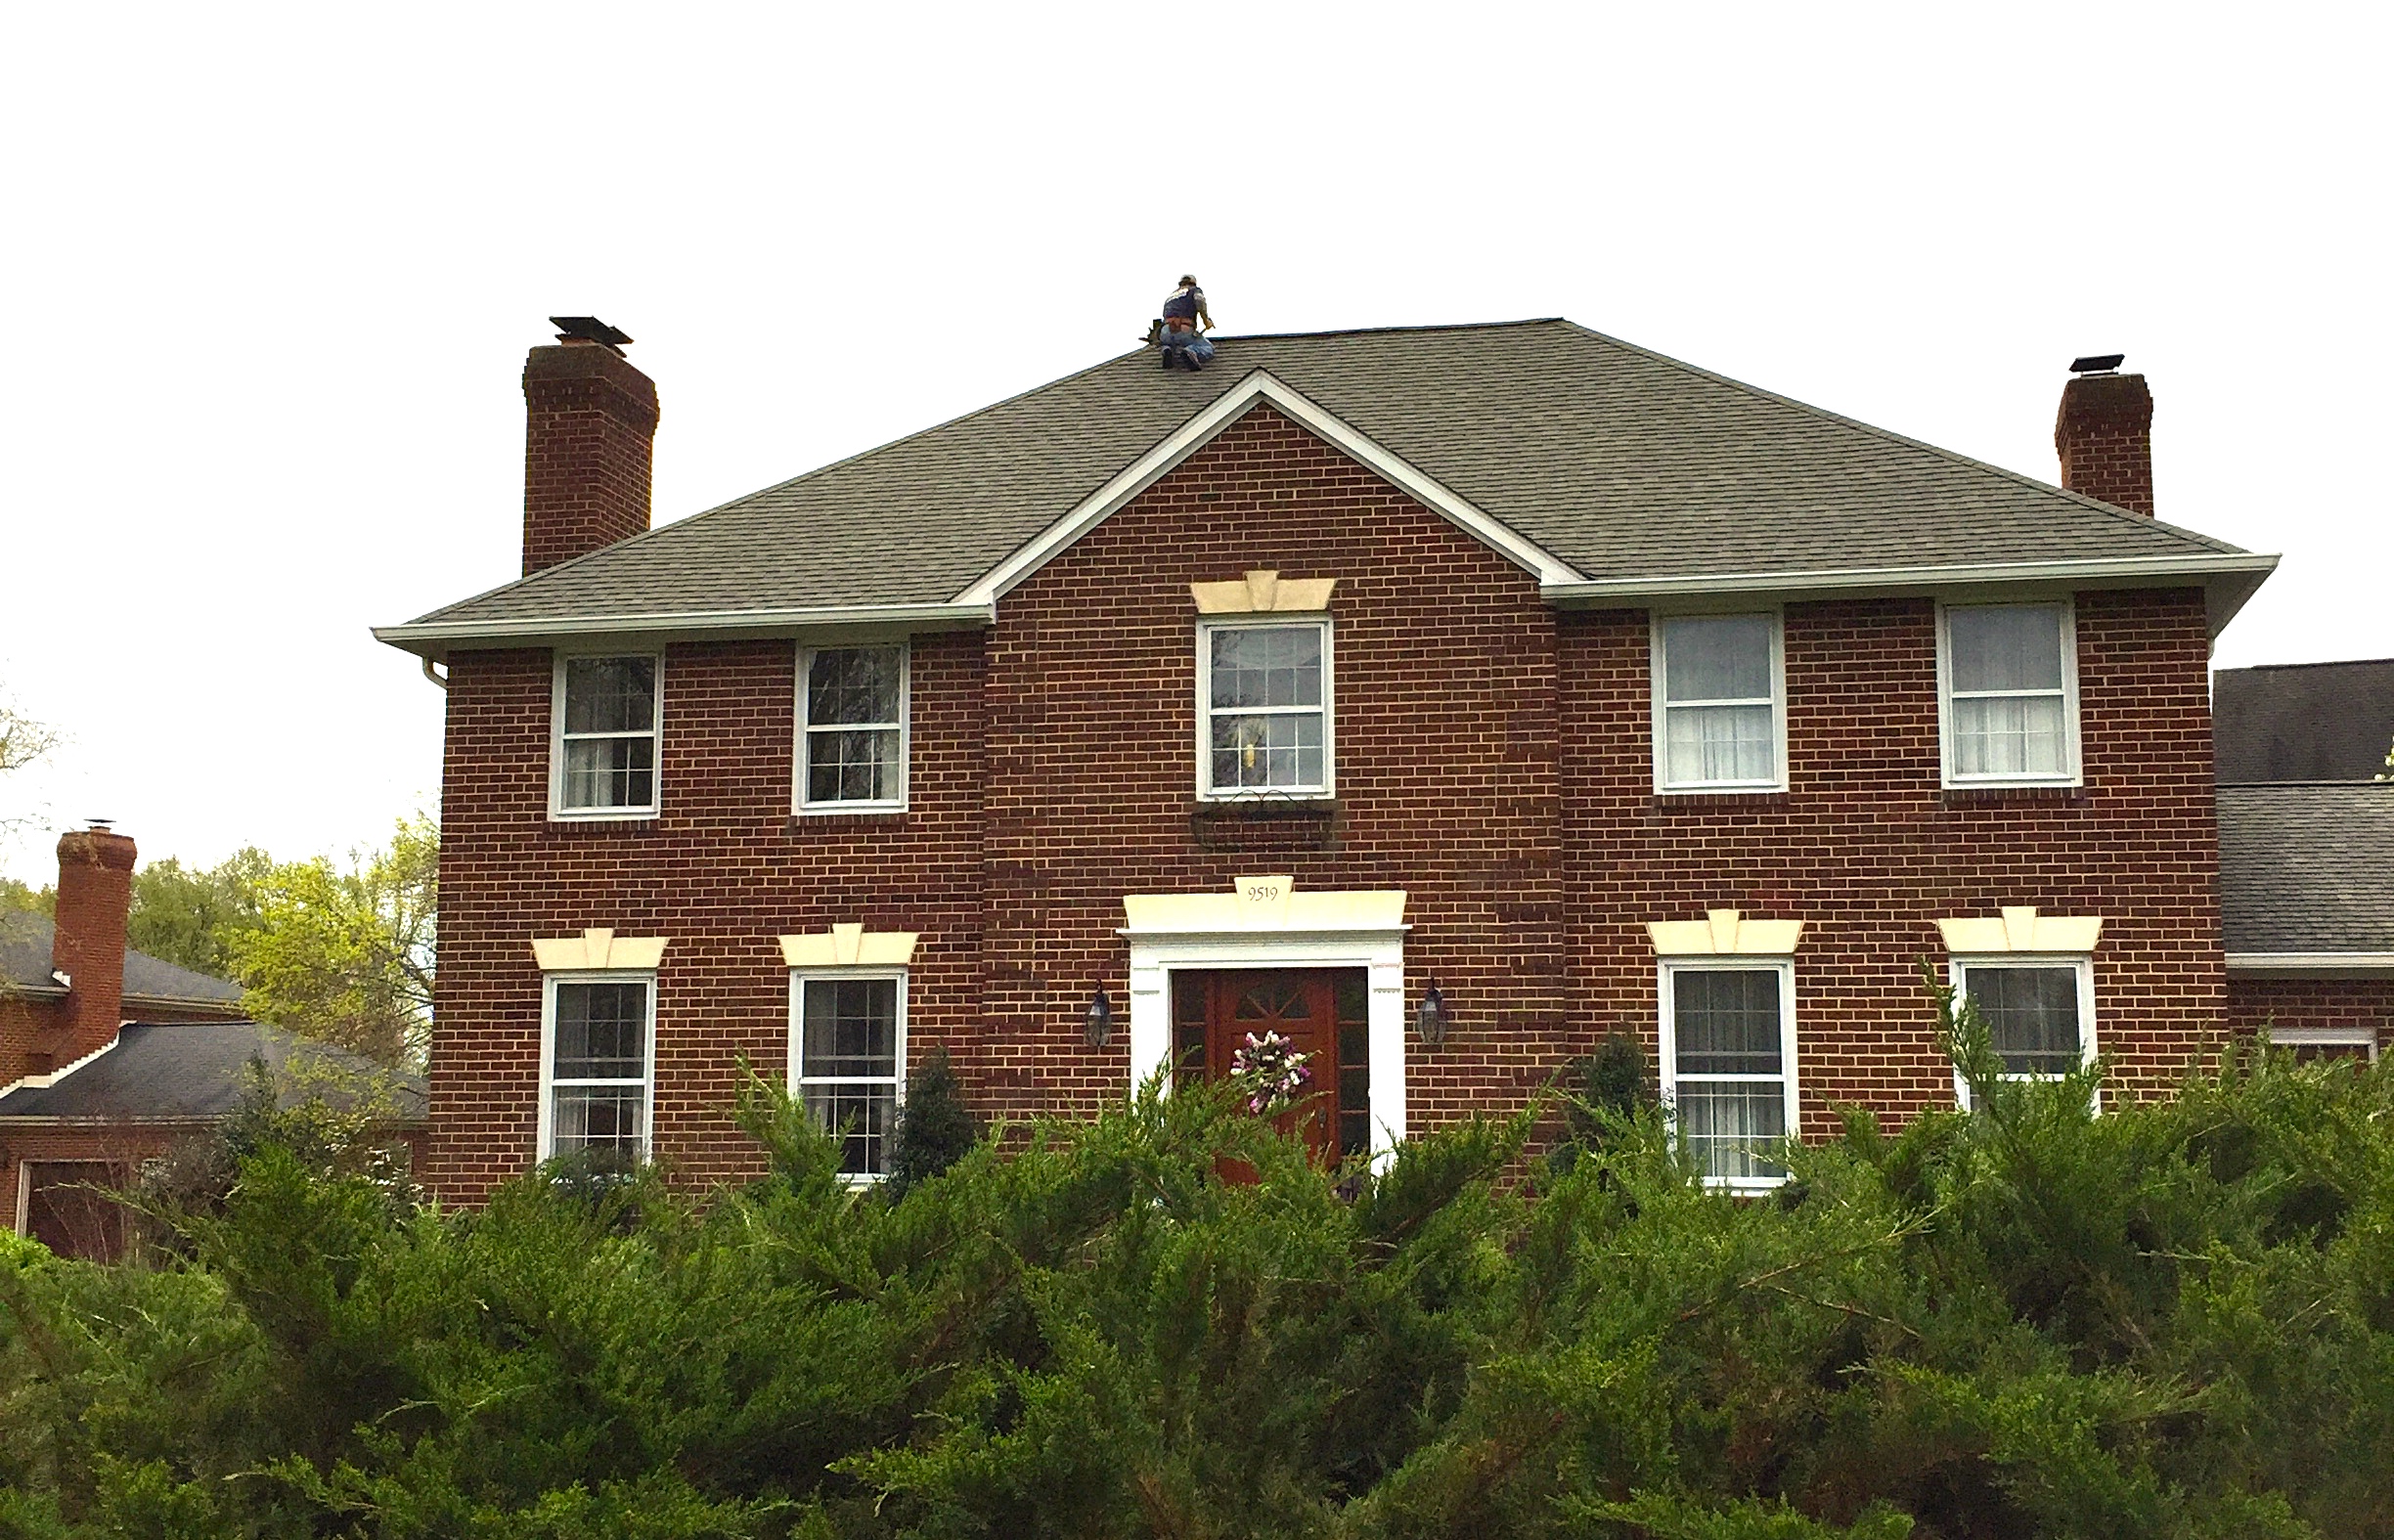
They also did an inspection and discovered 3 spots where squirrels had chewed up the shingles trying to get inside. We quickly had that fixed. I recommend that everyone have their roof inspected each year. The damage on ours wasn’t visible from below, so we would not have even known until water damage became visible inside. That would have been much more expensive to fix!

Here’s why I think everyone should get a roof inspection. This is where a squirrel chewed a hole right on the corner. You can’t see it from below, so we wouldn’t have known it was there.
Many roofing companies will inspect at no cost and take pictures to show you damage that they find. Many thanks to the A Team Roof Cleaners, and Marshall Roofing for the repairs.
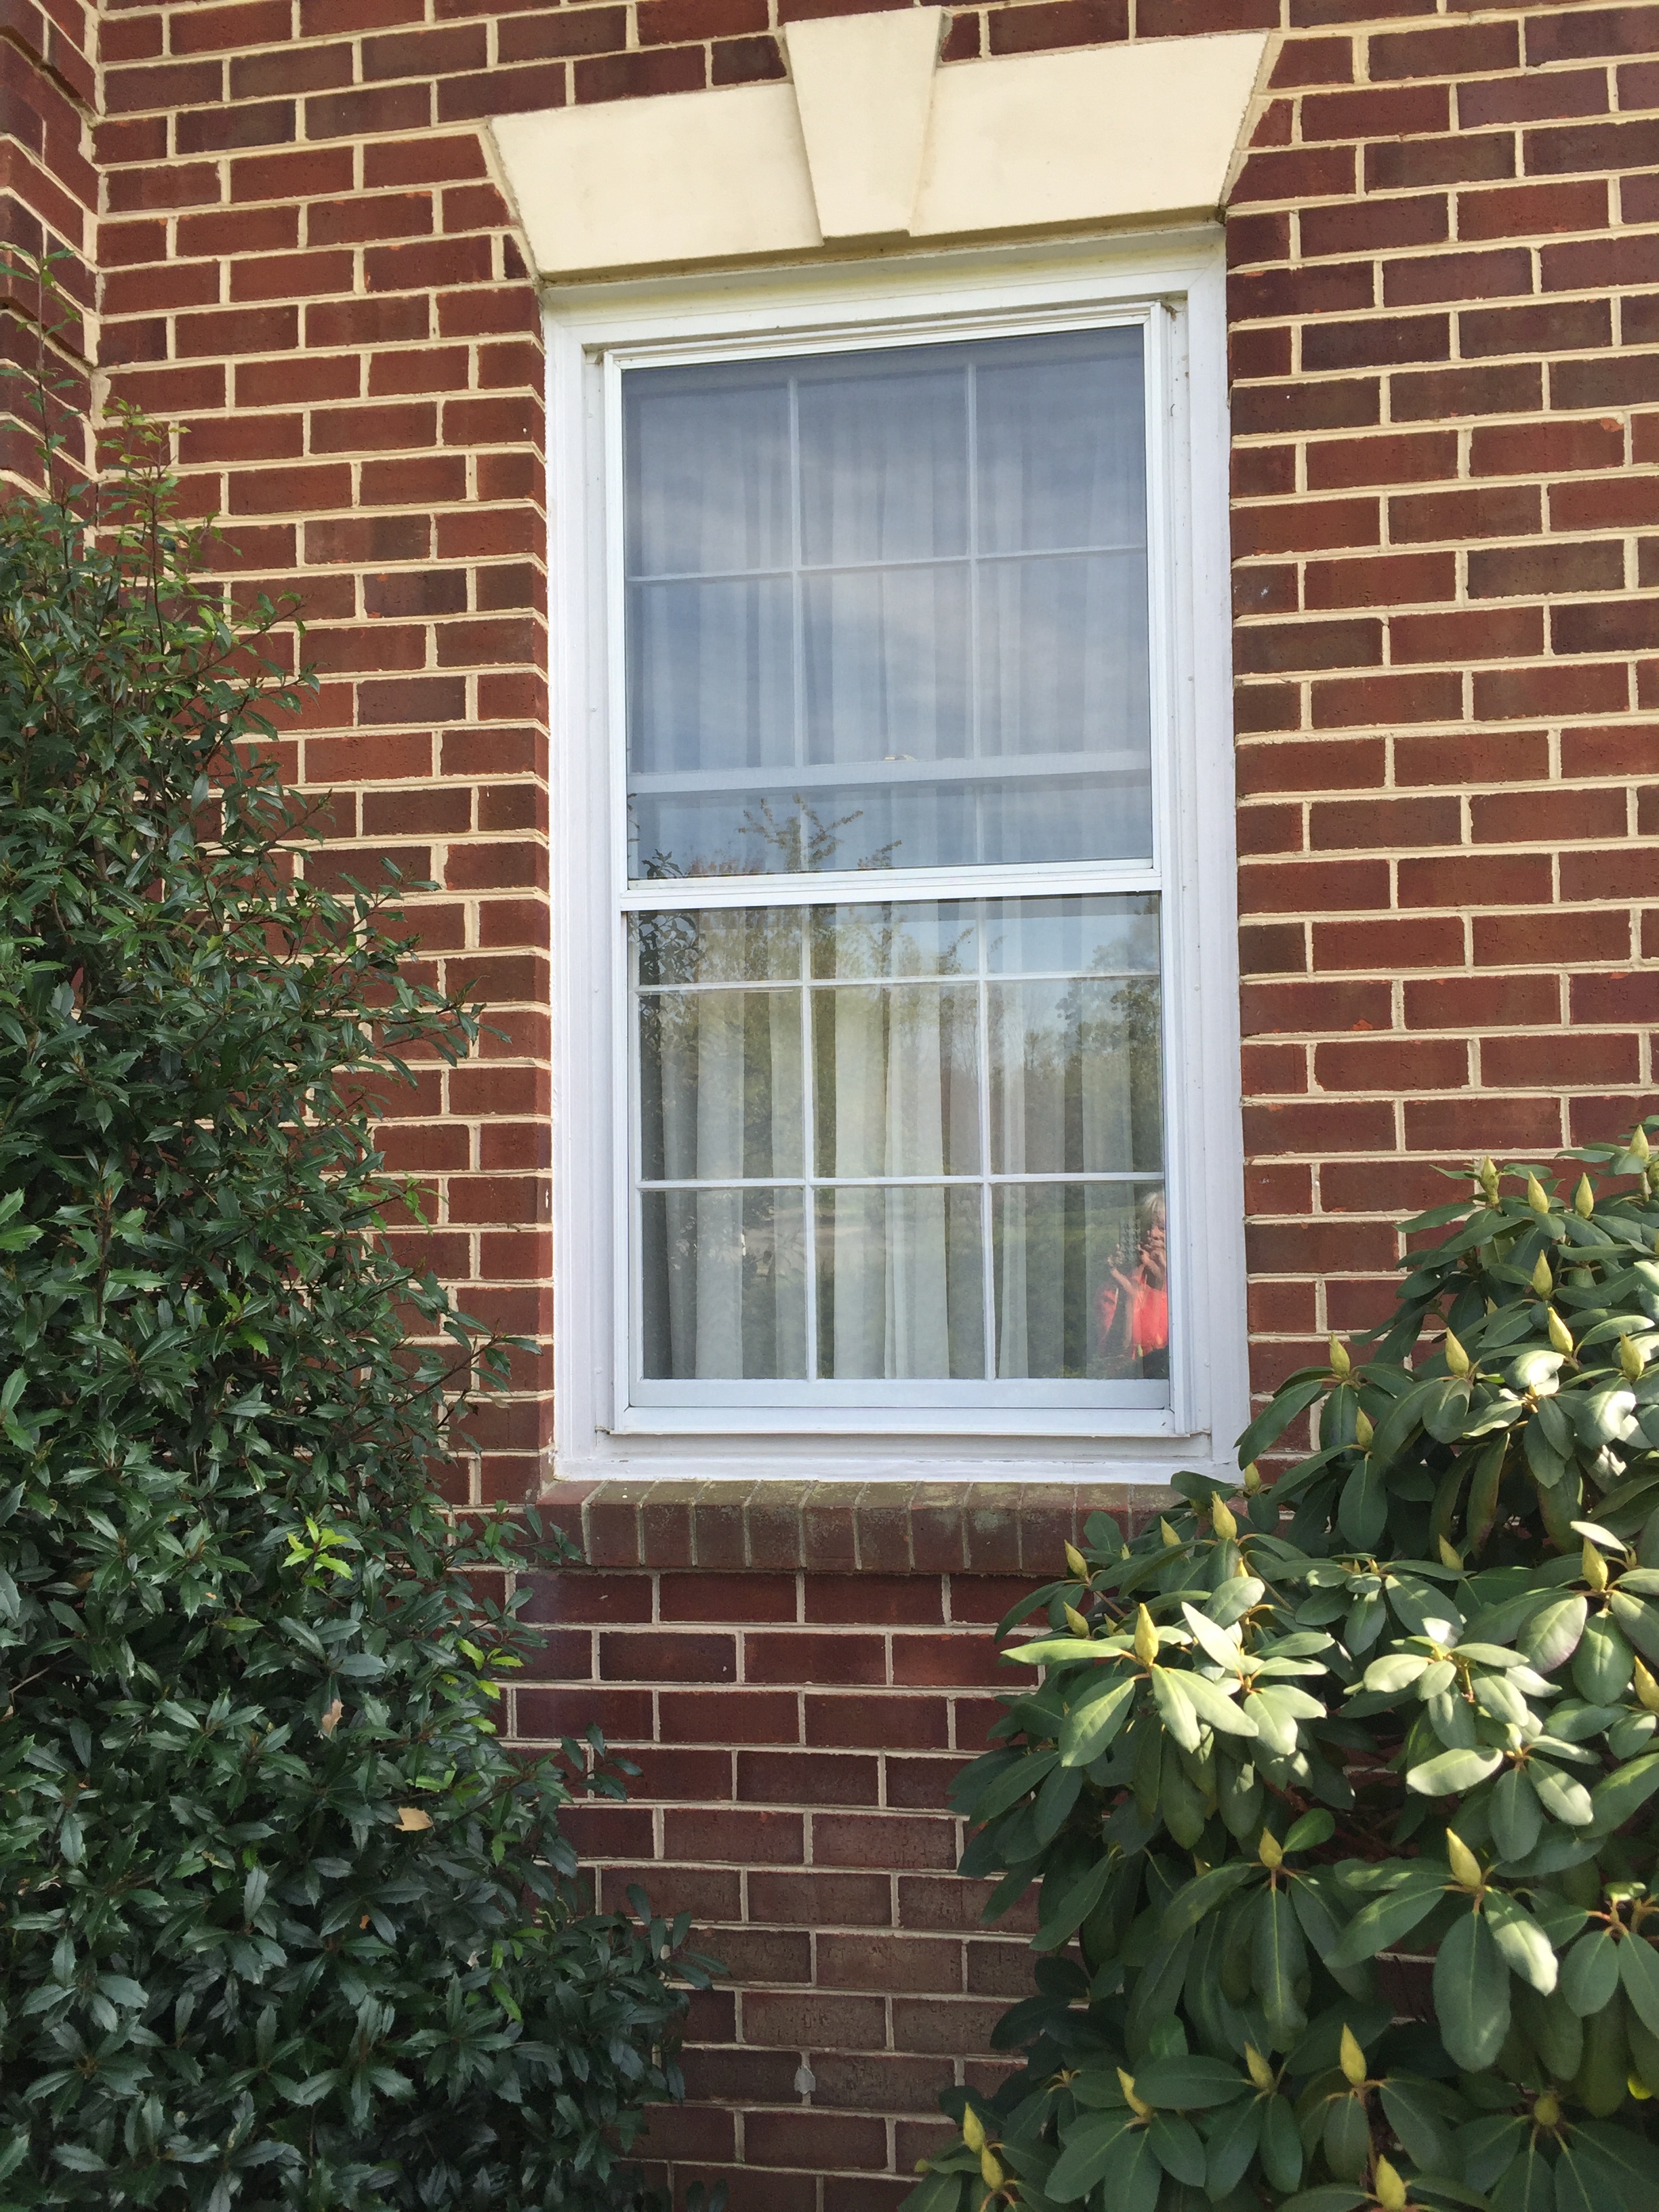
BEFORE— The 30 year old storm windows. Back then you only had one option of where you could place the center bar, only in the middle of the window. That meant looking at it every time you looked outside – not pretty!
I am also back on track replacing ten of the storm windows on the main level of the house. I’m always a “bring the outside in” kind of girl, so having proper windows is important to me. The former storm windows didn’t match up with the style of window in the house, so instead of looking out of a pretty wooden window, we had been looking at an ugly metal bar in the middle of our view. The new windows are great, and even come with a new coating that helps them stay clean — YAY!!!! I love that feature.
Anyone who is considering window replacement look at this option first. The new storms provide great R-value, and in our case were 1/10th the cost of a window replacement.

Here are the nice new storm windows – with the center meeting bar where it should be. And bonus being a special coating to help keep the windows clean!
That’s a fantastic savings! We chose Larsen Gold Series Storm windows — I’m not a paid spokesperson, but I do believe in sharing my sources.
I also still need to scrub down the north steps in front of the house. I like using oxygen bleach and then rinsing it well. Makes the stones and the grout look like new. And this year, I’m determined to actually finish power washing the sidewalk. There’s always some touch up paint needed on the trim work. It all takes time, but in the end, it makes everything so much nicer.
 Those of us who live in the Washington, D.C. area are very happily watching our national cherry trees blooming, and that means mine are not far behind. So as I wait on my beautiful cherry tree to start opening up, I’m checking off things on my to-do list for this spring — hope that yours is on its way, too. Happy gardening!
It seems that this Christmas season I have been playing a little too much catch up with the leaf raking. I feel like taking a moment to relax and sharing a few photos of Christmas this year at our home. Much like years past, I used lots of fruit in the Williamsburg style. There are candles and wreaths in each window, and garlands with cranberry chains around the door, stair railings and candle post. It is simple, but fitting to the history of the colonial style of architecture in this area of the east coast. And of course, I love it!
I hope each and everyone of my cherished readers has a warm and happy Christmas, and a healthy new year! I’m looking forward to next year’s gardening, and planning for some interesting new plants to try. May you enjoy each and every new day in 2016!

The front door at night, with a Williamsburg style this year. Lots of fruit and cranberry chains.

The living room tree all aglow!

Here is the tree in a daytime shot so you can see the ornaments a little better. And this year my tree is celebrating its 21st birthday!

The entry foyer with amaryllis flowers, my favorite Santa and angel chimes.

And — to me — the crowning touch is always Christmas bows!

Merry Christmas from our house to yours!
This was the view of autumn leaves from my deck this year. They were so beautiful! Now I have a lot of raking in my future.

Now that the mums have finished blooming, I have filled in the pots with boxwood trimmings from my yard. They make beautiful “plants” all winter long.
I’m finishing the last of the winterizing and want to share a few tips that will add polish to the holiday curb appeal, and make the perfect backdrop for seasonal decorations. These will make a big difference for just a weekend’s worth of effort. And as an added bonus, it’s also a great way to work off some of that turkey with all the trimmings that we love so much!
First up is finishing the leaf raking and weed removal. Reach in and pick out all the leaves that have gotten stuck in the bushes and then do a final pass in the mulched areas of the garden and your lawn. This alone will make a huge difference in the appearance, but we aren’t going to stop there! Next, give the mulch a rake to loosen it up, and add extra if needed. Winter mulch tip: As you are stirring up the mulch, make sure to leave a space of a few inches between the mulch and the wall of your home. This will discourage the unwanted “guests” (mice!) from burrowing there.
Fill in gaps in the garden by creating “instant plants,” just push small branches into the soil. Simple as that!
Here is a row of “instant juniper” plants, where I removed the summer annuals. You’d never know they aren’t actually growing!
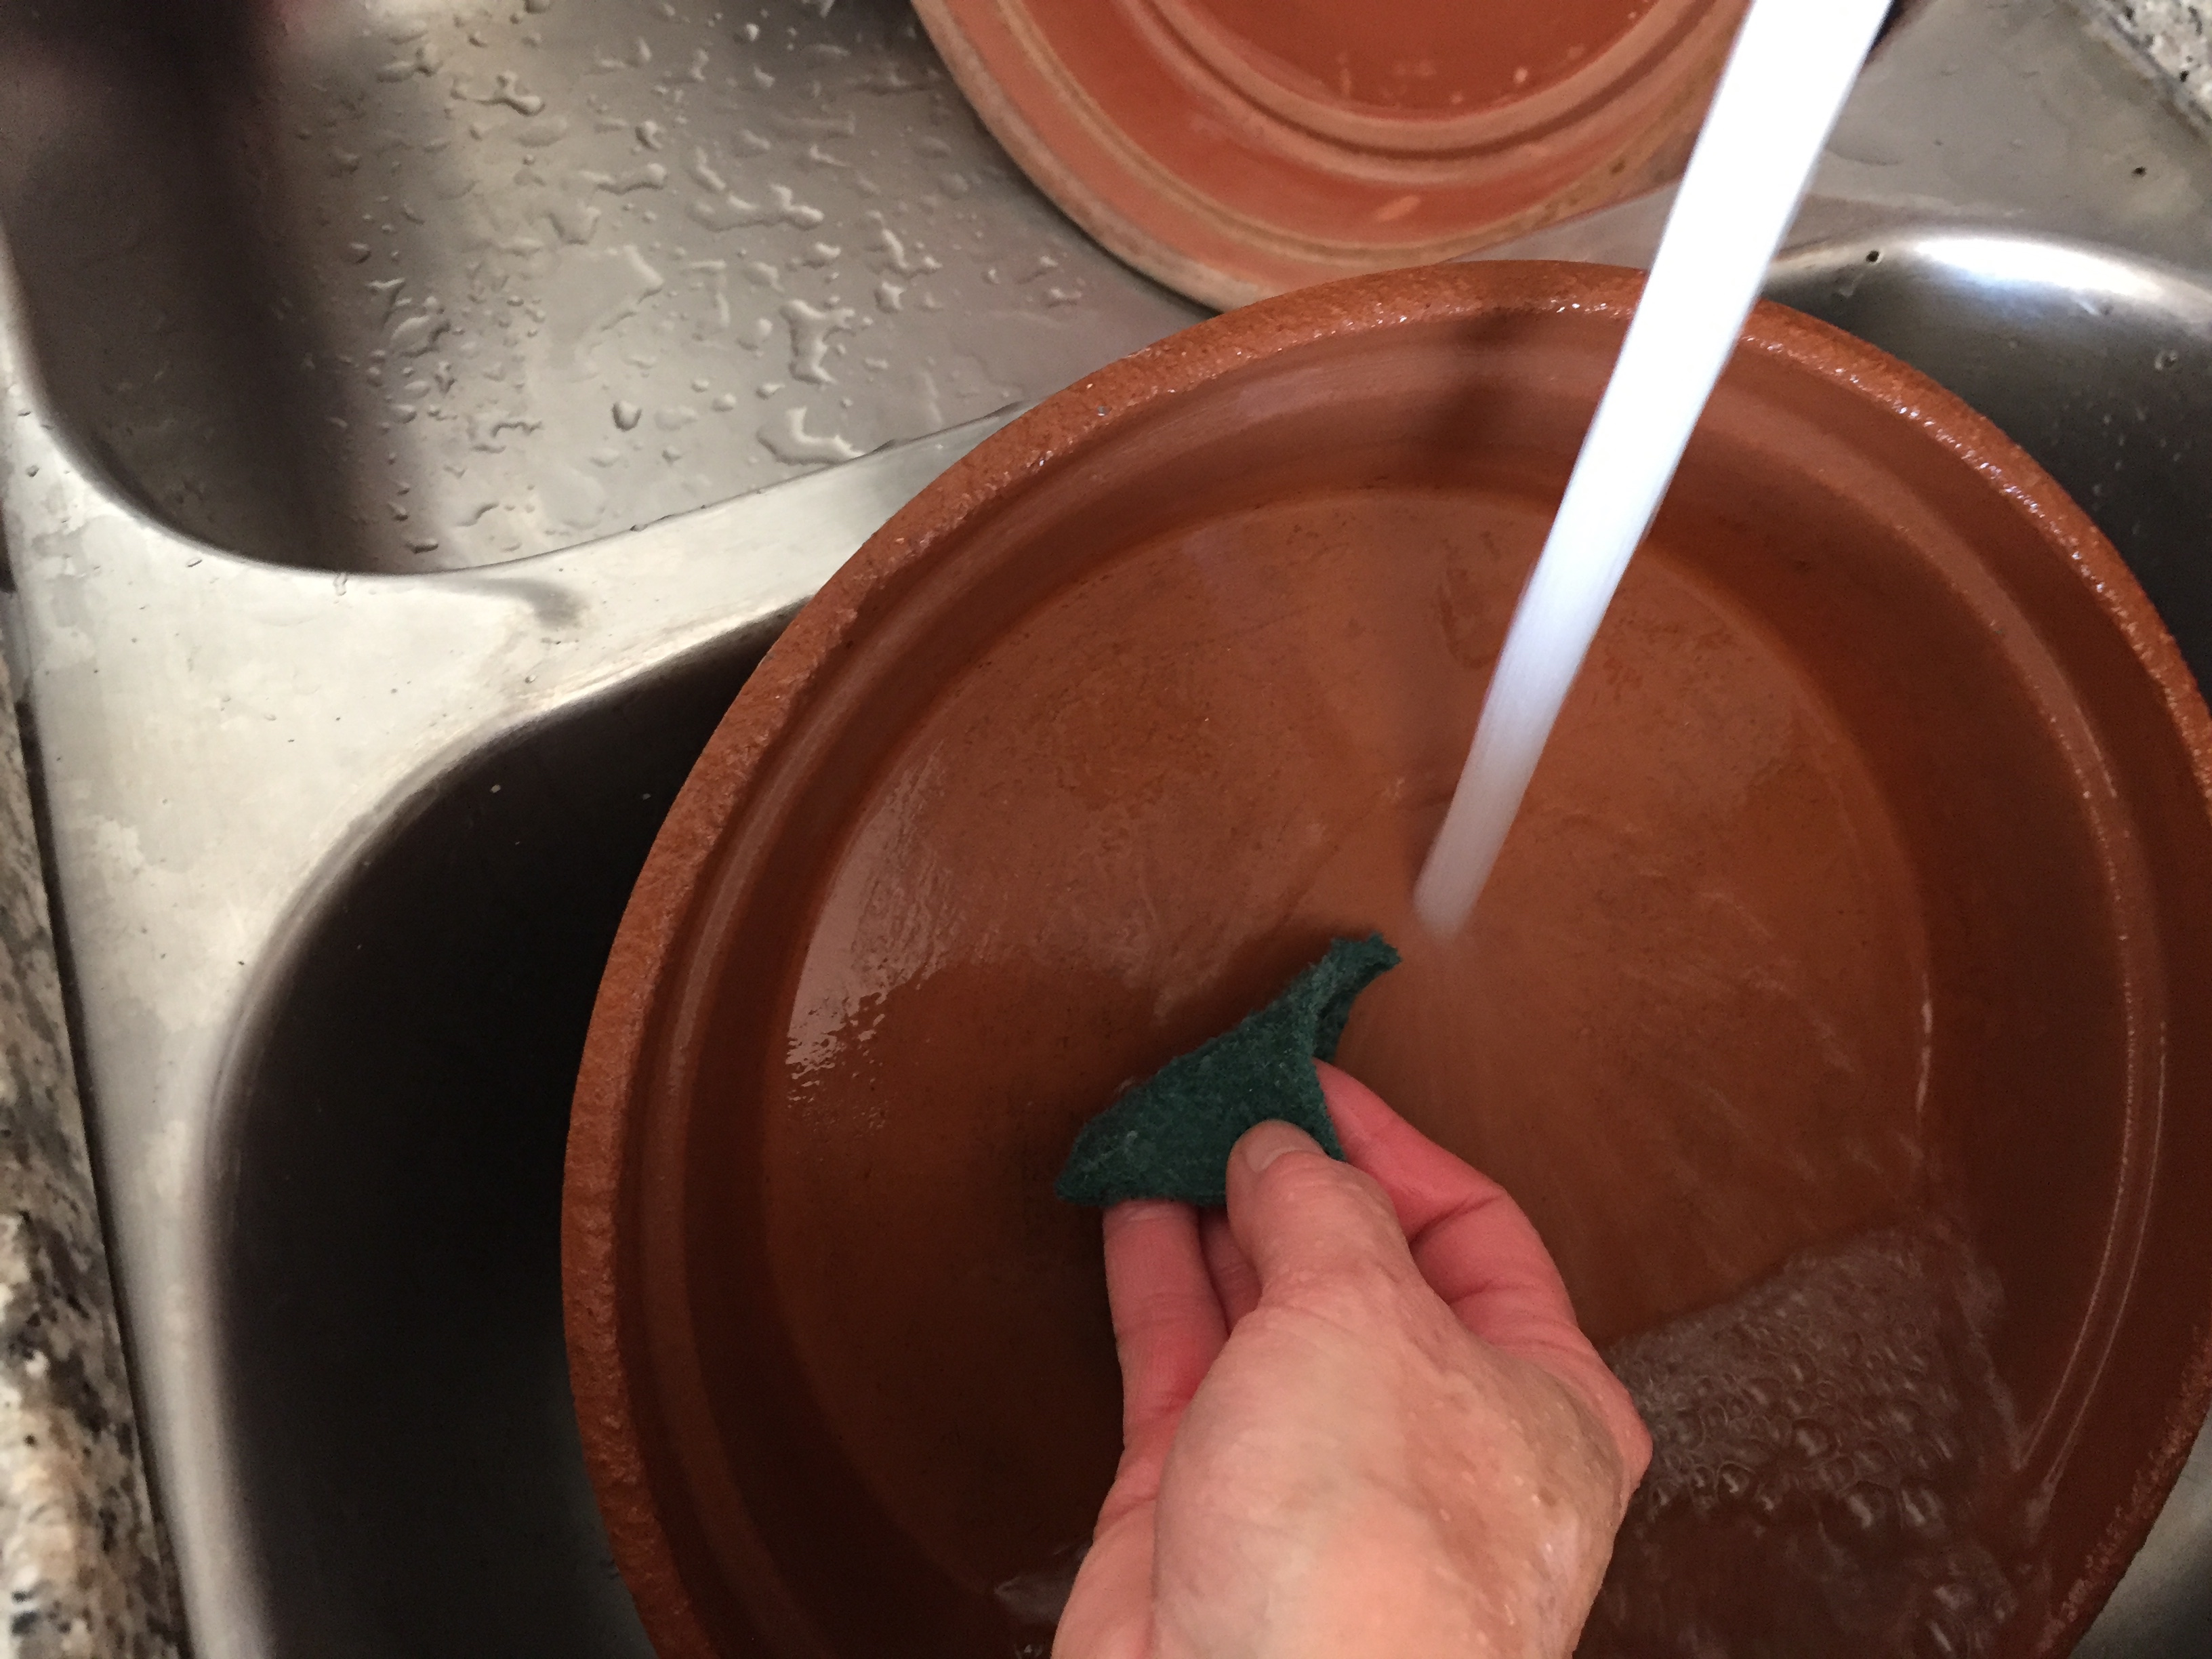
Perfect time of the year to give the clay pots a good cleaning before storing them away for the winter months.

Not all of the “instant” plants are used outside. This extra ivy is in a bucket of water and will root over the winter. Ivy is also a good air filter, so I love to have some inside!
Now that you have pulled out the spent summer flowers and have areas that might be looking a bit too spare, here’s one of my favorite tricks of the trade: I trim the bushes in the yard and use those trimmings to create “instant plants.” Just take the branches and push them into the soil about 6 to 8 inches. I use about a dozen small branches to create each “plant.” On either side of the driveway where I grow vinca in the summer, there are now juniper. They look great, you’d never know they weren’t actually growing. I also do this in the pots and window boxes to create small boxwood “plants.” This trick lasts for months, usually into February, and since I trimmed the branches from my own yard, its free!
Speaking of planters and pots, this is the perfect time to give the clay pots a scrub and dry them in the sun before putting them away for the winter months. I like to use a scrub brush or a kitchen scrubbie with regular dish soap for this job. They easily get rid of the grime on the pots and make quick work of the job. Find a good place for winter storage where they won’t freeze. The clay can be very susceptible to cracking apart when it freezes. The same scrub is perfect for all the yard tools as well. A tip for the shovels and rakes: Once they have been cleaned, a light coating of cooking oil or spray will help guard against rust over the winter.
The final crowning jewel to get your home ready is clean windows. Now that your yard looks so nice you will want to have fresh, sparkling windows to view all your hard work!
Enjoy!
Time for a nice hot cider…
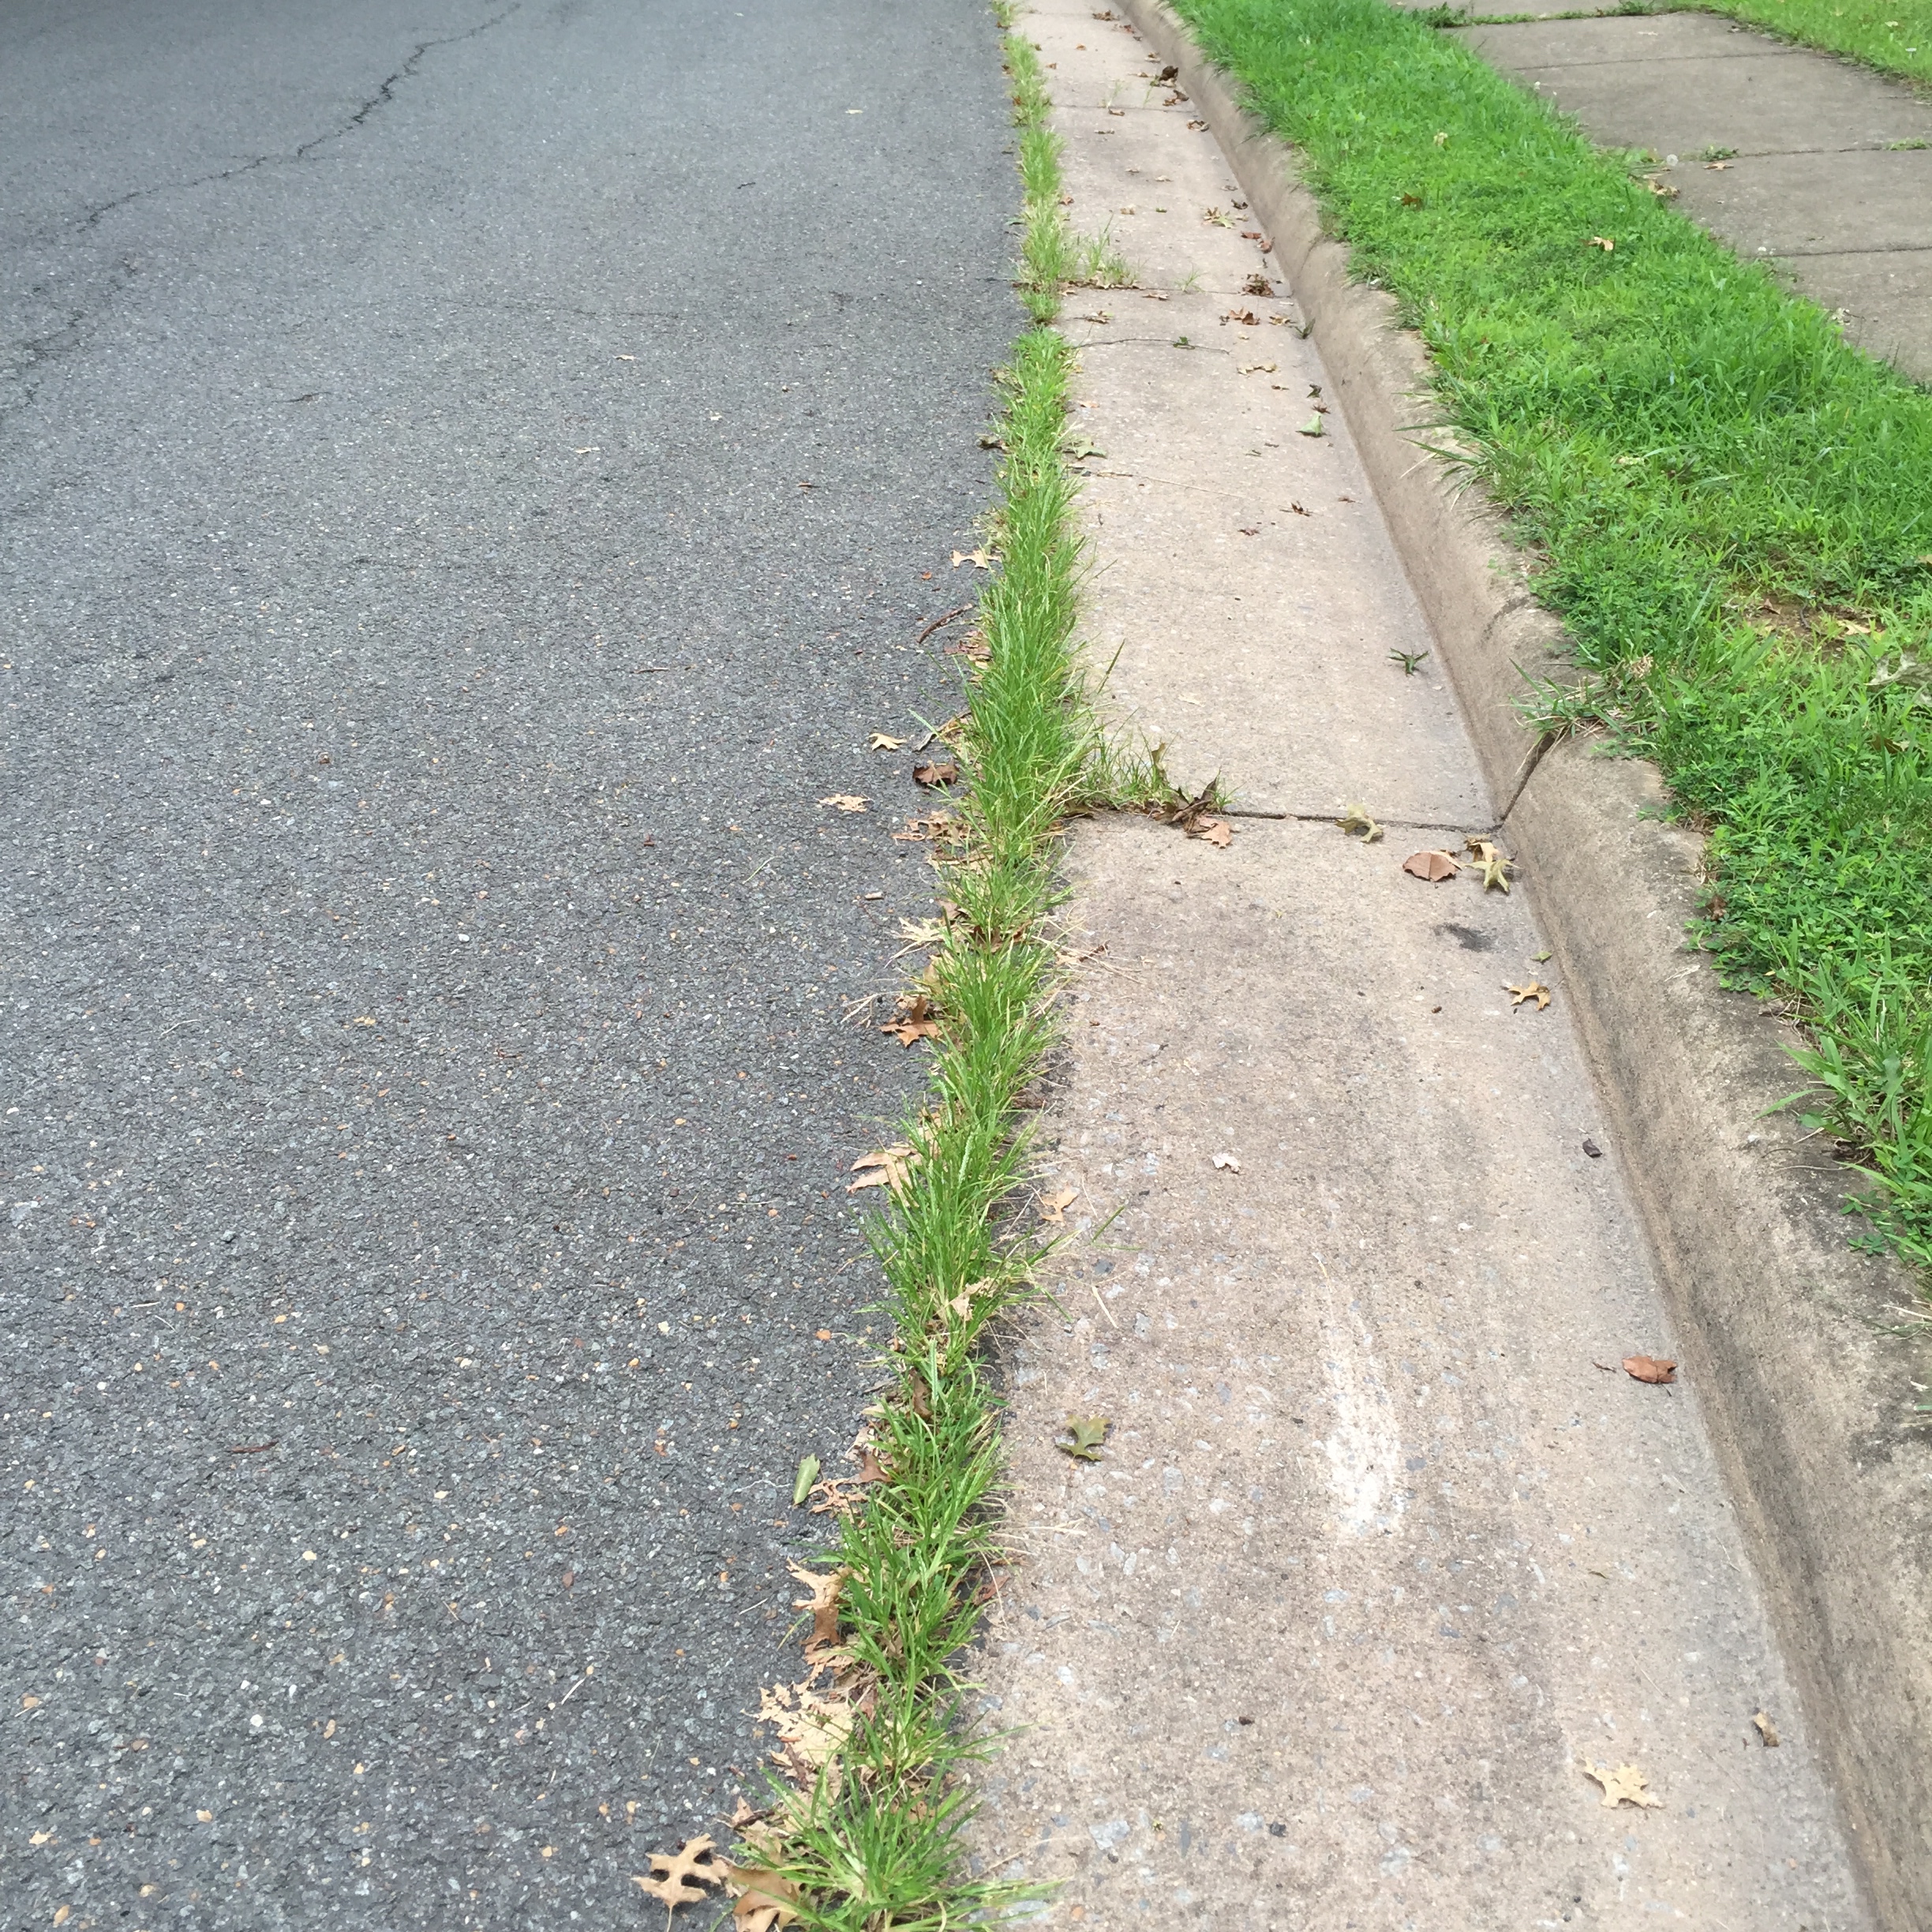
BEFORE: With all the heat and rain, we are getting lots of unsightly weeds.
With the temperatures in the triple digits these days, I am seeing lots of weeds coming out of the cracks in the pavement, especially along the gap where the curbing meets the asphalt.
I have a super easy, inexpensive and totally earth friendly way of getting rid of them — VINEGAR! In the heat of the day (the hotter and sunnier the better), just spray it on the weeds. The weeds will be dead the next day. (I buy a huge jug from the warehouse store — about $2.99 — which lasts the whole summer.) I prefer to scrape them out with the edge of a shovel, never to see them again. If you choose not to remove them, they will eventually disintegrate on their own.
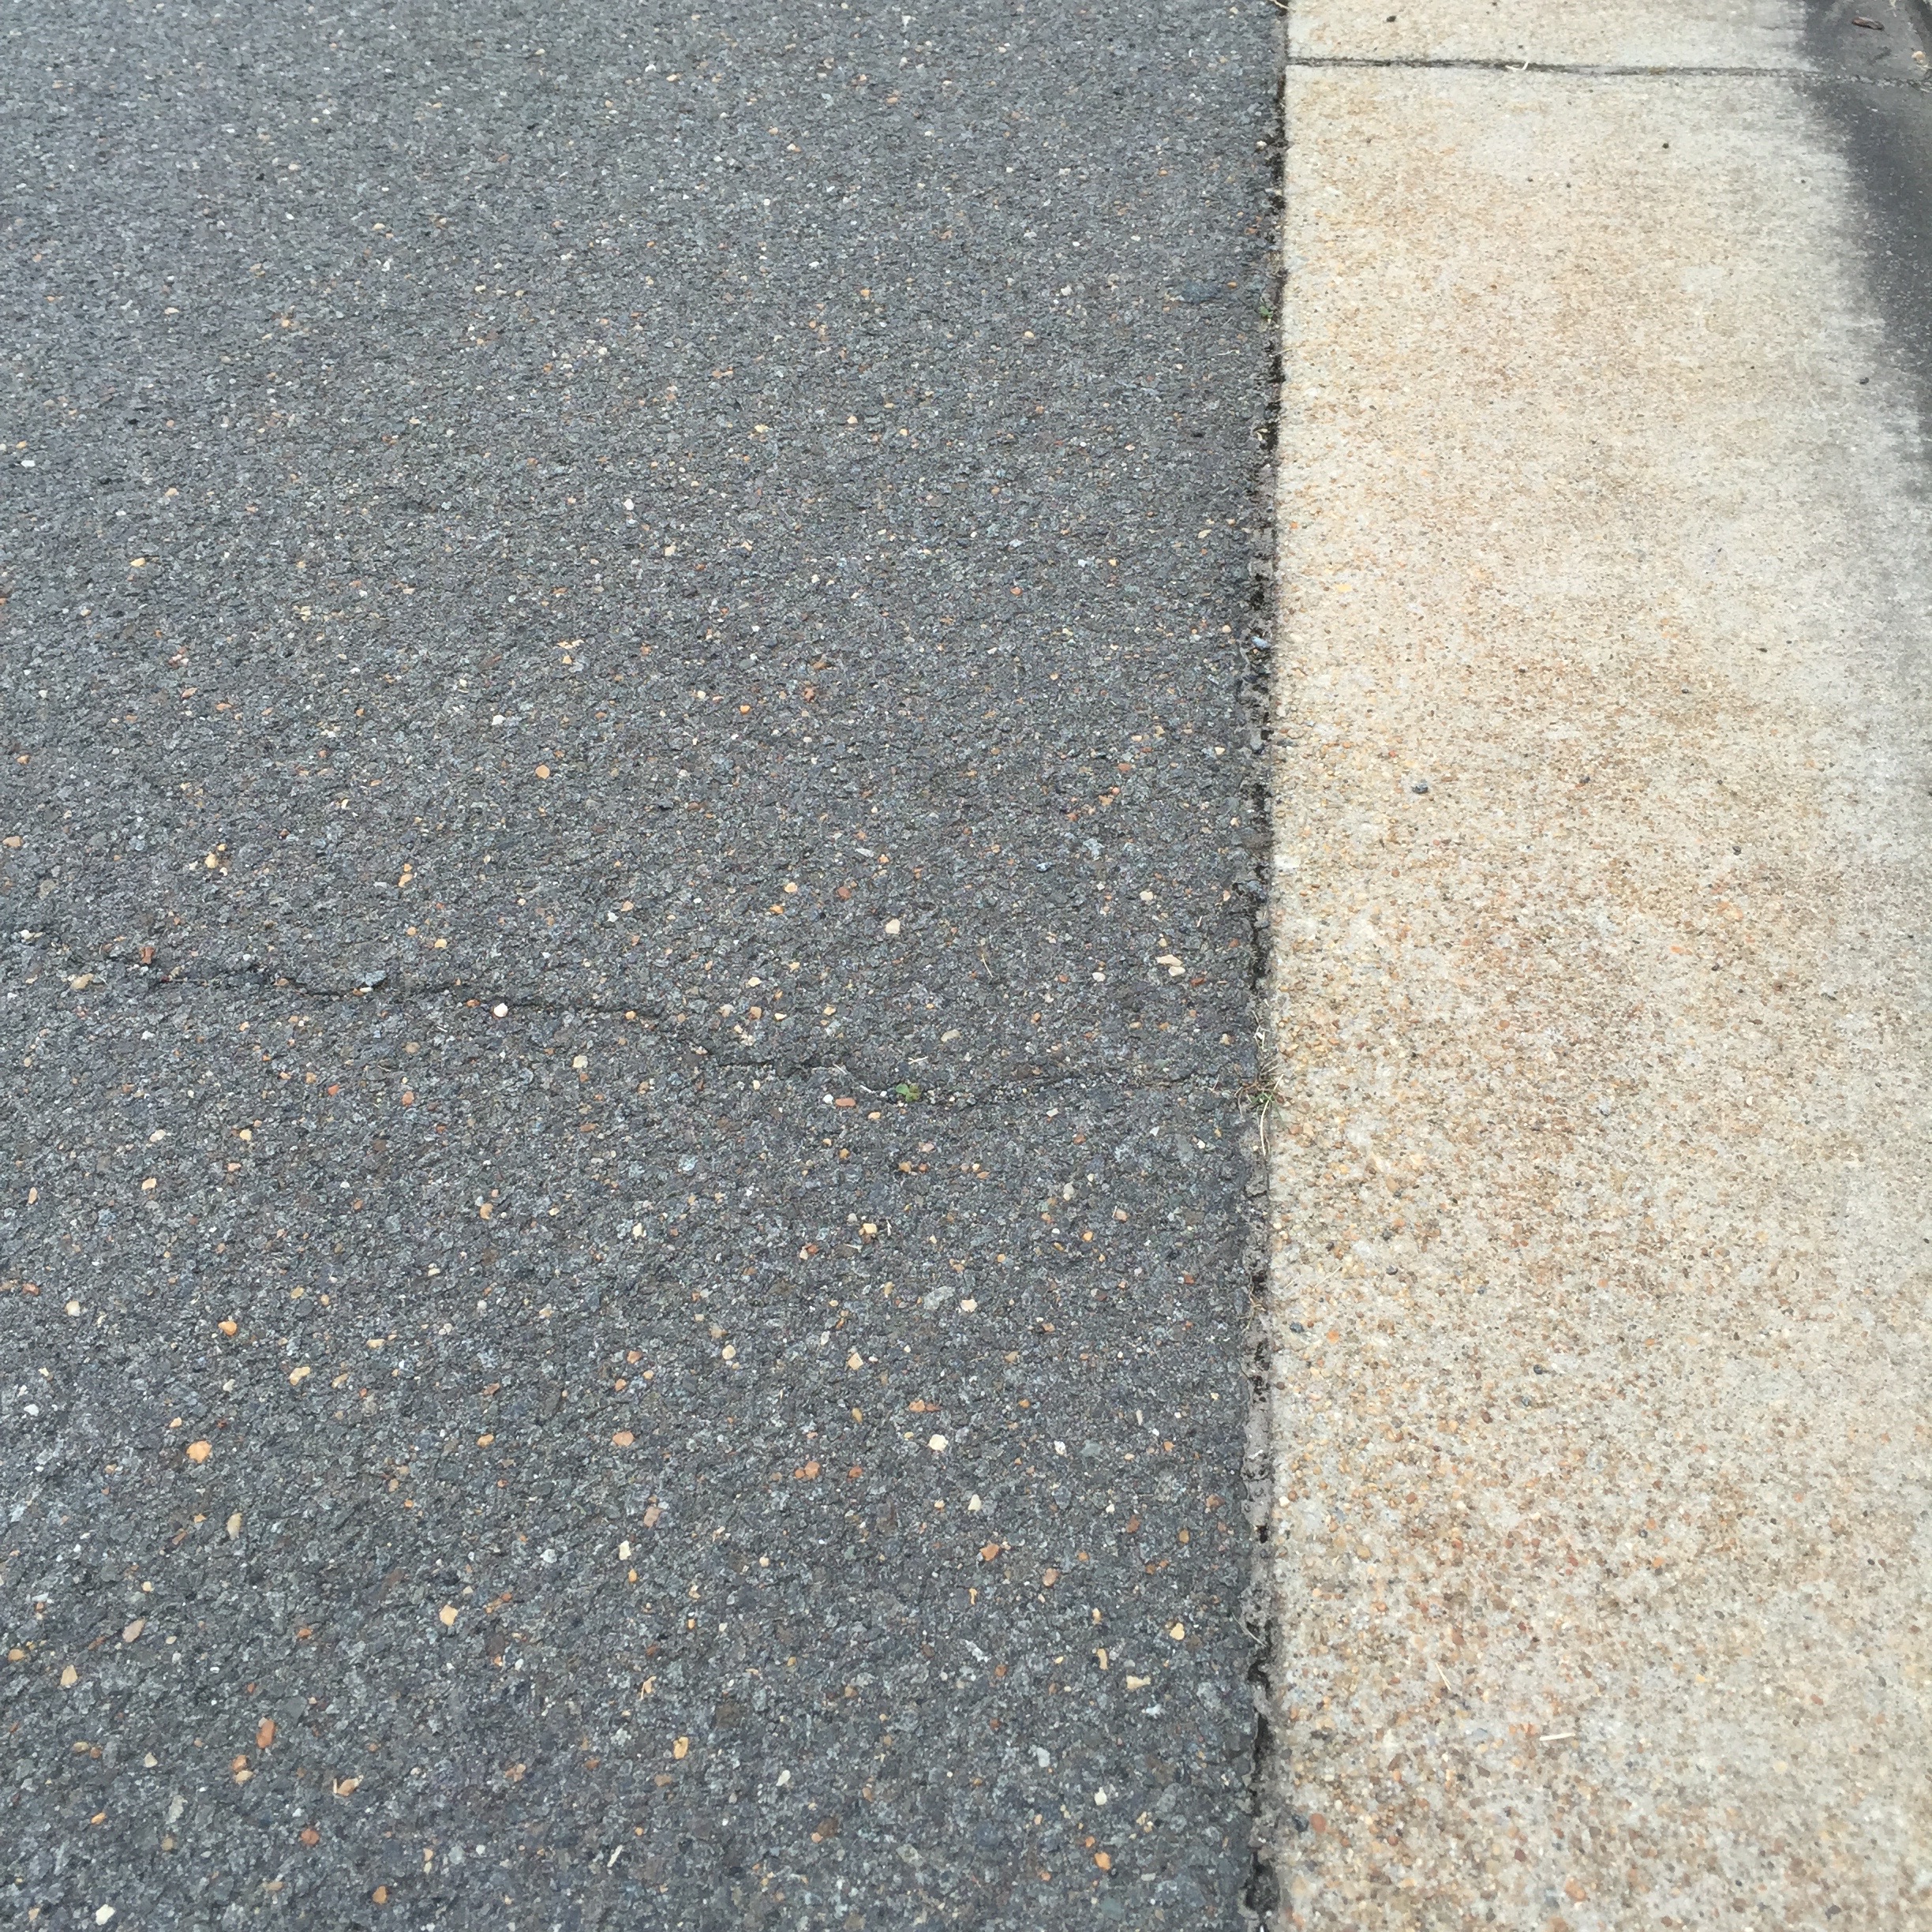
AFTER: One day after spraying with vinegar — all weeds are dead and gone! Much better.
Happy Weeding!
The alternative is expensive weed killer, which is very toxic to wildlife and the waterways, so I urge everyone to give vinegar a try. It works great for me, and I hope it will for you, too.
Now if I could just find a great way to keep the wire grass from growing into my garden without having to dig it out — that would be fantastic!
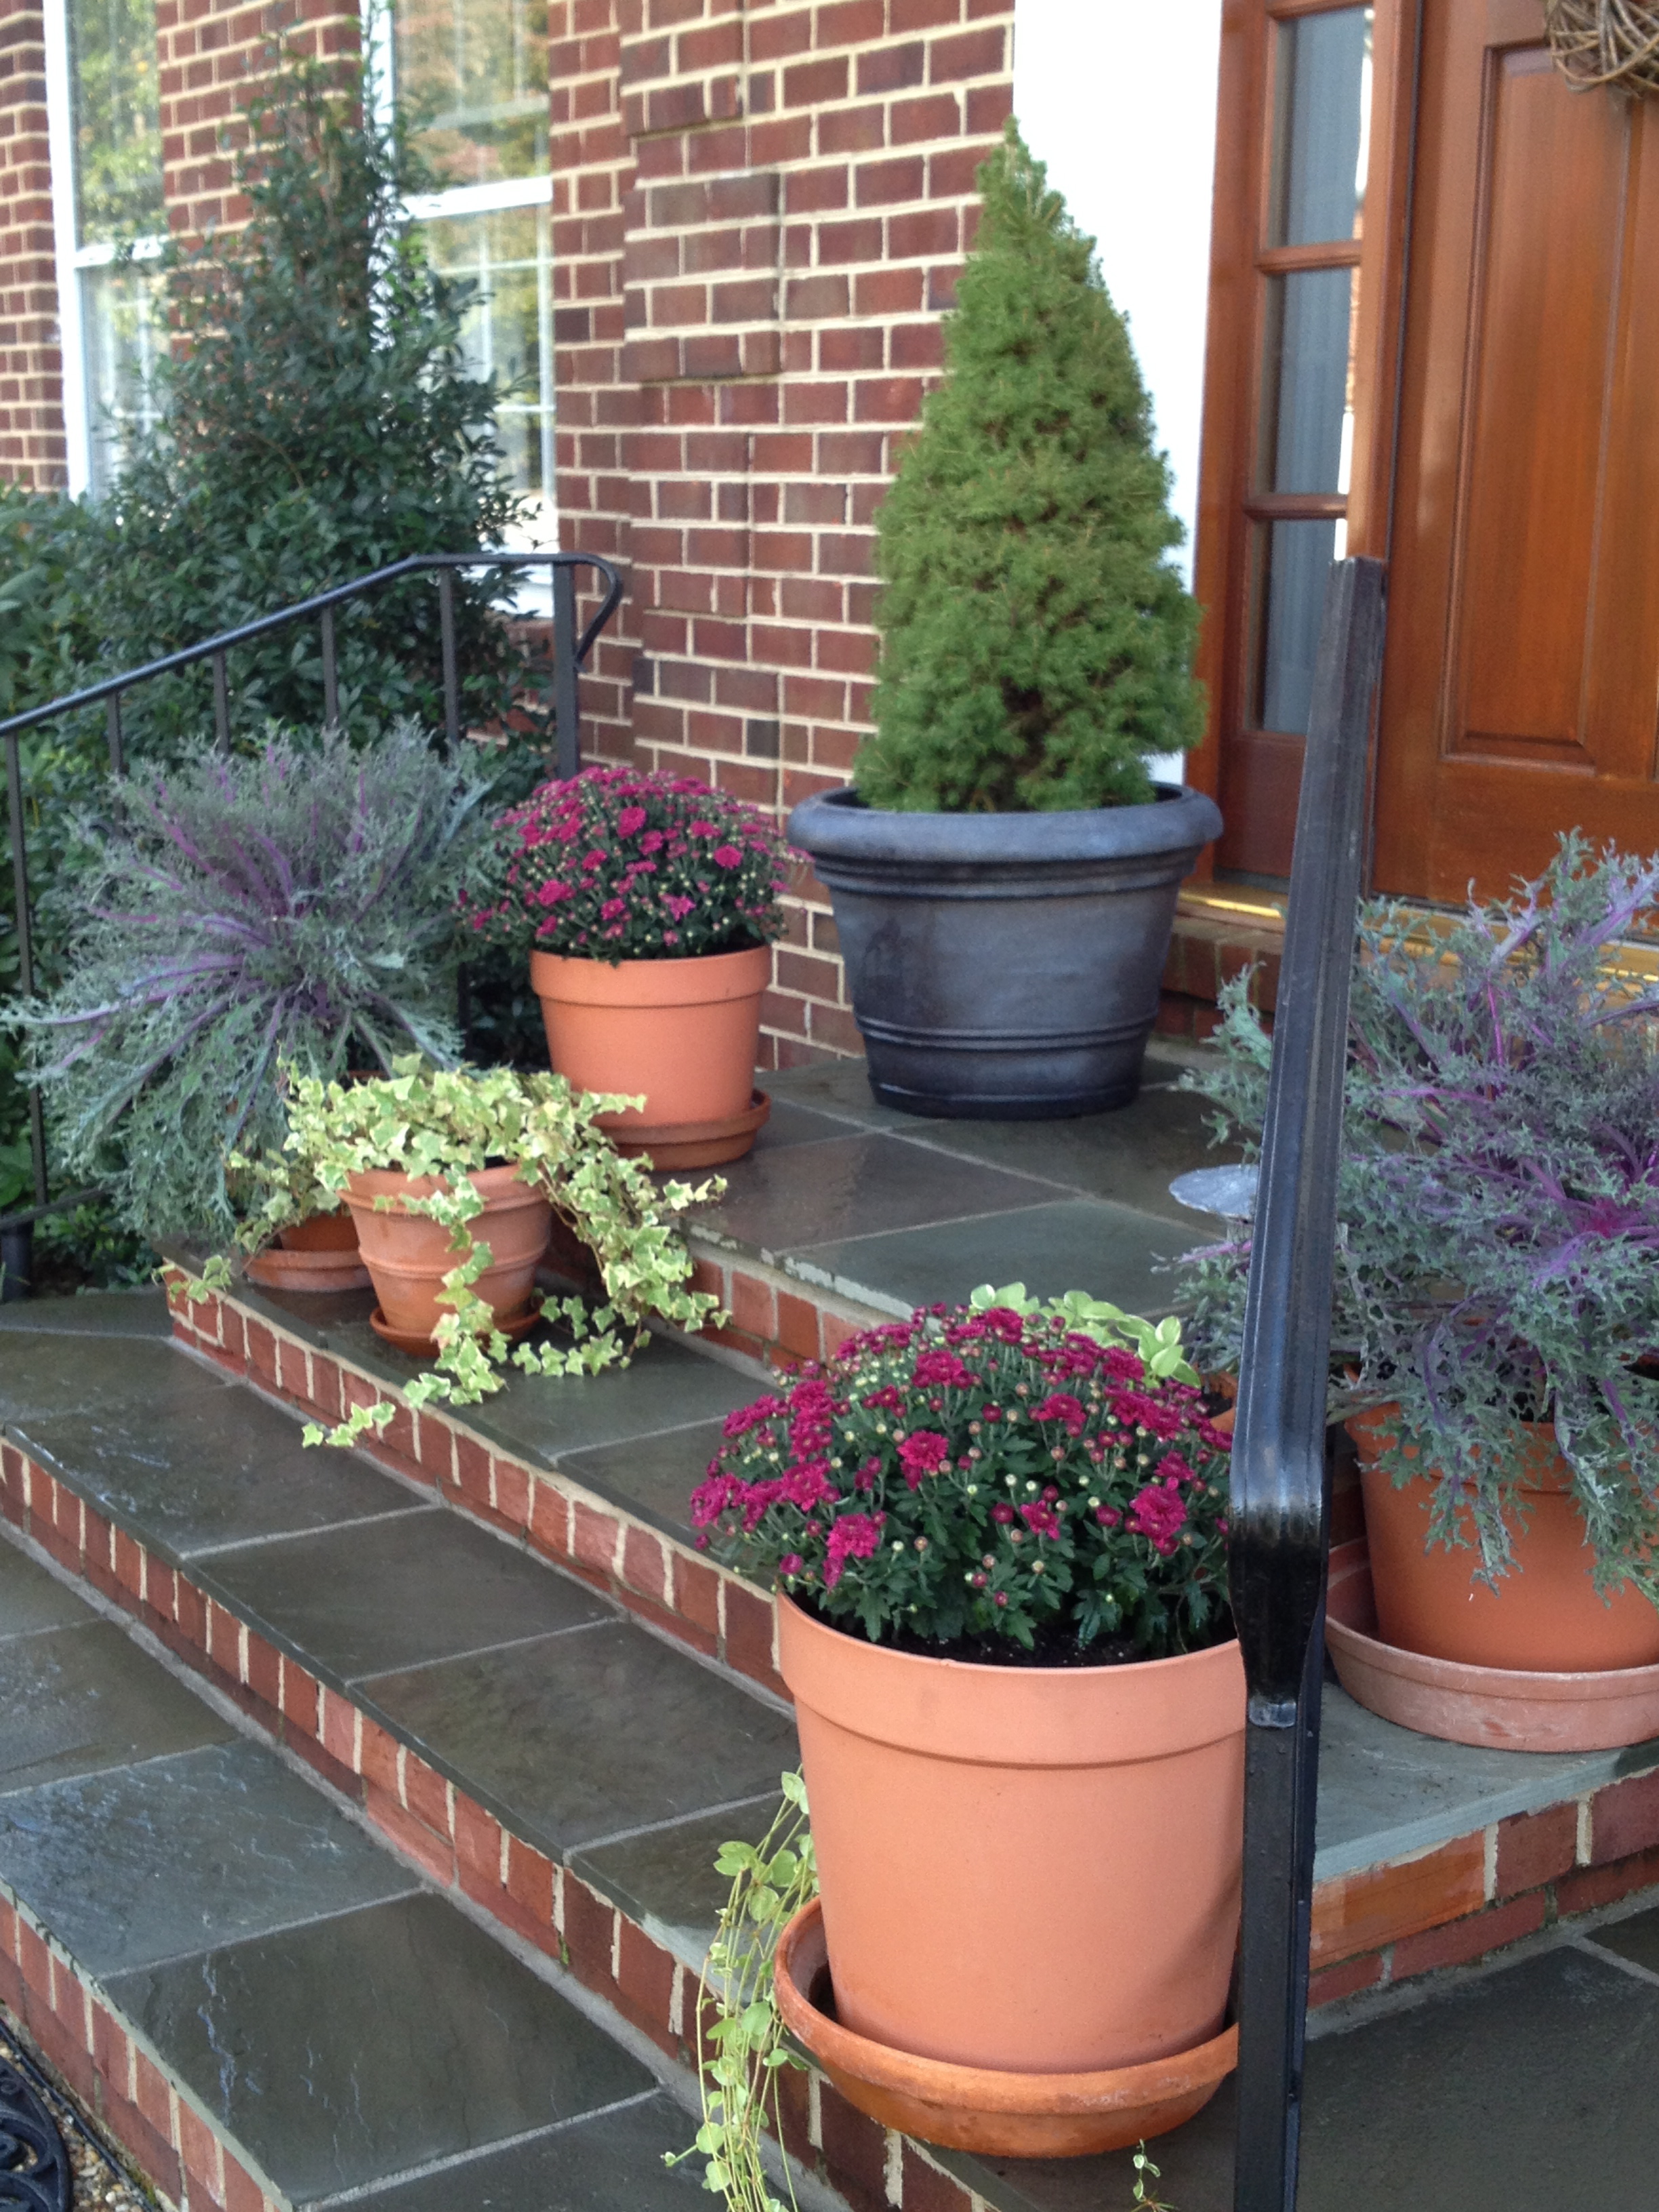
This year’s Fall colors on my porch are deep pinks, purples and teals.
I am getting the gardens ready for Fall, and it has been a beautiful weekend for doing the last bit of weeding and edging. Although the chores are not much fun, I rewarded myself by getting some gorgeous additions for the front entrance: ornamental kale, mums, violas, eucalyptus and some variegated ivy that I will use to add some punch.
This year there are some very interesting colors in the selections at the nurseries. I was inspired by a really beautiful kale, and I am pulling various shades of purples, deep pinks and a teal green from it and adding some bright accents with the ivy and the violas.

This ornamental kale was my inspiration for the Fall colors I chose this year.
As the season progresses, I will add pumpkins and gourds for Halloween, and for Thanksgiving I’ll add some Indian corn. Here again, the choices are amazing — the gourds I’ve seen have so many beautiful greens and ivories, not just the traditional oranges and yellows of yesteryear.
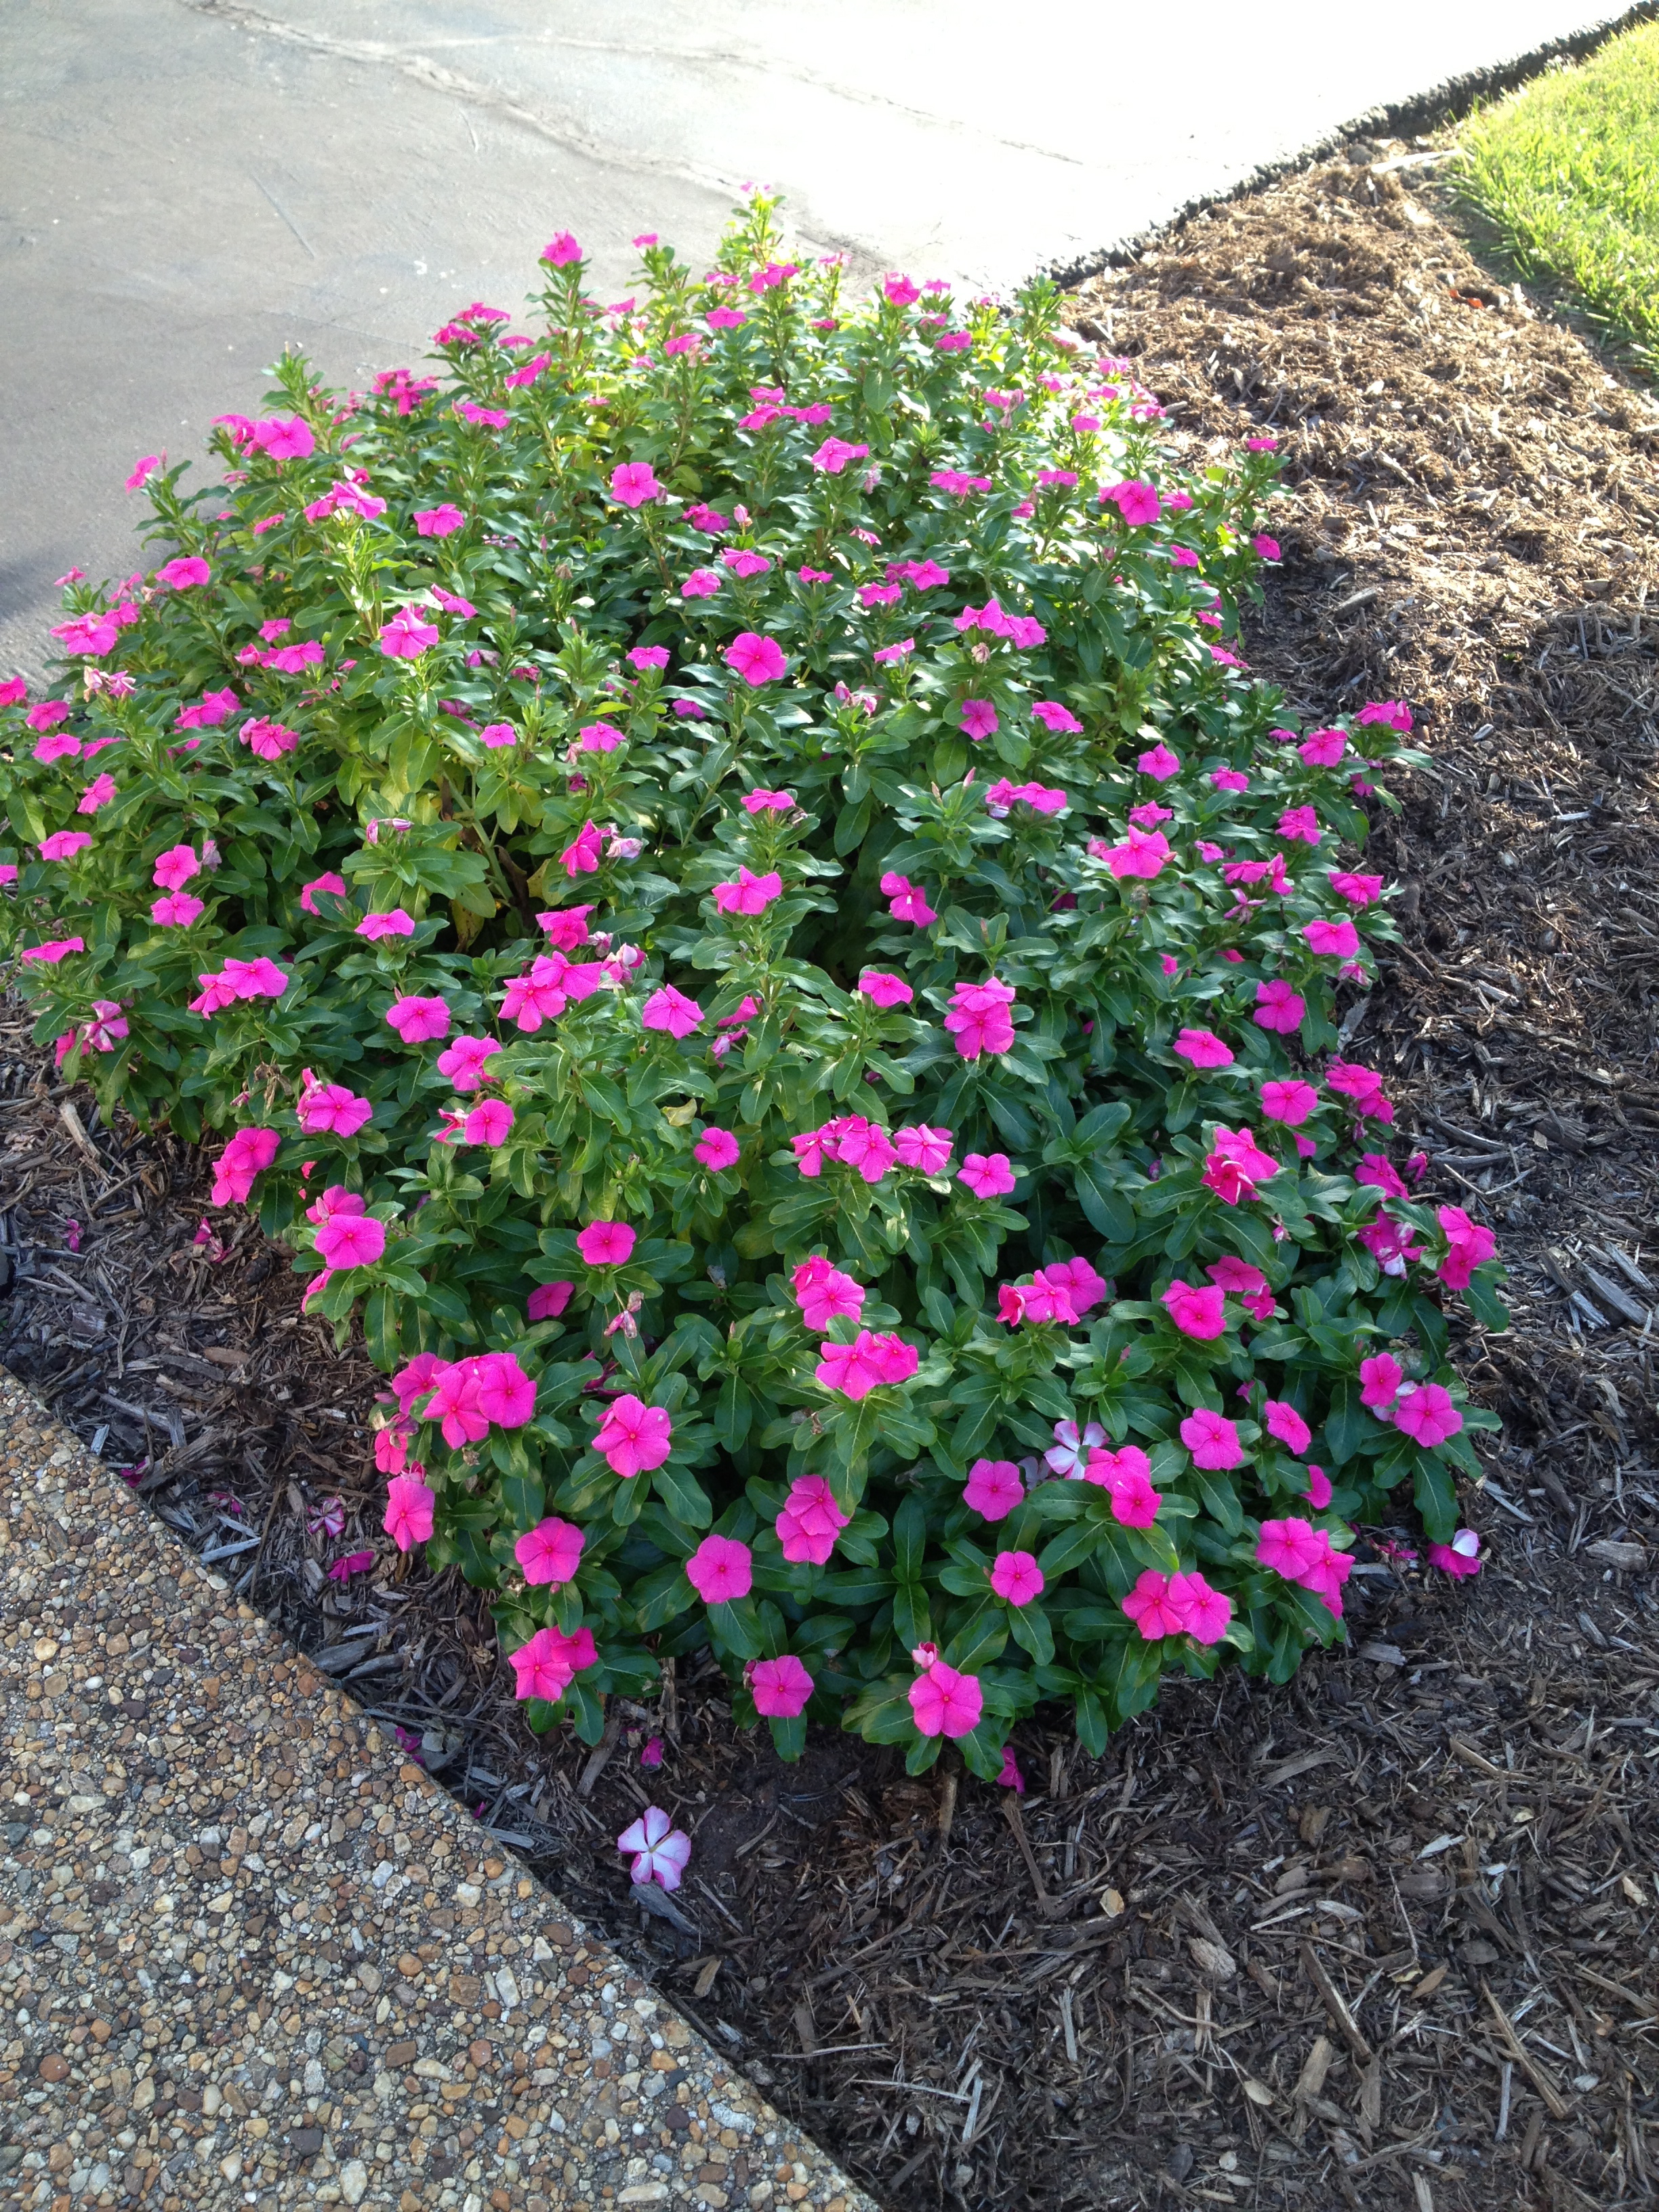
Normally by this time of year summer annuals would be in decline, but our strange year once again is proving to be different.
It seems that we are having a very late Autumn in the mid-Atlantic region. Barely anything has changed color, and most of the summer annuals are still blooming well. Because of this, I am going to break one of my cardinal rules. I am normally not one for mixing seasons, and I like to give each season its special time to shine, but it makes it hard for me to remove the summer flowers when they are all still looking so pretty. (I know, I get too attached to my babies… I mean my flowers, LOL!) In order to make the summer flowers work in the design, I bring in texture and color that will coordinate with the vinca and the mandevilla vine which are still thriving. They are both deep pink, so I especially like the combination with the kale! This is normally where I would have installed pansies, so when the frost arrives (and the vincas pass on to flower heaven), I will replace them with some pansies or violas. I love to have some flowers on each side of the driveway to welcome us home year ’round since that is the entrance most used.
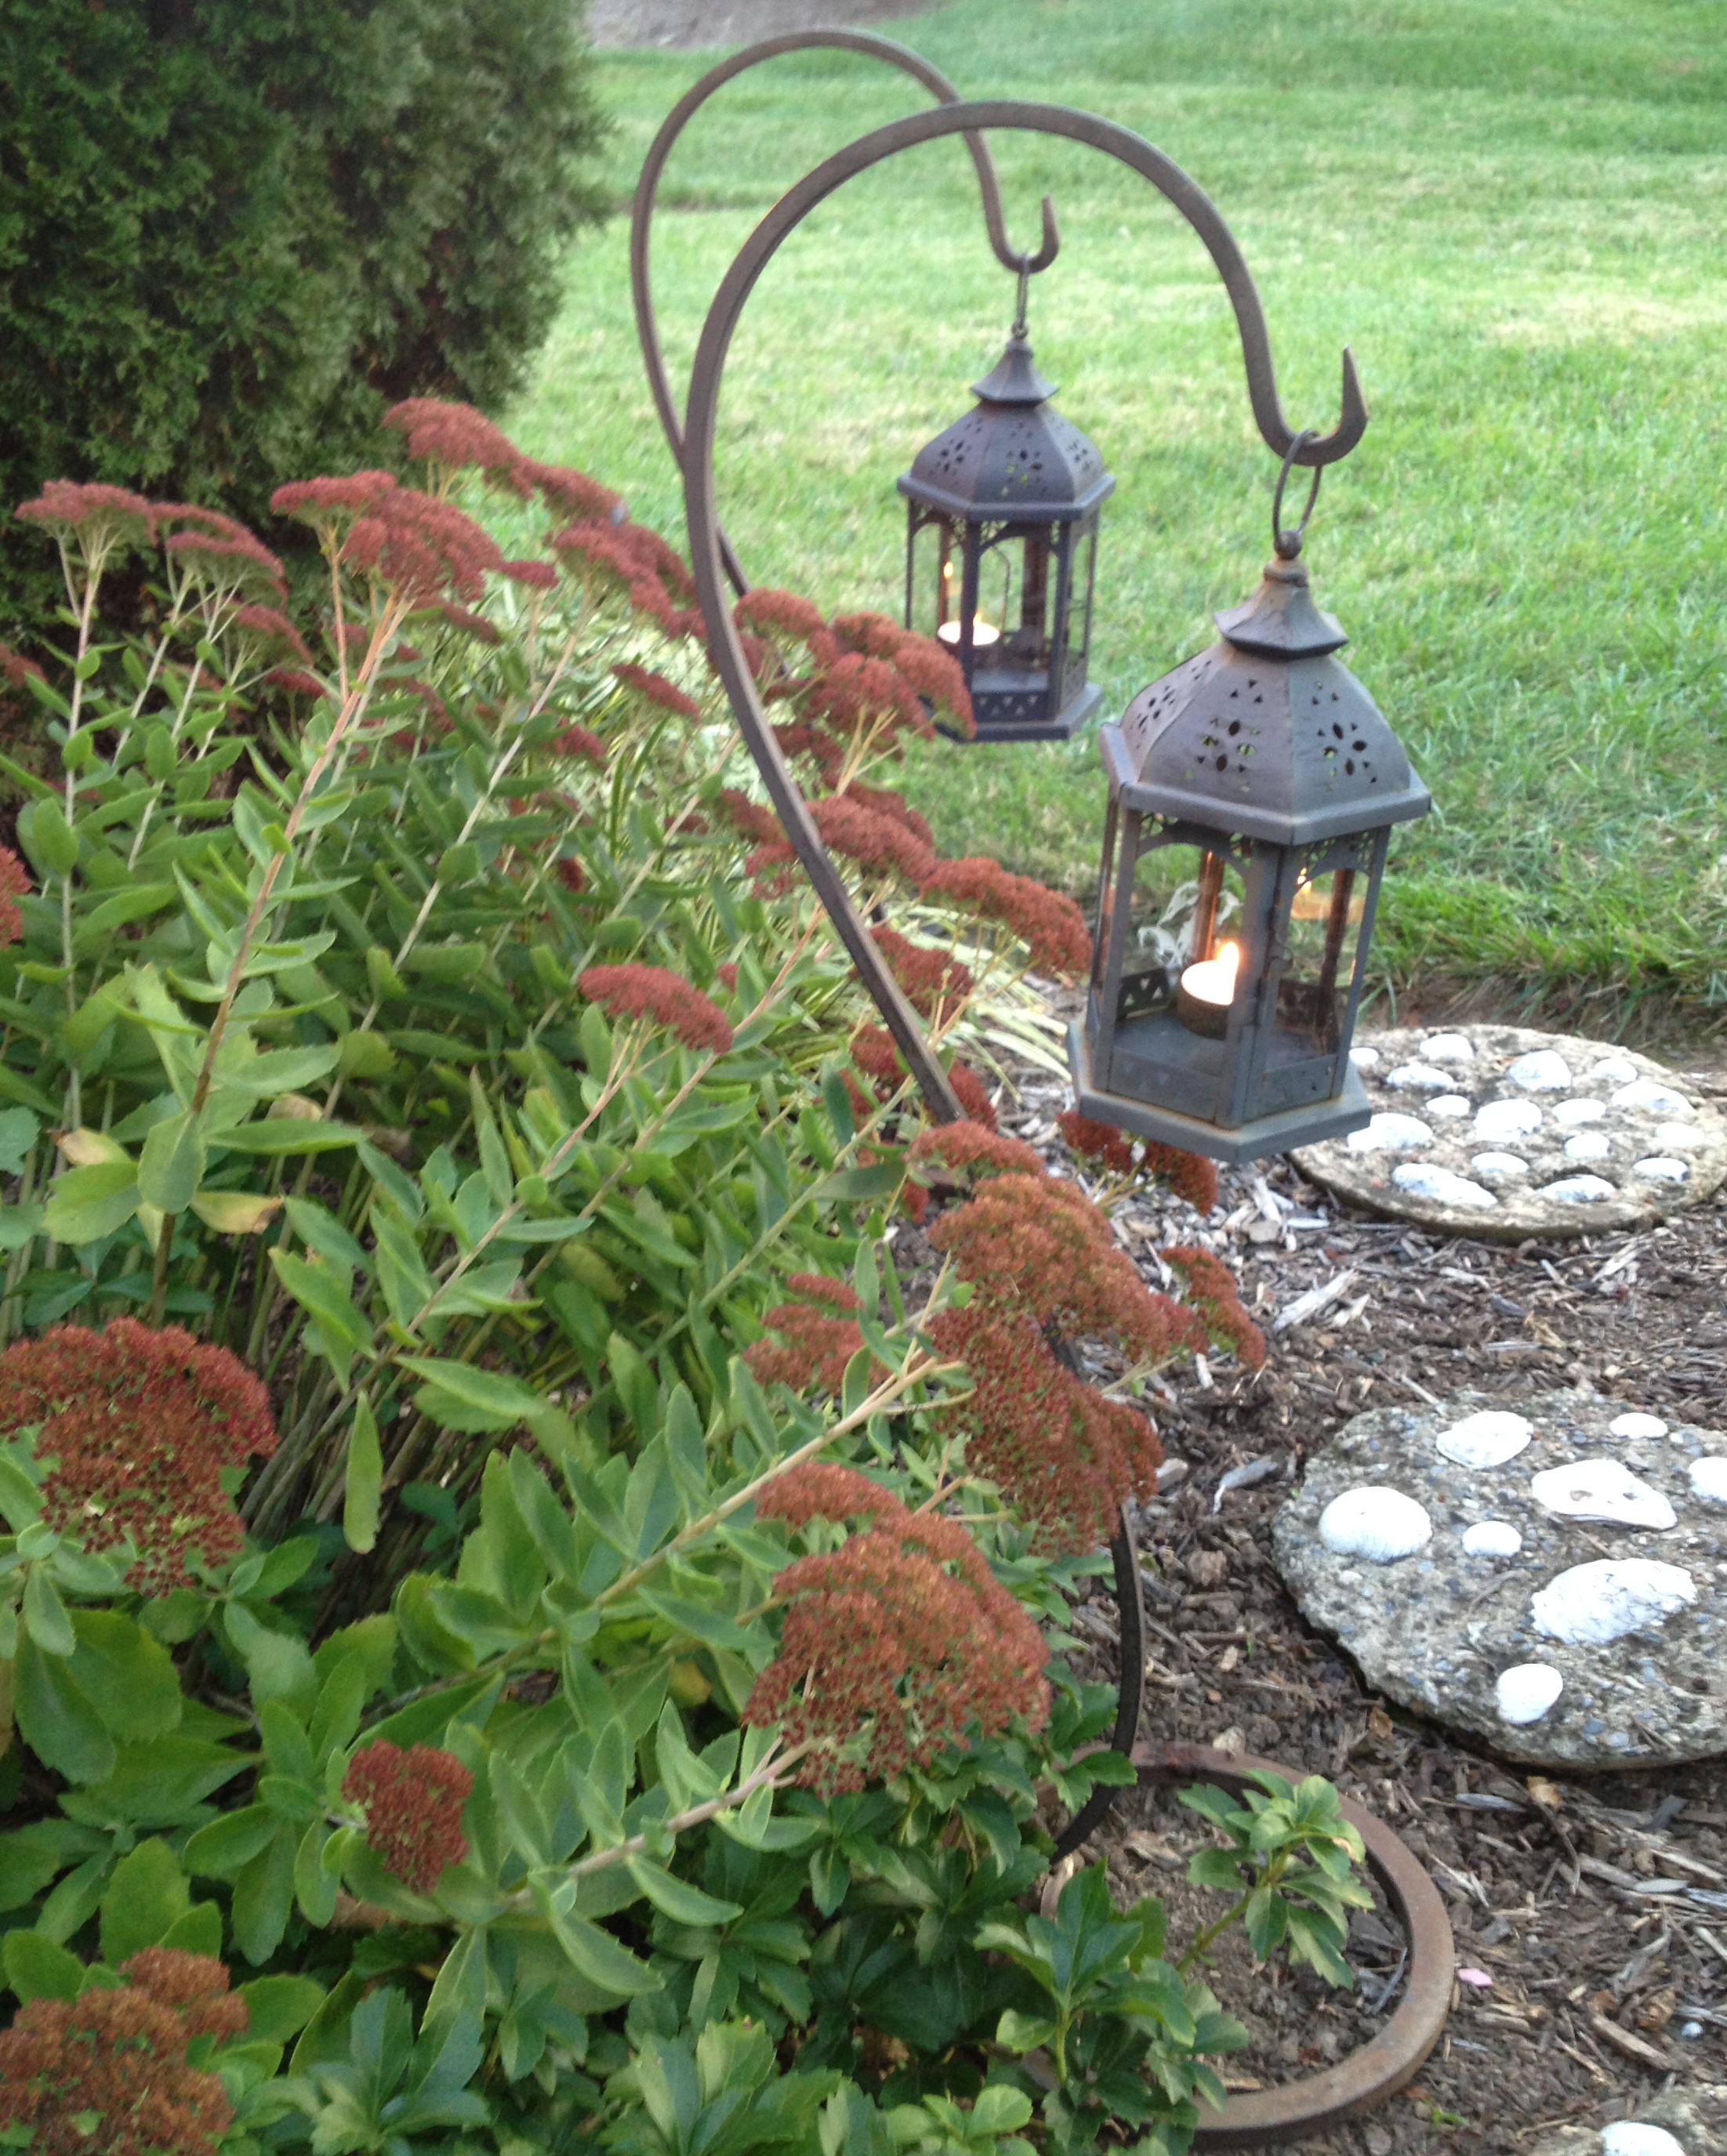
Lanterns on shepherd’s hooks are a great portable way of lighting a pathway — or anywhere else!
I have been so taken with gorgeous candle lanterns from magazines and in pictures that I have seen lately. I love to make the garden come alive with light especially on Halloween and when guests are expected, so I will be adding all my lanterns here and there along the walkways. In addition, there is some beautiful uplighting in the trees and against the house, which have been in place now for many years. I just love the look, and it really shows off the trees at night in a very interesting way! If safety is a concern, battery-powered candles can be substituted in lanterns for real ones. Another easy way of adding lighting is with solar lights, no wiring involved. It seems technology is really improving at a rapid clip in this field, and there are some really pretty styles now, unlike the clunkers of a decade ago.
Fall is a season full of beauty, and it’s so nice to have some cool fresh air again. I hope you can find some time to get out and enjoy what Mother Nature is giving us. Please let me know what is inspiring you this season. Happy gardening!
Happy Fall!