Archive for Garden Crafts

A Cherry Blossom Tree Craft For The Ages

It’s almost cherry blossom time here in the D.C. metro area. That is the time all of us who live around here look forward to each year. It is a magical time, the harbinger of spring, and a time to enjoy all the beauty that Mother Nature provides us. It’s fleeting though, and the tree blossoms only last for a couple of weeks, if we are even lucky to have them for that long. So today I want to show you an easy peasy craft that is super realistic looking, and will last years to come! Come along, and I’ll show you how to make this cherry blossom arrangement —
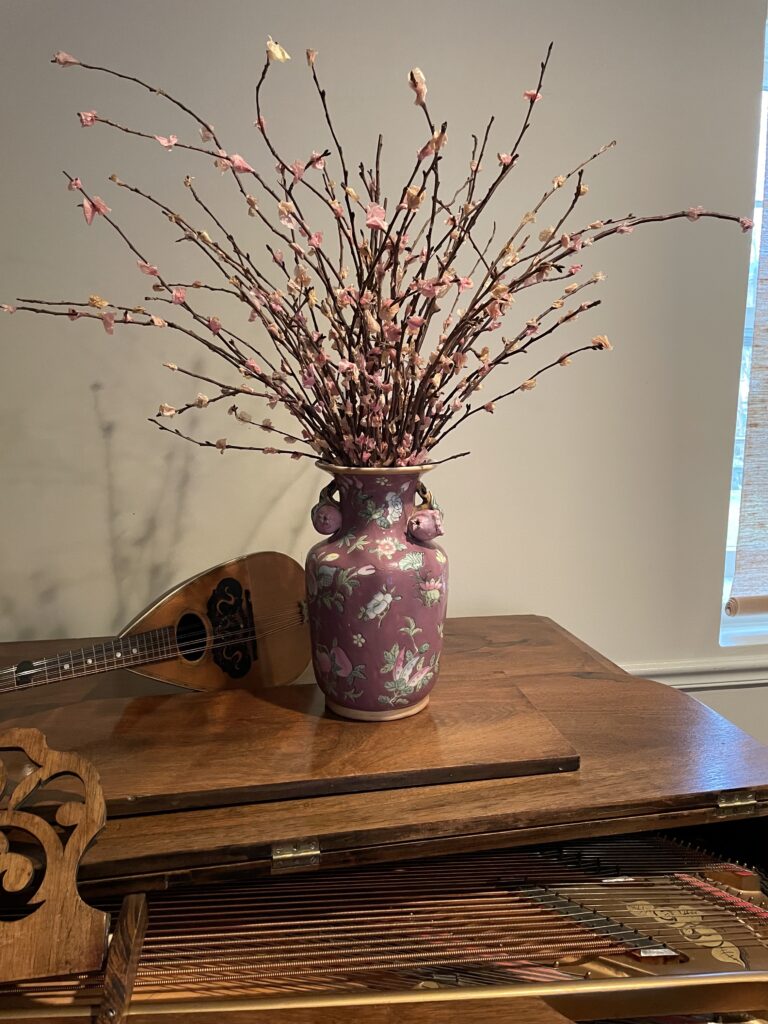
These cherry blossom branches are so realistic looking, don’t you think? My mother-in-law, Barbara, made them close to 20 years ago as a craft project with her garden club. Here’s how to make them…

First step is to go out in the yard and pick up dead, fallen branches. These were from actual cherry trees, but many other types of tree branches work well: willow, dogwood, crepe myrtle — really, any branches that are thin will work for this. They can be straight or curved. Collect as many as you want for your arrangement. For reference, this one has about 30 branches and fills a 5 inch diameter vase. Next, cut the branches to what ever length you desire. Those in the photo are about 24″ long.

The next step is to cut LOTS of 1 1/2″ circles out of pink tissue paper. Plan on at least 6 circles for each branch. You can buy a paper punch at craft stores to make these circles quickly, or go old school and just cut them out free form, they don’t need to be perfect. Fold each circle into quarters, and crimp the bottom. This makes the little individual blossoms. We found it easier to make a whole bag of them at one time. Glue each blossom on a branch, leaving 4″ to 5″ of space between flowers. My favorite glue to use is a hot glue gun because it dries so quickly, but you can really use any craft glue so long as it dries clear. Let the glue dry thoroughly.
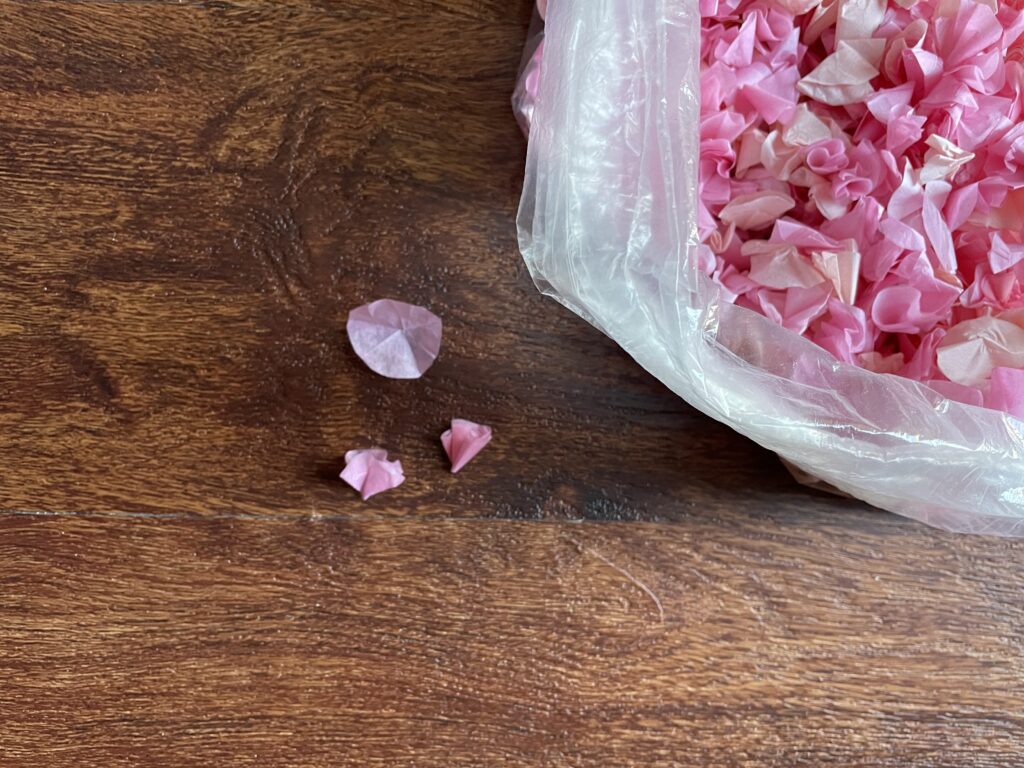
An alternative would be to make coral colored circles which would look like quince branches, or yellow circles would look like forsythia branches.

Next, using a vase of your choice, add each branch individually into the vase to get a beautiful shape, and enjoy! These are so beautiful, and look so real! I’m not kidding when I say these are 20 years old; they really last a long time! I hope you will try to make some.

Happy Spring Everyone!

Fun Summer Projects – Trash to Treasure


We've had so much rain here that working in the garden can't happen, so I'm working on some fun projects in the meantime-

Welcome to our tropical rain forest! We’ve had so much rain here that working in the garden can’t happen, so I’m working on some fun projects in the meantime-

Happy Summer everyone! Trash to treasure is one of my favorite pastimes.  I’ve been busy doing a few fun summer projects and want to share them with you. We’ve had a lot of rain here in the mid-Atlantic region, so as it’s been too wet to work the garden, I’ve been working on these projects between the storms.

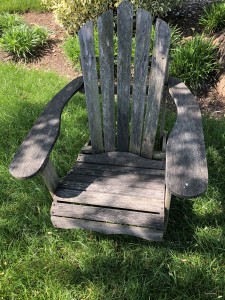
Trash to treasure - these great chairs were covered in years worth of grunge when I first got them.

Trash to treasure – these great chairs were covered in years worth of grunge when I got them.

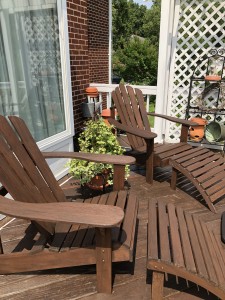
Recently I was given some old Adirondack chairs with ottomans that a neighbor no longer wanted. They had sat in the woods for years and had gotten covered in sap, bugs, pollen, mud, algae and who knows what else. They were in pretty rough shape, but I scoured them down, power washed them twice, and finally brought out the palm sander and managed to get through all the grunge. It was quite a job, but I was determined to make them beautiful again. A few coats of my favorite stain and sealer later, and now they are fantastic! I moved them up onto the deck, and now they make a great spot to sit and relax or maybe even whale watch! Trash to treasure, for sure!

After a ton of cleaning and sanding they are now the perfect place to relax-

After a ton of cleaning and sanding they are now the perfect place to relax.


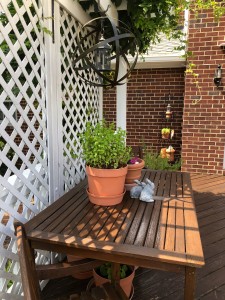
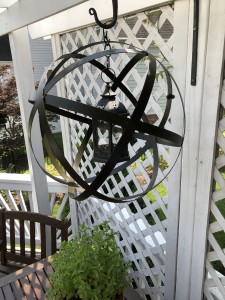
Also on the deck, I moved the teak dining table over to the arbor. I came up with a really fun and simple idea to create an outdoor chandelier above it. These were all things that I had, but easy to find at most garden centers. I took a wrought iron plant hanger and attached it to the center support post of the arbor, then with a few links of metal chain hung a garden orb. Inside the orb I hung a candle lantern. It makes a great chandelier, and no wiring necessary!


An easy chandelier made with a plant hanger, some chain, a candle lantern and a garden orb- no electricity needed!

An easy chandelier made with a plant hanger, some chain, a candle lantern and a garden orb — no electricity needed!

Here's a closeup so you can see how I put it together.

Here’s a closeup so you can see how I put it together.

These were fun projects.  Don’t be afraid to roll up your sleeves and apply some elbow grease — restoring old furniture is very rewarding. The chandelier project was very easy, and it will be nice to enjoy a meal underneath! Hope you’ll give them a try…

The Weather Outside is Frightful — Time for Some Indoor Gardening!

2018 has been foggy, windy and mostly frigid- time to stay inside!

2018 has been foggy, windy and mostly frigid. Time to stay inside!


I’m ready for some nicer days — aren’t you? 2018 has been unusually frigid and foggy, wildly windy, and with sudden, crazy temperature swings.  It makes me crave some tropical — or at least milder — springtime weather. Not to be had just yet, so until then, I’m doing some gardening indoors.

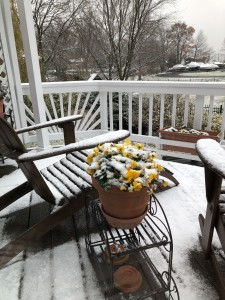
Crazy back and forth temperature swings have confused even the pansies as to what season we are in.

Crazy back and forth temperature swings have confused the pansies as to what season we are in.


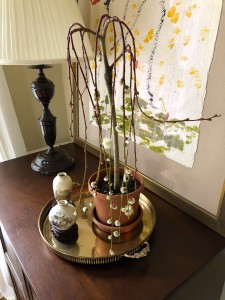
Time for a fun new plant or two- this one is a weeping pussy willow.

Time for a fun new plant or two — this one is a weeping pussy willow.


I’m always on the lookout for interesting new houseplants and couldn’t resist this one. It’s a weeping pussy willow, grafted onto a standard willow trunk. There is a legend that goes along with it: If you tie a loose knot in a trailing willow branch and then make a wish, the wish will come true. You then untie the knot and thank the tree, and it will grant you more wishes in the future. Well, I could use some of that! I’ll tell you if it works!


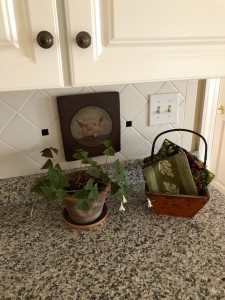
My shamrock is also starting to bloom again. I guess it knows that St. Patrick's Day is almost here.

Another great low-light plant is the shamrock. This shamrock is starting to bloom again. I guess it knows that St. Patrick’s Day is almost here!


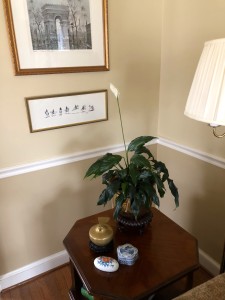
The peace lily and the shamrock also are starting to bloom. I’ve had both of these for a number of years and highly recommend them for low-light areas. Mine are both in need of re-potting in larger containers, but I’ll wait until the blooms fade. A good rule of thumb is to use the next size up in pots, and March is a perfect time to re-pot a houseplant.

This peace lily is a great plant for low-light conditions, and rebloos several times a year.

This peace lily is a great plant for low-light conditions, and re blooms several times a year.


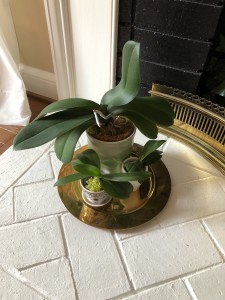
These are orchids that are not blooming at the moment. I have any idea to try-

These are orchids that are not blooming at the moment. I have any idea to try –


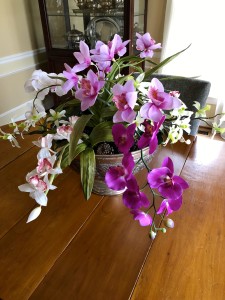
I’m waiting on some orchid plants to come back into bloom and decided to do something fun with them — I made an orchid garden to use as a centerpiece in the dining room.

If you want to try to make one of your own, here’s how: I took a huge punch bowl and lined it with floral foam (mine took four bricks of floral foam). I then added the real orchids (still in their pots) into the punch bowl around the outside rim. (So they can be popped out easily to water and put back in.) With the space that was left, I added faux orchids (I used 9 stems/sprays), and filled in with pine cones to cover any remaining visible floral foam or open spots. (You could also use moss, or shells, or anything you like for this step.) Bunching them all together garden style like this creates a statement piece with lots of impact. It’s so tropical-looking — just what I was going for! It makes me feel like I’m in a Victorian greenhouse when I look at it — a real plus for these chilly days. This could be done with any flowers or greenery that makes you happy, so I hope you’ll give it a try. Good cure for the winter blahs!

Here's my finished orchid garden- hope you'll give this a try!

Here’s my finished orchid garden. Hope you’ll give this a try!

Kicking Out the Winter Blaaahs

A simple bundle of amarylis flowers in a round cylinder vase adds a great pop of color on the hearth. They are tall, so I like using them up against a wall in an unexpected place.

A simple bundle of amaryllis flowers in a round cylinder vase adds a great pop of color on the hearth. They are tall, so I like using them against a wall in an unexpected place.

I always feel like my house looks so bare after I take down the Christmas decorations. The outside, too, seems so bleak and beige. It gives me a case of the blaahs. Here are a few simple things I’m doing to counteract those winter doldrums at my home.

I like to have colorful flowers to give some warmth to the home. For me, that means using tropical flowers and colors. I love the way tropical flowers work with so many furniture styles, too. From modern contemporary, to coastal, to traditional, they look wonderful.

I’m a practical lady and, as you know, and I like to grow a lot of the plants I use for decorating. But tropical flowers don’t grow around here unless you have a greenhouse, so my choices are purchasing them from a floral supply shop (very expensive!), or using silk replicas. Well, you know what this budget-minded lady is going to use! There are some amazingly realistic silks available now, too.

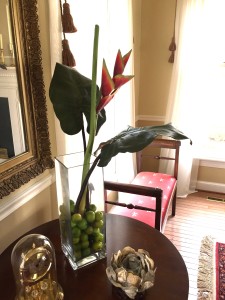
On a tabletop I have a single heliconia flower. Such vibrant colors, makes me feel warm. I filled the base with crabapples for some extra color.

On this tabletop I have a single heliconia flower. Such vibrant colors make me feel warm. I filled the base with crabapples for some extra color.

With many tropical flowers, you get wonderful impact with one or just a few flowers, especially with the larger flowers. The key is color — the more saturated the better, in my opinion. Luckily, readily-available square and round cylinder vases are great with almost everyone’s personal style.

Here are a couple of my favorite ways to display arrangements made for console tables or floor arrangements. These are tall so they are better positioned near a wall rather than as a centerpiece, which you would want to be low enough you could see across the table for conversation.

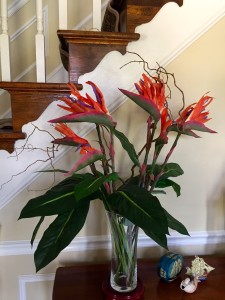
In the entry hall I have a vase of bird of paradise flowers. I added a branch from the curly willow tree to give the arrangement some motion.

In the entry hall I have a vase of bird of paradise flowers. I added a branch from the curly willow tree to give the arrangement some motion.

It’s also nice to have small “minis” that you can scatter around on side tables, or on a tray with other things, or even in multiples down a mantle or dining table. I’d suggest trying orchids or succulent plants that require very little care, great for busy lifestyles or those who travel.

Here’s a fun tip to give some extra zip to your floral creation: take advantage of the base of the clear vases by using interesting things to dress them up. Some favorite fillers are shells, beach glass, stones, wine corks, small fruit, moss or lining the vase with leaves.

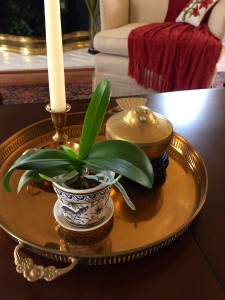
I like to balance out the room with some small mini potted plants, these tiny orchids can live for years with very little care.

I like to balance out the room with some small mini potted plants, these tiny orchids can live for years with very little care.

When I was last at my wholesaler with a friend, we discovered that there is now a 4″ wide ribbon that is made exactly for this, and looks like a variegated leaf — pretty clever! We picked some up for her daughter’s upcoming wedding.

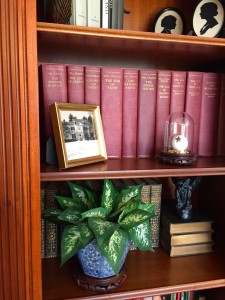
Don't forget your bookcases- just a small pot of leaves or ivy can breathe some color back into an otherwise missable spot.

Don’t forget your bookcases! Just a small pot of leaves or ivy can breathe some interest into an otherwise stale spot.

Another tip when using silk flowers in a clear vase is to add a couple of inches of water. This might seem funny to some, but it seals the deal, makes faux flowers seem real! And one more tip when using faux: make sure to keep them dusted.

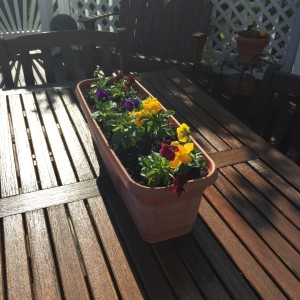
Outside, I love to have a few pots of pansies for color, and I add branches of boxwood or juniper for some background. I also do the same with bare branches from the curly willow for some interest and height.

Well, these are a few of my favorite ways to combat the blaahs. Hope you find them interesting, and please share with me what you do in your home!

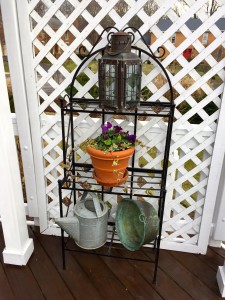
Where I sit at the kitchen table I like to have some flowerpots to look at out on the deck. Makes me feel like Spring can't be too far off. Nice thought!

I like to have some flowerpots to look at out on the deck from where I sit at the kitchen table. Makes me feel like spring can’t be too far off. Hmmm…. Nice thought!


Save

Save

Save

Save

Save

Time for Collecting Seeds and Preserving Blooms

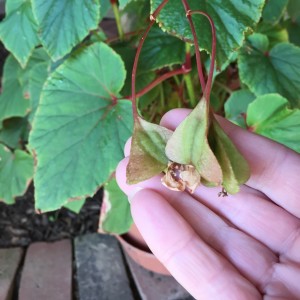
Look closely at your plants, many will have seed pods that you can dry and save for next year. This begonia has really strikingly pretty ones in a teardrop shape.

Look closely at your plants. Many will have seed pods that you can dry and save for next year. This begonia has strikingly pretty ones in a teardrop shape.


Hi, friends — happy fall! I’m sorry I have not posted for a while. I’ve been busy finishing up projects, and glad to say that I have completed many. The ten new storm windows are installed, and the new flooring in my basement finished, too. Now I can get back to my favorite thing — gardening! I was asked to write a post on how I collect seeds and keep plants for the next year, and I am happy to do just that.


There are many plants that I’m saving this year by collecting their seeds and berries.

After collecting pods, let them dry out. Break them open and pop the seeds out. Save for Spring planting.

After collecting pods, let them dry out. Break them open and pop the seeds out. Save for spring planting.

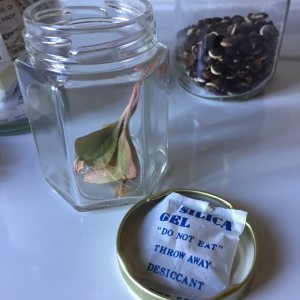
I like to store my seeds in recycled glass jars. I glue silica packs to the inside of the lid to keep moisture at bay.

I store my seeds in recycled glass jars. I glue silica packs to the inside of the lid to keep moisture at bay.

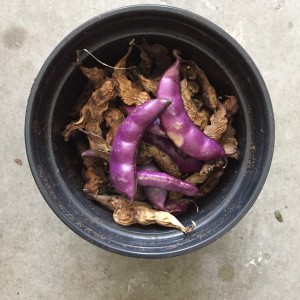
The pretty Hyacinth bean vine produced literally hundreds of pods this year. The best way to save these is simply to pick them and let the pods dry out. The pods break open quite easily then, and I just store the seeds in a glass jar until next spring. Here’s a preserving tip that you might not know: Glue a silica pack on the inside of jar lids — it will absorb any excess moisture from accumulating inside the jar. I save the silica packs from old shoe boxes and other shipping boxes that come with them inside, so it’s a great reuse for them.


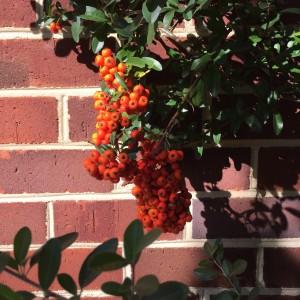
Many bushes in the garden will drop berries that will sprout in the Spring. Transplant the seedlings from these to a safe spot in the garden, and you will be amazed at how quickly these volunteers will grow into great new plants.

Many bushes will drop berries that will sprout in the spring. Transplant the seedlings to a safe spot in the garden, and you will be amazed at how quickly these volunteers will grow into great new plants.

Many plants in the garden, such as the nandina, holly bushes, pyracantha and liriope, have berries that I just let fall into the garden. In the spring I cull the best sprouts from these to start new plants. It’s amazing how quickly they grow into beautiful plants all on their own with hardly any effort.


Many of the annual flowers that I grow in the garden produce seeds. If you check the soil in the areas that you have planted with annuals, you will see volunteers sprout up regularly. I do this every year with the vinca that is planted by the driveway. Even the gorgeous heirloom begonias that I grow in pots will self-seed. It’s always a good idea to save some of the seed just in case they don’t return. It’s easy to find the seeds. They will either be in little pods or form inside the flowers.

I love how many varieties of vinca are now growing in my garden. Many annuals will drop seed throughout the Summer, and if the soil is not distrubed too much you will have many new sprouts in the Spring. I like to keep the strongest of the new sprouts and clear the rest.

Many annuals will drop seed throughout the summer, and if the soil is not disturbed too much you will have many new sprouts in the spring. I like to keep the strongest of the new sprouts and clear the rest. Each year I like to grow a different color vinca. It’s fun to see the blend of colors from previous years, growing up through the current year’s plants.


Some of the more tender herbs and plants are easily propagated by taking cuttings that you can root in water then plant indoors to save over the winter months. Begonias and basil are two of my favorites.

Some of the more tender herbs and plants are easily propagated by taking cuttings that you can root in water then plant indoors to save over the winter months. Begonias and basil are two of my favorites.


Another way of saving begonias, ivy and many herbs (such as basil) is by pinching off a few branches and rooting them in water. In just a few weeks you will have enough roots to sustain a fresh plant that you can keep indoors over the winter months, and plant outside once spring comes. The same can be done with many of the hardy herbs, like chives, oregano and thyme that grow in a clump. Just divide a small clump (2″ or so), and plant to create a wonderful indoor planter that you can pick and enjoy for cooking all winter.


This is a huge bundle of liatris from the garden that I hung to dry and then arranged in a clay pot. I have many of these on top of the cabinets in my mud room.

This is a huge bundle of liatris that I hung to dry and then arranged in a clay pot. I have many of these on top of the cabinets in my mud room.

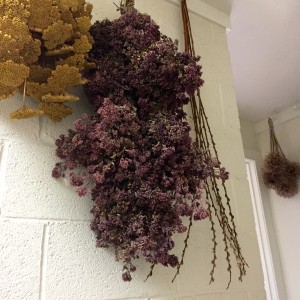
I hang lots of the flowers from the garden from peg racks to let them dry, and store them there until they make their way into a flower arrangement. It adds color, and I love having a reminder of Summer all Winter long. Here I have yarrow, oregano, pussy willow, bay leaves, lavendar and many others. Easy to do!

I hang lots of the flowers from the garden from peg racks to let them dry, and store them there until they make their way into a flower arrangement or wreath. It adds color, and I love having a reminder of summer all winter long. Here I have yarrow, oregano, pussy willow, bay leaves and many others. Even hummingbird vine that I twist into wreath bases. Easy to do, and it’s fun to be able to make things for gifts that you grow yourself!


There are some herbs and perennials that I cut and dry to enjoy all winter in bundles and arrangements through out the house. These will stay pretty — sometimes for years — if they are out of direct sun. I regularly dry the liatris, yarrow and even oregano when it’s flowering. I like to hang it in bundles from peg racks in the mud room to add a little color.


There are other perennials like the blackberry lily that I let dry and the seeds will easily shake off into a paper bag. Those will be saved in a jar as well for springtime planting.

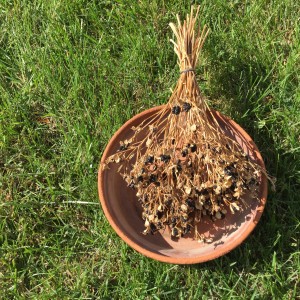
Some perennials produce very decorative seeds after flowering, like these blackberry lily. Once the stems start to fade, I cut and dry them. It's easy to shake the seeds off into a paperbag and save them for next year's planting.

Some perennials produce very decorative seeds after flowering, like these blackberry lily. Once the stems start to fade, I cut and dry them. It’s easy to shake the seeds off into a paper bag and save them for next year’s planting.

Happy Fall Gardening Everyone!
Happy Fall Gardening Everyone!
 

I hope that you will try a few of these in your own garden. Seeds are like coins in a piggy bank. It’s always fun to have some “Gardener’s Gold,” and don’t forget to share your bounty with other gardeners — a jar of seeds for a Christmas gift is always fun and welcome!

Save

Save

Save

Save

Save

Save

Save

Save

Save

Save

Great Ideas for Gardening Gifts

I just had a most fun weekend with my high school friends for an all-class reunion. It has been more years that I want to count, but it seems we always pick up where we left off, and we always love getting together! Since I’m still a “local”, I love opening up the house to my out of town friends. I was bestowed with some very creative and lovely gifts and want to share some pictures, because I thought that if you are like me, then you are always looking for ideas for great gifts! These ladies came up with some fantastic and thoughtful ones that you could tailor to your own lucky recipient!

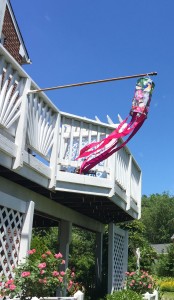
Windsocks and garden flags are colorful and cute, and they have a hidden benefit!!!

Windsocks and garden flags are colorful and cute, and they have a hidden benefit!!!

I love this windsock. I hung it out off the deck railing right away to signal that the party had begun, and not only is it colorful and cute, but after a couple of days we realized it had a hidden benefit! I have a wide deck railing that the birds like to perch on, and every day I would need to wash it off due to the bird’s leaving something unwanted behind — if you know what I mean. The motion of the windsock hanging so close to the rail kept them from perching there, or doing their “business” there. Yay!  Hidden benefit!!!!  Don’t worry though, there are plenty of close by spots for them to perch, and for us to enjoy them in the garden.


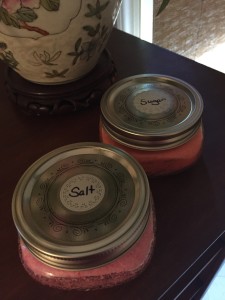
How wonderful to pamper yourself with a hand and foot scrub after a long day of gardening!

How wonderful to pamper yourself with a hand and foot scrub after a long day of gardening!

Here’s another creative, pretty and very useful gift that any gardening lady or gent would love!  These are specially-made hand and foot scrubs — sugar for your hands, and salt for your feet. There are many recipes to make these online and you can even color them with food dye to match the personality of your lucky recipient. And really, who doesn’t like to pamper themselves after a long day’s gardening? Perfect! Of course, these containers are just right, too!


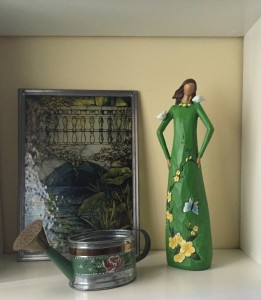
My Earthgirl Statue, handpainted watering can, and a stained glass panel. Love them all!

My Earthgirl statue, a hand-painted watering can, and a stained glass panel. Love them all!

I thought this was truly fantastic:  an Earthgirl statue bestowed on yours truly — I’m humbled! This was a very inventive gift for me, of course, but there are so many interesting statues out there, that I’m sure you could find the perfect one for your gardener as well! Also, I included a couple of other things I have received over the years in the photo. Watering cans are classic, fun and useful, and I’ve always loved this stained glass panel of Monet’s Waterlily garden.


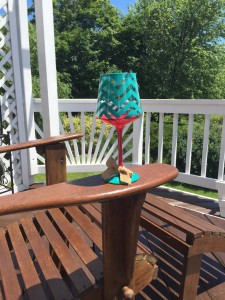
A bottle of wine is always enjoyed here- and now I have a special glass, too!

A bottle of wine is always enjoyed here with guests — and now I have a special glass, too!

And last, but not least — what a perfect way to end the day: to sit back to view your garden, but with a glass of wine in a hand-painted wineglass!  There was a different glass for each of us. How special is that??

I hope these imaginative ideas will help you to choose a great gift next time you are looking for one. Thank you again to my lovely house guests, I will treasure these always! And you shouldn’t have!


Bringing Autumn Inside the Home

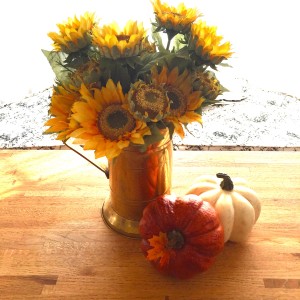
Sunflowers are one of my favorite fall flowers- I love to have them on the kitchen table to enjoy.

Sunflowers are one of my favorite fall flowers. I love to have them on the kitchen table to enjoy.

I hope this finds everyone enjoying the beauty of autumn. I feel like the rich colors of the season — golds, oranges and reds — are always so heartwarming.

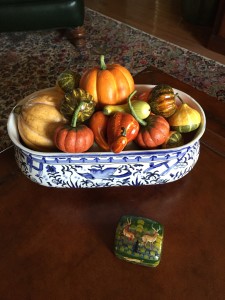
It inspires me to bring those colors inside my home and display as many of my favorite pumpkins, gourds and fall flowers as I can. I use real, dried and artificial ones in bowls, baskets and flower pots all over the house. The more the merrier for me.

I’ll be the first to admit that I have a bit of an obsession for those cute little gourds. I’ve been collecting them for years and love putting them out each fall. This year’s decoration is more casual and simple here at the house. Here are some photos of some of my favorites — hope you enjoy the autumn tour!

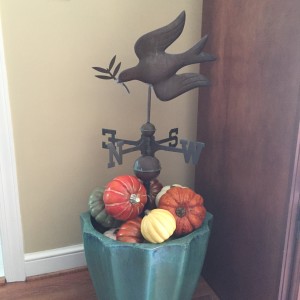
I love to change up the weathervane for each season. This time of year I surround it with gourds.

The weather vane gets something different for each season. This time of year I surround it with gourds.

My collection of paper mache gourds are used to fill all kinds of containers which I use on tabletops and as centerpieces. Whenever I see new gourd varieties this collection grows!

My collection of paper mache gourds are used to fill containers which I use on tabletops and as centerpieces. Whenever I see new gourd varieties this collection grows!

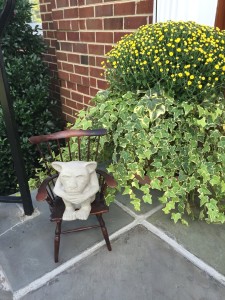
I like to have some flowers by all the entry doors to welcome visitors. This year I used beautiful deep yellow mums by the front door. My favorite gargoyle welcoming visitors, too!

I like to have some flowers by all the entry doors to welcome visitors. This year I used beautiful deep yellow mums by the front door. My favorite gargoyle is welcoming visitors, too!

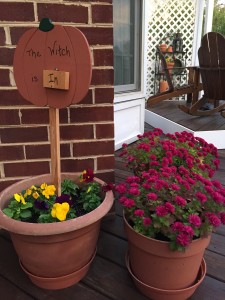
By the kitchen door I have pansies, violas & mums in yellow, plum and burgundy colors. Most of my friends and family use this door so I always like it to look cheery.

By the kitchen door, I have pansies, violas and mums in yellow, plum and burgundy colors. Most of my friends and family use this door so I always like it to look cheery.

More pansies fill containers on the deck for entertaining outside.

More pansies fill containers on the deck to look festive for entertaining outside.

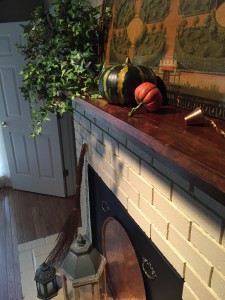
Back inside on the mantle in the family room I love to display the pumpkins with lanterns, ivy and more candles.

Back inside, on the family room mantle  I love to display the pumpkins with lanterns, ivy and more candles.

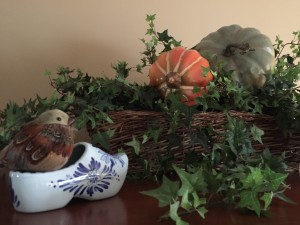
Adding a few of my chubby birds in the family room, too!

Adding a few of my chubby birds into the mix in the family room, too!

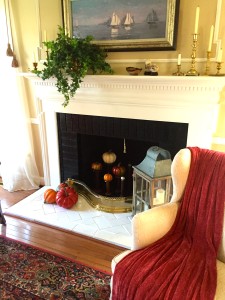
The living room fireplace has a fun new twist this year with the addition of some antique spools that I'm using to display pumpkins on top of. Reminds me of my dear friend who gave them to me every time I see them!

The living room fireplace has a fun new twist this year with the addition of some antique spools on which I display small pumpkins. Reminds me of my dear friend who gave them to me every time I see them!

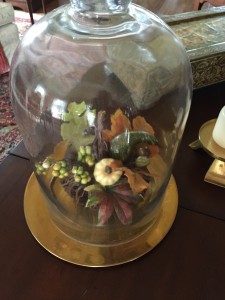
A grapevine pumpkin with a spray of fall leaves and berries under a garden cloche sits on the coffee table.

A grapevine pumpkin with a spray of fall leaves and berries under a garden cloche sits on the coffee table.

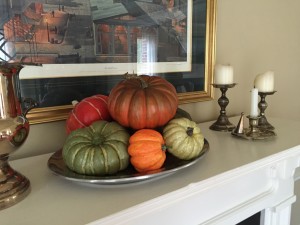
Simply piled on a platter to add color in the dining room.

Pumpkins piled simply on a platter add color on the dining room mantle.

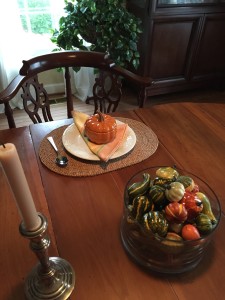
Who wants soup? I love all the pumpkin bowls and tureens at home shops the last few year. These have a lid to keep things hot.  I've used them to bake pumpkin custard, too- yum!

Who wants soup? I added these to my collection a few years ago. They have a lid to keep things hot. I’ve used them to bake pumpkin custard in, too – yum!

In years past we created much more elborate arrangements- this one was made by my Mom & I for her garden club event, but I'm feeling like a simpler style this year.

In years past, we created much more elaborate arrangements. This one was made by my Mom and me for her garden club event, but this year I’m feeling like a more casual style fits my mood.

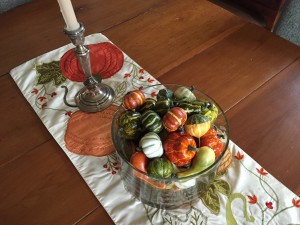
And last, but not least a favorite table runner with pumpkins, and a trifle bowl full of gourds on the dining room table. I wish everyone a very happy and healthy Thanksgiving and hope this will insipe you to bring some autumn into your home!

And last, but not least a favorite table runner with a pumpkin motif, and a trifle bowl full of gourds on the dining room table. It’s not fancy, and I like the simpleness for everyday. Here’s wishing everyone a very happy and healthy Thanksgiving and hope this will inspire you to bring some autumn bounty into your home!


Roses, Roses, Roses – It’s Almost Valentine’s Day!

Everything you ever wanted to know about Roses-

Everything you ever wanted to know about Roses

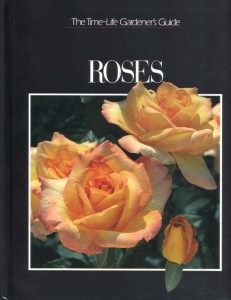
With Valentine’s Day right around the corner, I thought this might be the perfect time to blog about roses — their meanings and how to dry them, in case anyone wants to preserve their bouquets! Years ago, I was asked to be a part of putting together a series of gardening books for Time-Life Books. My floral business was really centered all around roses, so I chose to work on the Rose book in the series. It was my first chance at being a contributor to a book in my chosen craft, and I was more than happy to help them out. These books have been out of print for a long time now, but the information is timeless. My specialty was drying the roses so that they looked fresh. I had it down to a science — usually drying 1000 stems at a time, every 2 to 3 weeks. Any thing that did not meet highest standard was turned into potpourri for sachets. When you are in a very small business you learn not to waste a single bit of anything! So, here are a few of my favorite drying techniques from the Roses book, and some fun facts on rose color:

First up: Choosing the right color rose to convey your sentiment.

The rose is always the flower most associated with being a gift of romance and love. And, why not? With its beauty and beautiful scent, who wouldn’t love to receive them?

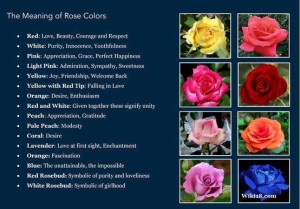
Each color has a different meaning to convey your sentiment.

Each color has a different meaning to convey your sentiment.

This colors and meanings chart will help you choose the perfect bouquet of roses for your loved one. Rose color was used as a form of communication from ancient times through the Victorian period, all but lost to us now. Here is the meaning of each:

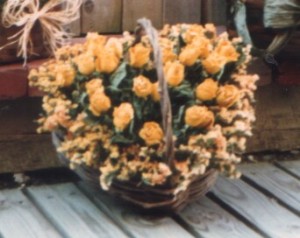
This is a heart shaped rose arrangement I made years ago with roses that I dried myself. The colors will stay intact for a long time!

This is a heart shaped rose arrangement I made years ago with apricot colored roses and statice that I dried myself. The colors will stay intact for a long time when carefully air-dried.

Next: Enjoy your roses! Lift them out of the container each day and trim an inch from the stem, replace the water with fresh. After a few days, when the roses are half opened, is the perfect time to preserve them. Any longer in the water will cause the roses to open too much, and the effect will not be quite as good.

To dry, simply bundle the roses in small bunches of eight or ten stems at the most, and hang upside down in a room with dim light, but good air circulation. Use a fan to help if you need to. The perfect temperature is around 70, and low humidity is a must. I like to use elastic bands to bundle them, because they will hold fast to the stems as they shrink slightly when drying. The drying

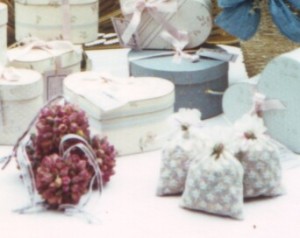
Save your rosepetals, (or any buds that haven't dried as beautifully as you might like) for sachets, or potpourri. These are pomanders, sachets & hatboxes filled with rosepetal potpourri which was some of my biggest sellers.

Save your rose petals, (or any buds that haven’t dried as beautifully as you might like) for sachets, or potpourri. These are rosebud pomanders, sachets & mini hatboxes filled with rose petal potpourri that I made for craft shows and shops. Terrific for gifts, too!

process will take 2-3 weeks, and then you will have your roses for years! I like to pull the outermost petals off to expose the more vibrantly colorful ones just inside making them appear fresh. The greenery will also hold its color for at least a year when dried this way. The rose color will intensify during the drying process, and sometimes even change completely as they dry — pinks become coral, orange becomes red, white becomes more creme. Hope you will try this!

Have a beautiful Valentine’s Day!

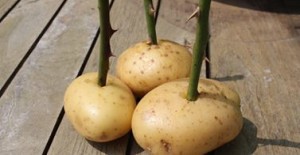
Easy way to start a rose bush from a rose stem.

Easy way to start a rose bush from a rose stem.

Update: I just saw this great way of rooting roses from stems. Simply insert the stem in a potato before planting at about 3 inches below top of soil. In about 2 months you will have a new rose bush! What a great way of recycling a Valentine’s Day bouquet!

Recycled Garden Art

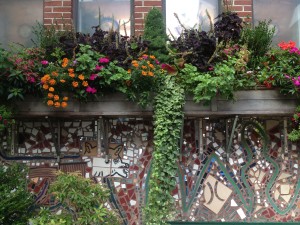
A wall of rescued tile turned into Art.

A wall of rescued tile turned into Art.

I don’t know about you, but I love to craft, and especially with recycled items. I have been on a recent trip to Philadelphia and while there went to an amazing place called the Magic Garden. It’s filled with mosaics covering pretty much everything. There are about 150 properties in and around the city with mosaics from this prolific artist and it really got my creative juices flowing. I definitely have a mosaic or two in my future — maybe a birdbath or a garden table. What a fun way to show your own personality in a garden!

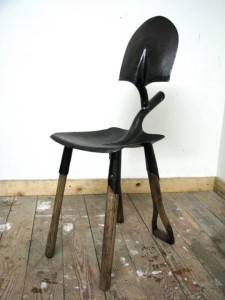
Made from worn out gardening tools, this chair is a definite for my garden.

Made from worn out gardening tools, this chair is a definite for my garden.


I like the idea of having useful items that double as Art. The internet is an amazing place for inspiration. I have become a huge fan of Pinterest for craft ideas. I think this chair from Pinterest is so terrific. Anything that I can make with rescued, or broken-beyond-repair things is high on my list! I love the ability to switch things around, so small projects, like a birdbath or a pretty flower pot with shells glued on, are fun to create and fill in gaps when the flowers are not in season.


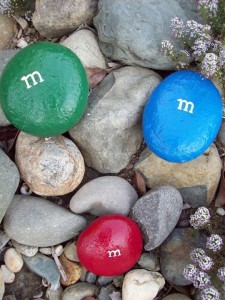
Great "Kid" project- rocks painted like candy.

Great “Kid” project- rocks painted like candy.


There are such cute things for every level and age of artist/gardener. I saw these cute little rocks painted up like M&M’s, (again on Pinterest,) and thought what a great project for kids! It’s always nice to have some ideas that really can’t be done wrong to make even the most timid feel like an artist!


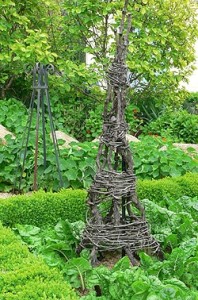
These topiary forms are made with harvested vines and branches.

These topiary forms are made with harvested vines and branches.


Another useful art project that I very much want to make are a few of these topiary forms, made with harvested vines and a few branches. The more natural the better in my garden! I love creating ivy topiaries, but you can grow any number of things on them — small gourds, cucumbers, clematis — sky’s the limit!


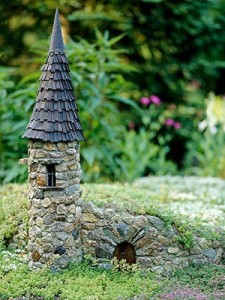
Made with small stones, what a fun Fairie house-

Made with small stones, what a fun Fairy house!


For those who like to attract garden fairies into your life, how about a charming little dwelling on the side of a garden path?  I think I’d take it one step further and disguise a light inside to mark the edge of the pathway at night.


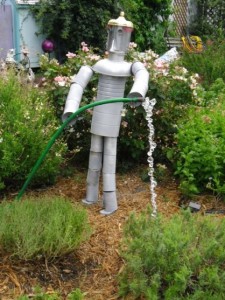
Tin man made from old cans- add a hose, and he becomes a built in helper!

Tin man made from old cans. Add a hose, and he becomes a built in helper!


It seems there are so many great ways to recycle cans these days. I love this tin man! And if he can help with the watering, then I’d really like to have him in my garden!

So much inspiration, and I’d love to credit to the creative people who made these items, but it’s impossible to trace the originator on photos that don’t have a watermark. These (except the top picture, which I took) are all from Pinterest. Well — I think I have enough winter projects to keep me busy for a long time. I love to recycle! What projects do you have in store?

Too Cold Outside? Time for Indoor Gardening

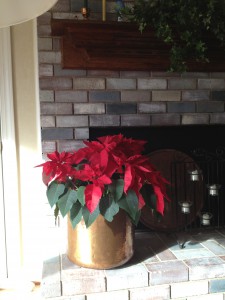
With a perfect filtered southern exposure, this poinsettia is still blooming.

This winter has been so drab, windy and cold, I have been spending time on one of my favorite activities: indoor gardening. My holiday poinsettia is still doing wonderfully, and a beautiful amaryllis is only now finishing its bloom. But now it is time to change the seasons inside the house, because spring will be here soon and I want to get a jump on it. I have some fun projects in store, and hope they will inspire you to give a couple of them a try.

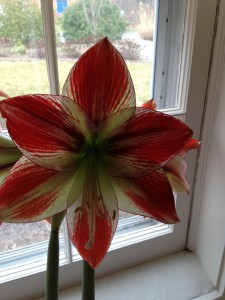
This variety of amaryllis is "peppermint stick". I was lucky that the bulb sent up two shoots, each with four flowers.

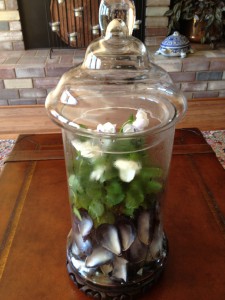
I have always wanted a greenhouse, but I don’t think that’s going to happen any time soon. My solution to that is to create a coffee table terrarium. I found a nice apothecary-style jar at a local thrift shop to use, but really any big jar will work well for this. First, wash your container well with dish soap and rinse thoroughly. Next, add an inch or two of small gravel, shells or even glass beads for drainage. Be creative — you can see this layer from the sides so have fun with it.

For this terrarium I used mussel shells for drainage and to dress up the sides, then added a blue and white pansy.

Cut a small piece of coffee filter or fabric to cover this layer and provide a barrier, then add about 2-3 inches of potting soil. Add your plants and whatever small decorative items you wish to embellish with your own style. Add a little water and the lid. Now enjoy your new “mini-greenhouse.”

Gift tip: Terrariums make super gifts for people who travel because you almost never need to add water! So make two and spread some fun.

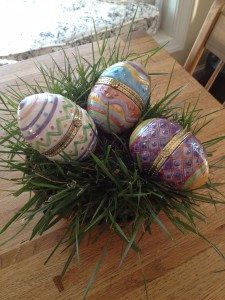
Another easy and stylish centerpiece is a grass dish garden. All you need is a shallow container that is waterproof (so that you don’t wreck your tabletop), a small amount of gravel to fill the bottom and some sod cut to fit. It will be the perfect place to rest a few Easter eggs, or just leave plain for a more contemporary look. This is a fun way to utilize those small little trimmings when you edge your garden beds!

For this centerpiece, I used a 12" drainer dish as a base filled with some sod. Makes a great spot for Easter eggs!


This is also a great time to re-pot existing houseplants, before they start to grow for the new season. It is best to only go up one pot size though, and always use fresh new potting soil. Once replanted, I give mine a covering of moss over the soil for a special touch.

With any luck from Mother Nature we will have a mild Spring and be back outside soon. Until then — happy indoor gardening!

A Superhero for Gardeners – It’s Potman!

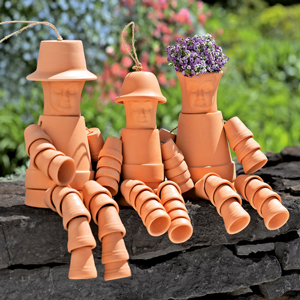
This picture was taken a long time ago in London, in front of one of my favorite florist's shop (Kenneth Turner). I have always loved the "Potman", and think it would make a wonderful alternative to a scarecrow in the garden.

I know that title is more than a little bit silly, but I’m hoping it caught your attention. We have all seen scarecrows protecting seedlings in the garden before, but here’s a new twist on that idea. How about making one out of clay pots instead of the usual clothing stuffed with straw?

If you are like me, you have probably accumulated way too many clay pots over the years.  Some of mine are cracked or slightly broken. Even still, I hate to throw them away. This is a perfect craft for all of those less than perfect pots you may have hanging around.

It’s very simple to create this fun project. First, lay out on the ground the pots you want to use and stack them in the order you would like them to be in. Once you have come up with your perfect Potman, measure the length of the arms, legs and body, neck and head. The sections are held together by rebar and twist-ties, so measuring will help you to determine the length of rebar you will need. (Add about 2 feet to the rebar for the legs.)

Here is a diagram of the rebar skeleton, and where to connect them with twist ties. This is just a suggestion - you might have a different pose that you would prefer for yours.

Next, pound two of the rebars into the ground about 2 feet deep for stability.  Begin stacking the pots on them for the feet and legs. Add the pot which will become the abdomen next with the rebar poking through the drainage holes in the sides of the bottom of the pot to secure it to the legs. Then attach a bent rebar in the shape of an upside down “U”. This should be secured with long twist ties to the leg rebar. The next pot will be the torso. For this pot, choose one that is one size larger than the lower one, and it will nest nicely on top to create its own seal. Before connecting them, secure a “J” shaped rebar to the “U” shaped one with more twist ties. This “J” shaped rebar should be long enough to protrude from the torso pot and into the pots you will be using for the neck and head, to secure them. Connect the shoulder and arm rebars. You may find this step easier to put together on the ground, then lift into place as one piece. Again, secure with more twist ties, and add the neck and head pots. Your done!
Some helpful tips:  To cover rebars which may be exposed, or to fill in “joints” where pots connect, use sheet moss. Your Potman will look like it has been there a long time, and it will add character to your garden. Also, it’s fun to fill the “head” pot with soil to grow grass, or a vine that you can style into “hair.”

If you live in an area prone to freezing winter temperatures, make sure to give the pots a seal with some polyurethane spray before assembly. This will protect them from the effects of the cold and wet.

I hope you will try this craft, and have him (or her) protect your garden from the crows! Enjoy!
Update: August 7, 2012. I was just on Pinterest and saw this cute variation. It is held together with ropes to make it possible to pose. The two on the left can also be used as wind chimes!

Bringing the outdoors in – Fresh and Dried Arrangements

Using a single type of flower in mass makes a timeless arrangement

As some of you may know, I was the sole proprietor of a floral crafts business. It was during the heyday of English & French Country design, and everything revolved around bountiful floral creations. Although today the trend is more towards the tropical end of the spectrum, my heart still lies with the roses, boxwood, and other botanicals which I am so fond of working with. As the summer moves forward, many flowers in the garden are getting to the perfect stage to be dried, and I would like to share a few insider tips.

Here are some ways to dry flowers without having them end up looking dried. Many think it’s difficult to achieve, but it’s actually quite easy. One of the best ways is simply to lay them flat on an old screen in a single layer. Another way is to hang them in a small bundle. Both ways should be in a room with good air circulation (sometimes using an oscillating fan helps), and keeping them out of direct sun.

Small bundles of roses hang to dry in my workshop.

Most require only a couple of weeks to fully dry. Some of my favorites for drying are roses, hydrangea, amaranths, safflower, larkspur, yarrow, cockscomb, and liatris. There are many that dry exceptionally well and retain their colors for a long time. Botanicals that dry well include boxwood, lamb’s ears, artemesia, lemon leaves, branches like curly willow, eucalyptus and of course moss of all kinds.

Another method of preserving is with glycerine. This requires submersing the botanical in a tub of glycerine and water, and can be a bit messy, but the end result is a very pliable stem. This can also leave a shiny layer on the foliage, so it’s best used on branches, like eucalyptus or boxwood, not flowers.

A current, and highly popular style of arranging is using a single type of fresh or dried flower in large masses, it really plays up the beauty of the specific type of flower used, giving it importance.

Gerbera Daisy stems are supported by Apples in this arrangement.

It is a style of arrangement anyone from beginner to expert florist can create and be proud of, and is the most requested design of florists nationally these days. Also a popular trend is filling the vase with fruit or nuts, or wrapping the stems with a large leaf. This can also serve to hold the stems of the flowers or branches in place.

I hope I have given a second chance to some beautiful flowers by way of drying and enjoying them inside in the months ahead. In my house I love having reminders of how my garden bloomed, and just bringing the outdoors in to enjoy again and again.

Sharing Buttons by Linksku